Rear Axle Seals: The Ultimate Information and Replacement Thread (3rd gen)

Bummer, BFAD exeeded his bandwidth...

You will either have to wait till his bandwidth resets, or offer him the $3 for a month of Photobucket Pro.
 
Bratworks,

How did the job go?

OK, it's been a while since I completed the job and I finally have a moment to share my experiences...

After removing the axle assembly from the housing and removing the circlip, I used the "slam the splined end of the axle shaft onto a piece of wood on the ground" method for freeing the pressed-on components (inner retainer, ABS ring, outer retainer, wheel bearing). After this was done and all of the grime was removed, the new components were installed using a shop press.

Now that's where I should have read a bit further through the thread before proceeding... When I stopped for the night, I decided to review the rest of this discussion and read, to my dismay, that the ABS ring and inner retainer are not pressed all of the way against the rest of the components!!! The next morning I had a good look at what I had gotten myself into: the ABS ring, being hollow, very effectively covered the circlip, making it practically impossible to remove and thus rendering the "slam the splined end of the axle shaft onto a piece of wood on the ground" method of removal completely ineffective... After some head scratching I decided to risk the careful application of an angle grinder to the inner retaining ring - this worked and I was able to gently pry the ABS ring far enough to place it in the proper position on the shaft. I was able to re-use one of the original retaining rings to replace the one that was cut off and pressed it into place beside the ABS ring. In order to determine the correct placement for the two parts, measurements were taken referencing the centre of the inner seal and the face of the backing plate - I can't remember the actual numbers right now but it was pretty much straight forward.

Another lesson that was learned involved the re-installation of the brakes - never try bleeding drum brakes without first re-installing the drum... Fortunately I caught the problem before the brake pistons were driven right out of the cylinder... Luckily I was able to use a ratcheting tie-down strap to tighten everything back up...

So far so good, no visible leaks and everything seems to be rolling fine. Since finishing this job I've replace the exhaust (behind the catalytic converter), both O2 sensors and the clutch master cylinder (a whole other story...).
 
wow!

Another great write-up! I'm going to talk to my mech tomorrow and see what he quotes... we're supposed to be leaving on vacation in a week so I'll weight the info here with the cost (ear ware from the wife as well as the $$$)... we shell see... I now have an excellent idea of what's involved!! thanks FISH!!
 
My total cost of doing the job was $662.83. I was quoted over $1200.00 by my mechanic to do the same work, so my savings was about $538.00.

Considering it took me 16 hours in total to do the job (I really took my time to make sure I did it right, and that time includes removal, installation, bleeding the brakes, cleaning all the parts, topping off the diff, and cleaning up the garage when I was done), I'd say it paid off pretty well.

My math says:

$538.00 / 16 hours = $33.62 per hour. So I paid myself $33/hr. to do this job. Not to shabby if you ask me, plus I got some tools out of it that I can use, and some experience, which is of course invaluable. Sooner or later I'll have to do it on my fiancee's 4Runner, and I bet it'll take about 1/2 the time now that I know what I'm doing.

GOOD LUCK!


I'm all for do it yourself and this is one of the best write ups on the site.

I wanted to mention for those who don't have a garage or live in an APT like I do, that I was recently quoted by a private Toyota shop in San Diego (The Truck Shop) ~ $650 for the full replacement with Toyota parts. The dealer will easily charge $1000-$1200 for this repair.

I understand there is about $350-$500 in parts needed for this repair, depending on where you get them and what tools you already have. At this point, if I had to have this done I would probably take it my local shop because of the warranty BUT not everyone has access to a local Toyota mechanic with great rates. Also, if you live in an apt / condo community like I do then there is probably no way you can do this yourself without getting seriously harassed by your HOA.

One of my axle seals was recently seeping but it seems to have stopped. If it gets worse I will have to fix it somehow. :hatsoff:
 
Last edited:
Awesome write-up! I've never taken apart the axles, and was surprised how easy it was. I replaced the seals, and had a shop press the bearings off/on. They groaned when I said Toyota axles, but had them ready the next day.

Parts $319.54
Labor $110.00


Some advice:
1. For removing the brake drums, tighten two bolts into the inner holes to pull the drum away
2. For removing the axle seals, grab it with vise grips and tap gently with a hammer using the axle for leverage, it will pop right out
3. For installing the axle seals, use a roll of electrical tape laying sideways for the right diameter to pound it in evenly
4. After installing the drums, make sure to spin the star wheel back or pull the e-brake 100 times, or else it feels spongy even after you bleed the lines
 
yeah i know this is an old forum but i noticed you guys were getting charged up the ass for the press work on your axles. I replaced my seals and bearings, shoes,and wheel cylinder about a month ago yeah about $100 in parts but i was only charged about 15 bucks an axle to have the swedge rings knocked off the old bearing taken out old seal taken out and new seal bearing and swedge ring put back on. and that was ONE AXLE. in it all together parts and labor about 180 200 bucks. I bought my own oil, seals, used my own jacks tools took off the wheels took off the drums disconnected the brake lines used yellow wire nuts (worked perfect) unbolted axles pulled axles out shoved rags in the holes and took them down. he charged me 115 dollars. including the new bearings to do the machine work, save some money i took my axles off 2 hours. had the axles down on a friday night and axles were finished by 2 the next day. one thing you can do is find a guy that does good machine work out of a store. the reason these guys charge so much is if they screw up its insured by them. Its a toyota and if your like me you like to use it as a toyota OFFroading. learn to work on your stuff gas is expensive enough and parts are not cheap. might as well get a haynes book and follow it step by step get the parts ahead of time plan it out and make arrangements with a machinist or mechanic and it will save you that extra cash for the next bad#$# thing you need for your toyota.
 
Does anyone have the specs somewhere for the positioning of the ABS and retainers rings? I'm aware they shouldn't be bottomed out, but I didn't see anywhere that said where they should be, other than "measure where they are before you take the old ones off". This method isn't very reassuring.
 
Does anyone have the specs somewhere for the positioning of the ABS and retainers rings? I'm aware they shouldn't be bottomed out, but I didn't see anywhere that said where they should be, other than "measure where they are before you take the old ones off". This method isn't very reassuring.

On pg SA-84 of the '99 FSM it shows the ABS ring pressed on so the inboard edge of the ABS ring is 122.2 +/- 1.0mm from the outboard face of the axle flange. By outboard edge of the flange, I mean the surface where the brake drum mates.

According to some posts, you'll need to adjust the position of the retainer inboard from the ABS ring to properly mate with the seal.

-RC
 
Thanks to the OP for this write up. It was invaluable when servicing my E-Locker before I swapped it in.

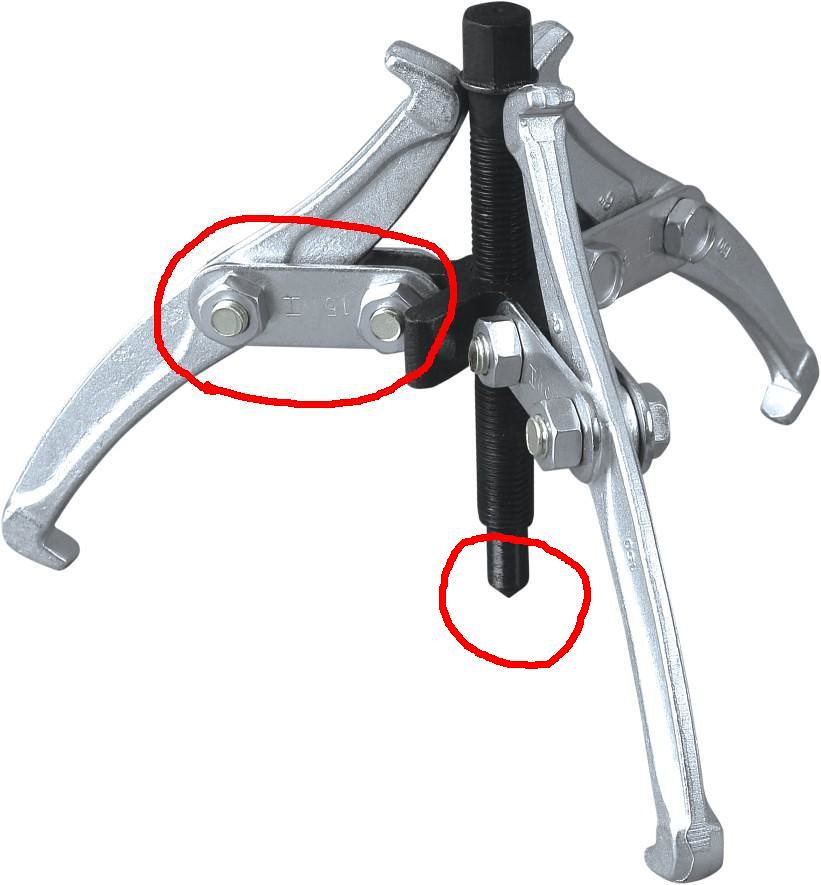
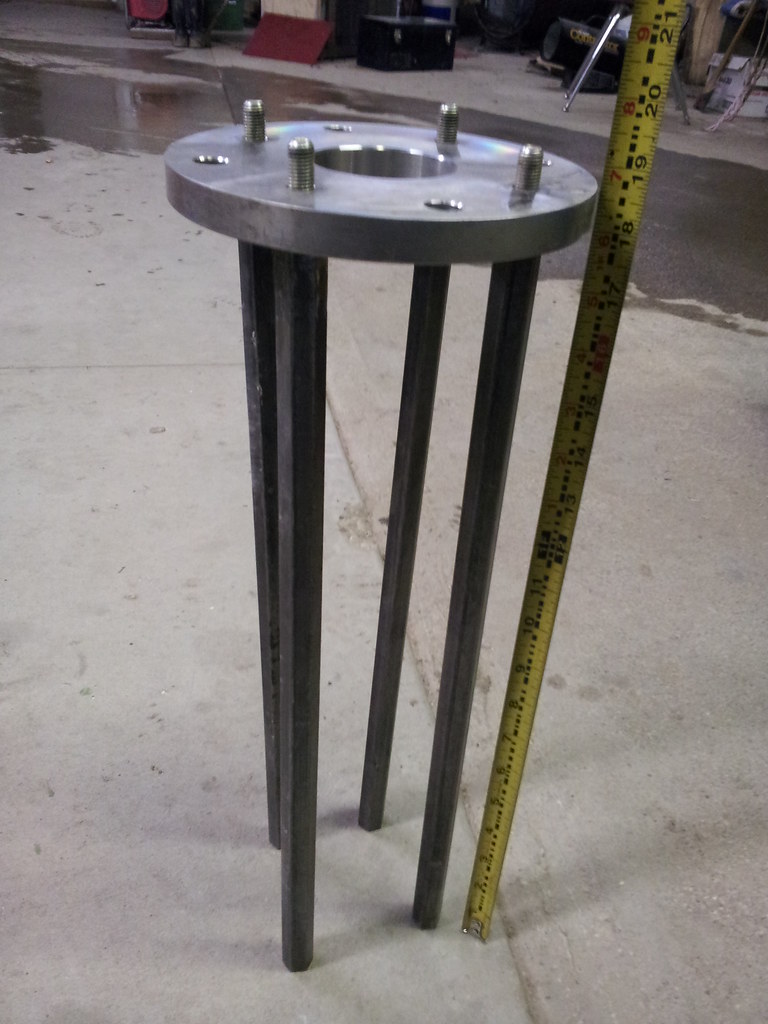
To anyone that wants to attempt the bearing press work themselves I have includes pictures of my own SST. There are various homemade styles out there but I thought I would share mine to possibly give ideas to others. The components that I chose were ones that I had available to me for very cheap so the cost drove my design. The stainless steel ring started out life as something completely different hence the extra holes. The circled holes are the same bolt pattern as the flange and there only 4 that are needed for this application. I chose hex rod because it was available and could be gripped with a wrench to tighten down onto the four M10X1.25 studs on the backing plate. I decided to relieve the tapped holes towards the end because the studs aren’t threaded all of the way down. In the picture you can see that the threads in the tapped holes do not start right away. To the outside of the dashed lines on the ring is the point of contact for the press and the ring. The studs on the end of the shaft are also M10X1.25 so you simply use the nuts that hold the backing plate to the flange as fasteners for the tool also. The overall length isn’t critical I only put a tape measure in the photo for scale. As far as the retainer removal I made an extended reach gear puller. Imagine the one pictured below with MUCH longer shackles. I was told it looked like a War of the Worlds Tripod :). Try to use a gear puller that has a sharp point on the bottom like the one pictured. This allows the puller to stay located onto the end of the axle shaft. The axle shaft has a center drill mark for holding purposes during machining.
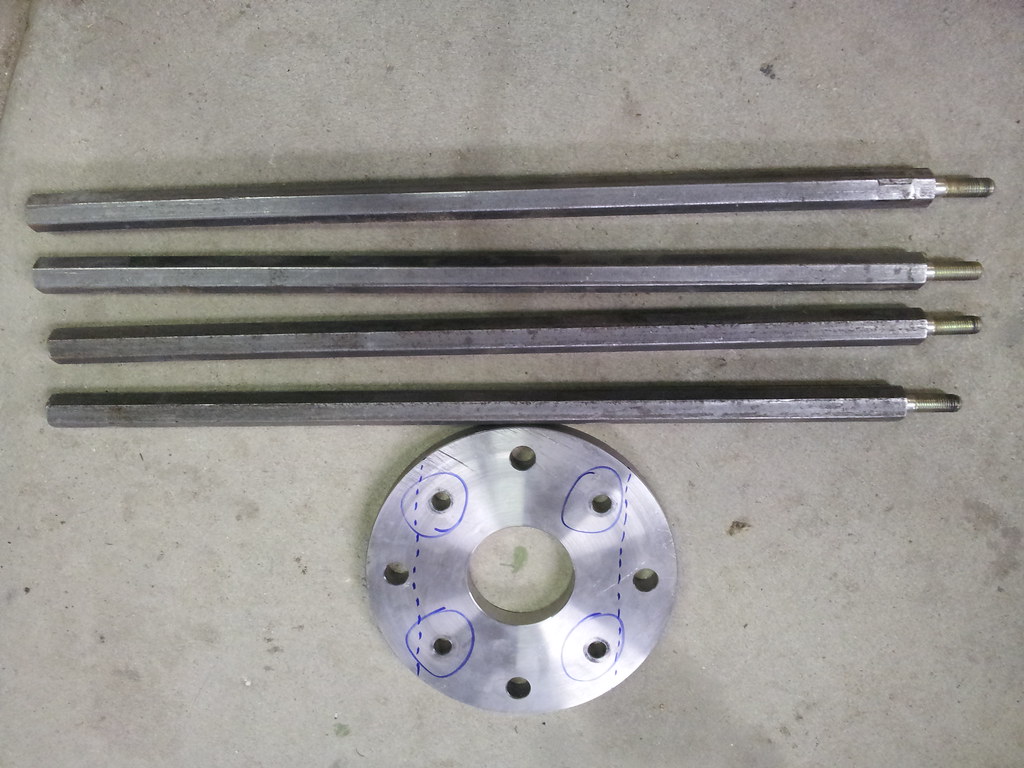
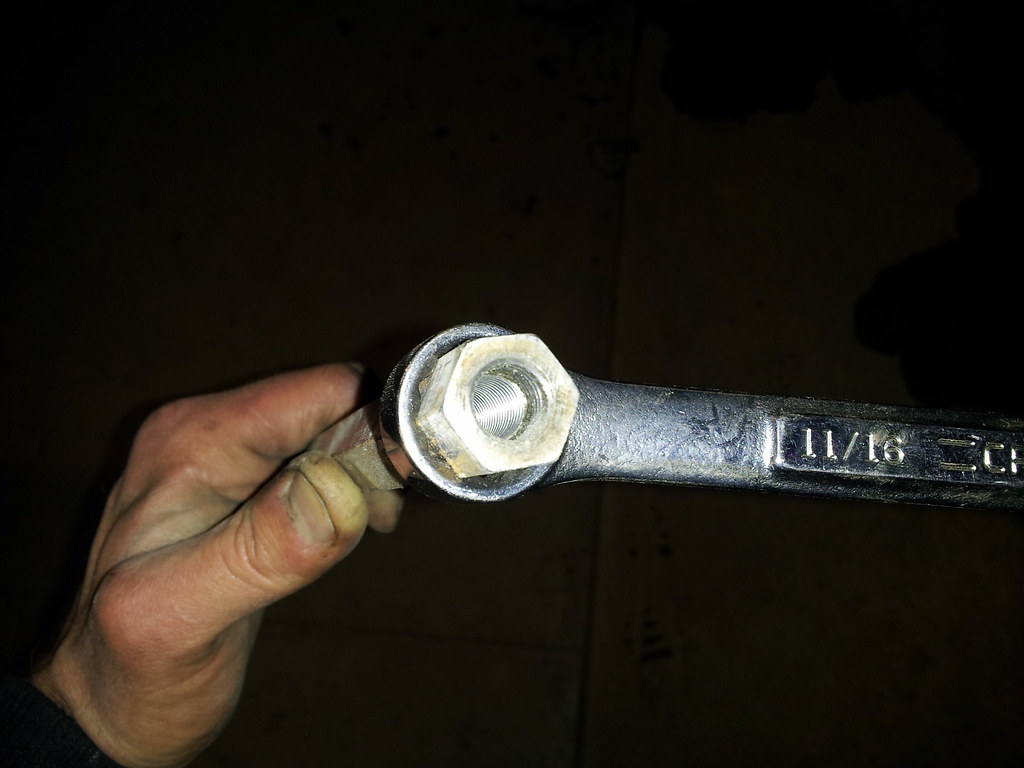
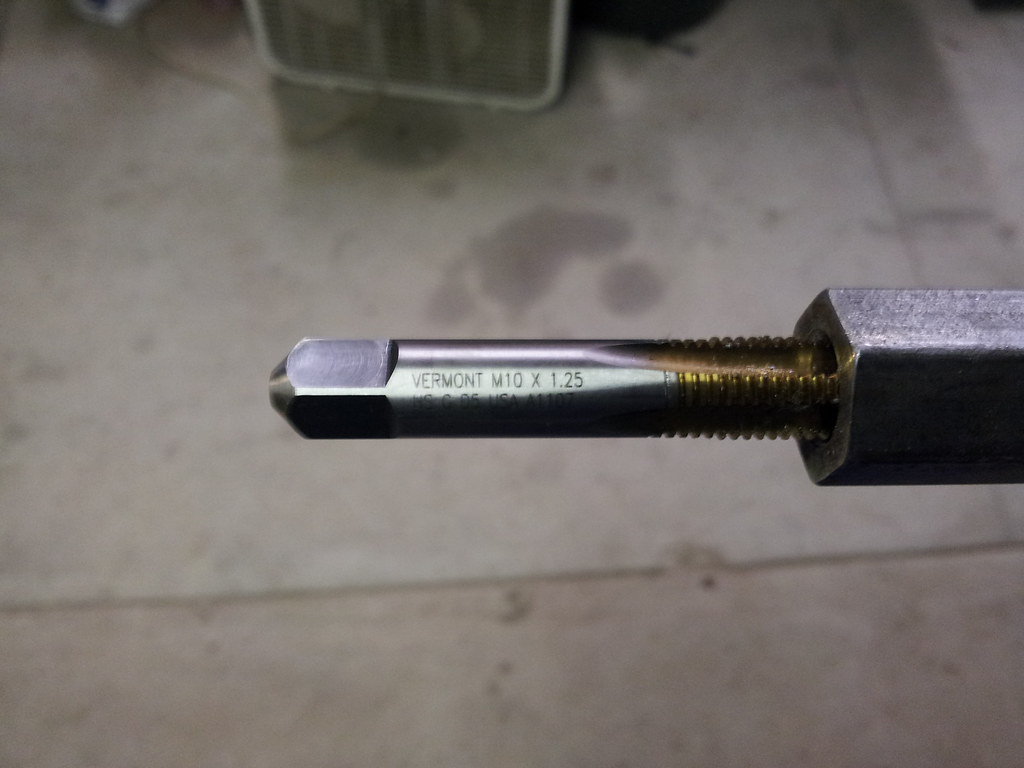
Untitled by xcmtb83, on Flickr


Untitled by xcmtb83, on Flickr


Untitled by xcmtb83, on Flickr


Untitled by xcmtb83, on Flickr


171107602618_171107602618 by xcmtb83, on Flickr
 
very nice indeed. good job bro I get to do this tomorrow, with the help of this write up.
Again great job and thank-you. :thumb3:
 
Long time lurker, first time poster.

I'm about to undergo this job on my '96, driver side only. Dealer quoted me $383.50 for the parts (coming straight out of my new suspension fund) and I go to pick them up today. Price seems a bit higher than the OP stated...

In any case, I'm saving oodles of dough by doing this job myself, and of course a huge thanks in advance goes out to BigFishAllDay for doing the best write-ups ever, especially for my mechanically-intrigued but generally-inexperienced self.
 
part #'s

Just a heads up, part numbers will will not be the same for everyone. I thought I'd save some time by bringing in the part numbers to my local Toyota dealer parts dept. but none of them matched. I know sounds stupid, but true. Maybe just my local yota dealer but doubt it. Just thought I'd share.
Parts were for 98 4runner SR5 3.4 4x4
OOPS, part numbers ok, guy at my local Toyota dealership brain dead.
 
Last edited:
I'm getting ready to replace my seals and bearings in my '97 2wd 4runner. I'm going to buy a press so I can do all the bearing work myself. Can someone post the length of the axle? I am looking at a Northern Tool press and want to make sure it can handle the axle.

Thanks,
Ed P
 
I'm getting ready to replace my seals and bearings in my '97 2wd 4runner. I'm going to buy a press so I can do all the bearing work myself. Can someone post the length of the axle? I am looking at a Northern Tool press and want to make sure it can handle the axle.

Thanks,
Ed P

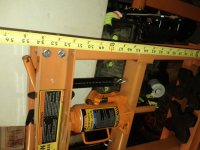
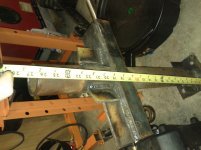
this is the press I used and the SST I made to get the bearing, races, and ABS skid control rotor pressed off. My tape measure its a 10ths tape but you can still see the inch side, and the pics might be sideways if so sorry, dont have time to edit. hope this helps
 

Attachments

  • IMG_20130122_171143.jpg
    IMG_20130122_171143.jpg
    125.5 KB · Views: 3,132
  • IMG_20130122_171323.jpg
    IMG_20130122_171323.jpg
    127.9 KB · Views: 3,234

Members online

Forum statistics

Threads
278,310
Messages
3,554,076
Members
248,016
Latest member
Advally Service

Trending content

Back
Top