Low profile XM (shark fin) antenna swap

Did someone document that "ghetto" mod in a how-to? I might choose to do something similar unless there's a low-profile alternative antenna for a 2016 4Runner. I'm ready to install my k9 rack and I want to leave room for the table tray as a future upgrade.

There's no write-up that I saw. Just go buy two large rubber washers, two large metal washers, a bolt, and a locknut. tighten it down and cover the seams with silicon. I haven't had any leaks yet.

See: http://www.toyota-4runner.org/5th-g...install-detailed-lots-pics-3.html#post2790267
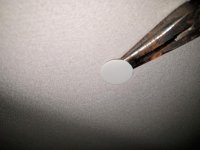
 
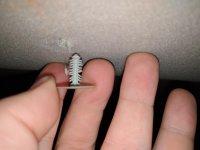
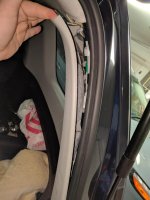
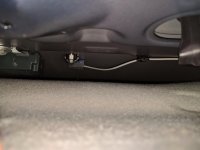
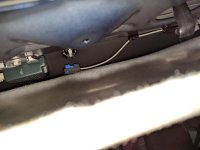
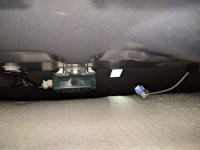
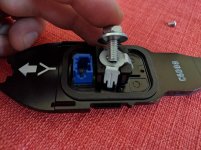
I'm adding a bunch of pictures for anyone like me who could have used some more help visualizing this process. I used needlenose pliers to remove the headliner clips. Then I popped open the passenger side rear pillar cover. I didn't need the driver side. This provided just enough room to slide my hands up into the cavity above the headliner to reach the antenna bolt and connector clip. Thankfully my wife was willing to help and her smaller hands were much more adept at this than mine.

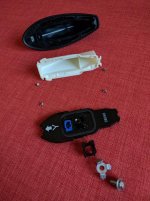
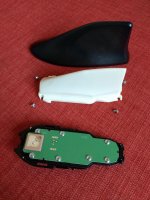
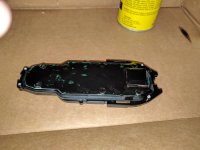
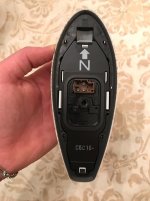
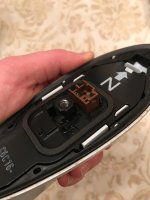
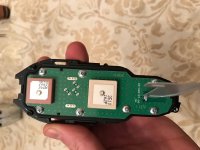
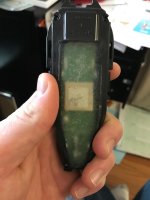
I'm also including a couple pictures of the antenna disassembled. Once I saw how short the actual antenna is, I started thinking about just modifying this for use. The trick is to waterproof it ...
 

Attachments

  • headliner_clip_nn_pliers.jpg
    headliner_clip_nn_pliers.jpg
    130.1 KB · Views: 1,971
  • headliner_clip.jpg
    headliner_clip.jpg
    115.5 KB · Views: 1,964
  • back_pillar_cover.jpg
    back_pillar_cover.jpg
    127.8 KB · Views: 2,052
  • xm_antenna_nut_connector.jpg
    xm_antenna_nut_connector.jpg
    123.1 KB · Views: 2,032
  • xm_antenna_connector_off.jpg
    xm_antenna_connector_off.jpg
    135.7 KB · Views: 2,051
  • xm_antenna_removed_internal.jpg
    xm_antenna_removed_internal.jpg
    127.6 KB · Views: 2,774
  • xm_antenna_exploded_1.jpg
    xm_antenna_exploded_1.jpg
    137.7 KB · Views: 1,902
  • xm_antenna_exploded_2.jpg
    xm_antenna_exploded_2.jpg
    138.5 KB · Views: 1,942
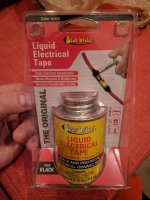
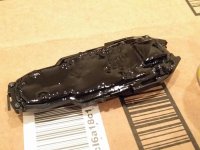
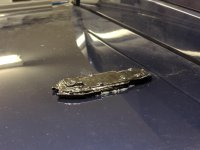
We found some liquid electrical tape at the hardware store and figured it might just work. The back of the container warned that it has ingredients, "known to the state of California to cause cancer and birth defects or other reproduction harm." It's a good thing I'm in Texas! So I started applying layers upon layers and eventually it started looking pretty good. The next morning I ran it under the faucet and I didn't see any water get into the opening underneath. So I used a little silicone and we bolted it back on. I've still got about 3" of clearance between it and the bottom of my new k9 rack, so I'm hoping this will work out.
 

Attachments

  • xm_antenna_bolt_closeup.jpg
    xm_antenna_bolt_closeup.jpg
    130.4 KB · Views: 2,007
  • liquid_electrical_tape.jpg
    liquid_electrical_tape.jpg
    132.1 KB · Views: 1,908
  • base_antenna_first_layers.jpg
    base_antenna_first_layers.jpg
    133.1 KB · Views: 1,948
  • base_antenna_more_layers.jpg
    base_antenna_more_layers.jpg
    128.6 KB · Views: 1,943
  • painted_antenna_installed.jpg
    painted_antenna_installed.jpg
    130.7 KB · Views: 2,586
  • painted_antenna_installed_under_rack.jpg
    painted_antenna_installed_under_rack.jpg
    128.9 KB · Views: 1,926
We found some liquid electrical tape at the hardware store and figured it might just work. The back of the container warned that it has ingredients, "known to the state of California to cause cancer and birth defects or other reproduction harm." It's a good thing I'm in Texas! So I started applying layers upon layers and eventually it started looking pretty good. The next morning I ran it under the faucet and I didn't see any water get into the opening underneath. So I used a little silicone and we bolted it back on. I've still got about 3" of clearance between it and the bottom of my new k9 rack, so I'm hoping this will work out.

Thanks for updating this. I hope the liquid tape works, in my experience it peels off fairly easily and I'm not sure what kind of thermic properties it has. I do know that for waterproofing electronics something called potting compound is typically used. In this case the electronics are probably the less of a worry, I'd be more concerned about UV and heat damage from the sun. Let us know how it goes.
 
So the only way to do the newer 2016/2017 it's too lop it off? No alternatives found yet?

I posted a link on the previous page to a solution. It's what I plan on doing, I've just been dragging my feet on a rack cause I don't really need one yet.
 
Thanks for updating this. I hope the liquid tape works, in my experience it peels off fairly easily and I'm not sure what kind of thermic properties it has. I do know that for waterproofing electronics something called potting compound is typically used. In this case the electronics are probably the less of a worry, I'd be more concerned about UV and heat damage from the sun. Let us know how it goes.

The liquid tape is definitely delicate, but I don't anticipate it getting touched often. I wasn't considering UV fatigue. Thanks for the tip on the potting compound. I was thinking of buying some Sugru, but I got impatient and wanted to get it done this weekend. I'll definitely have to keep an eye on the liquid tape. I'm not so concerned about the XM working as I am the waterproofing of that hole. We left a small diaper in the headliner gap just under the antenna, so that should turn from yellow to green if it gets any moisture :D
 
Removing the shark fin was probably the stupidest thing I've had to do on then 4Runner yet, reminded me of work on a jeep.

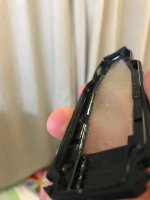
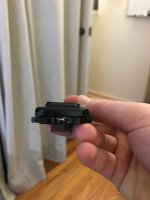
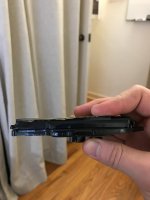
Anyways, this is off my 2016 Limited. It appears different, or maybe I'm missing something, but how do I get this black plate off to access the screw head so I can disassemble this thing? My intentions were to chop the fin flat for clearance.

It looks like there's 3x pressure clips, one on each side and a third up front, but it doesn't seem to be loosening. Thought I'd check here before I break any clips off. Thanks.
 

Attachments

  • IMG_1649.jpg
    IMG_1649.jpg
    115 KB · Views: 1,849
  • IMG_1650.jpg
    IMG_1650.jpg
    112.7 KB · Views: 1,913
Last edited:
Cancel that, got it popped off with a pair of pliers.
 

Attachments

  • IMG_1654.jpg
    IMG_1654.jpg
    116.9 KB · Views: 1,973
  • IMG_1653.jpg
    IMG_1653.jpg
    114.8 KB · Views: 2,065
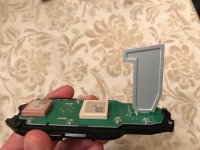
There are several versions of the sharkfin antenna's guts actually. Mine had two "chip" style receivers, as well as a flat metal blade-type antenna that fit up inside the sharkfin part of the plastic housing. I've now seen two others that had no metal blade, and one only had a single chip for XM only.

Here's the guts from mine, note the flat blade antenna:

IMG_20151026_090952.jpg


So, after a bit of research, IIRC, the pink colored chip is the Sirius/XM receiver's antenna, the grey is for GPS, and the flat blade is for FM Diversity which allows the stereo to cut to a smaller, ultra-low gain antenna when local stations are being overloaded from being to close to them. Interesting note, in Honolulu where I had my car audio shop decades ago, I used to install two antennas on customer vehicles when I carried a specific model of Clarion stereo. It had two antenna ports, one for "DX" one for "LOCAL", and it would automatically switch to the shorter antenna when one was in town. Worked okay for its time, but new stereos work much better than the old units like this!

Okay, FM 101 class is done, I'll shut the hell up now!!!

So, if one were not terribly concerned with FM reception, would it be necessarily bad to simply cut and bend, or remove entirely, the diversity antenna? From my understanding of radio antenna's the wavelength likely won't match anymore, but my primary objective here is to clear a low profile rack, so I'm willing to sacrifice this diversity antenna. Old post I know, just thought I'd ask your thoughts.
 
Weird! That metal "1" antenna plate is what I would have expected to see under the shark fin when I disassembled mine. But mine didn't have that part. I wonder why some have it and some don't. I also just noticed that mine only has one square chip and yours has two. My GPS must be located somewhere else. I thought I read somewhere that it is located in the dash. You'd think all 2016's would be the same. Granted you have a Limited and I have a TEP, but aren't our stereo system "upgrades" the same? So odd ...

Also odd - per the first post in this thread, "For 2014+ 5th gens, the shark fin antenna no longer contains the GPS chip or the diversity antenna".

I don't think I can answer your question as to whether you can just cut that thing off. If you're daring, you could release those 7 screws to remove the circuit board and see how the antenna is attached on the other side. It might be possible to non-destructively remove it to test the impact of its removal. The main thing I'd be concerned about in your case is messing up the GPS antenna function. Of course ... you can always buy another shark fin if it all goes to hell.
 
Weird! That metal "1" antenna plate is what I would have expected to see under the shark fin when I disassembled mine. But mine didn't have that part. I wonder why some have it and some don't. I also just noticed that mine only has one square chip and yours has two. My GPS must be located somewhere else. I thought I read somewhere that it is located in the dash. You'd think all 2016's would be the same. Granted you have a Limited and I have a TEP, but aren't our stereo system "upgrades" the same? So odd ...

Also odd - per the first post in this thread, "For 2014+ 5th gens, the shark fin antenna no longer contains the GPS chip or the diversity antenna".

I don't think I can answer your question as to whether you can just cut that thing off. If you're daring, you could release those 7 screws to remove the circuit board and see how the antenna is attached on the other side. It might be possible to non-destructively remove it to test the impact of its removal. The main thing I'd be concerned about in your case is messing up the GPS antenna function. Of course ... you can always buy another shark fin if it all goes to hell.

Good points, thanks for the insight. I'm just going to cut it off and see what happens. This is entirely unlike me, but given the circumstances I'm not left with many options. If I have to purchase another one so be it.
 
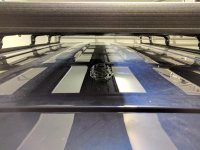
To follow up, I decided to scrap the outer fin altogether. I'm confident that with a bead a silicone sealing the two halves of the actual antenna together, as well as a bead on the mounting surface of the roof, that the electronics will be safe and overall leak-free.

I took a dremel to the inner fin, sanded the surface flat, and filled it in with plastic epoxy. The material sets in just a few minutes so you can test-fit for clearance with the electronics in the antenna as well. Overall I'm happy with how this turned out, it's very low profile and should allow me to fit a table underneath my rack with shorter feet. The whole objective here was to avoid having a roof rack that sits high on the roof, while maintaining the under-rack table slide. It would certainly look cleaner if I didn't clearance it as much and epoxied the outer shark fin cover, but in my particular case every mm of clearance helps. Hasn't been easy but it'll be nice when it's done.
 

Attachments

  • unnamed.jpg
    unnamed.jpg
    33.6 KB · Views: 1,706
  • unnamed-1.jpg
    unnamed-1.jpg
    31 KB · Views: 1,730
  • unnamed-2.jpg
    unnamed-2.jpg
    35.8 KB · Views: 1,721
  • unnamed-3.jpg
    unnamed-3.jpg
    39.4 KB · Views: 1,860
I think you said in another thread that you're getting a Front Runner rack with shorter feet and this antenna mod is to accommodate their version of the under-rack table. I trust you're getting all the measurements to confirm this will fit, but there's one thing I'll warn you about.

In my experience (what little I have in this realm so far), I found it very difficult and frustrating accessing all the bolts and nuts to attach my tent to the rack. And that's with the standard "tall" feet, not the shorter version. Granted, we only loosely positioned the "hat mount" feet onto the rack, then placed the tent onto those, and finally tightened all the bolts down once the rack was in the perfect position. So accessing the four bolts holding the tent to the feet and the eight bolts that hold the feet to the rack was a real PITA. It certainly would have been easier if we had tightened the feet down before getting the tent up there, but I wasn't confident that we could measure and position them perfectly before tightening them down.

Anyway, I'm just warning you that with the rack closer to the roof you'll have even less room to get your hands in there to access hardware. I looked around online and I think I'll invest in some extra long box end ratchet wrenches for the next time I have to R&R the tent.
 
Joining in here. Anybody find a plug in solution for a 2016+ 4runner? Have a 2018 that I would like to add a K9 as close to the roof as I can. Thanks, Tyler
 
I am also waiting for a solution to the 2016+. I have the regular 60mm foot and would like to switch to the 40mm. If there is no solution, I might just have to remove the shark fin off and plug the holes. Thanks
 

Members online

Forum statistics

Threads
278,310
Messages
3,554,077
Members
248,016
Latest member
Advally Service

Trending content

Back
Top