
W211_to_T4R
New member
Here is a simple DIY on changing serpentine belts on the V6 (1GR-FE) 4Runners. I couldn’t find any DIY threads with pictures, so I decided to make one. It took me less than 10 minutes from start to finish, so anybody could do this with the basic tools. Hope this helps.
Tools needed:
• Ratchet
• 10mm socket
• 14mm socket or you could use a 14mm offset wrench
• Cheater bar

First, remove the two 10mm acorn nuts holding down the engine cover.
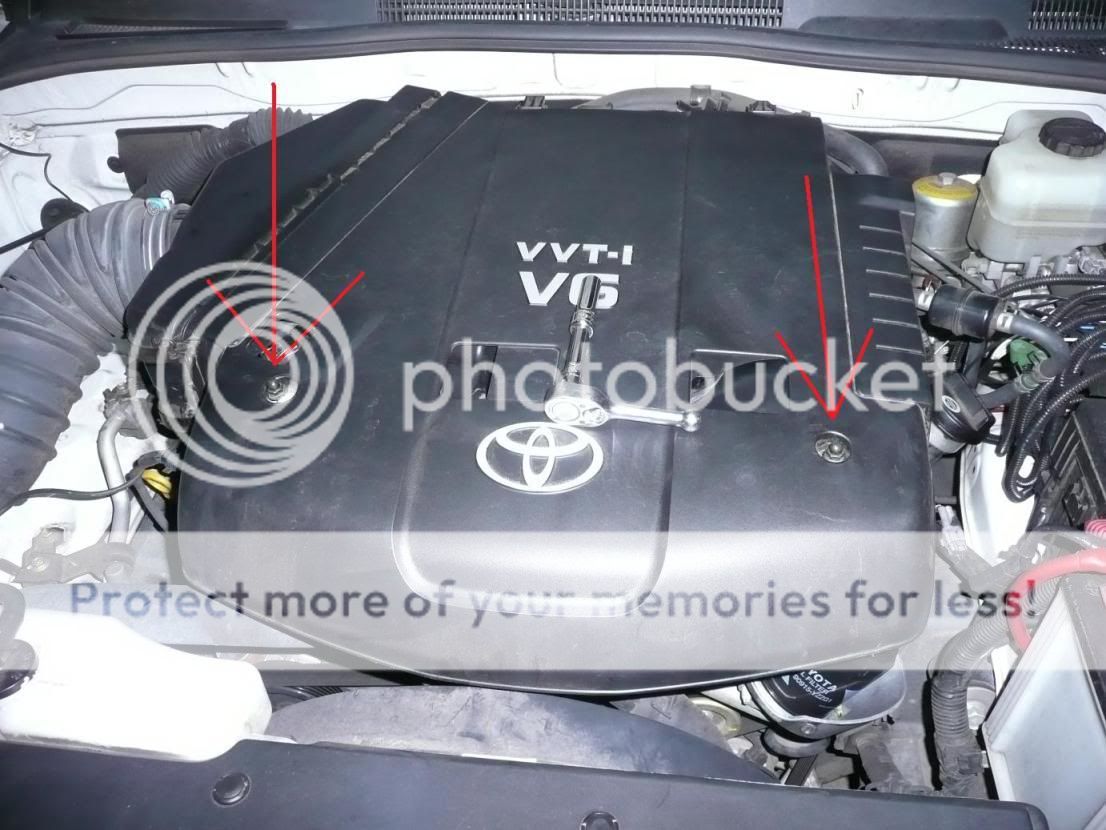
Lift the front of the engine cover, then pull towards you.

This is the rear of the engine cover where the hinges are. Just unhook it.

This is your belt tensioner
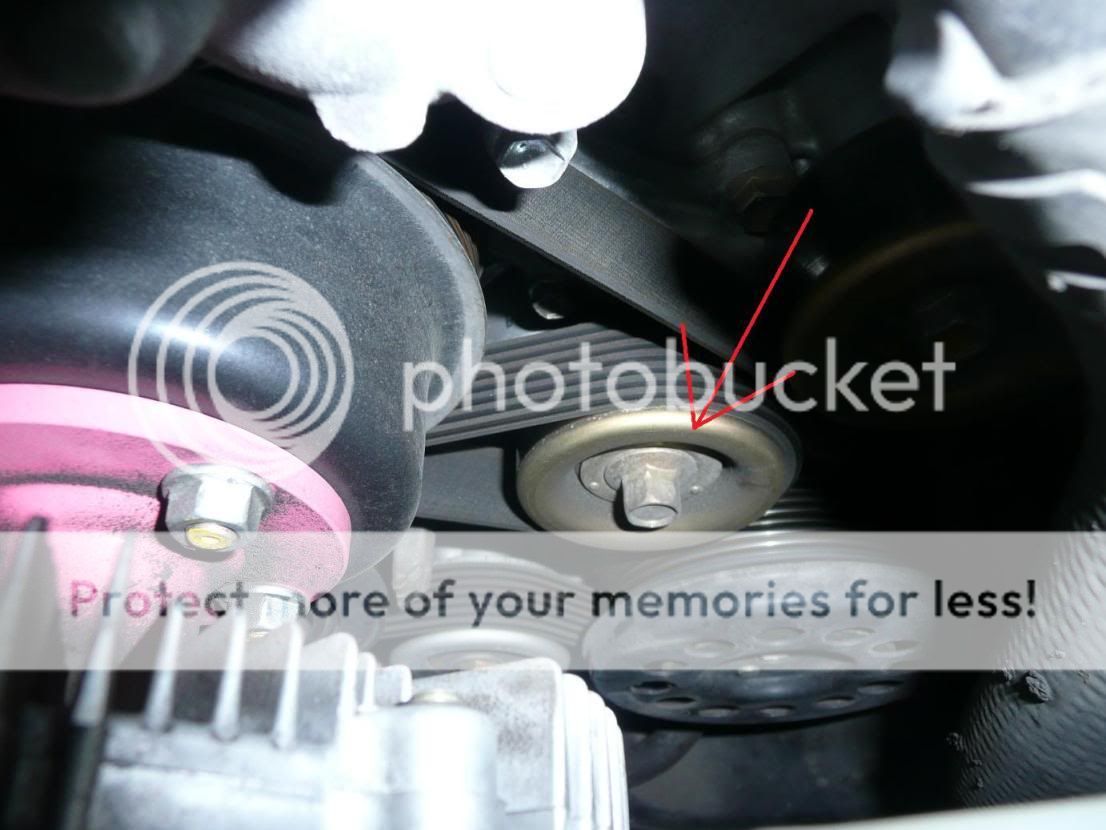
Take your 14mm socket or offset wrench and place it on the belt tensioner as pictured/video. Lift wrench or ratchet upwards (counter-clockwise) to release the tension then slide the old belt off. Remove old belt from all the pulleys, then route it around the cooling fan.

VIDEO
Old belt:

New belt:

Now install your new belt by routing it around the cooling fan first then around the idlers & pulleys. It will be a tight fit since the belt hasn’t been stretched out, so just be patient. I routed the belt in this particular order:
a) Over water pump pulley
b) Under Idler #2 (driver’s side)
c) Around alternator pulley
d) Around A/C compressor pulley
e) Over Idler #1
f) Around Crankshaft pulley
g) Around belt tensioner
h) Under water pump pulley
i) Over Idler #2 (Passenger side)
j) Finally around power steering pump as you release the belt tensioner.
I prefer to use the 14mm socket + ratchet + cheater bar so you have more leverage.

Picture of 14mm socket + ratchet + cheater bar positioned on belt tensioner.


Make sure belt fits perfectly on all the grooves on the pulleys. Re-install engine cover then start engine.
Tools needed:
• Ratchet
• 10mm socket
• 14mm socket or you could use a 14mm offset wrench
• Cheater bar
First, remove the two 10mm acorn nuts holding down the engine cover.
Lift the front of the engine cover, then pull towards you.
This is the rear of the engine cover where the hinges are. Just unhook it.
This is your belt tensioner
Take your 14mm socket or offset wrench and place it on the belt tensioner as pictured/video. Lift wrench or ratchet upwards (counter-clockwise) to release the tension then slide the old belt off. Remove old belt from all the pulleys, then route it around the cooling fan.
VIDEO
Old belt:
New belt:
Now install your new belt by routing it around the cooling fan first then around the idlers & pulleys. It will be a tight fit since the belt hasn’t been stretched out, so just be patient. I routed the belt in this particular order:
a) Over water pump pulley
b) Under Idler #2 (driver’s side)
c) Around alternator pulley
d) Around A/C compressor pulley
e) Over Idler #1
f) Around Crankshaft pulley
g) Around belt tensioner
h) Under water pump pulley
i) Over Idler #2 (Passenger side)
j) Finally around power steering pump as you release the belt tensioner.
I prefer to use the 14mm socket + ratchet + cheater bar so you have more leverage.
Picture of 14mm socket + ratchet + cheater bar positioned on belt tensioner.
Make sure belt fits perfectly on all the grooves on the pulleys. Re-install engine cover then start engine.


