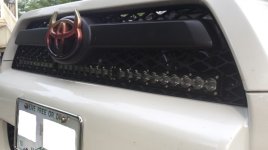
30” BD Stealth LED Light Bar, Upper Grille ’12 SR5 – Installed!

barryhiram

New member
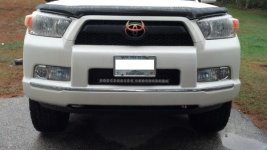
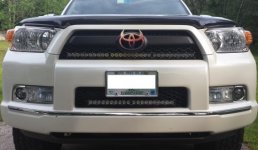
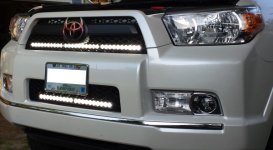
One of my goals from the beginning when purchasing my 4Runner was to keep all mods low key or hidden whenever possible. When researching aftermarket lighting (yes I’m a light fanatic), HID’s wouldn’t serve my purpose, next I checked out LED light bars. There are tons of companies producing anywhere from cheap to expensive light bars, 3 stood out for my needs, Rigid, VisionX, and Baja Designs. After reviewing each (which were all great), I choose BD for my mod, as it would produce maximum output without sacrificing light quality. Oh, and almost forgot to mention, as a bonus, they have a third wire that runs to light, it’s a momentary ground trigger (light has an internal controller) that will dim output light 50% for dusty conditions, or press for three seconds and they turn into a strobe. Actually didn’t know about those features until after I bought the 20”.

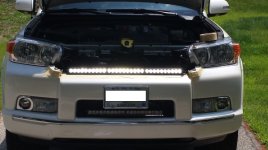
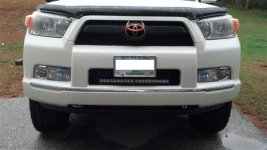
After completing the installation, I was talking to my neighbor (has ’14 Trail that we lifted last month) and asked him to checkout my latest mod in the front, he looked but didn’t see anything, so I hit the high beams which turned the light bar on, to which he replied holy sh!t that’s bright. He stated he didn’t even notice it…………so I guess I accomplished my goal……..lol.

Difficulty: Moderate - 7 out of 10
Trimming grille is more difficult

Start to finish time – bout 4 hrs. I’m sure it can be done in less time (was figuring it out as I went along).

Required Tools: Tape, Panel tool, Screw Driver
Tape Measure, Angle Grinder, Drill Bits
Air Saw, Micro Torch or Heat Gun, Razor Knife
Wrenches – 9/16” & 10 MM
Sockets – 9/16” & 10 MM
File, Ratchet, Drill, White Grease Pencil
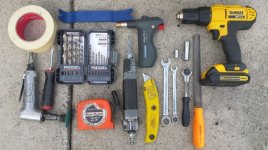
Tools.jpg

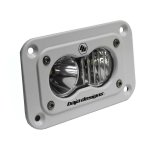
Ordered a Stealth Driving/Combo part #47-3003 from [MENTION=120150]TotalAutomotiveLV[/MENTION]. Thanks to Chas and Mike for cutting me a smokin’ deal, fast shipping, and outstanding customer service. Box arrived in perfect condition; light bar was securely packaged to prevent damage. Contents of package were light bar, stainless steel mounting hardware, 3 pin Delphi Weather Pack Male Connector, and basic instructions. No wire harness or pigtails are included. Not a big deal since I already had a harness installed from the 20” light bar installation.
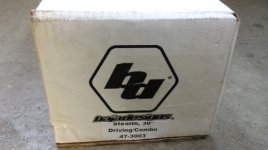
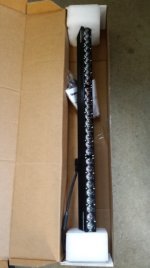
Box1.jpgBox2.jpg

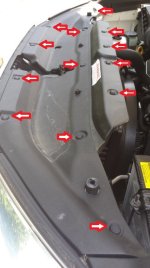
Remove Radiator/Grille panel – Remove 13 push pins by pushing down on center portion of pin until you hear a click, then remove by hand.
Trim Panel.jpg

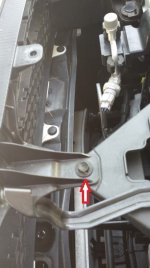
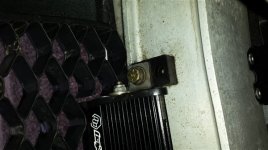
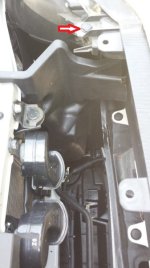
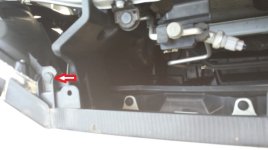
Remove two push pins, one driver, and one passenger. Remove grille support bolt (10 MM socket)
Driver Push Pin.jpgPass Push Pin.jpg
Grille Support Bolt.jpg

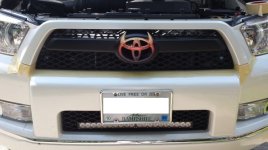
Add masking tape to bumper cover where center grille meets bumper cover. This will protect cover from scratches while disassembling.

Tape.jpg
 

Attachments

  • Tools.jpg
    Tools.jpg
    79.1 KB · Views: 3,942
  • Box1.jpg
    Box1.jpg
    35.8 KB · Views: 3,206
  • Box2.jpg
    Box2.jpg
    36 KB · Views: 3,292
  • Trim Panel.jpg
    Trim Panel.jpg
    60.5 KB · Views: 3,217
  • Driver Push Pin.jpg
    Driver Push Pin.jpg
    71.9 KB · Views: 3,193
  • Pass Push Pin.jpg
    Pass Push Pin.jpg
    39.3 KB · Views: 3,200
  • Grille Support Bolt.jpg
    Grille Support Bolt.jpg
    60.6 KB · Views: 3,163
  • Tape.jpg
    Tape.jpg
    49.3 KB · Views: 3,304
Register to hide this ad
To remove grille there is a great write-up by [MENTION=57963]TOYSTRY[/MENTION] http://www.toyota-4runner.org/5th-gen-t4rs/84880-how-guide-grillcraft-upper-lower-grill.html, remove grille.
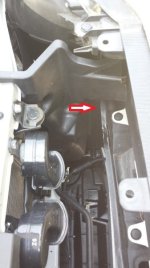
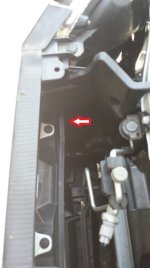
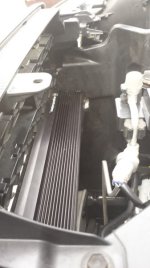
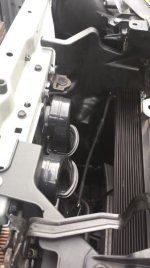
Remove left and right air deflectors. Note there is one push pin (per deflector) located just under metal bracket, use the brail method and remove. Pull deflector straight forward (toward front bumper) to unclip from radiator support, angle back towards back of headlight assembly and remove. They are a PIA to remove, just take your time. Pieces will need to be trimmed once light has been installed.

Driver trim.jpgPass trim.jpg

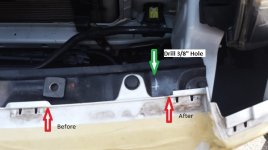
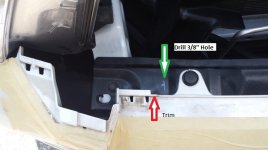
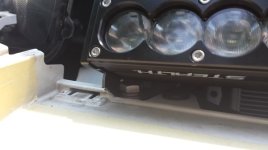
Now for the fun, need to find to find center opening (where lower grille set in bumper cover), measure distance, divide in half, mark metal bracket. Loosely assemble light mounting brackets to light bar (mounting hole should be under light bar). Measure from left to right mounting holes for total length (should be roughly 30 3/8”). Half of that should be 15 3/16”, transfer that measurement from center of metal bracket mark left and right (green arrows), make mark. Now measure from edge of bumper cover (by red arrows) toward radiator 1-1/16”, make mark. Drill 3/8” hole in metal bracket. Next, trim bumper cover (red arrows), this will allow light bracket to extend forward about ¼”. Trimming can easily be done with a sharp razor knife.

Driver Side Mount.jpgPass Side Mount.jpg

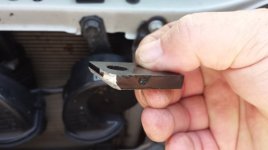
Since metal bumper support is lower than bumper cover where holes were drilled, need to make two ¼” spacer plates with a 3/8” hole.

Spacer Plate.jpg

Notice mounting hole is located close to a raised portion of metal bumper plate, bevel end of spacer so it sits flush with metal plate and mounting hole. Repaint spacer.

Spacer Plate2.jpg

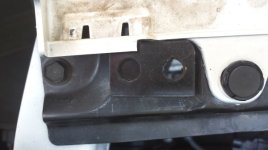
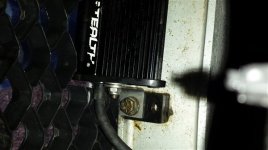
Take passenger side light mounting bracket, install mounting SS bolt through bracket, spacer block, and metal bumper bracket (would recommend adding a 3/8” flat washer under metal bumper bracket, not included in kit), and start nut, do not tighten. Next, take driver side light mounting bracket and insert SS mounting bolt, insert 10MM lock washer onto light bar stud, start nut. Insert remaining 10MM lock washer on opposite end, slide mounting stud through passenger bracket already mounted, start nut. Inset driver SS mounting bolt through driver side spacer and metal bumper plate, insert 3/8” washer and start nut. Snug 10MM nuts so they are tight, but not so tight that the light can’t pivot up/down. Completely tighten Driver/Passenger SS mounting bolts using 9/16” wrench and socket.

Driver mounting BKT.jpgPass mounting BKT.jpg
 

Attachments

  • Driver trim.jpg
    Driver trim.jpg
    60.9 KB · Views: 3,126
  • Pass trim.jpg
    Pass trim.jpg
    49.2 KB · Views: 3,176
  • Driver Side Mount.jpg
    Driver Side Mount.jpg
    48.8 KB · Views: 3,301
  • Pass Side Mount.jpg
    Pass Side Mount.jpg
    48.2 KB · Views: 3,231
  • Spacer Plate.jpg
    Spacer Plate.jpg
    30.3 KB · Views: 3,180
  • Spacer Plate2.jpg
    Spacer Plate2.jpg
    36.5 KB · Views: 3,203
  • Driver mounting BKT.jpg
    Driver mounting BKT.jpg
    37.6 KB · Views: 3,141
  • Pass mounting BKT.jpg
    Pass mounting BKT.jpg
    32.9 KB · Views: 3,126
Last edited:
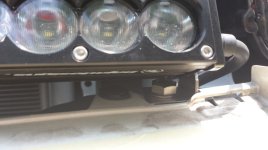
With light bar mounted, plug into harness and verify operation before reassembly starts.

Light bar installed.jpglight bar installed2.jpg

Trim left and right air deflectors to clear light, re-install. Light bar should pivot up/down without hitting.

Air Sheild DR.jpgAir Sheild PASS.jpg

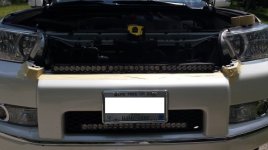
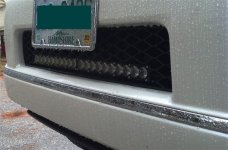
At this point adjusted light bar to proper height for light output (follow headlight alignment recommendations). This step is important so grille can be accurately cut. Take grille assembly and slide it into place (until it hits light bar), mark the edges of light bar on the outside of grille with grease pencil, suggest leaving a 1/8”-1/4” larger gap top/bottom to allow future light adjustment. Remove from vehicle, carefully start cutting plastic Grille, and take your time! Test fit, trim, test fit, trim until it fits, and then file all edges for a clean look. You might be asking why I listed a Micro Torch or Heat Gun in tool list when we haven’t used it yet. Well, here’s a tip; after filing or grinding plastic, it changes color, by taking a torch and heating the plastic it will case the plastic to return almost to the same color as before cutting/filing. Do not allow flame to contact plastic, don’t want to burn it. Just wave the flame back and forth until desired color returns…….if done properly it’ll look factory. Once fit is complete, reinstall grille with push pins and bolt, remove tape, and reassemble.

Grille side.jpg

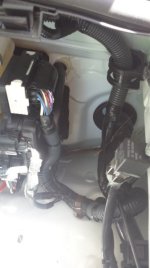
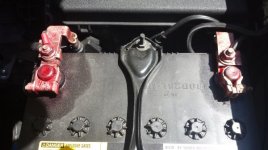
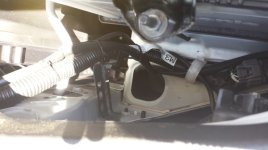
Wiring harness was routed from relay (mounted driver side of engine compartment) to battery and light bar following factory harnesses, wire tied nice and neat. Battery has been coated with an anti corrosion spray, positive (+) and negative (-) wires from relay at battery are waterproof connectors. Factory positive battery cable protective cover still snaps on. Switch harness is routed through firewall through factory grommet, sealed with silicone to prevent moisture from entering cabin. Harness is then routed to Factory style switch in dash.

Relay.jpgBattery.jpg
Harness front grille.jpg
 

Attachments

  • Grille side.jpg
    Grille side.jpg
    33.8 KB · Views: 3,151
  • Relay.jpg
    Relay.jpg
    55.1 KB · Views: 3,116
  • Battery.jpg
    Battery.jpg
    76.9 KB · Views: 3,096
  • Harness front grille.jpg
    Harness front grille.jpg
    38.6 KB · Views: 3,172
  • Light bar installed.jpg
    Light bar installed.jpg
    42.2 KB · Views: 3,209
  • light bar installed2.jpg
    light bar installed2.jpg
    48.9 KB · Views: 3,179
  • Air Sheild DR.jpg
    Air Sheild DR.jpg
    61.9 KB · Views: 3,087
  • Air Sheild PASS.jpg
    Air Sheild PASS.jpg
    60.9 KB · Views: 3,114
Last edited:

Attachments

  • Before.jpg
    Before.jpg
    52.4 KB · Views: 4,420
  • Grille front.jpg
    Grille front.jpg
    47.7 KB · Views: 3,148
  • Baja Designs Stealth-OnX Wiring Diagram.pdf
    Baja Designs Stealth-OnX Wiring Diagram.pdf
    16 KB · Views: 485
  • BD 61-3608 Y Harness.jpg
    BD 61-3608 Y Harness.jpg
    11.9 KB · Views: 2,824
  • 20150710_191423.jpg
    20150710_191423.jpg
    48.2 KB · Views: 3,251
Last edited:
[MENTION=103267]Saker[/MENTION]

I call your 20, and raise with a 30.................................:hiding:

:jk:
 
One of my goals from the beginning when purchasing my 4Runner was to keep all mods low key or hidden whenever possible. When researching aftermarket lighting (yes I’m a light fanatic), HID’s wouldn’t serve my purpose, next I checked out LED light bars. There are tons of companies producing anywhere from cheap to expensive light bars, 3 stood out for my needs, Rigid, VisionX, and Baja Designs. After reviewing each (which were all great), I choose BD for my mod, as it would produce maximum output without sacrificing light quality. Oh, and almost forgot to mention, as a bonus, they have a third wire that runs to light, it’s a momentary ground trigger (light has an internal controller) that will dim output light 50% for dusty conditions, or press for three seconds and they turn into a strobe. Actually didn’t know about those features until after I bought the 20”.

After completing the installation, I was talking to my neighbor (has ’14 Trail that we lifted last month) and asked him to checkout my latest mod in the front, he looked but didn’t see anything, so I hit the high beams which turned the light bar on, to which he replied holy sh!t that’s bright. He stated he didn’t even notice it…………so I guess I accomplished my goal……..lol.

Difficulty: Moderate - 7 out of 10
Trimming grille is more difficult

Start to finish time – bout 4 hrs. I’m sure it can be done in less time (was figuring it out as I went along).

Required Tools: Tape, Panel tool, Screw Driver
Tape Measure, Angle Grinder, Drill Bits
Air Saw, Micro Torch or Heat Gun, Razor Knife
Wrenches – 9/16” & 10 MM
Sockets – 9/16” & 10 MM
File, Ratchet, Drill, White Grease Pencil

View attachment 163787

Ordered a Stealth Driving/Combo part #47-3003 from [MENTION=120150]TotalAutomotiveLV[/MENTION]. Thanks to Chas and Mike for cutting me a smokin’ deal, fast shipping, and outstanding customer service. Box arrived in perfect condition; light bar was securely packaged to prevent damage. Contents of package were light bar, stainless steel mounting hardware, 3 pin Delphi Weather Pack Male Connector, and basic instructions. No wire harness or pigtails are included. Not a big deal since I already had a harness installed from the 20” light bar installation.

View attachment 163788View attachment 163789

Remove Radiator/Grille panel – Remove 13 push pins by pushing down on center portion of pin until you hear a click, then remove by hand.

View attachment 163790

Remove two push pins, one driver, and one passenger. Remove grille support bolt (10 MM socket)
View attachment 163791View attachment 163792
View attachment 163793

Add masking tape to bumper cover where center grille meets bumper cover. This will protect cover from scratches while disassembling.

View attachment 163794


Awesome Write up and thanks for the Support!!!


This Stealth bar is no longer available from Baja Designs and has been replaced by the S8

Here are the items you need...
S8 with Amber backlighting

Baja Designs S8 LED Light Bar - Total Automotive Performance - Your Source for Auto Parts and Accessories

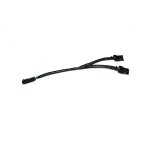
Wire Harness, the ability to turn ON/OFF and control the amber backlighting of the S8

Baja Designs S8 LED Light Bar - Total Automotive Performance - Your Source for Auto Parts and Accessories

Let us know if you need any help on this.
 
Reserved 4 - night pictures soon

Do you have any pics of how you mounted the lower LED bar? I am going to be mounting a 20" LED bar in the lower grille of my old man's 2011 Limited cause he liked how it looked and worked on my 03. Any pics or description of how you did it and how easy/hard it was? Thanks!
 
Awesome Write up and thanks for the Support!!!


This Stealth bar is no longer available from Baja Designs and has been replaced by the S8

Here are the items you need...

S8 with Amber backlighting

Baja Designs S8 LED Light Bar - Total Automotive Performance - Your Source for Auto Parts and Accessories

Wire Harness, the ability to turn ON/OFF and control the amber backlighting of the S8

Baja Designs S8 LED Light Bar - Total Automotive Performance - Your Source for Auto Parts and Accessories

Let us know if you need any help on this.

Thanks man!

Sad to hear the stealth line has come to an end :sobbing:, so much for the strobe feature eh. Specs on the S8 looks good, thanks for keeping us updated.

Contemplating my next mod..............aux reverse lights

S2 Pro.jpg

or a pair of Rigid SR-Q2 flush mounted into bumper cover. Will hit you up when I'm ready to pull the trigger.
 

Attachments

  • S2 Pro.jpg
    S2 Pro.jpg
    30.9 KB · Views: 1,092
Do you have any pics of how you mounted the lower LED bar? I am going to be mounting a 20" LED bar in the lower grille of my old man's 2011 Limited cause he liked how it looked and worked on my 03. Any pics or description of how you did it and how easy/hard it was? Thanks!

Unfortunately I didn't, but here are a couple of completed exterior shots.........

Baja LED Light Bar (1).jpg
Baja LED Light Bar (4).jpg

Tomorrow I'll try to take some close up pictures. Installation wasn't difficult about a 6 out of 10. Bumper cover did not need to be removed, procedure is similar to 30", but instead of using nuts and bolts, I drilled and tapped the aluminum bumper. Spacer is roughly 1/2" thick, this is to raise brackets up so they are flush with lip on bumper, allowing light bar to be located as far forward as possible thus lining up with black trim.

Of course different light bars have different mounting heights so it's key to measure before cutting anything!
 

Attachments

  • Baja LED Light Bar (1).jpg
    Baja LED Light Bar (1).jpg
    57.6 KB · Views: 990
  • Baja LED Light Bar (4).jpg
    Baja LED Light Bar (4).jpg
    65.2 KB · Views: 790
[MENTION=127401]Krayziekid[/MENTION],

As promised 20" BD Stealth mounted.................

20 inch Driver side mount.jpg
20 inch Passenger side mount.jpg

I used 3/8" x 1" grade 8 bolts with lock & flat washers. Spacer blocks are 1/2" thick, front edge is beveled to match radius of bumper lip. This allows light bar mounts to be located further forward.

Height of outer light bar housing is about 1/8" higher than black plastic grille bottom. I like to perform a final light aiming (up/down) before cutting grille. Remember to cut grille slightly larger than housing, this will allow future adjustments if say, you add a lift.
 

Attachments

  • 20 inch Driver side mount.jpg
    20 inch Driver side mount.jpg
    47.3 KB · Views: 782
  • 20 inch Passenger side mount.jpg
    20 inch Passenger side mount.jpg
    54.4 KB · Views: 773
Last edited:
[MENTION=127401]Krayziekid[/MENTION],

As promised 20" BD Stealth mounted.................

View attachment 186457
View attachment 186458

I used 3/8" x 1" grade 8 bolts with lock & flat washers. Spacer blocks are 1/2" thick, front edge is beveled to match radius of bumper lip. This allows light bar mounts to be located further forward.

Height of outer light bar housing is about 1/8" higher than black plastic grill bottom. I like to perform a final light aiming (up/down) before cutting grill. Remember to cut grill slightly larger than housing, this will allow future adjustments if say, you add a lift.

Beautiful. Thanks! Would it be possible to mount this light bar slightly further back and not have to cut the grille? I am all for it, but I am doubting my old man is gonna like the idea of cutting the grille. He isn't looking for absolutely maximum performance, but just some additional lighting, even if it is slightly blocked by the grille accents.
 

Members online

Forum statistics

Threads
278,312
Messages
3,554,086
Members
248,016
Latest member
Advally Service

Trending content

Back
Top