

MNT4R
New member
This is pic heavy, but hopefully helpful. I am not an electrician, but researched things pretty heavily before pulling the trigger on this. I am not responsible for anything that occurs if you do this on your own (damage to property, yourself, or others). That said, this was relatively straightforward and fun. "Like" the thread if you read and find helpful, then I will know if I should do more.
The first two posts are mine (I reached the pic limit for the first post), please read both, please comment!
Couple comments:
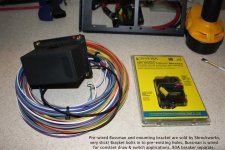
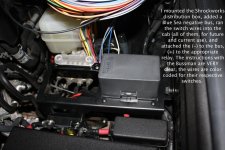
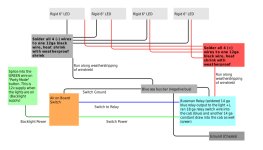
1) The shrockworks distribution module was a cool find. They are not sponsoring me or paying me to say that, it just is. The bracket fits behind the stock relay box and with three screws it is secure, doesn't block the firewall, and looks stock. The Bussman iis weather resistant, look stock, and has been pre-wired to save you a lot of time wiring up relays. The challenge is, unless you are installing 10 accessories at once, you have to figure out what to do with all of the extra wires! I put all the extra switch wires under the driver dash (not fused, not live), they will wind up there sooner or later. The rest (currently 3 relay wires and 4 constant draw) I ran through a 1" loom to the passenger side via the back of the engine bay. I will post pics of this later, but it gives me more space to make connections, un-clutters the area around the Bussman, and keeps those wires long in case I need them later. It also looks clean.
2) If you haven't done it before, practice soldering multiple times on waste wire before doing this. It is not hard, but it could be bad if you are doing it for the first time on chopped up expensive wiring harnesses.
3) The bottom line is, to hook up the prewired Bussman, all you need is to not be color blind, but if you want to understand what it is and how it works, this is an awesome thread DIY Bussmann RTMR Fuse Block, Part 1 ? Introduction | Bodenzord
4) I soldered and heat shrunk (with weatherproof shrink) all connections, why use crimp connectors when you could make this a permanent, weatherproof, pro job.
5) Make sure that you are using the appropriate size wire for the job. https://www.tessco.com/yts/industry/products/itm/automotive/get_wired.html
6) ENJOY!
The first two posts are mine (I reached the pic limit for the first post), please read both, please comment!
Couple comments:
1) The shrockworks distribution module was a cool find. They are not sponsoring me or paying me to say that, it just is. The bracket fits behind the stock relay box and with three screws it is secure, doesn't block the firewall, and looks stock. The Bussman iis weather resistant, look stock, and has been pre-wired to save you a lot of time wiring up relays. The challenge is, unless you are installing 10 accessories at once, you have to figure out what to do with all of the extra wires! I put all the extra switch wires under the driver dash (not fused, not live), they will wind up there sooner or later. The rest (currently 3 relay wires and 4 constant draw) I ran through a 1" loom to the passenger side via the back of the engine bay. I will post pics of this later, but it gives me more space to make connections, un-clutters the area around the Bussman, and keeps those wires long in case I need them later. It also looks clean.
2) If you haven't done it before, practice soldering multiple times on waste wire before doing this. It is not hard, but it could be bad if you are doing it for the first time on chopped up expensive wiring harnesses.
3) The bottom line is, to hook up the prewired Bussman, all you need is to not be color blind, but if you want to understand what it is and how it works, this is an awesome thread DIY Bussmann RTMR Fuse Block, Part 1 ? Introduction | Bodenzord
4) I soldered and heat shrunk (with weatherproof shrink) all connections, why use crimp connectors when you could make this a permanent, weatherproof, pro job.
5) Make sure that you are using the appropriate size wire for the job. https://www.tessco.com/yts/industry/products/itm/automotive/get_wired.html
6) ENJOY!
Attachments
-
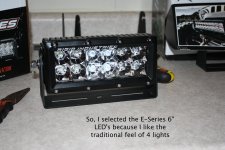 1 Light.jpg132.6 KB · Views: 3,408
 -
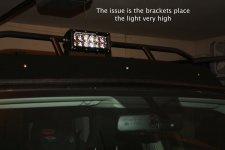 2 Bracket height.jpg123.4 KB · Views: 3,368
 -
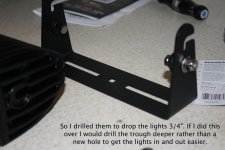 3 Drilled Bracket.jpg119.5 KB · Views: 3,411
 -
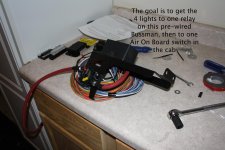 4 Relay.jpg132.3 KB · Views: 4,050
 -
 5 Bussman.jpg135.9 KB · Views: 3,947
 -
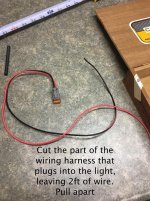 7 Cut Harness.jpg142.6 KB · Views: 3,547
 -
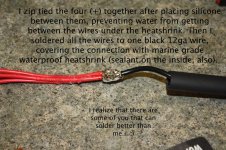 8 Solder wires.jpg148.1 KB · Views: 3,402
 -
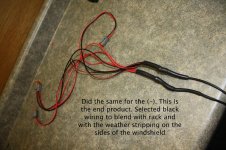 9 Final Harness.jpg141.7 KB · Views: 3,402
Last edited:

 If you run your lights similarly feel free to PM me.


