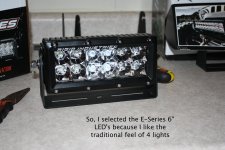
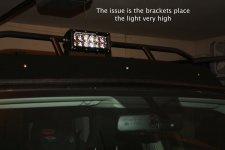
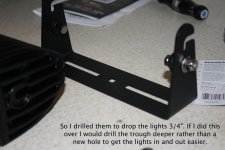
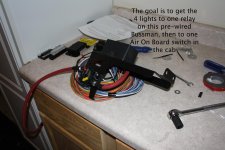
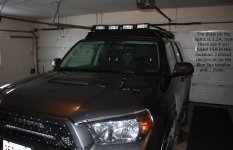
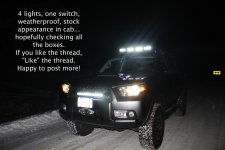
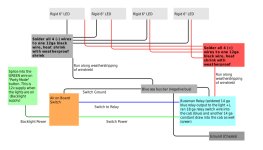
4 Rigid Lights, one switch, Shrockworks Relay distribution install

MNT4R

New member
This is pic heavy, but hopefully helpful. I am not an electrician, but researched things pretty heavily before pulling the trigger on this. I am not responsible for anything that occurs if you do this on your own (damage to property, yourself, or others). That said, this was relatively straightforward and fun. "Like" the thread if you read and find helpful, then I will know if I should do more.

The first two posts are mine (I reached the pic limit for the first post), please read both, please comment!

Couple comments:
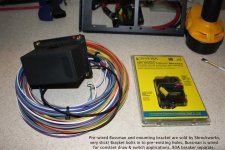
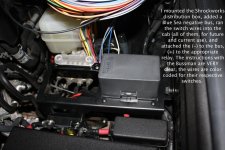
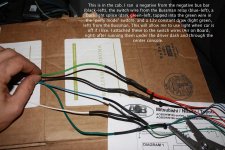
1) The shrockworks distribution module was a cool find. They are not sponsoring me or paying me to say that, it just is. The bracket fits behind the stock relay box and with three screws it is secure, doesn't block the firewall, and looks stock. The Bussman iis weather resistant, look stock, and has been pre-wired to save you a lot of time wiring up relays. The challenge is, unless you are installing 10 accessories at once, you have to figure out what to do with all of the extra wires! I put all the extra switch wires under the driver dash (not fused, not live), they will wind up there sooner or later. The rest (currently 3 relay wires and 4 constant draw) I ran through a 1" loom to the passenger side via the back of the engine bay. I will post pics of this later, but it gives me more space to make connections, un-clutters the area around the Bussman, and keeps those wires long in case I need them later. It also looks clean.
2) If you haven't done it before, practice soldering multiple times on waste wire before doing this. It is not hard, but it could be bad if you are doing it for the first time on chopped up expensive wiring harnesses.
3) The bottom line is, to hook up the prewired Bussman, all you need is to not be color blind, but if you want to understand what it is and how it works, this is an awesome thread DIY Bussmann RTMR Fuse Block, Part 1 ? Introduction | Bodenzord
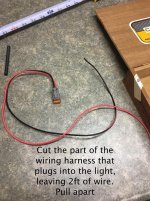
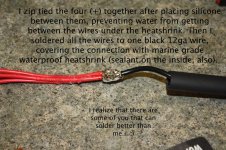
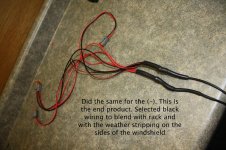
4) I soldered and heat shrunk (with weatherproof shrink) all connections, why use crimp connectors when you could make this a permanent, weatherproof, pro job.
5) Make sure that you are using the appropriate size wire for the job. https://www.tessco.com/yts/industry/products/itm/automotive/get_wired.html
6) ENJOY!
 

Attachments

  • 1 Light.jpg
    1 Light.jpg
    132.6 KB · Views: 3,402
  • 2 Bracket height.jpg
    2 Bracket height.jpg
    123.4 KB · Views: 3,366
  • 3 Drilled Bracket.jpg
    3 Drilled Bracket.jpg
    119.5 KB · Views: 3,407
  • 4 Relay.jpg
    4 Relay.jpg
    132.3 KB · Views: 4,041
  • 5 Bussman.jpg
    5 Bussman.jpg
    135.9 KB · Views: 3,943
  • 7 Cut Harness.jpg
    7 Cut Harness.jpg
    142.6 KB · Views: 3,545
  • 8 Solder wires.jpg
    8 Solder wires.jpg
    148.1 KB · Views: 3,399
  • 9 Final Harness.jpg
    9 Final Harness.jpg
    141.7 KB · Views: 3,400
Last edited:
Register to hide this ad
Continued

...Continued from previous....
 

Attachments

  • 10 screen tool.jpg
    10 screen tool.jpg
    126.9 KB · Views: 3,208
  • 11 Wired Bussman.jpg
    11 Wired Bussman.jpg
    135.8 KB · Views: 5,084
  • 12 switch attached.jpg
    12 switch attached.jpg
    140.5 KB · Views: 4,579
  • 12 switches on.jpg
    12 switches on.jpg
    168.1 KB · Views: 3,256
  • 13 LIghts off fin.jpg
    13 LIghts off fin.jpg
    127.3 KB · Views: 3,348
  • 13 Lights on.jpg
    13 Lights on.jpg
    125.4 KB · Views: 3,372
Last edited:
Great job man! Running wire makes me nervous but you made it look doable. I'm looking into Spod when I finally get some more lights. Did you look into Spod or switchpro at all?
 
Great job man! Running wire makes me nervous but you made it look doable. I'm looking into Spod when I finally get some more lights. Did you look into Spod or switchpro at all?


Thanks!! I looked at some other switch options, including those. I think they look really awesome, but I have a compulsive desire to make things look more stock-like by replacing the 6 blanks in the truck :) If you run your lights similarly feel free to PM me.


Sent from my iPhone using Tapatalk
46f3269426a9abfea2fbe50f8fcb6958.jpg
 
Last edited:
Yeah that looks good. I have the heated seats in those spots so I only have maybe just one blank to the left of the steering wheel.
 
Yeah that looks good. I have the heated seats in those spots so I only have maybe just one blank to the left of the steering wheel.


I live in Minnesota, to be honest I'd rather have heated seats in those spots!


Sent from my iPhone using Tapatalk
 
Nice Work!

I actually just got the Shrockworks setup as well, and it's a fine piece of kit. Looks good, OEM quality, and tons of flexibility for whatever I could want to run. I am just waiting on all of the pieces to show up so I can get it everything installed.

Sidebar: I got their RBS battery mount as well to hold my winch cutoff relay. Also a very well put together piece of equipment.
 
Nice Work!


I actually just got the Shrockworks setup as well, and it's a fine piece of kit. Looks good, OEM quality, and tons of flexibility for whatever I could want to run. I am just waiting on all of the pieces to show up so I can get it everything installed.


Sidebar: I got their RBS battery mount as well to hold my winch cutoff relay. Also a very well put together piece of equipment.


Thanks! I totally agree. I was very impressed about the quality and thoughtful design. Great tip about the battery mount. Smart move waiting, too, until everything gets here. The extra wires are a bit unwieldy. What accessories are you going to install? Looking for ideas...:)


Sent from my iPhone using Tapatalk
 
For starters it's just my bumper light bar and the switching circuit for the winch cutoff. Definitely planning on rounding out the lighting (roof bar, reverse, rock lights). On the fence about hard mounting the air compressor.

I'll probably just route the bundles to a common location to spread them out until they get used. Kinda glad I didn't get both fuse units from the start, as that would have been a whack ton of wires to deal with.
 
For starters it's just my bumper light bar and the switching circuit for the winch cutoff. Definitely planning on rounding out the lighting (roof bar, reverse, rock lights). On the fence about hard mounting the air compressor.


I'll probably just route the bundles to a common location to spread them out until they get used. Kinda glad I didn't get both fuse units from the start, as that would have been a whack ton of wires to deal with.


I agree. That's a lot of wires. If you have the dual bracket, though, that blue sea bus matches perfectly over the mounting holes and was super nice to run negative terminals to. Have fun with the build!


Sent from my iPhone using Tapatalk
 
...Continued from previous....

Great write-up! Very helpful. I got the 4 e series as well! Planning on getting this installed with the new bussmann panel this Sunday but got a question

Question: I got the same pre wired cooper bussmann panel but I don't have the circuit breaker and the negative bus. Are those 2 required???

Thanks look forward to hear back from you
 
Great write-up! Very helpful. I got the 4 e series as well! Planning on getting this installed with the new bussmann panel this Sunday but got a question


Question: I got the same pre wired cooper bussmann panel but I don't have the circuit breaker and the negative bus. Are those 2 required???


Thanks look forward to hear back from you


Thank you. I've had the set up for 10 months now with zero problems in rain, snow, extremes of temperature, etc. So at least thus far it has proved to be a durable solution

As far as using the negative bus I would say no. You can ground your various accessories to the chassis of the truck near where they are installed. But, sometimes this can be difficult and can require sanding some of the primer/paint off of the car and given the fact that I have a high-level of corrosion where I live I thought it best just to run everything off of one bus.

Regarding the breaker, I am no electrician, but the bussman does have a maximum amp draw. Likely if you short an accessory distal to the bussman, the fuse for that accessory will blow, but, if you have too many accessories on and overdraw the bussman, I was uncertain what would happen and installed the breaker to be safe (rather than fry the bussman and re wire all this stuff). It was cheap and easy enough to get on Amazon prime. That shrockworks bracket is super ergonomic for all of the above and looks stock. Good luck, practice soldering on spare wires if you haven't already, make sure your heat shrink is waterproof, and PM with questions
-Jeff


Sent from my iPhone using Tapatalk
 
Last edited:
4awg cables to the 80amp breaker

Did you make the positive cables for your 80A thermal breaker? Or did you buy them from somewhere? I am about to start this project myself and cannot find specially cut cables for the application. Thank you for your time,

Adam
 
[MENTION=177825]Acorn58[/MENTION] I had the guys at Tacomapros do it. They are fast and take PayPal. Setup is still working flawlessly at a year out.


Sent from my iPhone using Tapatalk
06a52e0ba5c452d584414ac1e8a94e49.jpeg
 
[MENTION=177825]Acorn58[/MENTION] I had the guys at Tacomapros do it. They are fast and take PayPal. Setup is still working flawlessly at a year out.

Hi MNT4TR - Two questions:
  1. What type of 6" E-series Rigids did you get? Flood, driving, spot, etc...
  2. How are the the 4x E-series lights holding up? Would you change anything on the install?

Many thanks!
 
Hi MNT4TR - Two questions:
  1. What type of 6" E-series Rigids did you get? Flood, driving, spot, etc...
  2. How are the the 4x E-series lights holding up? Would you change anything on the install?

Many thanks!

1) combo
2) zero issues. I would do it the same way all over again.
 

Members online

Forum statistics

Threads
278,316
Messages
3,554,107
Members
248,016
Latest member
Advally Service

Trending content

Back
Top