
You are using an out of date browser. It may not display this or other websites correctly.
You should upgrade or use an alternative browser.
You should upgrade or use an alternative browser.
415Yota’s Build
- Thread starter T4topher
- Start date


T4topher
Member
You've been busy! You don't need 4.7s often, but when you do...
Marlin was running a 10% discount and i wasn’t sure if it was the OEM tcase gears causing my 70Mph+ vibrations (before I figured out it was the flange) so I said what the heck. Kinda happy I did it after getting stuck in that mud, I didn’t realize low gears would be good for that too. You’d think marlin would advertise that with his huge list of benefits the dual cases provides lol.

Doc2012
Senior Member
You’d think marlin would advertise that with his huge list of benefits the dual cases provides lol.
So you’re running a 4.7 crawl box in front of a stock chain drive case?
I’ve always been advised against that; keep being told that the torque from the 4.7 box could/would break the chain/other stuff in the case.
I really need to find another top-shift to do my duals; and think I might do 4.7 and 4.7 (I have a Lefty. [emoji51])
Sent from my iPhone using Tapatalk
T4topher
Member
So you’re running a 4.7 crawl box in front of a stock chain drive case?
I’ve always been advised against that; keep being told that the torque from the 4.7 box could/would break the chain/other stuff in the case.
I really need to find another top-shift to do my duals; and think I might do 4.7 and 4.7 (I have a Lefty. [emoji51])
Sent from my iPhone using Tapatalk
Yea that’s what I’m running. But why would they make adapters that attach to said tcase? Also when marlin only offered built units he didn’t even offer the 2.28 version. I guess we will see, it is a ton of torque.. I feel like I have read that somewhere though. Sometimes having a mid range low gear is nice though, but dual 4.7’s would be cool. Top shift cases are rare now, I got an email like a year ago that trail gear was paying 500$ for top shift tcases.
T4topher
Member
Family has been on vacation so I’ve been pretty busy.
Couple things that I will be changing about the eimkeith bumper: 1. mud gets trapped really bad inside the driver side wing, most bumpers are open at the bottom there with a tube support going to the wing from the frame. 2. The fuel tank brackets can’t be removed without removing the bumper, if I have to change the fuel pump I don’t want to have to drop the bumper.
You can see how full the wing of the bumper is with mud through the hole in the frame.

This is where I want to cut the bumper

Got some Plano bins from Home Depot, pretty happy with these and the cost wasn’t bad at all.

Finished the AN lines for the fuel tank, haven’t tested the lines yet but they seem like they will be good.


Made a cutting board top for my drawer

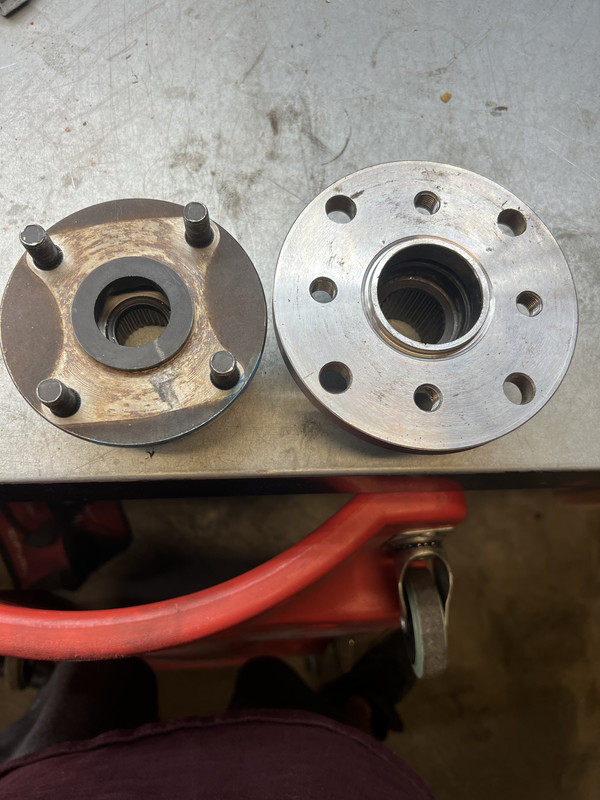
Got my driveshaft flange bushing made out of steel, my boss helped me turn it on a lathe at our shop.
Went back up to signal peak

Went on a hike from the campsite down to Spaulding lake, was somewhat difficult as there was no path but was able to use gps on my phone lol.


Got a cheap Fiskars shovel mounted to the roof rack, foldable smittybilt one wasn’t cutting it.

Last but not least I welded in some tubes in the frame for the front bumper, every time I would use my winch the bumper got sorta loose at the front through bolts. Also pushed the bumper in about 1.5” or so. Was a lot more cutting than I thought it would be lol. I might make a plate for the top of the frame on the addicted offroad crossmember and through bolt one of the back bolts eventually too.


Couple things that I will be changing about the eimkeith bumper: 1. mud gets trapped really bad inside the driver side wing, most bumpers are open at the bottom there with a tube support going to the wing from the frame. 2. The fuel tank brackets can’t be removed without removing the bumper, if I have to change the fuel pump I don’t want to have to drop the bumper.
You can see how full the wing of the bumper is with mud through the hole in the frame.
This is where I want to cut the bumper
Got some Plano bins from Home Depot, pretty happy with these and the cost wasn’t bad at all.
Finished the AN lines for the fuel tank, haven’t tested the lines yet but they seem like they will be good.
Made a cutting board top for my drawer
Got my driveshaft flange bushing made out of steel, my boss helped me turn it on a lathe at our shop.
Went back up to signal peak
Went on a hike from the campsite down to Spaulding lake, was somewhat difficult as there was no path but was able to use gps on my phone lol.
Got a cheap Fiskars shovel mounted to the roof rack, foldable smittybilt one wasn’t cutting it.
Last but not least I welded in some tubes in the frame for the front bumper, every time I would use my winch the bumper got sorta loose at the front through bolts. Also pushed the bumper in about 1.5” or so. Was a lot more cutting than I thought it would be lol. I might make a plate for the top of the frame on the addicted offroad crossmember and through bolt one of the back bolts eventually too.

sleepydad
Senior Member
Family has been on vacation so I’ve been pretty busy.
Couple things that I will be changing about the eimkeith bumper: 1. mud gets trapped really bad inside the driver side wing, most bumpers are open at the bottom there with a tube support going to the wing from the frame. 2. The fuel tank brackets can’t be removed without removing the bumper, if I have to change the fuel pump I don’t want to have to drop the bumper.
I was also thinking about this one, I have not gotten into a spot where it would load up with mud but I'm guessing you could add 400 lbs into the wings in a very short time.
I would also like to be able to access the rear body mounts without breaking my wrist.
some holes are needed, glad to see you got the tank sorted. I'm doing the last fitting on mine right now. will post a build entry and a video of what I ended up doing.
T4topher
Member
I was also thinking about this one, I have not gotten into a spot where it would load up with mud but I'm guessing you could add 400 lbs into the wings in a very short time.
I would also like to be able to access the rear body mounts without breaking my wrist.
some holes are needed, glad to see you got the tank sorted. I'm doing the last fitting on mine right now. will post a build entry and a video of what I ended up doing.
Good point forgot about the body mounts, definitely want those accessible. Wondering if it will be easier to route my exhaust out after I make the chop, somewhat loud in the cabin with the muffler turn down. If it’s still difficult then I might just add a resonator like yours.
T4topher
Member
And here’s another update, some 4runner mostly tool/shop stuff.
Made my old 5 drawer HF mechanic cart into a welding cart, shortened and welded a tank mount on the side for the gas. I’m really pleased with how this came out.

Picked up the lower matching box for 300 and grabbed this for 150. Pretty beat up, lower box was mint though.

Glued in drawer liners were a PITA to get out. Please never glue your drawer liners to your drawers.

Cleaned it up welded/bondo’d and painted all the holes, installed new soft closing slides. Ton of work but pretty satisfied with the results.

New tools for the toolbox (needed the rivet tool for the drawer slides)


Coolant hoses under the throttle body turned completely white (seems like coolant permeated through or something). I’m thinking this might be because my coolant overflow tank is slightly overfilled? Coolant overflow tank hose is also white.


Grabbed a 700 watt inverter and used my rice cooker while camping this weekend. Made some spam musubis for the group. Turned out pretty good.

Couple pics from trip this weekend, might have some cool ones coming up. Went on a pretty sweet little ohv trail.


Has anyone else experienced this? 3 of the ribs on both of my cvs are rubbing on my eimkeith LCA reinforcements at full compression. Can clearly see the paint rubbed off on the LCA to bare metal and the clean marks on the cv boots.


Made my old 5 drawer HF mechanic cart into a welding cart, shortened and welded a tank mount on the side for the gas. I’m really pleased with how this came out.
Picked up the lower matching box for 300 and grabbed this for 150. Pretty beat up, lower box was mint though.
Glued in drawer liners were a PITA to get out. Please never glue your drawer liners to your drawers.
Cleaned it up welded/bondo’d and painted all the holes, installed new soft closing slides. Ton of work but pretty satisfied with the results.
New tools for the toolbox (needed the rivet tool for the drawer slides)
Coolant hoses under the throttle body turned completely white (seems like coolant permeated through or something). I’m thinking this might be because my coolant overflow tank is slightly overfilled? Coolant overflow tank hose is also white.
Grabbed a 700 watt inverter and used my rice cooker while camping this weekend. Made some spam musubis for the group. Turned out pretty good.
Couple pics from trip this weekend, might have some cool ones coming up. Went on a pretty sweet little ohv trail.
Has anyone else experienced this? 3 of the ribs on both of my cvs are rubbing on my eimkeith LCA reinforcements at full compression. Can clearly see the paint rubbed off on the LCA to bare metal and the clean marks on the cv boots.
sleepydad
Senior Member
Good point forgot about the body mounts, definitely want those accessible. Wondering if it will be easier to route my exhaust out after I make the chop, somewhat loud in the cabin with the muffler turn down. If it’s still difficult then I might just add a resonator like yours.
Next week I will be back home, no complaints the land of mahalo is always fun. I’m 100% sure after sitting on the beach staring out into the pacific I have myself convinced I’m going to make my own custom tank.
Will give myself room to route the exhaust without having to use a wrap. Even with the resonator it’s key to get it pointed out away from the truck. my son now wants a custom exhaust for his truck so I’m thinking of doing a practice run on a pie cut exhaust.
second2none
New member
Nice build and rig
T4topher
Member
Nice build and rig ����
Thank you!
Next week I will be back home, no complaints the land of mahalo is always fun. I’m 100% sure after sitting on the beach staring out into the pacific I have myself convinced I’m going to make my own custom tank.
Will give myself room to route the exhaust without having to use a wrap. Even with the resonator it’s key to get it pointed out away from the truck. my son now wants a custom exhaust for his truck so I’m thinking of doing a practice run on a pie cut exhaust.
Ahh man I love it out there. If I were better at welding aluminum I’d probably do the same, would be nice to make the tank have a few more gallons too. Check out these pie cuts this guy sells, he makes some pretty cool stuff.
Pie Crust Pie Cuts – Overkill Racing
I realized last night I got the incorrect AN lines, I got rubber lined instead of ptfe lined (can smell fuel permeating through the AN lines).. What a dummy, the description on the website is somewhat misleading though in my defense.. I should’ve just gone hardlines from the get go, not sure why it took me so long to figure that out..

Last edited:
phattyduck
Elite Member
A lot of the hoses are 'compatible' - but will smell, as you know. I've had one of my project cars long enough now that I had to replace my Aeroquip push-lock hose because it was aging/cracking! Make sure you get the right hose ends for the PTFE hose.I realized last night I got the incorrect AN lines, I got rubber lined instead of ptfe lined (can smell fuel permeating through the AN lines).. What a dummy, the description on the website is somewhat misleading though in my defense.. I should’ve just gone hardlines from the get go, not sure why it took me so long to figure that out..
-Charlie
T4topher
Member
A lot of the hoses are 'compatible' - but will smell, as you know. I've had one of my project cars long enough now that I had to replace my Aeroquip push-lock hose because it was aging/cracking! Make sure you get the right hose ends for the PTFE hose.
-Charlie
At this point I think I’m just going to use this copper/Nickel hardline and call it done, relatively cheap and I already have all the compression couplings at my plumbing shop so all I really need is the tubing itself.
T4topher
Member
At this point I think I’m just going to use this copper/Nickel hardline and call it done, relatively cheap and I already have all the compression couplings at my plumbing shop so all I really need is the tubing itself.
Almost 4 months later the lines are still sitting on my work bench lol. Anyways bit of a solid update with more to come still. Got the radflo suspension in, got some stuff to clean up my auxiliary wiring, and figured out my ITRs are completely toast (last suspension/steering piece that I haven’t replaced).
I got an ender3 s1 pro 3d printer, been pretty useful so far. The auto bed leveling is garbage but the printer itself works good.
Side panel flush filler pieces

Printed a mount for my m18 leaf blower

Made mounts for my inverter so I didn’t have to remove my platform to mount the inverter

Next up is to print a custom mount for this thing, I can’t believe it only has 4 wires going to it for 8 switches. I like the way my current switches look but it’s a rats nest of wires behind the dash lol..

After about 4-5months of waiting finally got my radflos, 2.5” w/resi and adjusters front and rear.

Must of tried 10 different orientations before I landed on this one for the resi’s, feel like it’s a weird spot for them but that’s how it shows it on Sonoran steels instructions.

Rears had their own struggles as well, had to make a custom bushing that goes inside the lower mount bushing because they were just a tad too long. Also not pictured but I got snowbound lower shock mount skids as well.


Got this rifle case mounted to my roof rack, going to store spare parts/tools in there so I can lighten up some of the bins I store inside the 4runner.

Finally made a skid for my dual tcases, still needs paint lol.

Last but not least won these wits end goodies at the timmy the toolman bbq, had a great time lots of good peeps out there. Can’t wait for next bbq!

T4topher
Member
Couple updates to the build
Didn’t end up 3d printing a bracket for this, used the oem switch blanks and one of the brackets that came with the auxbeam panel. Had to countersink the mounting hardware which turned out really nice.

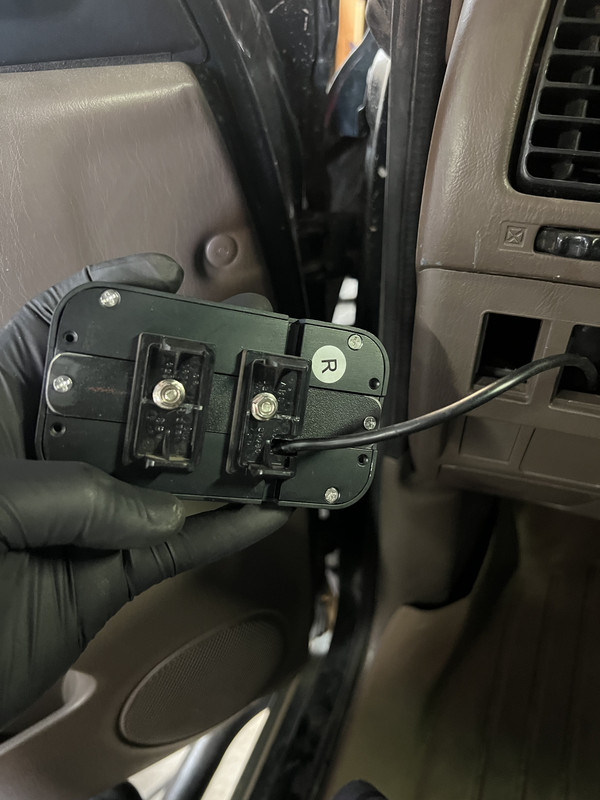
Here’s the old rats nest of wiring compared to the small wire that’s replacing it (actually I think this is only half of the rats nest lol). The switch panel system really is so much cleaner and easier, wish I would’ve done this from the beginning.

Had to copy Timmy the toolman with the fuse panel install, pretty happy with how it came out. Oh yea had to get a new odyssey battery which was lame (was only like 4yrs old), going to take way better care of this one.

While installing my custom skid plate I decided to add some heat shielding to protect the transmission/transfercase. I definitely notice a significant increase in trans temps when I have my skid plates on, hopefully this helps a bit.

Back to the fuel tank adventure, hopefully my 3rd time doing the fuel lines is the last time. Decided to cut the eimkeith bumper to make tank removal/reinstall significantly easier. This bumper was way over engineered so I’m not too worried about removing this small piece.

Designed and printed out some brackets to hold all the fuel lines to the frame.

And here it is all plumbed, might have had a leak or two but just had to snug the fittings down a bit more and boom she’s running good again.

Not much left to do on this thing, hoping to hit the trails hard this year. Happy new years everyone!
Didn’t end up 3d printing a bracket for this, used the oem switch blanks and one of the brackets that came with the auxbeam panel. Had to countersink the mounting hardware which turned out really nice.
Here’s the old rats nest of wiring compared to the small wire that’s replacing it (actually I think this is only half of the rats nest lol). The switch panel system really is so much cleaner and easier, wish I would’ve done this from the beginning.
Had to copy Timmy the toolman with the fuse panel install, pretty happy with how it came out. Oh yea had to get a new odyssey battery which was lame (was only like 4yrs old), going to take way better care of this one.
While installing my custom skid plate I decided to add some heat shielding to protect the transmission/transfercase. I definitely notice a significant increase in trans temps when I have my skid plates on, hopefully this helps a bit.
Back to the fuel tank adventure, hopefully my 3rd time doing the fuel lines is the last time. Decided to cut the eimkeith bumper to make tank removal/reinstall significantly easier. This bumper was way over engineered so I’m not too worried about removing this small piece.
Designed and printed out some brackets to hold all the fuel lines to the frame.
And here it is all plumbed, might have had a leak or two but just had to snug the fittings down a bit more and boom she’s running good again.
Not much left to do on this thing, hoping to hit the trails hard this year. Happy new years everyone!
Couple updates to the build
Didn’t end up 3d printing a bracket for this, used the oem switch blanks and one of the brackets that came with the auxbeam panel. Had to countersink the mounting hardware which turned out really nice.
Not much left to do on this thing, hoping to hit the trails hard this year. Happy new years everyone!
That's a fantastic idea using the switch blanks to mount the switch panel! Hopefully I remember that if I ever install one. Looks great!

thezentree
Senior Member
Did you ever get your tacobox leak resolved?
T4topher
Member
Did you ever get your tacobox leak resolved?
Yea i did fix it. What I ended up doing was putting a hose clamp on the shift boot and I haven’t even had a drip after that. I tried a zip tie but wasn’t tight enough.
T4topher
Member
Seems like I’m overdue for an update. Fair amount of them this time. I started a new job and I get off much earlier which gives me a couple hours everyday to do a bit of work before I have to pick up my daughter from school. Can’t wait to get out wheeling/camping this year.
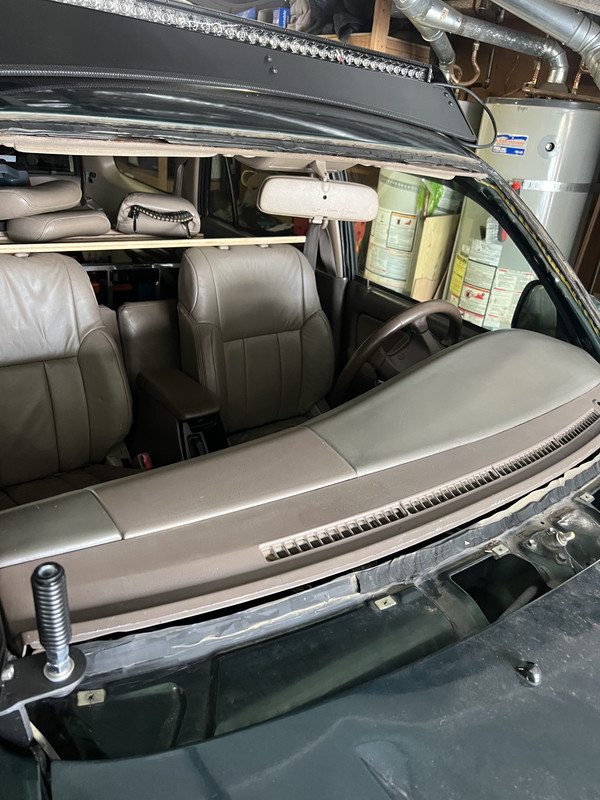
Removed/reinstalled front windshield (Timmy the toolman video coming out in the near future). The exterior seal was peeling up in the corners and I could tell the last person didn’t do a great job. Ended up being a little rust in a couple spots so I’m really glad I fixed it when I did. Used the oem seal and am super happy with how it came out.

Got a dual arb compressor, didn’t want to get rid of the abs module so I couldn’t fit it in the engine bay. Ended up putting it in the rear cubby, made a solid bracket out of 1/8” steel. Installed a stainless braided line for the front locker (need like 12-14’ length). Had to wire it and my secondary switch panel to the auxiliary battery.


Replaced the ujoints and cardon joint in my driveshaft, I think from driving with it out of balance for a while it was starting to mess up the u joints and I found a bit of play in one of them. The cardon joint is a direct fit to the Toyota transfercase flange so I can eliminate the custom bushing I made a while back.

Got an eimkeith swingout hinge and a truenorthfab swingout kit. Ended up working out good but had to reinforce the connection really well. Going to make a fold down table eventually as well. The hatch clears the tire by millimeters lol.


Here you can kind of see how I had to offset the tube on the swing out from the pivot point on the eimkeith hinge. I was skeptical at first but it turned out more beefy than the majority of swingouts Ive seen.


Final product

Strapped the hoses on my front resi’s a bit better

Installed 861’s in the rear and had to reroute the resi’s on my rear shocks as well.

Got an OEM hood protector. Also sold my old diy roof rack and picked up a Sherpa rack. Swooped up a killer deal on the rigid light bar, came with no wiring harness and got it for about 1/4 of the price of a new one.


Tried to go wheeling but the road was closed so we went to one of our buddies property and camped there. Did a bunch of shooting and that was about it. Cut my pinky finger really bad right when we were supposed to leave and had to go to Kaiser to get stitches real quick lol.


Got a morflate kit, pretty nice quality.

And last but certainly not least I got a supercharger!!! Woot not much left I can do to this thing without going SAS. I feel like if I go 1 tons this truck is going to weigh too much for the engine to handle, sucks we can’t really legally do engine swaps in CA anymore.

Removed/reinstalled front windshield (Timmy the toolman video coming out in the near future). The exterior seal was peeling up in the corners and I could tell the last person didn’t do a great job. Ended up being a little rust in a couple spots so I’m really glad I fixed it when I did. Used the oem seal and am super happy with how it came out.
Got a dual arb compressor, didn’t want to get rid of the abs module so I couldn’t fit it in the engine bay. Ended up putting it in the rear cubby, made a solid bracket out of 1/8” steel. Installed a stainless braided line for the front locker (need like 12-14’ length). Had to wire it and my secondary switch panel to the auxiliary battery.
Replaced the ujoints and cardon joint in my driveshaft, I think from driving with it out of balance for a while it was starting to mess up the u joints and I found a bit of play in one of them. The cardon joint is a direct fit to the Toyota transfercase flange so I can eliminate the custom bushing I made a while back.
Got an eimkeith swingout hinge and a truenorthfab swingout kit. Ended up working out good but had to reinforce the connection really well. Going to make a fold down table eventually as well. The hatch clears the tire by millimeters lol.
Here you can kind of see how I had to offset the tube on the swing out from the pivot point on the eimkeith hinge. I was skeptical at first but it turned out more beefy than the majority of swingouts Ive seen.
Final product
Strapped the hoses on my front resi’s a bit better
Installed 861’s in the rear and had to reroute the resi’s on my rear shocks as well.
Got an OEM hood protector. Also sold my old diy roof rack and picked up a Sherpa rack. Swooped up a killer deal on the rigid light bar, came with no wiring harness and got it for about 1/4 of the price of a new one.
Tried to go wheeling but the road was closed so we went to one of our buddies property and camped there. Did a bunch of shooting and that was about it. Cut my pinky finger really bad right when we were supposed to leave and had to go to Kaiser to get stitches real quick lol.
Got a morflate kit, pretty nice quality.
And last but certainly not least I got a supercharger!!! Woot not much left I can do to this thing without going SAS. I feel like if I go 1 tons this truck is going to weigh too much for the engine to handle, sucks we can’t really legally do engine swaps in CA anymore.
T4topher
Member
Here’s some of them more nitty gritty detailed updates:
Replaced my JBA ball joint boots since I got the defective ones. Seems good now.

Ended up crushing the connection on my oem intake box. Hit it with a torch and a piece of metal that fit inside pretty well and got it straightened out a bit. Now instead of worm drive hose clamps I’m using these nice turbo style clamps, they seem much better. Also I used to have the connection from the airbox to the fender well sealed with rtv but found that wrapping it with tape to achieve a tight works really well.


Can never get enough tools, got some KNIPEX pliers, m12 belt sander, and an m18 mid torque impact 1/2”. No picture of impact lol.


Headlights were a bit loose/shaky so I took the mounts apart and wrapped Teflon tape over all of the connectors. Ended up making some new retainer clips for the adjusters with my 3d printer.

The control box cover for my winch was broken so I ordered a new one but it’s been on back order for a couple months. Ended up 3d printing one and it came out alright, good enough to hold me over until I get the new one.

Removed front diff drop because it was making my CV boots rub against the LCA eimkeith reinforcements.
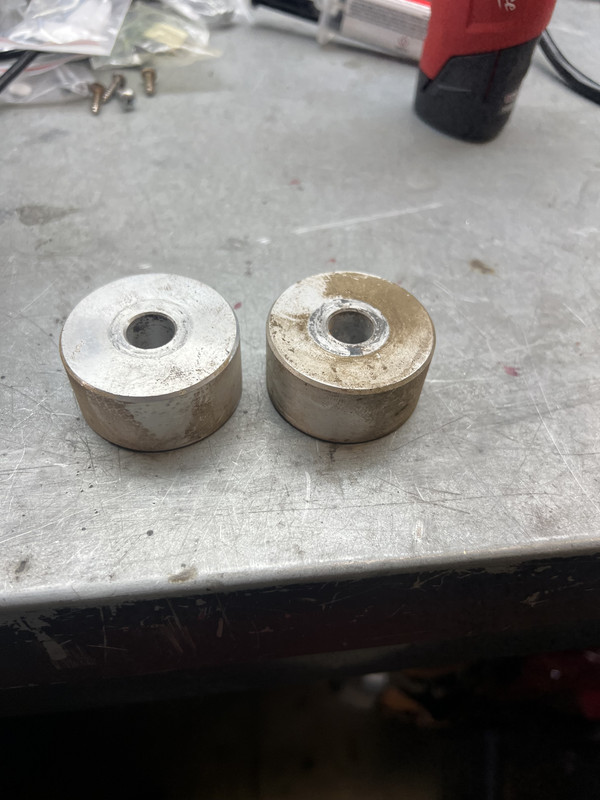
Here’s a sneak peak and what I just ordered a couple weeks ago.

Replaced my JBA ball joint boots since I got the defective ones. Seems good now.
Ended up crushing the connection on my oem intake box. Hit it with a torch and a piece of metal that fit inside pretty well and got it straightened out a bit. Now instead of worm drive hose clamps I’m using these nice turbo style clamps, they seem much better. Also I used to have the connection from the airbox to the fender well sealed with rtv but found that wrapping it with tape to achieve a tight works really well.
Can never get enough tools, got some KNIPEX pliers, m12 belt sander, and an m18 mid torque impact 1/2”. No picture of impact lol.
Headlights were a bit loose/shaky so I took the mounts apart and wrapped Teflon tape over all of the connectors. Ended up making some new retainer clips for the adjusters with my 3d printer.
The control box cover for my winch was broken so I ordered a new one but it’s been on back order for a couple months. Ended up 3d printing one and it came out alright, good enough to hold me over until I get the new one.
Removed front diff drop because it was making my CV boots rub against the LCA eimkeith reinforcements.
Here’s a sneak peak and what I just ordered a couple weeks ago.
Similar threads

- Replies
- 0
- Views
- 26


- Replies
- 2
- Views
- 3K


