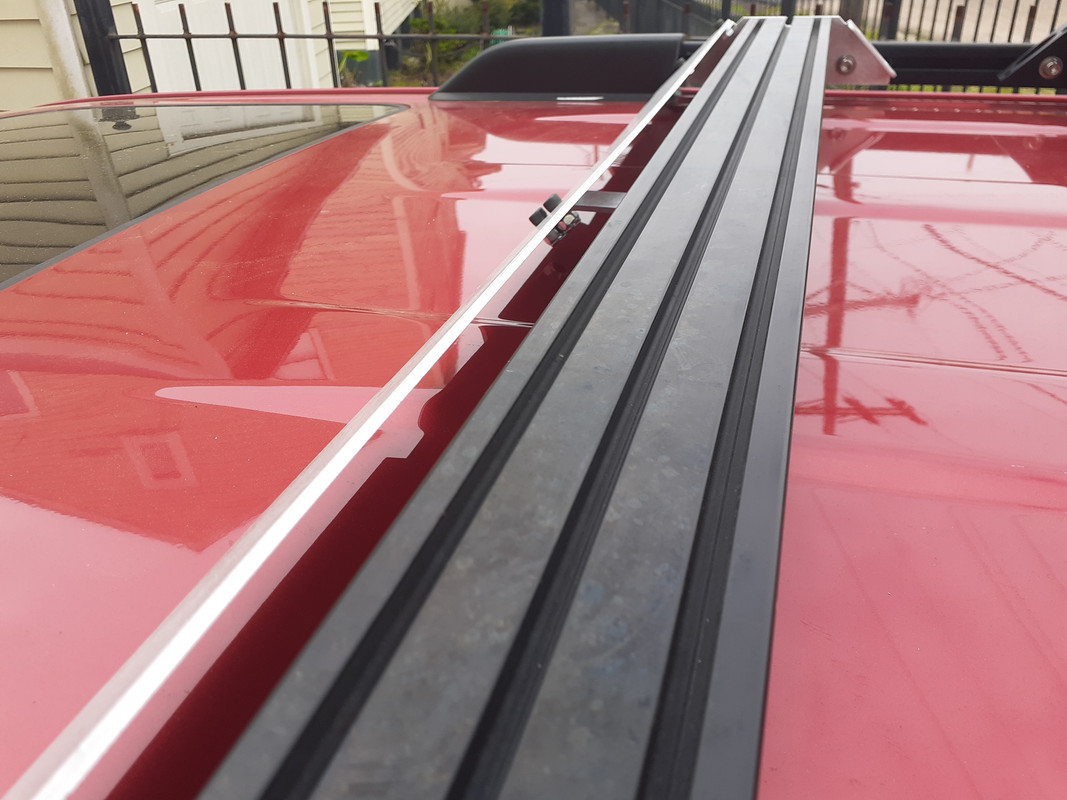
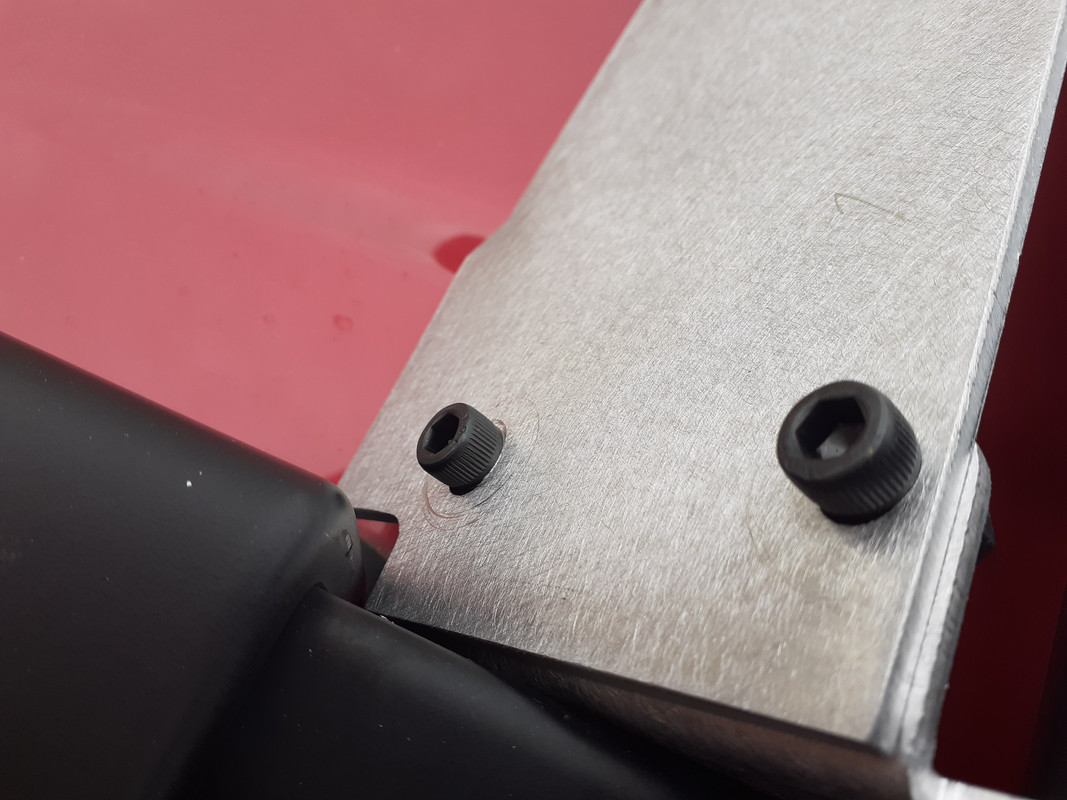
5th Gen Aluminum Roof Rack Using OEM Siderails: NiseRack

Eitek1: Yes, I am referring to the clamshell like the roofnest falcon, alu-cab, etc. external dimension 90" x 50"

Jpilot: Majority full length side rails have cross bars that are too low. I'm looking at the Niserack because it elevate the cross bars to avoid mounting bracket and above the shark fin.

Roofnest recommend Malone Aerobar Crossbar System, but it overhangs on the front.

this kind of crossbar would work with the clam shell style RTT ??

Low Cost 80/20(t-slot) crossbar DIY
 
I’m not familiar with any Canadian sources for extruded aluminum. My order from TNutz was perfectly cut to length and the price in the US was the least expensive. [MENTION=176262]Eitek1[/MENTION] did extensive research for sourcing parts so he would know of alternate suppliers.

Looking at the TNutz site, there’s an option for black anodized.
EX-1030-BLACK – 1″ x 3″ BLACK Smooth T-Slotted Aluminum Extrusion | TNUTZ

On the NiseRack site FAQ section there’s a description of DIY painting the brackets black to match:
Frequently Asked Questions | NiseRack.com

For shipping costs from US to Canada trying contacting TNutz directly. They should know the proper procedure. They may also have an affiliate in Canada.
Their phone number and email are here:
CONTACT | TNUTZ

For shipping the NiseRack brackets, contact Eitek1. You could compare shipping cost of UPS versus the USPS Priority International mail through their websites. I’m thinking USPS will be about $50 US.
Good luck, it will be worth the effort to research this. Let us know your results.
This is my favorite FAQ/Answer:

Q - I notice you only use standard measurements although the rest of the car is metric, what gives?

A - There are two types of standard measurement systems and only one of them has carried men to the moon. Do I need to say any more? :caked:
 
This is my favorite FAQ/Answer:

Q - I notice you only use standard measurements although the rest of the car is metric, what gives?

A - There are two types of standard measurement systems and only one of them has carried men to the moon. Do I need to say any more? :caked:

I've been working on some brackets of my own design and I discovered another reason to use SAE for this application: the slot in the roof rail is a little over 3/8 inch wide, so using 3/8 inch carriage bolts to mount the bracket is perfect. M10 carriage bolts are too big; and while M8 carriage bolts do fit, it's a little loose. The 3/8 inch carriage bolt is just right. Could this have been an accident? I'm not saying it was aliens, but . . .

I wanted to use metric, because I thought it was lame using SAE on a Toyota (one of the frustrations of owning older GM cars is having to keep both metric and SAE tools handy), but SAE it is, for this application.
 
Honestly my first response was "yeah, I'm not messing with that". I do like a challenge though so give me a few days to think on it.

On second thought, what is the diameter of the bar? I think I might have an idea....


Any update on your possible idea for a crossbar that would mount on the rounded Pro rack? A subsequent poster measured the side rail/tubes at 1.75 inch outer diameter.


Sent from my iPhone using Tapatalk
 
Any update on your possible idea for a crossbar that would mount on the rounded Pro rack? A subsequent poster measured the side rail/tubes at 1.75 inch outer diameter.


Sent from my iPhone using Tapatalk

I worked on it a bit and didn’t see a slam dunk solution. I shelved it for a bit.
 
Placed my order, looking forward to receiving these!

Got it and it should hit the mail tomorrow.

For everyone wondering about the faring, I picked up the latest prototype this afternoon and I’m pretty happy. I need to make a slight adjustment but it’s very minor and I can go into production without prototyping again. I would have installed it on my wife’s 4Runner but (no joke) someone stole the pet birds from the cafe on the corner and I was going through my security camera footage with the cops looking for evidence. My life is ridiculous at this point...

Not sure what the cost is going to be at the end. I’m still working on that. Just know I’m trying to keep all this reasonable.
 
Last edited:
Just came across this thread, love the concept. Subscribed-- when the wind faring is released I'll be placing an order for one along with your brackets.
 
Sorry to hear about the 4Runner...
Hope to order the fairing soon.
Thanks for the good work.
Got it and it should hit the mail tomorrow.

For everyone wondering about the faring, I picked up the latest prototype this afternoon and I’m pretty happy. I need to make a slight adjustment but it’s very minor and I can go into production without prototyping again. I would have installed it on my wife’s 4Runner but (no joke) someone stole the pet birds from the cafe on the corner and I was going through my security camera footage with the cops looking for evidence. My life is ridiculous at this point...

Not sure what the cost is going to be at the end. I’m still working on that. Just know I’m trying to keep all this reasonable.
 
20210320-102346.jpg


I am getting closer and have a design I like. I'll have it installed today and will do some testing... (Driving fast up and down the interstate to make sure there are no weird issues.)

I'm still figuring out the best way/hardware to bolt it up. I think installation will be pretty easy.

I think it's going to be ok on pricing too, which I was worried about.

I'll post details when I'm done testing.
 
I thought I'd drop in a few pics of it installed.

20210320-124729.jpg


20210320-124711.jpg


20210320-124700.jpg


I got up to highway speeds (80mph) for a bit. There was no discernible wind noise. I ran with the back of my sunroof open and couldn't hear anything. Looks like this is killing 100% of what was there. There is no weird whistle either which is good.

It was a PITA to install. I'm waiting on different hardware for the center support which should make it easier. It wasn't impossible to install, but if I do my job, it should be easy.

I'm going to tweak the design slightly but not enough to "re-prototype" it.

Now I'll start sourcing hardware and figuring out how to ship it reasonably.
 
...
It was a PITA to install. I'm waiting on different hardware for the center support which should make it easier. It wasn't impossible to install, but if I do my job, it should be easy.

I'm going to tweak the design slightly but not enough to "re-prototype" it.

Now I'll start sourcing hardware and figuring out how to ship it reasonably.

It’s looking good!
I know what you mean by a PITA to install, if you have medium to big fingers you can’t hold the nut in close quarters behind the angled plate to get the screw started. When I put my home brew version together I used 1/4-20 x3/4 inch socket cap screws and 1/4-20 flange nuts. I put a little adhesive under the flange nuts and taped down in place on the backside and let it dry overnight. The next day after the adhesive cured remove the tape and the nut is held in place for an easier assembly. A dab of epoxy would probably work well.

Maybe that would work for the center support system also.

Edit: instead of using tape, you could screw the hardware together after applying adhesive. Just don’t let any get on the threads.
 
Last edited:
I think there will be an easy way to do this...

I think that the method will be:
1. remove the front cross bar but leave the brackets.
2. While the bar is out, install the slide in nuts in the front and rear channel on the bottom of the crossbar.
3. Install the fairing with the 4 bolts and nuts provided.
4. Install the center support bracket on the fairing with the hardware provided.
5. Install the crossbar using only the front allen bolt.
6. Rotate the crossbar upward 90 degrees and align the slide in nuts with the holes on the fairing support.
7. Rotate the crossbar back into the horizontal position.
8. Install the allen head bolts from the bottom through to the slide in nuts to attach the fairing center support to the crossbar.
9. Install the remaining allen bolts to secure the crossbar to the bracket.
10. Check the tightness on all hardware.

I think that may be an easy way to do it. At least I imagine it will be. If that doesn't work I'll install some "nutserts" and just crimp them in. I don't really want to do that but I'm not going to ship something that's going to make someone cuss at me. LOL.
 

Members online

No members online now.

Forum statistics

Threads
278,316
Messages
3,554,121
Members
248,016
Latest member
Advally Service

Trending content

Back
Top