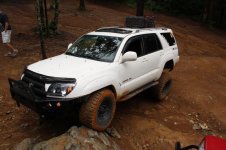
A-Ha's Build.

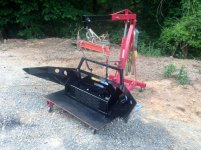
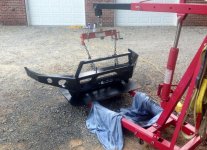
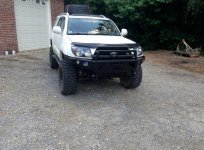
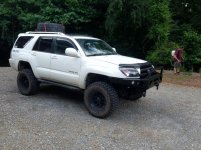
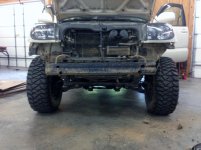
Got the bumper coated with a base coat of semi gloss primer Friday. Then it proceeded to rain the remainder of the weekend so it took forever to dry lol. I got to it last night an it was just dry enough to handle, so i got it mounted back up. The up side to painting these yourself is it only cost about 25 bucks for a gallon of paint. The downside, if your not a great spray gun painter you will have runs lol. Needless to say I've got a few good runs in the paint lol but I shoudn't have a problem sanding a bit and cleaning it up. Plus my body shop buddy got a hold of the toyota match white, some masking paper and tape. we should be able to get the base coat good and smooth before color matching most of the plating.

IMG_2706 (1024x768).jpg

IMG_2707 (1024x768).jpg

IMG_2716 (1024x768).jpg

IMG_2717 (1024x768).jpg
 

Attachments

  • IMG_2706 (1024x768).jpg
    IMG_2706 (1024x768).jpg
    138.5 KB · Views: 1,064
  • IMG_2707 (1024x768).jpg
    IMG_2707 (1024x768).jpg
    137.1 KB · Views: 1,086
  • IMG_2716 (1024x768).jpg
    IMG_2716 (1024x768).jpg
    136.8 KB · Views: 1,051
  • IMG_2717 (1024x768).jpg
    IMG_2717 (1024x768).jpg
    137.3 KB · Views: 1,097
Looks great there Austin, finally got some heavy duty protection for the girl.
Now you can get a little more aggressive without any worries, better feeling when your out there.
 
Looks great there Austin, finally got some heavy duty protection for the girl.
Now you can get a little more aggressive without any worries, better feeling when your out there.

thanks yo, definitely less worries.

Though I don't think I hesitated any less without it lol the old bumper was in pretty rough shape when I took it off.

IMG_2672 (1024x768).jpg

IMG_2671 (1024x768).jpg

IMG_2674 (1024x768).jpg

IMG_2675 (1024x768).jpg
 

Attachments

  • IMG_2672 (1024x768).jpg
    IMG_2672 (1024x768).jpg
    86 KB · Views: 1,013
  • IMG_2671 (1024x768).jpg
    IMG_2671 (1024x768).jpg
    97.9 KB · Views: 1,040
  • IMG_2674 (1024x768).jpg
    IMG_2674 (1024x768).jpg
    87.6 KB · Views: 1,025
  • IMG_2675 (1024x768).jpg
    IMG_2675 (1024x768).jpg
    84.2 KB · Views: 1,000
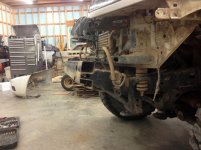
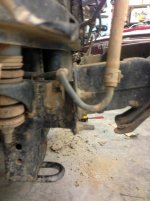
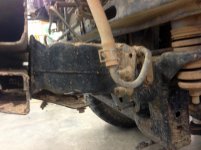
If anything, made it easier to get in behind there to clean everything up.

I know when I had my prior 04 going off roadding, I ripped off my front (stock) bumper many times. That's why I had to do some protection on this 08. Problem now, going to get more aggressive when coming in from the front side, see what kind of situations I shouldn't be doing.
 
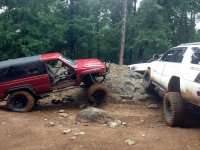
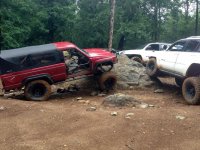
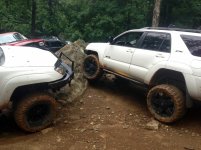
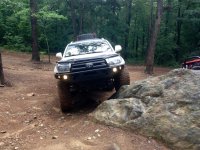
Went out to uhwarrie saturday, had an awesome time slidding around. The trail's saw a little over an inch of rain the night before we pulled in. Makes it even crazier for sure! Didn't get to many pictures unfortunately but had some fun poser shots lol

IMG_2802 (1024x768).jpg

IMG_2803 (1024x768).jpg

IMG_2807 (1024x768).jpg

IMG_2799 (1024x768).jpg

IMG_1480.jpg
 

Attachments

  • IMG_2802 (1024x768).jpg
    IMG_2802 (1024x768).jpg
    138.3 KB · Views: 954
  • IMG_2803 (1024x768).jpg
    IMG_2803 (1024x768).jpg
    137.5 KB · Views: 1,004
  • IMG_2807 (1024x768).jpg
    IMG_2807 (1024x768).jpg
    122.9 KB · Views: 954
  • IMG_2799 (1024x768).jpg
    IMG_2799 (1024x768).jpg
    138 KB · Views: 970
  • IMG_1480.jpg
    IMG_1480.jpg
    105.4 KB · Views: 2,964
Last edited:
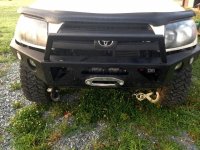
Got my winch in the mail yesterday and installed!
IMG_2932 (1024x768).jpg

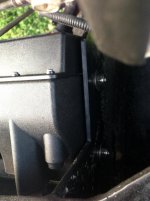
Had to remote mount the Control box, this is also the wireless brain for the wireless remote. Normally it mounts to the top of the winch and the kit comes with pre cut copper flat bars to make the connections from that location to the winch motor. So the supplied wiring was kinda useless. I was able to use the supplied battery cables to make the jump from the remote location to the winch motor. Just had to make my own cable leads to the battery. The winch itself fills up the bumper pretty tight, the control box just wouldn't workout on top.
IMG_2941 (1024x768).jpg

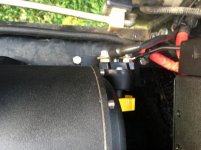
couple more holes to mount a power cut off switch. I wanted everything reachable through the access holes in the bumper.
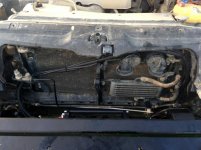
IMG_2940 (1024x768).jpg

Ran the wiring up and over the horn and across in front of the condenser. The two battery leads run off behind the driver head light to the battery.
IMG_2938 (1024x768).jpg

pretty simple operation just reach in and twist the knob to on,
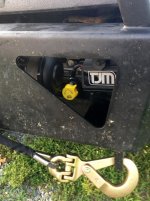
IMG_2934 (1024x768).jpg

Then just work the clutch engagement.
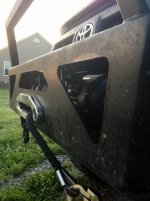
IMG_2935 (1024x768).jpg

All wired up and ready to recover. The wireless remote is bad ass It's rated to work up to 51ft away from the winch. Tested it out at my dads place, drove down into a small gully area and hooked up to a tree at the top. Walked up and over to the drive way and talked to dad while he washed his tundra and watched my truck pull itself up the hill. Pretty sick!
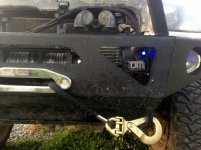
IMG_2942 (1024x768).jpg

The switch stays in the off position until needed but when the winch is turned on it has that cool LED light, changes to red when it is spooling out and green when spooling in, blue when ready to use. The TJM winch came with everything you see, fair lead, wiring, hook, wired and wireless remote, and synthetic line. I purchased from CBI the box came with the nuts the winch mounts with taped in a packing slip on the side of the box. Kind of indicating the winch didn't come with them (just an FYI if you purchase from Ebay or another vendor it may not contain mounting nuts.) The only hardware supplied in the TJM box were 6 bolts. Two for the fair lead and 4 to mount the winch. I assume you would just have to supply your own nuts for their hardware. I didn't have any metric nuts so I just swapped out the fair lead bolts with some standard thread bolts I had at the shop. Also the winch mounting bolts are on the short side in my opinion. They come with flat and lock washers; however, the bolts are to short to mount on 1/4" plating and still utilize the washers. Even though they're grade 8 I'll likely source some longer bolts to ensure I have enough holding strength in the mounts. The kit also came with free hat lol.

 

Attachments

  • IMG_2932 (1024x768).jpg
    IMG_2932 (1024x768).jpg
    138.8 KB · Views: 987
  • IMG_2941 (1024x768).jpg
    IMG_2941 (1024x768).jpg
    100 KB · Views: 948
  • IMG_2940 (1024x768).jpg
    IMG_2940 (1024x768).jpg
    96.8 KB · Views: 958
  • IMG_2938 (1024x768).jpg
    IMG_2938 (1024x768).jpg
    105.2 KB · Views: 920
  • IMG_2934 (1024x768).jpg
    IMG_2934 (1024x768).jpg
    121.4 KB · Views: 939
  • IMG_2935 (1024x768).jpg
    IMG_2935 (1024x768).jpg
    90 KB · Views: 959
  • IMG_2942 (1024x768).jpg
    IMG_2942 (1024x768).jpg
    98 KB · Views: 933
Last edited:
Steering rack

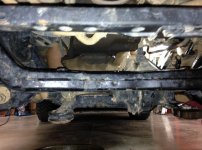
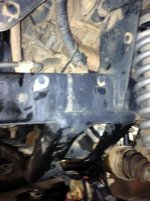
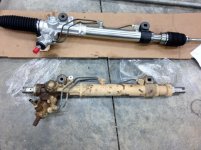
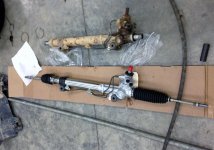
Well I dove into the sloppy steering issue I had last night. I have to say changing the steering rack on these trucks has been one of the more simplistic jobs I've done but way time consuming.

You have to remove the inner tie rods (with or without the outer end links on) unbolt the front axle front bracket supports, remove the oil filter (so oil change), disconnect the rusty corroded u joint coupling that attaches to the steering rack (had to use an air hammer), drain the steering fluid, and then you can unbolt and shimmy the steering rack out. As well of course wrestle with the skid plates. I got started at around 6 in the evening and aside from two random neighbors coming and chatting me up for an hour or so and my dad coming out to talk and hang out I got finished up cleaning the shop around 10:30-11. Have to run into firestone today and take advantage of my lifetime alignment but the truck already feels 10 times better.
IMG_0286 (1024x761).jpg

I noticed my front crank seal seems to be seeping I'm hoping it will make it to the next timing belt replacement at 220,000 miles I'm currently at 165,000.

IMG_0287 (768x1024).jpg

IMG_0288 (1024x766).jpg

IMG_0289 (1024x719).jpg
 

Attachments

  • IMG_0286 (1024x761).jpg
    IMG_0286 (1024x761).jpg
    100.1 KB · Views: 832
  • IMG_0287 (768x1024).jpg
    IMG_0287 (768x1024).jpg
    81.6 KB · Views: 810
  • IMG_0288 (1024x766).jpg
    IMG_0288 (1024x766).jpg
    109.2 KB · Views: 876
  • IMG_0289 (1024x719).jpg
    IMG_0289 (1024x719).jpg
    97.3 KB · Views: 827
Nice brotha! Glad you were able to get that knocked out. Sounds like you had some fun. So fresh oil and fresh PS fluid? Sounds like a winner!

I ordered some anti-rattle clips to keep my front brakes pad from knocking, some new rear end links to get rid of that annoying squeak and some seals for that T-Case seeping that you saw the other day. One for the output shaft and one inside the companion flange. Should work out perfect time for me to change the break in oil in the rear diff and change the t-case fluid at the same time. Still gotta figure out how to repair that e-locker harness I ripped off (getting the pins back in the right places) and get me old diff shipped out to it's new owner. Fun stuff man. Bobby went to URE Saturday.

Hope all is well. We should be doing a winery visit with the girls soon aye?

 
Nice brotha! Glad you were able to get that knocked out. Sounds like you had some fun. So fresh oil and fresh PS fluid? Sounds like a winner!

I ordered some anti-rattle clips to keep my front brakes pad from knocking, some new rear end links to get rid of that annoying squeak and some seals for that T-Case seeping that you saw the other day. One for the output shaft and one inside the companion flange. Should work out perfect time for me to change the break in oil in the rear diff and change the t-case fluid at the same time. Still gotta figure out how to repair that e-locker harness I ripped off (getting the pins back in the right places) and get me old diff shipped out to it's new owner. Fun stuff man. Bobby went to URE Saturday.

Hope all is well. We should be doing a winery visit with the girls soon aye?


Yeah the wifey was saying something about being off this weekend but i don't know what they may have planned. I seem to remember her saying that she talked to Shannon after I mentioned yalls interest but I haven't seen her since sunday haha. But I'm down to go.

I'm pretty confident you can use butt splicers and connect the wires individually instead of trying to replace the clip. They make the butt splices to where they have heat shrink on each end to seal off the connection, weather pack so to say. I was curious if you'll have to raise the breather tube for that elocker motor to prevent it from becoming submerged in a water crossing, or if it connected to a tee fitting to tie into the factory breather on the axle housing.
 
Yeah the wifey was saying something about being off this weekend but i don't know what they may have planned. I seem to remember her saying that she talked to Shannon after I mentioned yalls interest but I haven't seen her since sunday haha. But I'm down to go.

I'm pretty confident you can use butt splicers and connect the wires individually instead of trying to replace the clip. They make the butt splices to where they have heat shrink on each end to seal off the connection, weather pack so to say. I was curious if you'll have to raise the breather tube for that elocker motor to prevent it from becoming submerged in a water crossing, or if it connected to a tee fitting to tie into the factory breather on the axle housing.

I think Sarah told Shannon that she may have something going on this weekend so we may be shooting for next weekend.

Yeah, I could splice them together, but I still need to figure out what is what. Plus, the fact that my new harness is gonna come with a nice connector, makes me actually want to use it. Good question about that breather though. I'll have to look into it, but I think you're right, it should tie into the system somewhere.
 
I think Sarah told Shannon that she may have something going on this weekend so we may be shooting for next weekend.

Yeah, I could splice them together, but I still need to figure out what is what. Plus, the fact that my new harness is gonna come with a nice connector, makes me actually want to use it. Good question about that breather though. I'll have to look into it, but I think you're right, it should tie into the system somewhere.

oh yeah lol my sister in laws birthday is monday and we're not sure what she's wanting to do with sarah this weekend. Though she seem interested in the winery though when we spoke shortly last Sunday. I pretty sure sarah's off tonight I'll try to get her to finalize some plans and see where we're at.
 
Back when you had an OEM bumper, with the black fogs, why was the light output of the DRL's almost halogen/fog-light tint to them? Was it due to the black? or were they fog bulbs?
 
Back when you had an OEM bumper, with the black fogs, why was the light output of the DRL's almost halogen/fog-light tint to them? Was it due to the black? or were they fog bulbs?

whatever the factory fog/running lights were. I did change the running/turnsignal lights in the bumper to clear apposed to amber or yellow I didn't really like the amber bulbs on the white bumper specially durring the daytime they're always on.

looking back at them with the black film it definitely created a tint to the light
 
Last edited:
Watching those Uwharrie videos makes me wanna get out there soon with you guys! Iv spoke with superman a couple times. Trying to get my build started, but definitely would love to check out yaws rigs! Love the new bumper btw. Cheers!
 
awesome late night read! Great job on everything love that you do ALL your own work so do I, Im a tight wad and I love the mechanical work.
and nice trail ride pics
 

Members online

Forum statistics

Threads
278,309
Messages
3,554,071
Members
248,016
Latest member
Advally Service

Trending content

Back
Top