Ace's 1998 4Runner Build Thread

Yesterday I noticed the fan clutch was loud for too long so I ordered a replacement.

Tim covers diagnosis of a bad clutch & replacement here -

<iframe width="740" height="416" src="https://www.youtube.com/embed/WzhlACxqeqQ?t=170 title="Fan Clutch Replacement" frameborder="0" allow="accelerometer; autoplay; clipboard-write; encrypted-media; gyroscope; picture-in-picture; web-share" allowfullscreen></iframe>
 
Since my 1998 has no imobilizer/chip key I bought this Viper 3505V 2 way alarm at Amazon-
Look up ways of doing a secondary kill switch that interrupts power to the fuel pump. Hidden and separate from the alarm. Won't stop cat thieves or a tow truck... but then you should be pretty safe.

-Charlie
 
Removed and replaced the fan clutch, used this one -

https://www.amazon.com/dp/B0819TWFQT?psc=1&ref=ppx_yo2ov_dt_b_product_details

712OJPVOUJL._AC_SL1000_.jpg


Also replaced the rear liftgate struts with these -

https://www.amazon.com/dp/B00W8QBA30?psc=1&ref=ppx_yo2ov_dt_b_product_details

514D5-9aBYL._AC_SL1500_.jpg
 
Removed and replaced the fan clutch, used this one -

Amazon.com

712OJPVOUJL._AC_SL1000_.jpg


Also replaced the rear liftgate struts with these -

Amazon.com

514D5-9aBYL._AC_SL1500_.jpg


Happy to see this kind of maintenance getting done. I personally have Strongarm struts on the rear hatch of my 4Runner as well as on the hood of my Honda Accord. Great results. Thanks to @%1;for promoting these in the past, that’s why I went with them.

For the fan clutch I’m surprised you didn’t go with the saison unit. It’s under $100 and is OEM, but I hope you have good results with this one nevertheless.


Sent from my iPhone using Tapatalk
 
Won't stop cat thieves or a tow truck...

-Charlie

Earlier in this thread I posted that I installed a transmission skid plate / CAT shield, so the CAT protection has been addressed. Tow trucks and wheel thieves aren't much of a concern.

I did order a Directed Electronics 506T I.T. Audio Sensor to add to the Viper alarm to detect window breakage. Inexpensive and easy to add to the system, seems like a no brainer to counter smash & grab thieves.
 
Got a few things done today - the rear diff breather mod and I painted the rear drums.

Tim covers how he did the breather mod here -

<iframe width="560" height="315" src="https://www.youtube.com/embed/tCGMa4vng_g?si=erWaFBNQZLiofvep" title="YouTube video player" frameborder="0" allow="accelerometer; autoplay; clipboard-write; encrypted-media; gyroscope; picture-in-picture; web-share" allowfullscreen></iframe>

I bought the steel nipple, vent valve and the hose all on Amazon. The two "Toyota" parts I received were in plain plastic instead of the normal Toyota packaging so I kept the steel nipple but returned the valve to Amazon & ordered one from Toyota. The one from Toyota did arrive in normal packaging so I'm guessing the Amazon parts were knock offs.

Here is the 5/16 tubing I bought, came with clamps -

Amazon.com

618gJ-xbr9L._AC_SX679_.jpg


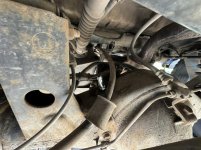
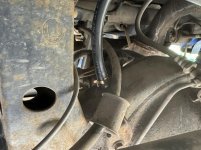
I removed the rear differential vent after I wire brushed the area of dirt, then installed the nipple with some teflon tape-
 

Attachments

  • IMG_8960.jpg
    IMG_8960.jpg
    121.9 KB · Views: 628
Last edited:
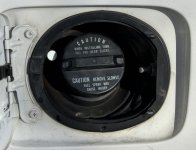
Then it was a matter of routing the hose up to the gas cap area and securing it with zip ties.

I removed the two bottom panel fasteners for the fuel filler neck cover but like Tim I had to break the upper pair. No big deal, I had spares from another job-

Amazon.com

61GB2R8ZR4L._AC_SL1200_.jpg


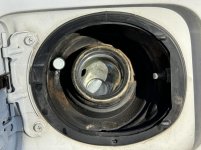
I made my hole in the fuel filler rubber surround with a bolt that I heated up with a propane torch. This created a nice, round hole for the vent to go into.

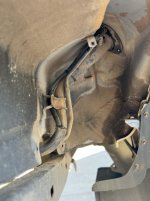
Then I put the new vent valve through the hole and connected the tubing after cutting it to length. Lastly I installed the clamp and installed the fuel filler tube cover. Here is the routed vent line -
 

Attachments

  • IMG_8967.jpg
    IMG_8967.jpg
    49 KB · Views: 638
Last edited:
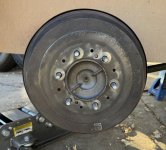
Since I had to remove the rear wheel to access the fuel filler tube area I decided to paint the rear drums.

They were't too rusty but I cleaned them up with wire brushes & such -
 

Attachments

  • IMG_8969.jpg
    IMG_8969.jpg
    81.4 KB · Views: 616
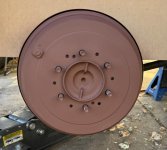
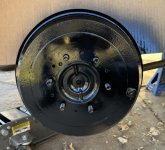
Then some Rustolem rusty metal primer and satin black -
 

Attachments

  • IMG_8971.jpg
    IMG_8971.jpg
    63.2 KB · Views: 611
  • IMG_8972.jpg
    IMG_8972.jpg
    95.5 KB · Views: 612
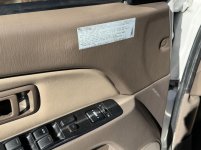
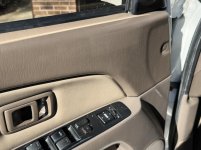
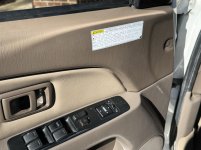
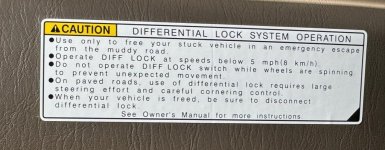
One more thing I did today - replace the faded warning decal on the driver's door panel -

Before

cleaned with denatured alcohol

after -
 

Attachments

  • IMG_8956.jpg
    IMG_8956.jpg
    103.1 KB · Views: 638
  • IMG_8957.jpg
    IMG_8957.jpg
    100.9 KB · Views: 655
  • IMG_8958.jpg
    IMG_8958.jpg
    104.4 KB · Views: 615
  • IMG_8959.jpg
    IMG_8959.jpg
    85.3 KB · Views: 616
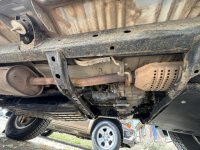
I prreviously installed a Talons Garage Transmission /Cat skidplate to protect both items. This is a really nice skidplate that has an additional wing on the passenger side to protect the catalytic converter from sawzall attacks.

Here's what it looks like on my 1998 SR5 -
 

Attachments

  • IMG_8991.jpg
    IMG_8991.jpg
    139.3 KB · Views: 507
Last edited:
Being that cat thieves are going to be in a hurry I wanted to install an additional shield or skidplate to stop them from cutting off the back of the cat before realizing they can't get to the front.

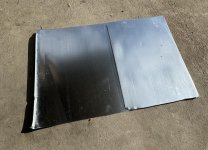
I could buy a transfer case shield from Talons but thought I'd just make a shield myself out of stuff I had on hand. The shield will only make the thief pause so that they can move on to easier pickings.

Looking around I found a piece of galvanized sheet steel used in HVAC, left over from a previous project-
 

Attachments

  • IMG_8992.jpg
    IMG_8992.jpg
    135.3 KB · Views: 534

Members online

Forum statistics

Threads
278,307
Messages
3,554,050
Members
248,016
Latest member
Advally Service

Trending content

Back
Top