Advice requested from those of you who have mounted tires & balanced wheels at home

Status
Not open for further replies.

foo

Banned
Advice requested from those of you who have mounted tires & balanced wheels at home

Advice requested from those of you who both mount your own tires & (static) balance your own wheels at home.

For example:
  • Do you know of the 15-inch stock steel wheels have a match-mounting (factory low spot dimple) mark on them?
  • Which material (steel or rubber?) and which length tire-valve stems do you recommend?
  • Do I need any other tools than those listed below and did I miss a critical step or trick?

If you have never mounted or balanced your own tires at home, you probably won't be able to add much practical value to this thread; however if you have actually mounted and balanced SUV tires at home, you almost certainly can add valuable pragmatic hints to this thread (such that we'll all learn from your experience).

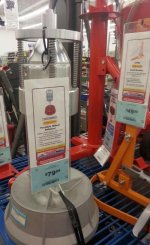
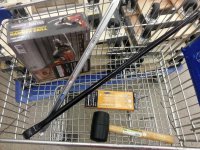
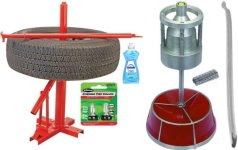
At a rough cost of around $200 (which pays for itself after about the 10th mounted tire), I already bought or will buy the following tools from Harbor Freight:

I will need to securely mount the tire changing tool, either to a large pallet, or to the concrete of my driveway or sidewalk (or maybe on the ground in the dirt somehow, temporarily).

I'll need four new tire valve stems so a basic question is which ones you recommend (e.g., Pep Boys, Kragen/O'Reilly, Autozone).

Other than tire valves, I'm hoping the tools I bought today are adequate, because I already have:
  • Air compressor, hose, air chuck, and tire pressure gauge
  • Shrader valve removal tool
  • Lots of dish detergent & water
  • Assorted pliers, wrenches, ratchets, and sockets
  • White greasy marking stick for marking tires

Here's the background:
A relative of mine owns the 2WD '97 4Runner Base Model (4cyl), and all four tires are worn well past the wear bars.

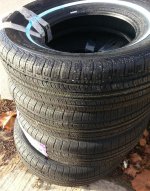
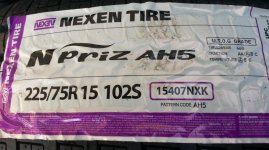
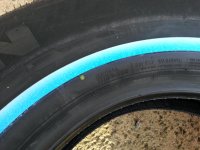
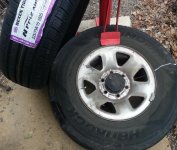
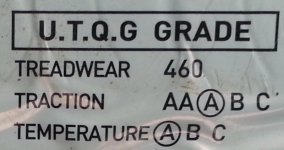
She has never once driven off road (not even on the shoulder of a road!), and she just ordered, online, the Nexen N'Priz AH5 P225/75R15 tires (load range 102S, Treadwear 460, Traction A, Temperature (aka Speed) A for about $60 each.

When the tires arrive in a few days, I plan on mounting and static balancing them for her and just want to ask for tactical advice from those of you who have done the task yourself.
I'm well aware of the difference between dynamic road-force balancing and static balancing.

Therefore, my plan is simple:
a. Drive the vehicle to determine if there is any pre-existing vibration,
b. Break the beads, and remove the old tires and wheel-balance weights,
c. Mount the new tires & new valve stems & pressurize to spec,
d. Balance the wheels statically,
e. Test drive at highway speeds for noticeable vibration,
f. If there is any wheel-related vibration, then (and only then) would I simply take the wheels in for dynamic road force balancing.

Note that I am aware that tire manufacturers use different paint dot schemes for match mounting:
  • Usually they paint a yellow dot at the tire's light spot which is paired with the valve stem on the wheel which is the wheel's heavy spot, and/or,
  • They paint a red dot at the tire's high point for radial runout and radial force variation.
  • But this applies mostly to match mounting on new factory wheels, and, in any case, is completely up to the tire manufacturer.

I have a few questions about the stock Toyota 15-inch wheels because where I mount the red spot (if the tires have a red spot, which takes priority over the yellow spot) depends on whether Toyota put a dimple in the steel rim to indicate the steel wheel's low spot.

All I'm asking for is practical advice and hints and helpful suggestions for how to do the job best from those of you who have actually mounted their own tires and balanced them yourself at home with standard home equipment.

a. Did I miss anything that I'll need to do the job right?
b. Do you have any tricks or hints to make the job easier, simpler, or better?
 

Attachments
  • tires.jpg
    tires.jpg
    43.1 KB · Views: 864
Last edited:
Register to hide this ad
Bolt that tire changer to the concrete if you can. I doubt a pallet will have enough strength to resist the level of force required. That model changer will get it done (some tires are easier to work on than others), but it won't be great. It shouldn't gouge the metal of the steel wheels too badly, but it will probably scrape the paint off, at least it did in my experience. Dish soap solution works fine, but I would suggest keeping it like 80% soap, 20% water (THICK) and use only enough to lubricate the bead. You don't want to slop any measurable amount of liquid into the tire. It will be trapped, cause corrosion, and make it impossible to balance.

Valve Stems: I would use whatever cheap rubber stems you find at the local autoparts store. I have used plenty of bottom of the barrel stems that are still going strong 10+ years later. You need a valve stem wrench ( http://www.autozone.com/tire-repair...mover-tool/slime-4-way-valve-tool/487510_0_0/ ), pulling the valve guts from the stem will make setting the bead MUCH easier, especially if you have a strong/hi volume air supply. If you do struggle setting the bead, try compressing the tire (around the circumference) with a ratchet strap. There is also always the fun way: https://www.youtube.com/watch?v=Js-AauVbxdk

Balancing: Airsoft/dynabeads/etc seem to be a much easier DIY than traditional wheel weights. I haven't run them myself, but a lot of people seem to be satisfied.

Airsoft Pellet tire Balancing including charts and calculators - Pirate4x4.Com : 4x4 and Off-Road Forum

DynaBeads Tire Balancing Beads


Hope this helps!
 
Last edited:
Bolt that tire changer to the concrete if you can.

Thank you for that advice.

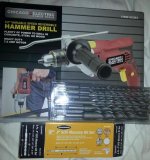
I generally don't like buying tools that will only be used once, but today I picked up, on sale, from Harbor Freight, item# 62383 Chicago Electric 1/2" Variable Speed Reversible Hammer Drill and Harbor Freight item# 62791 which is a six-piece eight-inch long set of SDS masonry bits (which includes the 1/2" diameter bit that I'll need to sink a 3/8" female thread into the concrete).

doubt a pallet will have enough strength to resist the level of force required.

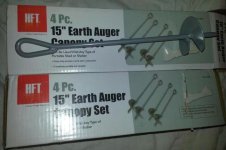
I'm going to concur with you that the pallet will almost certainly twist when I am forcing the tire around the most, so what I also picked up, just in case I decide to mount the tire changer into soil, are 8 of these Harbor Freight item# 69896 fifteen-inch long earth augers.

What I was thinking, at first, is that I could cut the looped head off the auger and then tap a 3/8" x 16TPI set of threads so that I could "bolt" the tire changer into the soil with 4 earth augers, or, I could leave the earth augers intact and use 8 of them to hold down the four legs of the tire changer (with a steel pipe between every two augers).

That model changer will get it done (some tires are easier to work on than others), but it won't be great. It shouldn't gouge the metal of the steel wheels too badly, but it will probably scrape the paint off, at least it did in my experience.
Thanks for that advice. I'm not very worried about the gouging of the metal as there is no way that the hand tool is going to be anywhere as powerful as the shop tools, which, I've seen how the shop guys mishandle them.

Doing it yourself is always going to be far more gentle on the wheels (no matter what tool we use) than what those guy do to wheels!

Dish soap solution works fine, but I would suggest keeping it like 80% soap, 20% water (THICK) and use only enough to lubricate the bead. You don't want to slop any measurable amount of liquid into the tire. It will be trapped, cause corrosion, and make it impossible to balance.
Thanks for the advice to keep the dish soap relatively thick and to keep it out of the tire.

Valve Stems: I would use whatever cheap rubber stems you find at the local autoparts store. I have used plenty of bottom of the barrel stems that are still going strong 10+ years later.
Actually, I found out today that it's not that easy. It's probably easy, but there are TWO fundamental diameters for valve stems!
  • 0.453 inch rim holes
  • 0.625 inch rim holes

And then there is the concept of the optimum length.
I wasn't sure what the size of the rim hole is since I don't have the vehicle with me, so I ended up buying both sizes at 2-inch lengths.

Only trial and error (or someone else's experience) will tell us if that length and diameter is optimal or not.

You need a valve stem wrench ( Slime 4 way valve tool 2044-A- ReadReviews onSlime #2044-A ), pulling the valve guts from the stem will make setting the bead MUCH easier, especially if you have a strong/hi volume air supply.
Yes. I have that tool. It is like a screwdriver for shrader valves.

If you do struggle setting the bead, try compressing the tire (around the circumference) with a ratchet strap. There is also always the fun way: https://www.youtube.com/watch?v=Js-AauVbxdk
I have seen the videos where they blow up the bead by igniting a flammable fluid, but I'll stick with using the air compressor.

If necessary, I'll try some kind of compression strap, but I'm hoping the air pressure alone will do the trick in setting the bead on the new tires.

Balancing: Airsoft/dynabeads/etc seem to be a much easier DIY than traditional wheel weights. I haven't run them myself, but a lot of people seem to be satisfied.
Ug. I hate the idea of putting a solution of "things" inside the tire, to let them balance the tire internally. I just don't like anything about the idea. It seems hokey to me, but if it works, I can't argue if someone else wants to do things that way.

Certainly there are more than a few ways to do any job. I'll try to do it the conventional way, and, if the wheels aren't statically balanced such that there is no vibration, then I'll have them dynamically balanced after the fact.

Hope this helps!
Yes, That helped greatly.

The main question I have is the rim-hole diameter and optimal tire-valve length, but those are really minor issues in the scheme of things.

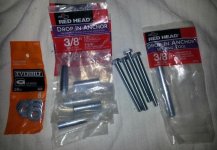
The other issue is where do I drill in my nice concrete garage floor, as I don't want to mess things up. I picked up a set of the following at Home Depot:
Four 3/8" (16TPI) by 3.5-inch long bolts
Four 3/8" Red Head Drop-In Anchors (SKU 92097-50125)
Eight 3/8" steel washers Everbilt (SKU 87480-02501)
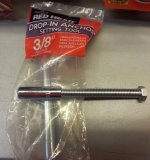
One 3/8" Red Head Drop-In Anchor Setting Tool (SKU 92097-07499)
 

Attachments

  • tire_change001.jpg
    tire_change001.jpg
    117.8 KB · Views: 2,223
  • tire_change002.jpg
    tire_change002.jpg
    110 KB · Views: 3,000
  • tire_change003.jpg
    tire_change003.jpg
    94.5 KB · Views: 1,984
  • tire_change009.jpg
    tire_change009.jpg
    64 KB · Views: 1,958
  • tire_change010.jpg
    tire_change010.jpg
    49.2 KB · Views: 1,866
  • tire_change012.jpg
    tire_change012.jpg
    45 KB · Views: 2,074
  • tire_change013.jpg
    tire_change013.jpg
    101.4 KB · Views: 2,404
  • tire_change004.jpg
    tire_change004.jpg
    64.8 KB · Views: 2,053
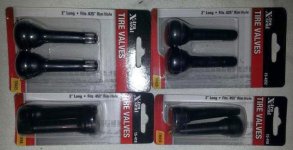
I realize it's a minor technicality, but does anyone know the optimal diameter and length of the tire valve stems for the stock 15-inch steel wheels?
 

Attachments

  • tire_change005.jpg
    tire_change005.jpg
    58 KB · Views: 1,920
  • tire_change007.jpg
    tire_change007.jpg
    75.7 KB · Views: 1,921
I realize it's a minor technicality, but does anyone know the optimal diameter and length of the tire valve stems for the stock 15-inch steel wheels?

Foo,

For the steelies that I have worked on in the past, the shorter the better. The steel of the wheel itself is relatively thin (<0.25") so as long as the stem isn't situated at an odd point (at a curve or tight corner) I think the shorter length pictured will be fine. If you run into trouble, any local shop/garage should be happy enough to sell you some for peanuts (likely less than the retail packaged versions you have pictured).

The mounting setup I used was threaded anchors in a concrete slab floor. It worked just fine.
 
For the steelies that I have worked on in the past, the shorter the better.

Thank you for that pragmatic advice as it seems that the selection of the best valve stem for the given application takes EXPERIENCE and KNOWLEDGE!

I had figured, without any good reason, that if some is good, more is better - so I got the LONGEST ones in the store.

I guess the drawbacks of the long ones are weight (slightly) and they can catch on curbs (eventually perhaps breaking them off).

I guess the drawback of the short ones are that they may be slightly harder to install and that they may be slightly harder to get an air chuck on them.

I'll go back and get some shorties, as the tires have not arrived yet anyway, and I need to get a puller tool for the valve anyway since the tool that I have is the screwdriver type which doesn't help with pulling the valve through the rim hole.
229492d1481043551-advice-requested-those-you-who-have-mounted-tires-balanced-wheels-home-tire_valve_tools.jpg


The steel of the wheel itself is relatively thin (<0.25") so as long as the stem isn't situated at an odd point (at a curve or tight corner) I think the shorter length pictured will be fine. If you run into trouble, any local shop/garage should be happy enough to sell you some for peanuts (likely less than the retail packaged versions you have pictured).

On the bottom of my valves are the following TR numbers molded into the rubber:
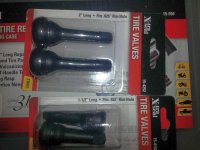
  • TR425E (060)(A) on the 2-inch long 0.625" rim-hole diameter O'Reilly's PN 15-4252 (XtraSeal 31inc.com) valve stems
  • TR 418 (060)(A) & TR418 (048)(A) on the 1.6 ounce 2-inch long 0.453" rim-hole diameter O'Reilly's PN 15-418 (XtraSeal 31inc.com) valve stems

These TR numbers apparently correspond to the industry standards of:
  • TR 418, 0.453 in (11.5 mm) rim hole diam. 2 in (51 mm) long
  • TR 425, 0.625 in (15.9 mm) rim hole diam. 2 in (51 mm) long
It seems that the TR 418 is the one I want because, apparently, most passenger tires are 0.453" in rim hole diameter, so I have to return the 0.625-diameter plugs anyway.

Looking up the specs for the TR 418, which seems to be a standard tubeless tire (<65psi) valve stem part number, it seems they're designed for a maximum steel rim thickness of 0.156" so I will measure that with calipers when I get the SUV and tires in my driveway.

The mounting setup I used was threaded anchors in a concrete slab floor. It worked just fine.

I think that's the way I will go, although I hate to drill holes in my driveway that will just end up rusting out over the years (yes, I'll put a flush bolt cap in the female threads).
 
UPDATE for today:

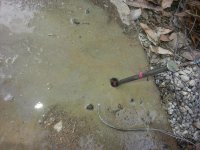
The tire mounting machine is mounted to concrete outside, so now all I need to do is wait for the tires, and pick up shorter 0.463" diameter valve stems and the screw-on-type valve stem removal tool (so that I can use that tool in order to pull the new valve on).

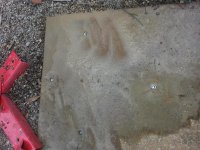
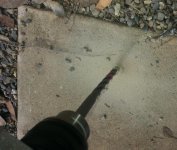
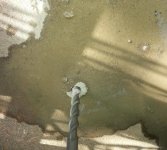
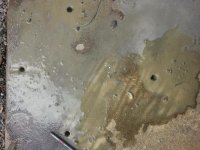
Drilling the 1-5/8-deep 1/2-inch wide holes in the concrete was far easier than I thought it would be, and only took a minute per hole (if that), so I wonder if I really ever needed the impact drill or not?

Too late. I own the impact drill now (maybe I'll find some use for it working on the cars?).

The four 3/8 inch 16TPI bolts were problematic, so I wish I knew then what I know now about sizing.
  1. One bolt snapped off below grade due to damage I did to the anchor threads (I didn't drill the hole deeply enough so I damaged the anchor threads when setting it)
  2. Probably I should have bought stainless steel bolts (or at least stronger bolts)
  3. The Goldilocks size is 2-3/4 inches but quarter sizes are hard to find in box stores
  4. Even on the net, quarter sizes are harder to find (but they do exist)
  5. Given that 2-1/2" is too short and 3-1/2" is too long, 3 inches is the best compromise
  6. I noticed in some youtube videos, people stacked extra washers to compensate for the extra quarter inch

All I need to do now is wait for the tires to arrive, as the research is always far harder than the actual work.
I probably should have gotten stainless steel bolts since I put it in a far off corner so I'm likely gonna just leave it mounted to the concrete (I think).

I did get stainless steel allen head plugs to plug the female bolt holes holes if I remove the tire mounting tool though.
 

Attachments

  • bolt_holes.jpg
    bolt_holes.jpg
    84.3 KB · Views: 1,867
Last edited:
You probably needed the impact drill. There literally is a 10:1 difference (or more) in drilling in concrete with an impact drill vs. a purely rotary drill.
 
Gotta say, I admire your dedication and your enthusiasm.

I've seen guys change tires on some of those manual tire changers and make it look easy as pie. I've also seen guys use the automatic tire changers and struggle endlessly. It's hard work until you get the rhythm down. I've changed a few motorcycle tires and have sworn it off. Hopefully the 15" wheels with the softer and larger sidewalls will be easier for you. And with steel wheels, you don't have to worry about scratching/damaging the wheel.
 
You probably needed the impact drill. There literally is a 10:1 difference (or more) in drilling in concrete with an impact drill vs. a purely rotary drill.

Well, sometimes the tool makes it "easy as pie" so maybe that's why it was so easy.
(Or maybe my sidewalk concrete is just crappy ... dunno; but now I have another 1/2 inch drill.)

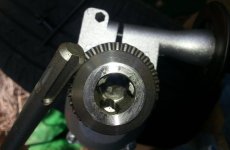
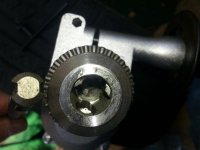
I did have a huge problem, surprisingly, with the drill, just getting the bits to spin straight in the chuck.
They were visibly wobbly just turning the drill on in the air.
It took forever and I never did get them completely straight.

Did I buy the wrong bits for the drill?
Both were bought at HF.

The bits are HF #62791 "Warrior 8-inch SDS Masonry Bit Set" with "shank style SDS".
The drill is HF #62383 "Chicago 1/2-inch Variable Speed Reversible Hammer Drill", but it says nothing of the "shank style".

Three questions came up after I drilled that I didn't know I needed to know before I drilled!
  1. What "shank style" am I supposed to have gotten?
  2. Am I supposed to drill concrete dry or wet?
  3. Is it normal for back-yard sidewalk concrete to only be about an inch and a half to (at most) 2 inches thick?
 

Attachments

  • harbor_freight_concrete_drill_and_bits_01.jpg
    harbor_freight_concrete_drill_and_bits_01.jpg
    37.8 KB · Views: 782
  • harbor_freight_concrete_drill_and_bits_02.jpg
    harbor_freight_concrete_drill_and_bits_02.jpg
    41.6 KB · Views: 852
  • harbor_freight_concrete_drill_and_bits_03.jpg
    harbor_freight_concrete_drill_and_bits_03.jpg
    105.7 KB · Views: 782
  • harbor_freight_concrete_drill_and_bits_04.jpg
    harbor_freight_concrete_drill_and_bits_04.jpg
    83.9 KB · Views: 768
  • harbor_freight_concrete_drill_and_bits_05.jpg
    harbor_freight_concrete_drill_and_bits_05.jpg
    70.1 KB · Views: 794
  • harbor_freight_concrete_drill_and_bits_06.jpg
    harbor_freight_concrete_drill_and_bits_06.jpg
    77.5 KB · Views: 768
Last edited:
Gotta say, I admire your dedication and your enthusiasm.
Thanks. I love your moniker.
It's as nondescript as mine!

Does anyone have any comments on the tires we got for this never-off-road 2wd SUV?
  • ~$70 Nexen NPriz AH5
  • Stock size: P225/75R15 102S
  • Treadwear 460, Traction A, Temperature A

Hopefully the 15" wheels with the softer and larger sidewalls will be easier for you. And with steel wheels, you don't have to worry about scratching/damaging the wheel.

I am agreeing with you that I'm already finding that the bead breaker on the HF tire changing tool either takes some getting used to (aka technique) or it flat out doesn't work. I suspect I'm doing something wrong.

Luckily, I bought the bead-breaker bar.

But I don't know exactly how to use that bead-breaker bar.

One basic question is which direction does the gooseneck go?

Does the gooseneck curl around the bead of the tire?

If so, how do you get the gooseneck in there under the bead if it curls under the bead of the tire?

NOTE: I have two two-foot tire irons if that's also what's required.
 

Attachments

  • toyota_mounting_tires_01.jpg
    toyota_mounting_tires_01.jpg
    140.6 KB · Views: 1,684
  • toyota_mounting_tires_02.jpg
    toyota_mounting_tires_02.jpg
    63.9 KB · Views: 1,587
  • toyota_mounting_tires_03.jpg
    toyota_mounting_tires_03.jpg
    64.6 KB · Views: 812
  • toyota_mounting_tires_04.jpg
    toyota_mounting_tires_04.jpg
    82.5 KB · Views: 3,078
  • toyota_mounting_tires_05.jpg
    toyota_mounting_tires_05.jpg
    36.4 KB · Views: 1,594
  • toyota_mounting_tires_06.jpg
    toyota_mounting_tires_06.jpg
    65.3 KB · Views: 1,462
  • toyota_mounting_tires_07.jpg
    toyota_mounting_tires_07.jpg
    48.3 KB · Views: 1,294
  • toyota_mounting_tires_08.jpg
    toyota_mounting_tires_08.jpg
    50.9 KB · Views: 1,367
Three questions came up after I drilled that I didn't know I needed to know before I drilled!
  1. What "shank style" am I supposed to have gotten?
  2. Am I supposed to drill concrete dry or wet?
  3. Is it normal for back-yard sidewalk concrete to only be about an inch and a half to (at most) 2 inches thick?

With respect to the difficulty of drilling straight holes, concrete is not homogenous or uniform - it consists of aggregate (rocks), maybe some wire or rebar, surrounded by hardened cement (similar to plaster of paris). The bit follows the path of least resistance, so when it hits a piece of hard aggregate, it will probably wander off in search of a softer path. It's not a precision operation.

For your other questions:
- Shank style looks fine, as long as it will chuck tightly into your drill and be centered.
- Drilling dry normally works just fine. Wet can help cool the drill bit for large, deep holes.
- If it's just a sidewalk (not designed to support a car or other heavy object) <2 inches thick is probably pretty normal, especially for older construction. If it's in the backyard as an add-on patio or something, it might have been (likely was) done without a permit, in which case it could be any thickness.
 
Last edited:
The bit follows the path of least resistance, so when it hits a piece of hard aggregate, it will probably wander off in search of a softer path. It's not a precision operation.
It was my fault for not being clear that the hole wasn't the problem; the wobbling was while it was in the chuck spun in the air.

It turns out that I bought the wrong bits. The shank style of SDS is for a specific type of chuck and my chuck was the normal symmetric style. Live and learn.

I just hope this thread helps OTHERS who read it before doing the job because a lot of the advice I got on the net was wrong (a lot more was right though - so I just want to keep the record straight).

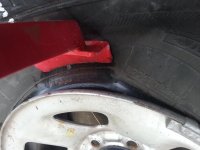
For example, the recommendation to use the Harbor Freight swan neck tire breaker was utterly wrong. That bead breaker bar is for a totally different type of tire and wheel assembly (one called "lock" I think but it doesn't matter because it's not for passenger tires).

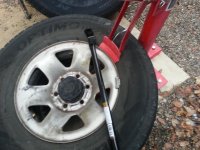
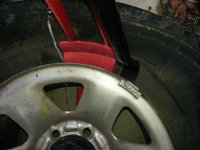
That bead breaker bar is utterly useless for our purpose because it slips off the rim every single time no matter what you do with it. You'd be better off with a butterknife. Whoever recommended it was trying to help but there is absolutely no way they could have actually ever have used it.
 

Attachments

  • wrong_tool_bead_breaker_1.jpg
    wrong_tool_bead_breaker_1.jpg
    64.4 KB · Views: 1,449
Last edited:
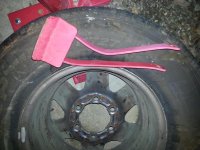
Another lesson for people reading this is that the harbor freight beadbreaker attachment is weak, and if you don't have perfect technique, it will bend like, well, like a butterknife, when you apply any force.

I'm sure the utter and dismal tool failure had a LOT to do with my lack of technique ... so I just warn people for the future ... that SUV tires may be too much for this bead breaker.

I'm gonna head off to HF to pick up a "real" bead breaker....
 

Attachments

  • wrong_tool_bead_breaker_3.jpg
    wrong_tool_bead_breaker_3.jpg
    74 KB · Views: 1,466
  • wrong_tool_bead_breaker_2.jpg
    wrong_tool_bead_breaker_2.jpg
    65.7 KB · Views: 1,279
  • breaking_bead2.jpg
    breaking_bead2.jpg
    39.4 KB · Views: 1,136
I did take someone's advice to get shorter tire valves and to buy the cheap tire-valve screw-on puller. I also have the lever-type tire valve removal-and-replacement tool on backorder.

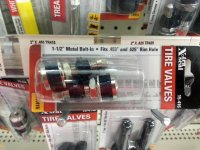
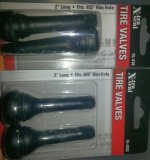
As a practical note to anyone reading this who contemplates doing their own tires, I found nowhere where this was mentioned but the 2 inches of the other tire valves seems to be the amount sticking out, and not the total length. I guess that's obvious, but not all specs are what you'd think they'd be.

The current tire valves stick out 1-1/4 inches, which is a tad too short, so these are 1-1/2 inches (0.453-inch rims, max 65PSI, TR414 style).
230549d1481649432-advice-requested-those-you-who-have-mounted-tires-balanced-wheels-home-tirevalves.jpg
 
A word of caution is that the Harbor Freight tired changing tool bead breaker is as soft as rubber, so, it was as easy to straighten out by hand as it was to bend by hand.
 

Attachments

  • 01_straighten_tire_wedge.jpg
    01_straighten_tire_wedge.jpg
    58.9 KB · Views: 1,016
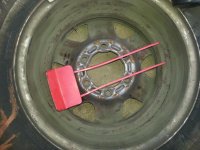
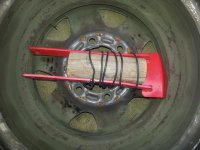
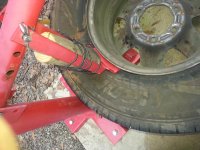
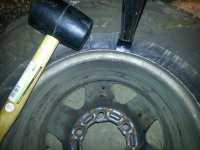
What the bead breaker shovel needs, from the start, is a bit of support, which is shown here (but after using it, I realized it needs to be about 2 inches from the top of the wedge to leave clearance for the rim of the wheel when breaking beads).

Luckily this wedge simply moved out of the way because it was just press fit in and wrapped with solid 120V copper wire.
 

Attachments

  • 02_strengthen_tire_wedge.jpg
    02_strengthen_tire_wedge.jpg
    57.3 KB · Views: 1,035
By moving the clovis pin to the outside adjustment hole (making the angle about 90 degrees to the tire), and with this artificially strengthened wedge, I was (finally) able to apply more force on the tire bead.
 

Attachments

  • 03_strengthen_tire_wedge.jpg
    03_strengthen_tire_wedge.jpg
    73 KB · Views: 1,037
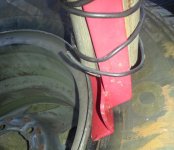
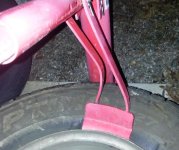
The fence post got in the way of the rim as shown in this photo, so, if you permanently mount it, make sure it's shorter by about 2 or 3 inches than the space allotted, and make sure it's mounted up high and not low where mine is now.

Notice how the wooden block hits the rim?
You don't want that.

You want the block to stay higher up, away from the rim by a couple of inches.
But, in this case, it didn't matter because the block moved when pressure was placed on it.
 

Attachments

  • 04_strengthen_tire_wedge.jpg
    04_strengthen_tire_wedge.jpg
    60.4 KB · Views: 872
Last edited:
Status
Not open for further replies.

Members online

No members online now.

Forum statistics

Threads
278,315
Messages
3,554,125
Members
248,016
Latest member
Advally Service

Trending content

Back
Top