
You are using an out of date browser. It may not display this or other websites correctly.
You should upgrade or use an alternative browser.
You should upgrade or use an alternative browser.
ANTMAN'S Thread
- Thread starter Antman
- Start date


Cozen89
Member
Sorry if this was mentioned, but I couldn't find it. What brand/model is this sub? I'd love something stealth and compact like this.
Subwoofer install- HOW TO
Picked up a small powered subwoofer from Crutchfield, and I figured I would post a writeup for those of you that are considering doing something like this. I'll give some hints, and suggestions for all you newbies to this sort of thing.
OK- Some background. I have had everything from 2-12's in the back of a pickup, to a nice small 10" custom box in my GTI, to powered subs in other vehicles. My ears aren't as young as they used to be, but I do enjoy feeling some bass when I'm cranking it!
You really can't compare a compact unit like this to a "real" box/amp combo. If you want to blow out your windows, this is NOT the sub for you. Basically it just fills in the lower end and creates a richer sound. It does thump hard enough to shake the rearview mirror, and you can feel the bass, not just hear it. For $200 (free shipping, and a free wiring kit too), it's a pretty good deal. If you've never had a subwoofer before, you will be impressed. I would rate it as "good". Oh yeah, it fits under the seat for a nice stealthy install!
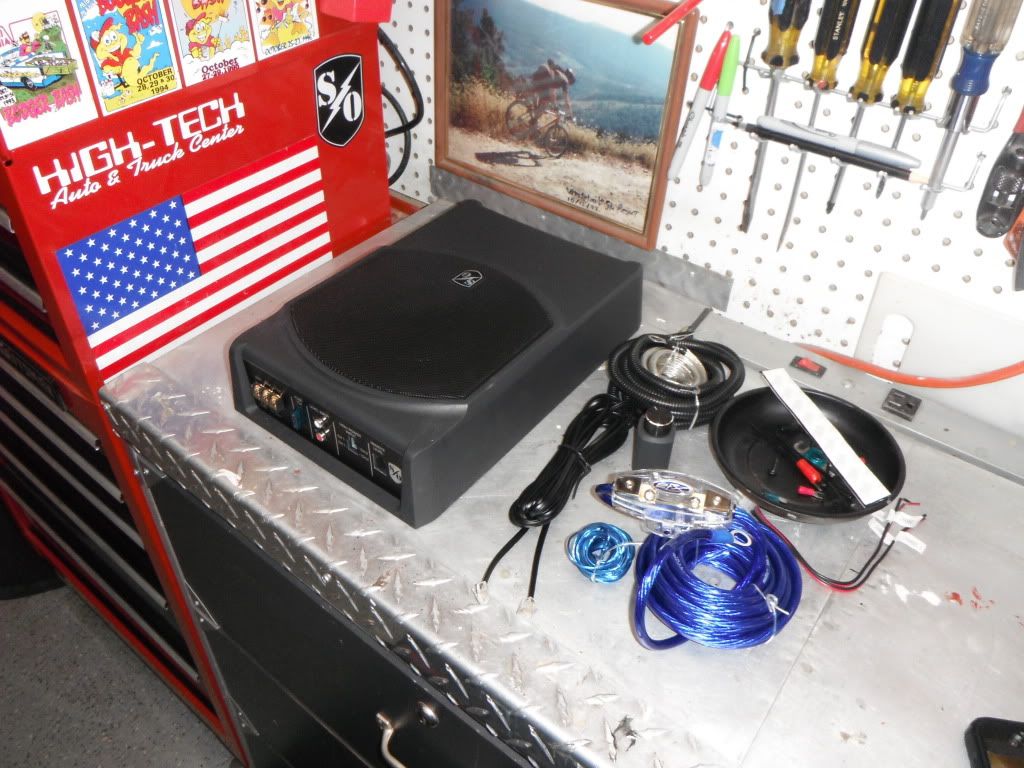
On to the install-
First, disconnect the negative battery cable. Don't forget to do this! Don't freak out, but when you reconnect everything and start up your 4Runner, the engine will probably die, and you will have to restart it. Normal stuff.
This sub is convenient because you only need to run a few wires. Power from the battery, a ground, and speaker inputs. First thing we will do is tap into the factory speaker wires and run them to the sub.
Start by removing the headunit. Darkdane did an excellent writeup on this, even including the speaker wire designations...
http://www.toyota-4runner.org/5th-gen-t4rs/90970-removing-stock-head-unit-5th-gen-4runner.html
Remove the top of the center console. This is optional, but it makes running the wires easier. To take the console apart, unscrew the shiftknob, and the 4WD knob counterclockwise. Sit in your passenger seat and pull the cover up. You will see the white connector (sorry forgot a pic!). When you unplug that, the console cover is off. Easy.
Since we are taking stuff apart- remove the drivers sill plate- just pull! And, the drivers kick-panel. There is a plastic "screw" next to the footrest that you can unscrew by hand. Then just pull the kickplate off towards you. Everything on the interior comes apart really easy, and goes back together nicely. Go Toyota!
Time to unbolt the drivers seat. You can leave the seat in the truck, it's just sooooo much easier if you unbolt it to have access to the floor.
Pry up on the bolt covers and set them aside.
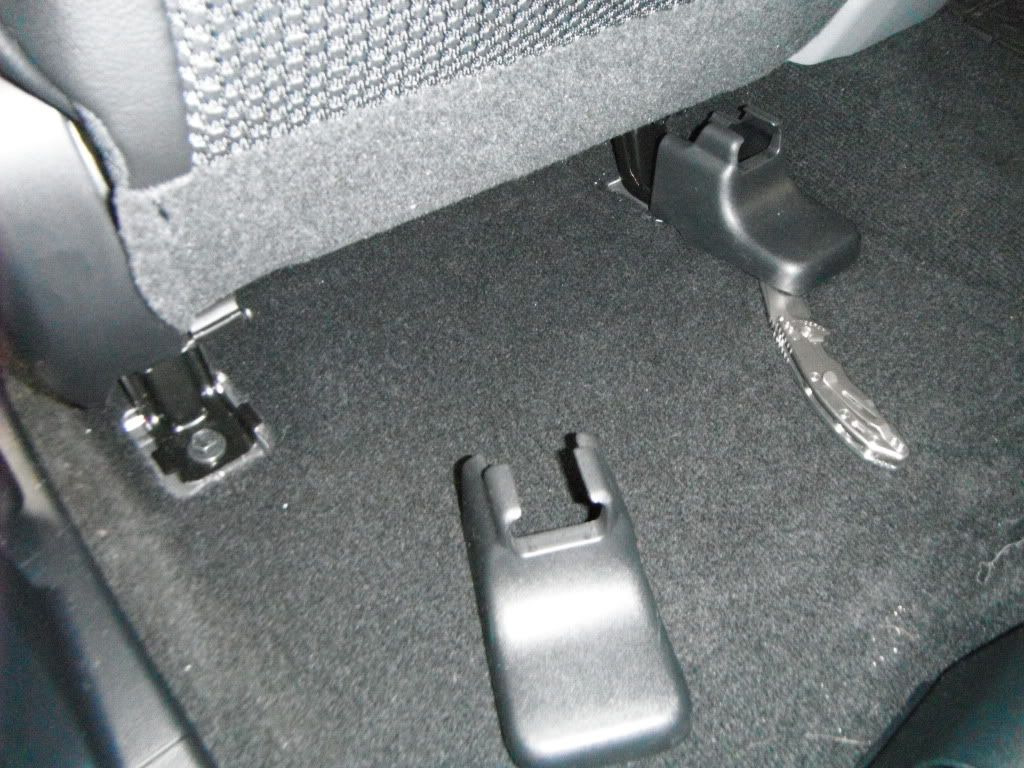
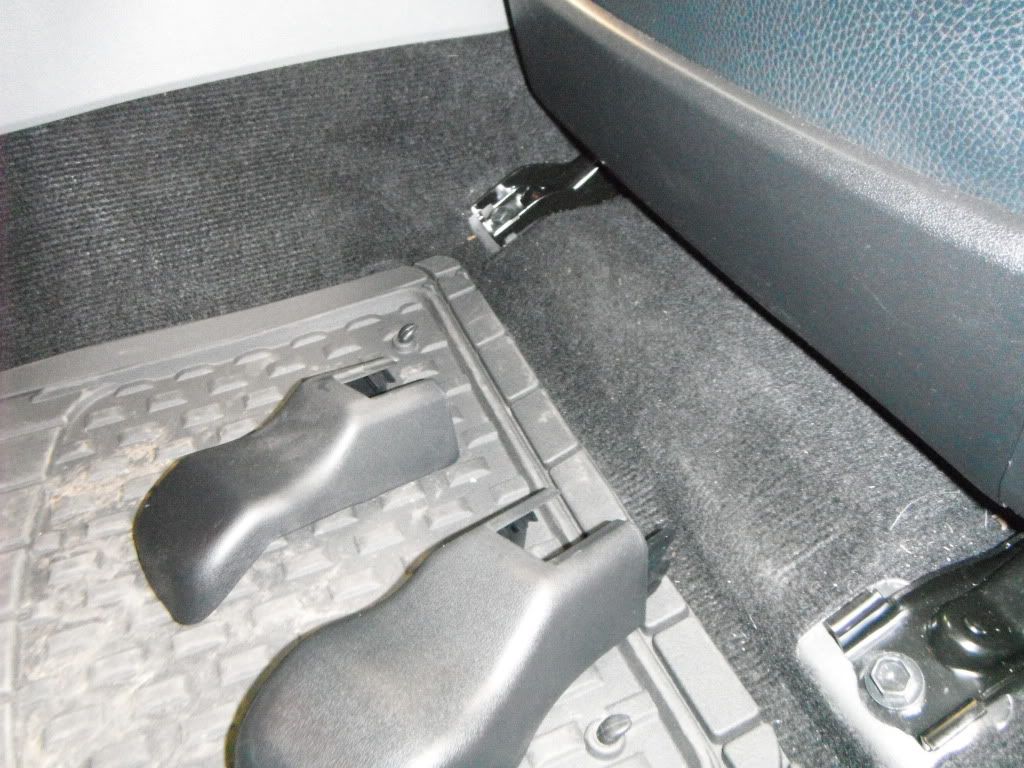
The 4 bolts are 14mm. Take them out and, Bingo! easy access. You do not need to unplug your seat's wiring harness.
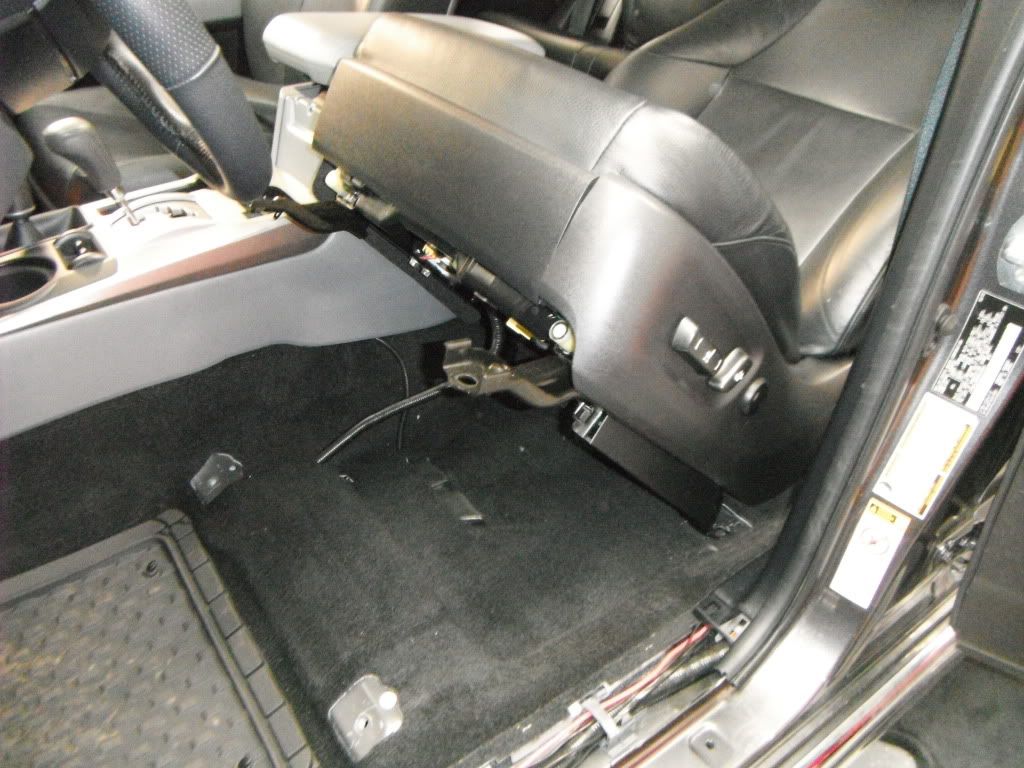
All done taking stuff apart. Time to run some speaker wire up to the headunit. You will need 2 speaker wires. TIP- instead of running 2 separate wires, fold a wire in half and run it. You can cut it in half once it's in place.
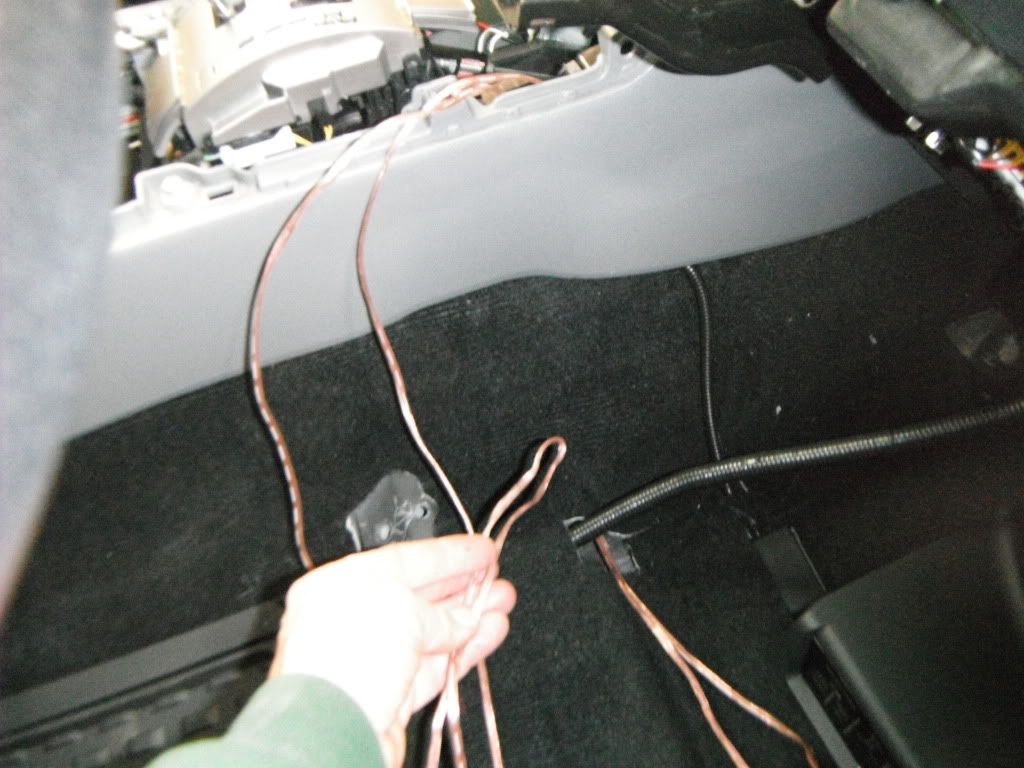
This is where we are now, organized chaos!
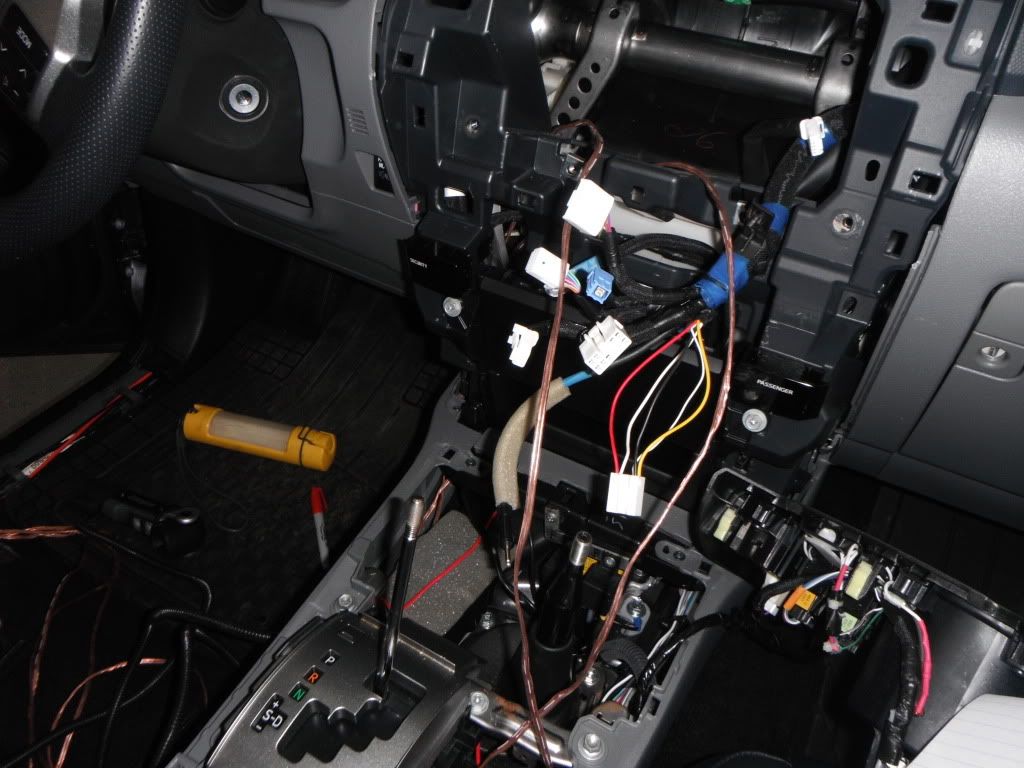
Time to tap into the rear speaker wires. White plug #G5. There are 5 wires, but we will only use 4.
These wires will send the signal to your amp (duh).
Black= LR+
Yellow=LR-
Red=RR+
White=RR- (Note use the THICKER white wire)
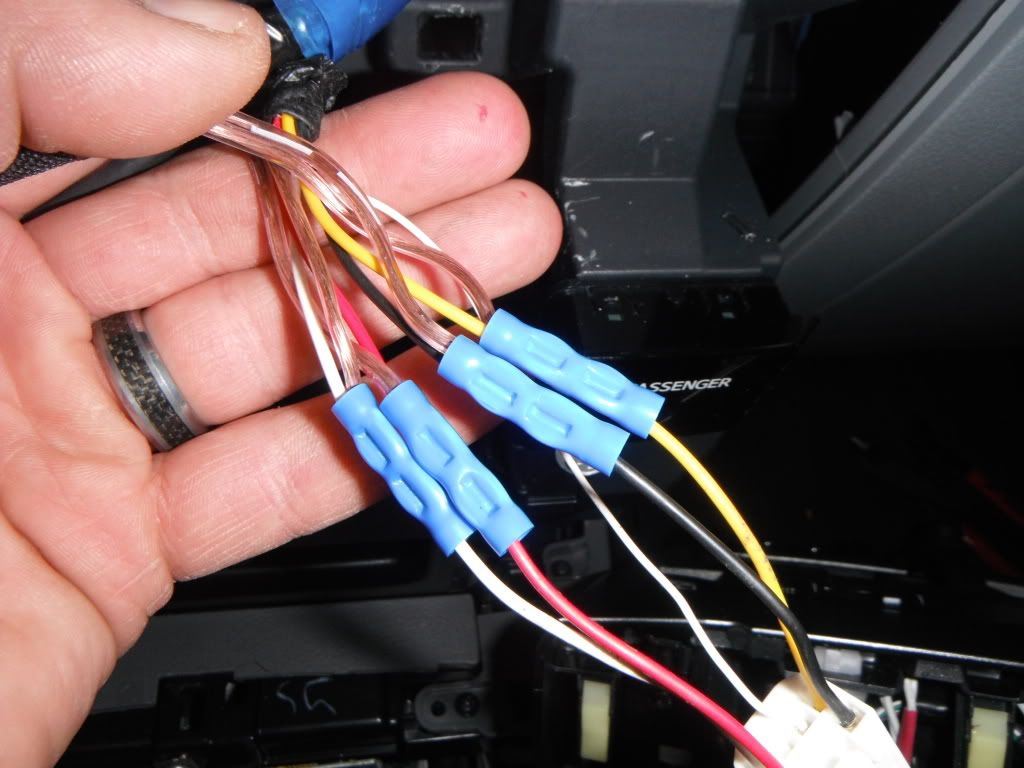
The blue things are called butt connectors. They are fairly easy to use, and make a nice connection. Pull the electrical tape off the factory plug, along with the split loom. Cut the wires about 3" from the plug. Leave yourself room to work! Strip both ends that you cut. Crimp a butt connector to the plug side for each wire.
Now, take the speaker wire you folded in half, and cut it. Split the speaker wire into 2 strands at the end. Strip the ends of all 4 wires.
Time to designate which wire is which for your hookups. Left and right doesn't matter, just positive and negative. Sooo, let's say the striped speaker wires will be positive. Twist a striped wire with the black wire, and crimp them both to the butt connector as one. The other striped wire will connect to the red wire. Do the same for the remaining 2 wires. It's easier to look at the pic!
Once the connections are made, throw some split loom on the speaker wires, and electrical tape the connections. Make it look neat, and it will last!
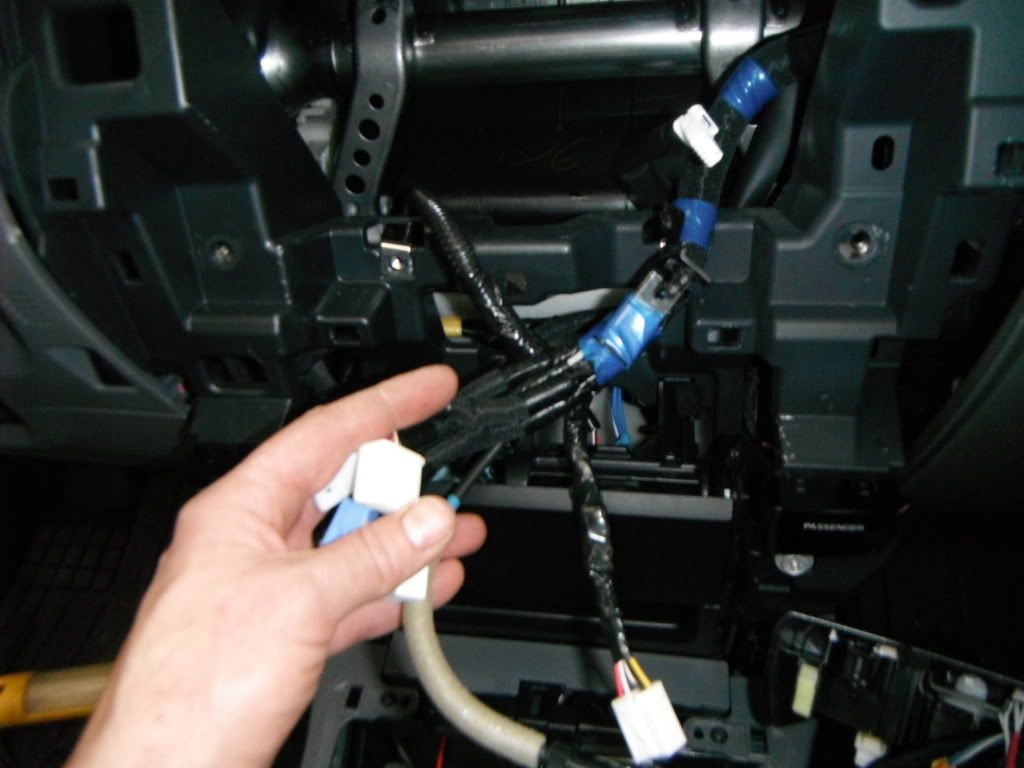
Go ahead and put your center console and head-unit back together now.
Time to run the power wire!
The sub comes with a free wiring kit- that's definitely the way to go unless you have all that stuff laying around!
Make sure there is no fuse in the holder for your power wire (just to be safe).
Make the connection at the battery + terminal. I mounted the fuse holder here.
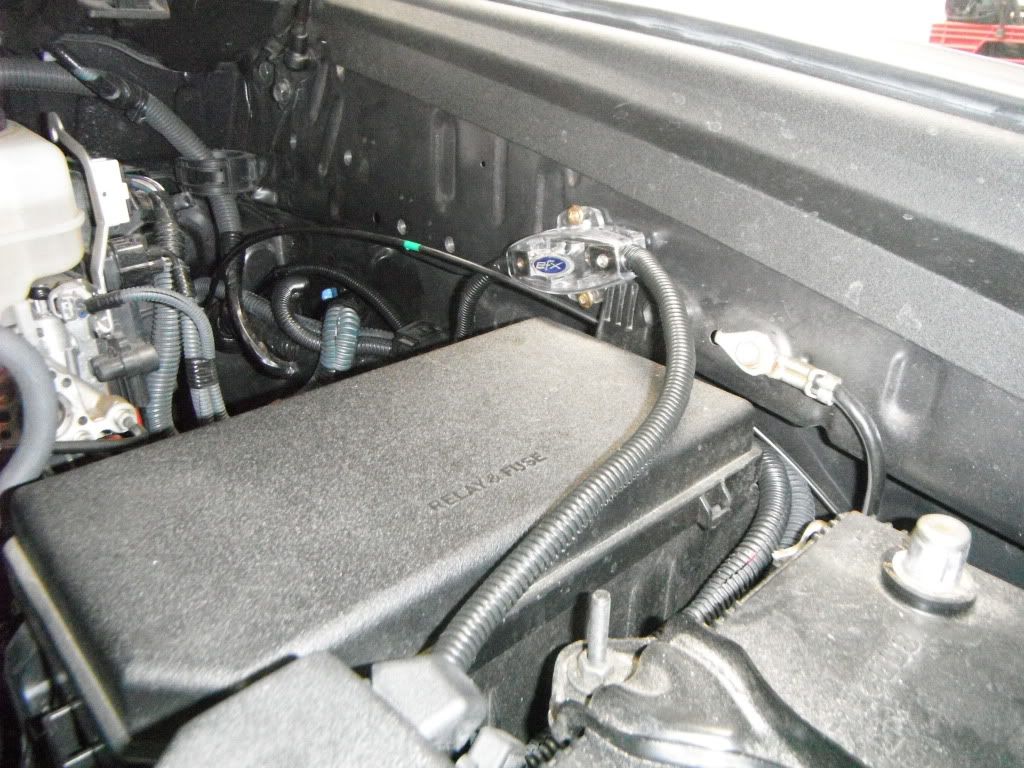
The kit comes with split loom. USE IT. You do not want this wire to ever be chafed, or cut. Even with a fuse, it could still spark if cut!
Here is a nice rubber grommet to run the power wire through- driver's side firewall.
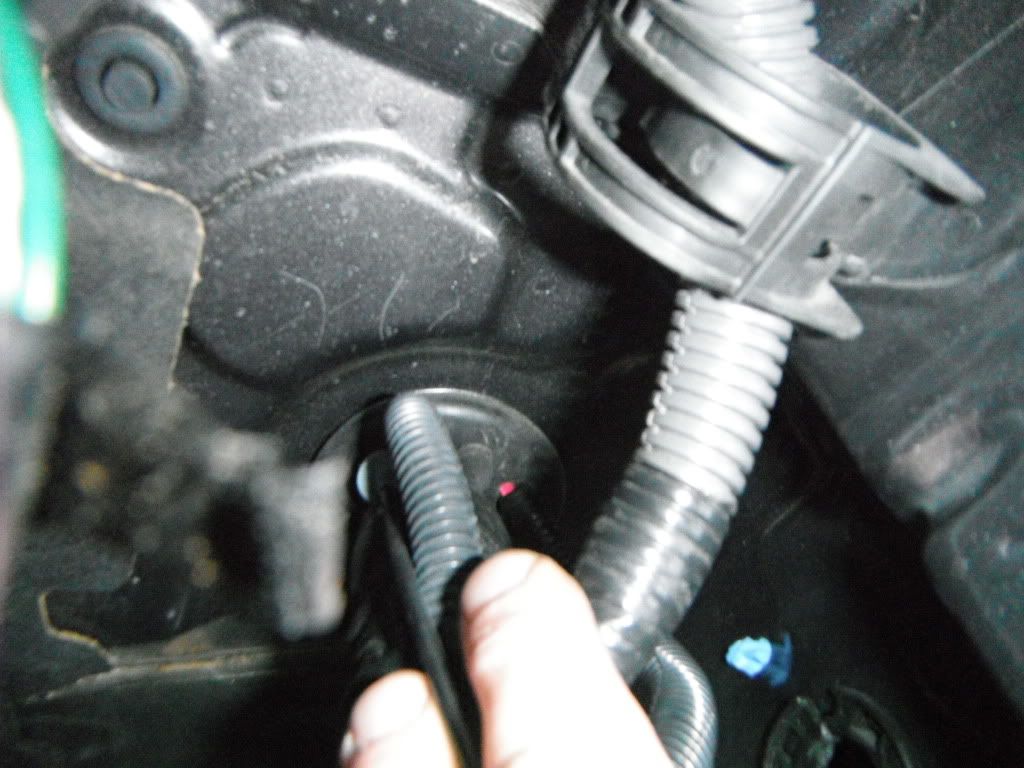
Best way to run this through is with a metal wire fish- like electricians use. I have a short piece that I use for things like this. Basically, a 3' piece of metal strap. You can push the fish right through the rubber grommet from the inside with a little force (NOTE- make sure the end of the fish is rounded, and not sharp so you can't nick any wires. Even the rounded end will push right through the rubber. Here's the fish in the engine compartment, from the driver's footwell (the rusted thing).
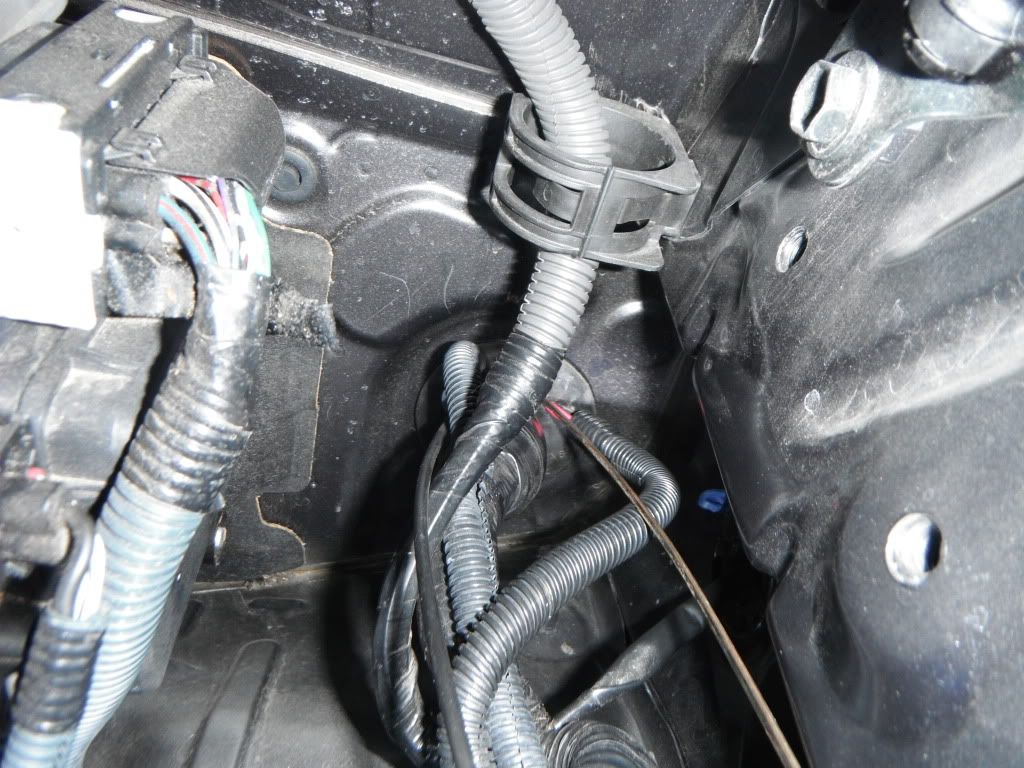
Tape your power wire to the fish. TIP- Make sure the fish is clean and dry. Wrap electrical tape tightly around the fish a couple of times, and then introduce the wire. Overlap of about 3" is sufficient. Wrap around the wire and the fish, and then up around just the wire itself. The point where the end of the wire and the fish are taped, will need to be taped until it tapers nicely, not a "step", or the wire will pull free.
TIP- I know you guys have some lube laying around, right? :frisky:
I don't care what kind you use, but you need to generously coat what you just taped up. I used dielectric grease, pervs...Pull the wire through from the inside.
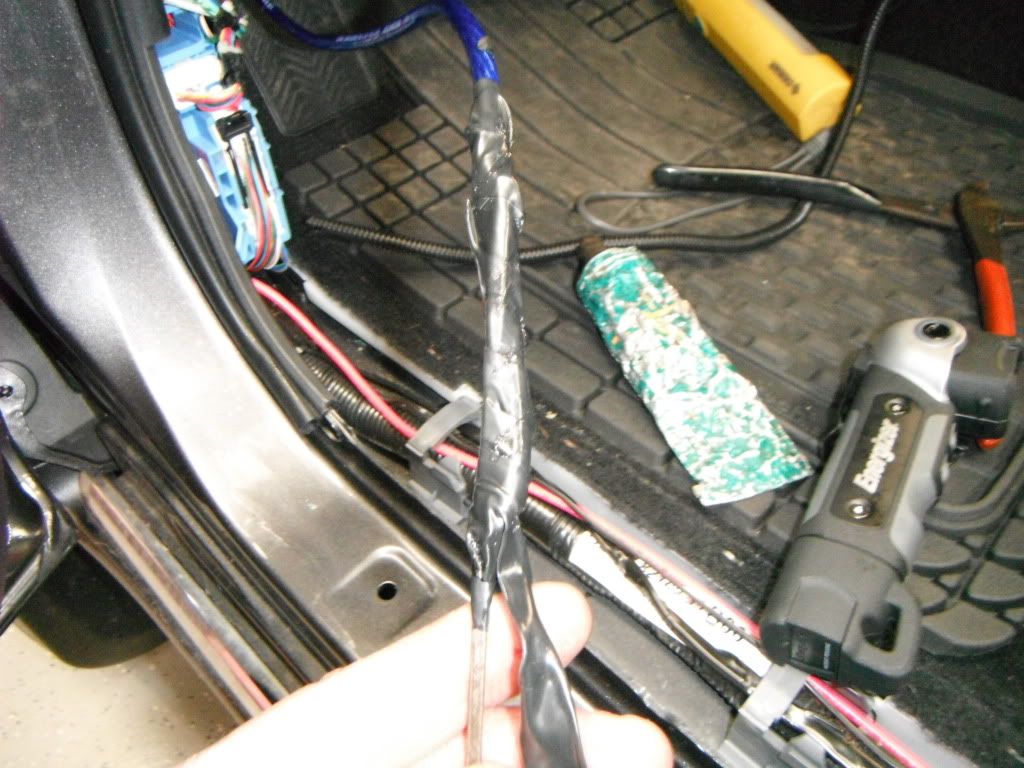
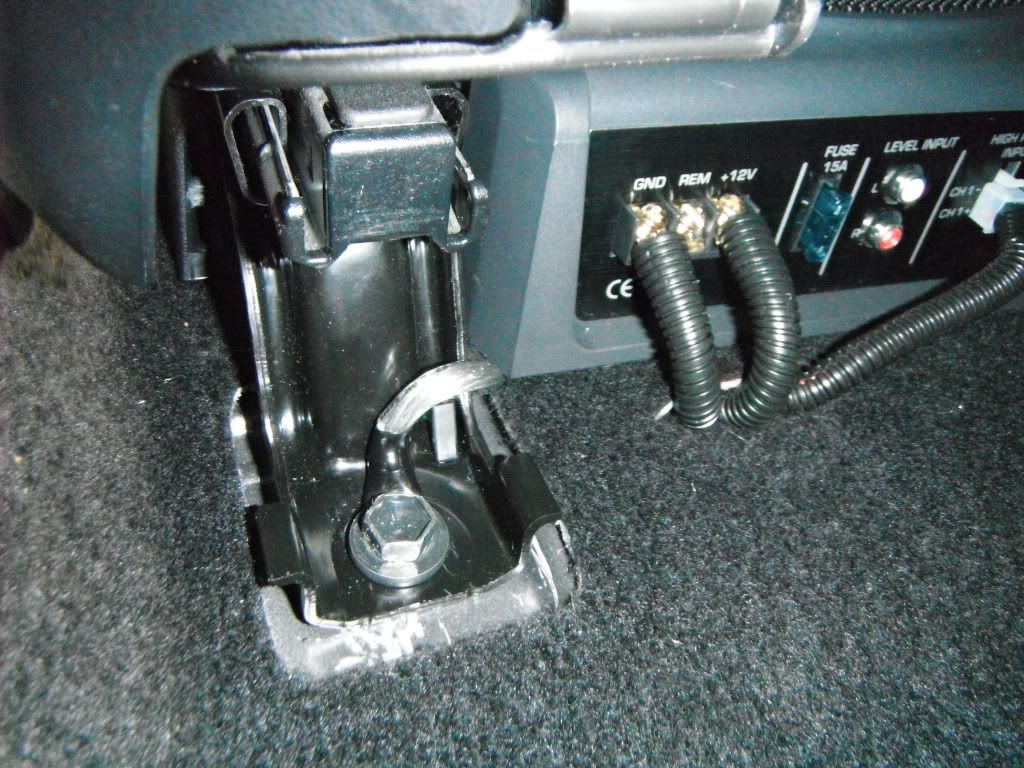
Run the wire down into the sill plate area, and then under the carpet to exit by the amp connections. I cut a small slit in the carpet for the wires to exit, right next to the amp connections. You can see this better in later pictures...
The speaker wires can now be fished out of the slit in the carpet, and connected to the plug for the amp. Remember- striped wires are +. TIP- To make crimping easier, strip the wire and then twist it. Put the butt connector into the crimpers FIRST, and then slide the connector over the stripped wire for crimping. Makes it much easier that way.
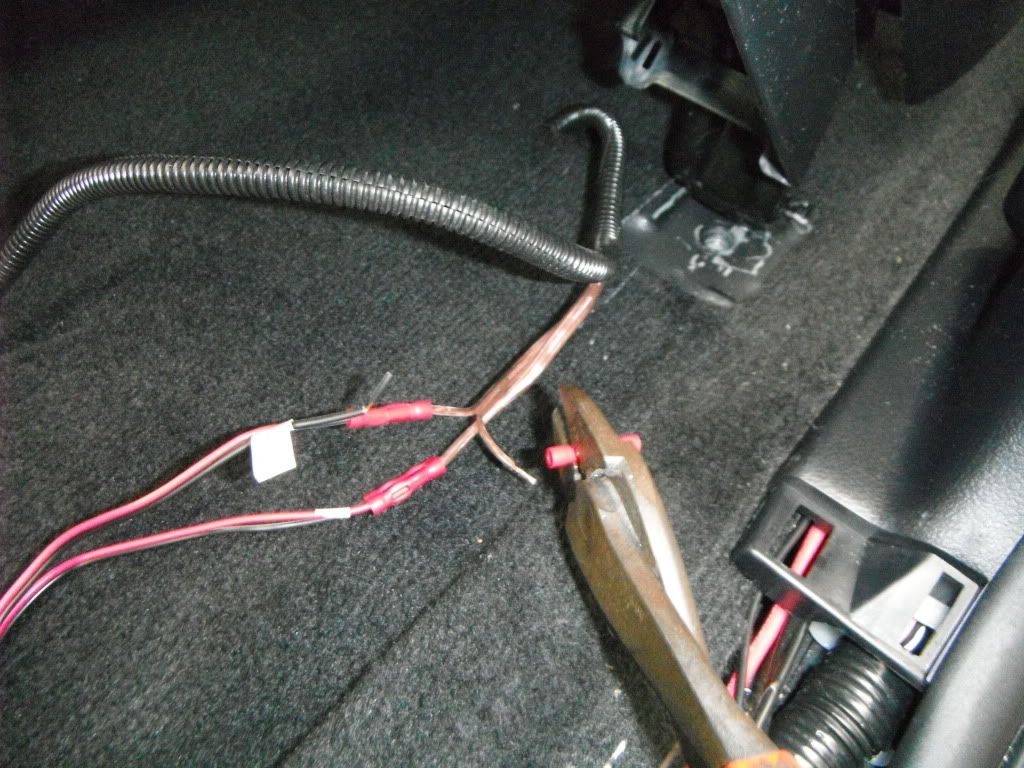
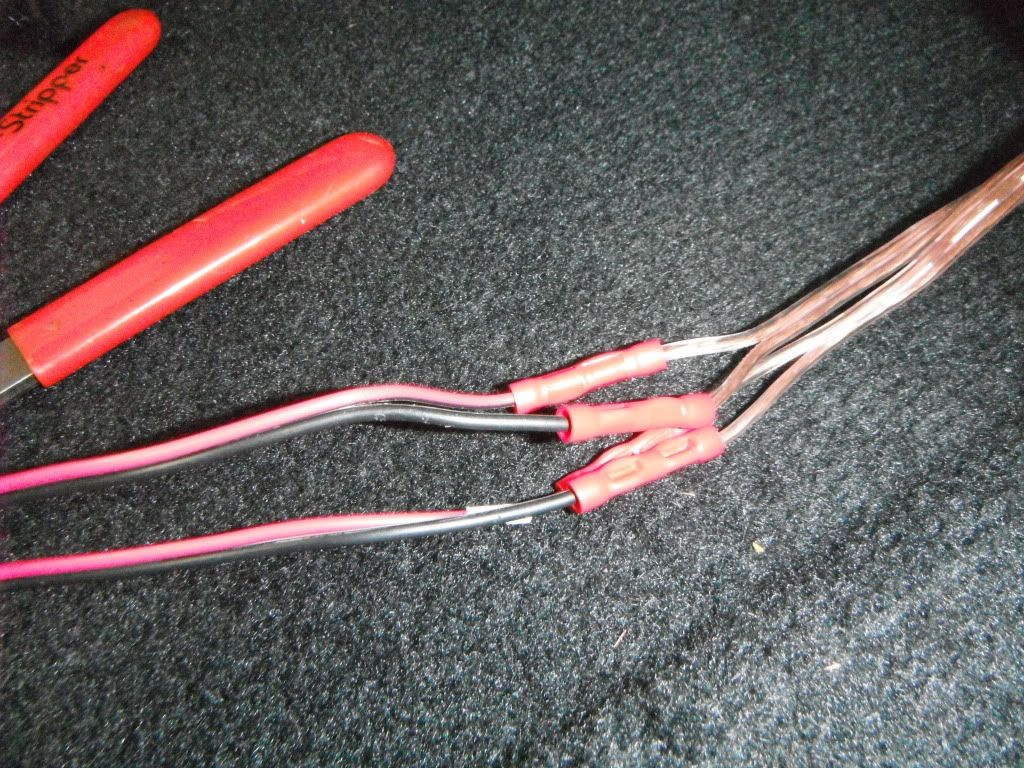
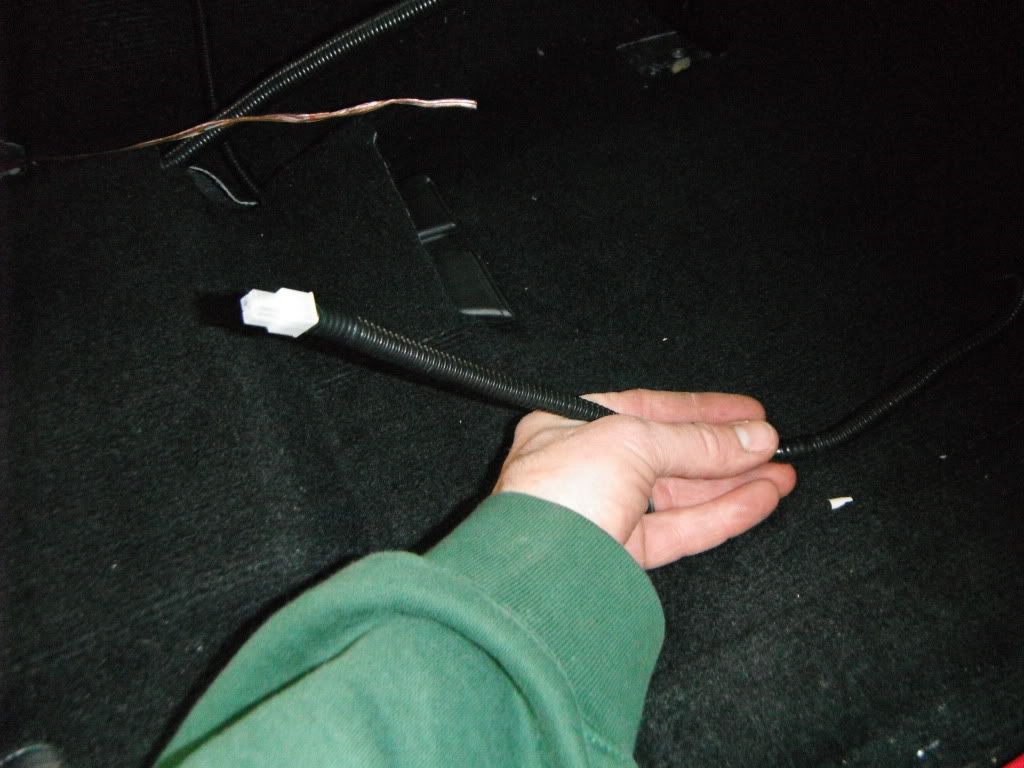
Wireloom the wires where they exit the slit.
One more wire to worry about- the ground. The ground wire should be as short as possible. You can connect it under the left rear seat bolt.
Continued:
dan.schweizer
New member
Sorry if this was mentioned, but I couldn't find it. What brand/model is this sub? I'd love something stealth and compact like this.
I saw your post and decided to order one for myself. It is the Sound Ordnance B-8PDT. It is $149 at Crutchfield right now. It does not come with the free wiring kit at that price but they offer 25% off one if purchased with the sub. I got the EFX PA10BX wiring kit that has the split loom with it. Does not have same fuse holder as the one Antman got, but it should work fine. The Sub + wiring kit + speaker wire ran me $180 with free shipping. Hard to beat that price.
dan.schweizer
New member
Antman,
For the sub install, you didn't go into how you mounted the amp to the floorboard. I am assuming you just used provided screws? What about water sealing it? Maybe Velcro mount to carpet instead?
For the sub install, you didn't go into how you mounted the amp to the floorboard. I am assuming you just used provided screws? What about water sealing it? Maybe Velcro mount to carpet instead?
Antman,
For the sub install, you didn't go into how you mounted the amp to the floorboard. I am assuming you just used provided screws? What about water sealing it? Maybe Velcro mount to carpet instead?
If the floor is flat, you can velcro it to the floor. Or what I do is place a thin board under the carpet then screw to the board. The carpet will keep it from going anywhere and you aren't putting holes in the floor.
I just did an install in a Frontier where the last installers had screwed both amps into the floor board and used 3 screws on one ground cable. I had to seal up 11 holes that were areas susceptible to rust. Good thing he lives in Vegas.

Antman
Elite Member
Antman,
For the sub install, you didn't go into how you mounted the amp to the floorboard. I am assuming you just used provided screws? What about water sealing it? Maybe Velcro mount to carpet instead?
I put velcro on the back of the amp, it sticks to the carpet. That amp can't go anywhere once it's in there.
dan.schweizer
New member
I put velcro on the back of the amp, it sticks to the carpet. That amp can't go anywhere once it's in there.
Looks like the Velcro route for me as well then.
Cozen89
Member
Looks like the Velcro route for me as well then.
[MENTION=131604]dan.schweizer[/MENTION] [MENTION=65614]Antman[/MENTION] awesome info on this amp guys, thanks for the info. Looks like my new ride's toys are going to be adding up quicker than I thought.

TheWraith
New member
Jeff
Which one can I tap that's has a constant 12volt or constant hot wire...

GiGi's 1996
New member
Hi Antman. I would really appreciate your time, opinions and wisdom.
My questions are related to towing, suspension and how your truck is set up.
Is this correct:
-You are running LT265/70R17 tires
-5100s - fronts set at 2.5, are you using stock coil? Rear 5100s with SAW 1.5 coils and Air Lift 1000 air bags to tow.
Is that it?
Do the Air Lift bags need some sort of spacer or something with the longer than stock SAW coil?
I trolled your thread, did not read alllll the pages and want to clarify that your truck still looks like pic and equipment is the same. Now for the questions, or more questions.....
Do you have aftermarket upper control arms? Not needed with 5100s at 2.5 only? How much weight do you tow? Any uneasiness in front being at 2.5/basically lifted but without the bigger tires? Anything you would do different?
My background is I have a new Trail that I am considering lifting. I had a '14 truck with 5100s set at 1.75 in front and 5100s in the back. I tow only about 6-8 times a year and tow about 3000 lbs. The '14 towed great, needed air bags, but now my big dilemma is to lift or not.
The attractive part, to me, about your truck is the fact that you have stock sized tires, your truck is lifted, you tow and it looks GOOD. Making sure it is not too good to be true.....THANK YOU for your time and expertise
My questions are related to towing, suspension and how your truck is set up.
Is this correct:
-You are running LT265/70R17 tires
-5100s - fronts set at 2.5, are you using stock coil? Rear 5100s with SAW 1.5 coils and Air Lift 1000 air bags to tow.
Is that it?
Do the Air Lift bags need some sort of spacer or something with the longer than stock SAW coil?
I trolled your thread, did not read alllll the pages and want to clarify that your truck still looks like pic and equipment is the same. Now for the questions, or more questions.....
Do you have aftermarket upper control arms? Not needed with 5100s at 2.5 only? How much weight do you tow? Any uneasiness in front being at 2.5/basically lifted but without the bigger tires? Anything you would do different?
My background is I have a new Trail that I am considering lifting. I had a '14 truck with 5100s set at 1.75 in front and 5100s in the back. I tow only about 6-8 times a year and tow about 3000 lbs. The '14 towed great, needed air bags, but now my big dilemma is to lift or not.
The attractive part, to me, about your truck is the fact that you have stock sized tires, your truck is lifted, you tow and it looks GOOD. Making sure it is not too good to be true.....THANK YOU for your time and expertise
Attachments
Antman
Elite Member
Is this correct:
-You are running LT265/70R17 tires
-5100s - fronts set at 2.5, are you using stock coil? Rear 5100s with SAW 1.5 coils and Air Lift 1000 air bags to tow.
Is that it?
Do the Air Lift bags need some sort of spacer or something with the longer than stock SAW coil?
Do you have aftermarket upper control arms? Not needed with 5100s at 2.5 only? How much weight do you tow? Any uneasiness in front being at 2.5/basically lifted but without the bigger tires? Anything you would do different?
Hey there!
Ok...First, THANKS for doing the research!!!
*Yes- you are correct on my setup.
*Air Lift will recommend to you longer airbags for aftermarket springs. Mine work perfectly, just like they did with the stock springs, so you could go either way.
*No aftermarket UCA's
*My boat probably weighs 2000-2500 lbs depending on gear/fuel load.
*The truck can wander a bit under heavy winds and takes some getting used to at speeds approaching 80mph. I usually drive pretty slow so NBD- definitely not "ideal".
*I am happy with this setup! I am always changing things (hopefully for the better) so here is what is in the future:
1-UCA's with factory style ball joints (more caster)
2-Slightly stiffer front springs (with the dual batteries the front is down about 1/2-3/4")
3-Next tires will be 285's or 275's only because the 265's look a little small to me. These Duratracs really have been incredible so far. Offroad, onroad, snow, rain, mud, great mileage, no balance issues, etc. Only negative is noisy as hell (I like it most of the time though).
4-But, lol, I will probably go BFG next time...
How'd I do- get it all?


Jhalko
New member
3-Next tires will be 285's or 275's only because the 265's look a little small to me. These Duratracs really have been incredible so far. Offroad, onroad, snow, rain, mud, great mileage, no balance issues, etc. Only negative is noisy as hell (I like it most of the time though).
4-But, lol, I will probably go BFG next time...
Funny man, when my Duratracs go (hopefully in a couple years!) I was planning on 285 BFG ko2's.
GiGi's 1996
New member
Hey there!
How'd I do- get it all?
Yes! You answered all my questions! Thank you so much.
-Good to know about the air bags, I was guessing that the 1.5" longer spring would not effect the air bag. There was never any mention of that happening in all the threads I read.
-I like the idea of no aftermarket UCAs.
-I certainly do not drive fast when towing our toys. So if you can do 80 hauling a boat, you answered my question about any possible uneasiness with basically lifted truck.
-You DO have different stiffer springs in the front, that makes me think I want to step it up with my truck and try to do something different then 5100s. I know, I know, I could get different springs like you, but I have my eye on something else.....
-I REALLY want to keep my stock tire size. I do not want to mess with the power of the truck when towing or even the day in and day out driving. I also do not want them to look small......I love love my Toyos, so much that I kept them when I traded in my '14.
All points lead to me to step back and level the truck, add some airbags and then see just how much longer I can live without a lift......haha.....Poor me, brand new upgraded truck and I want to change all the perfectness about it and then potentially be here in the future whining of how it sucks to tow or noises...haha..
Very much appreciated again. :hello:
GiGi's 1996
New member
Okay, now I see you do not have stiffer springs......YET.....
I get it....
I get it....
Antman
Elite Member
How tall is what unit?I was wondering how tall (height) the unit is.
Last edited:

Antman
Elite Member
Your UNIT man, your unit! C'mon man!!!
Damn, getting personal in here...
I'll just say what I always do.
He may be small, but he's a fighter.
Sh!t just got weird.:wow:

Ausumm
New member
How tall is what unit?
Sorry, I was admiring the pics of the rear storage compartment you made.
Wondering how tall it was.
Similar threads

- Replies
- 0
- Views
- 267

- Replies
- 0
- Views
- 2K

- Replies
- 2
- Views
- 3K

- Replies
- 13
- Views
- 3K


