ANTMAN'S Thread

ANTMAN MOD #4


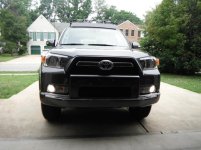
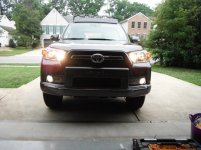
Independent Fog-Light Mod- using the factory switch.

This mod allows you to turn on your fog-lights whenever you choose. You can have the fogs on by themselves, with the DRL, with the Hi-Beams- whenever you want- as long as the ignition is on. If you want to be able to control the fogs anytime, regardless of ignition, the mod is even easier- but- you will probably leave your fogs on and come out to a dead battery. Your choice.

Others have performed this mod, but I don’t think anyone has done it with the original, stalk-mounted fog switch. I tried to cut as few wires as possible (only 2), so more people may be willing to take the plunge(?)

I stated earlier that I wasn’t ready to post this mod. That’s because, to me, it’s not complete. Reason? The little green fog LED in your dash that illuminates whenever your fogs are on, will not work. The computer sends a signal to light this up (CAN circuit), thanks to Nashman69g for explaining that to me. Before doing this MOD, when you turn the factory fogs on, you will notice a very slight delay before the LED lights up. That’s because it’s waiting for the signal from CAN. I have no idea how to “trick” the computer into lighting this up. I have had the entire gauge cluster out and apart (minus removing the needles) to try and figure this part out. Maybe someone a lot smarter than me can figure it out?

So- Bottom line. Fogs work perfectly whenever you want! LED indicator in dash does not work at all. (EDIT= See Antman Mod #4.1)


Here’s the writeup:


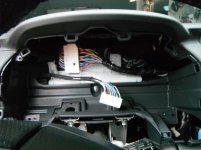
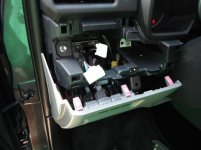
Pull apart your dash- and I mean that literally. The switch panel pulls towards you, and the lower dash just pulls away (you won’t need to remove this completely)

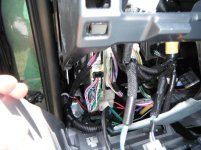
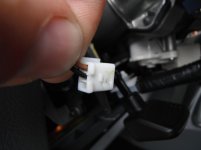
001.jpg

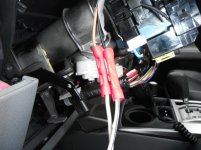
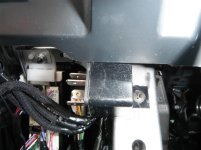
This is the location for the factory fog-light feed. PLUG 2D, PIN#9 from EWD

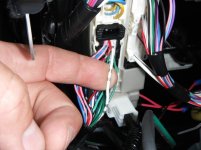
003.jpg

This is the wire- white with silver specs. This wire will “feed” the fog lamps.

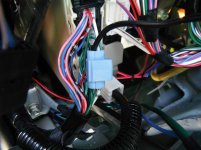
005.jpg

Tap into this wire with a 3M wire tap. We will connect this wire lead later.

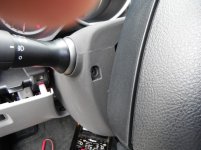
008.jpg

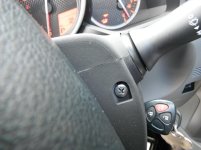
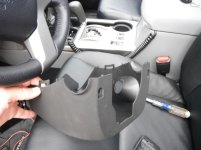
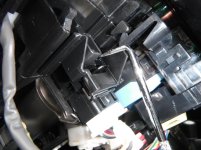
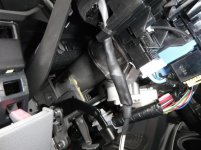
Time to take more apart! Remove the lower portion of your steering column with these 2 screws

012.jpg
013.jpg
014.jpg

**************(continued)
 

Attachments

  • 001.jpg
    001.jpg
    67.9 KB · Views: 40,096
  • 003.jpg
    003.jpg
    92.6 KB · Views: 40,035
  • 005.jpg
    005.jpg
    78 KB · Views: 41,366
  • 008.jpg
    008.jpg
    87 KB · Views: 39,873
  • 012.jpg
    012.jpg
    91.7 KB · Views: 39,445
  • 013.jpg
    013.jpg
    70.6 KB · Views: 39,339
  • 014.jpg
    014.jpg
    80.3 KB · Views: 39,252
Last edited:
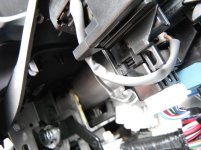
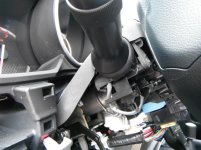
See this wire bundle? These are attached directly to the fog switch. Brown, and black under the shrinkwrap...


016.jpg
017.jpg


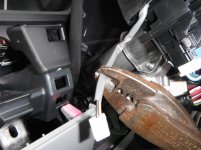
This plug is NOT easy to remove. I used a right angle pick on the top of the plug and pulled it out. Be patient here!


020.jpg

021.jpg


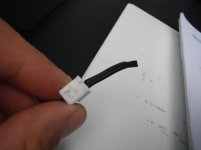
Cut the wires and connect each to a length of wire. I reinstalled the original plug (insulated), and shrinkwrapped the connections


022.jpg

023.jpg

024.jpg

025.jpg
<O:p</O:p
******(continued)
 

Attachments

  • 016.jpg
    016.jpg
    82.1 KB · Views: 39,490
  • 017.jpg
    017.jpg
    89.2 KB · Views: 39,567
  • 020.jpg
    020.jpg
    36.8 KB · Views: 39,487
  • 021.jpg
    021.jpg
    90.1 KB · Views: 39,306
  • 022.jpg
    022.jpg
    90.3 KB · Views: 39,258
  • 023.jpg
    023.jpg
    32.4 KB · Views: 39,090
  • 024.jpg
    024.jpg
    83.8 KB · Views: 39,061
  • 025.jpg
    025.jpg
    91.1 KB · Views: 39,284
Last edited:
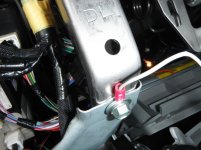
One wire will go to a ground (doesn't matter which, but I used the black one). Here is a good ground…This is a metal dash support behind the lower panel you have pulled off. This will be very evident when you have it apart...

026.jpg

The other wire (brown) will go to the relay you are about to mount. Attach a female spade terminal to the brown wire and connect it to relay terminal#86 (more on this in a minute)

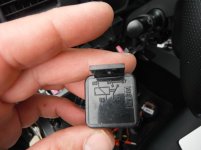
This is a standard relay – don’t get all worked up- it’s easy to hook this up. Relay's are like heavy duty switches that are controlled by, in this case, another switch. This will enable your lights to work without burning up your factory fog-light switch! The relay can mount here, right above the ground location.

I used a j-nut behind the metal dash support, and a screw to secure the relay.

027.jpg
028.jpg

<O:p</O:p
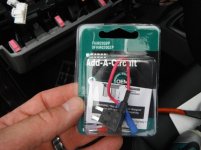
You will also need 2 mini-fuse taps (unless you want to cut more wires…). You can get these at any auto-parts store. Make sure you install two 15a fuses in each one! (buy fuses when you buy the taps, factory fuses won't fit!) Make sure you read the included instructions- these need to be installed correctly to properly protect the circuit. This is very important!


029.jpg


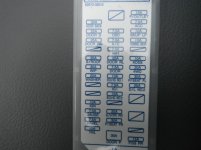
These minitaps will plug directly into your fusebox in the following locations: lower right (FOG FR 15A), and upper right (P/OUTLET 15A).

036.jpg


Attach some wire to each of the supplied connectors on the minitaps, and feed the wires to your relay location. Attach some female spade connectors and plug them into the relay:

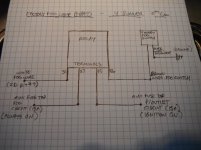
Your relay will have numbered attachment terminals. The minitap from the FOG FR will plug into terminal #87. The minitap from the P/OUTLET will plug into terminal #85.

One more connection to make! The lead that you tapped into the White fog-light wire. Attach a female spade to this, and connect it to the relay terminal#30.

Sounds confusing- but very simple. Here is a wiring diagram I drew up for you guys (and girls!):


039.jpg


<O:p</O:p
This is what you end up with.

Fogs only

031.jpg

Hi-beams with fogs

032.jpg

<O:p</O:p:thumb3:

Oh yeah- one other thing. If you want to control the fogs at any time, regardless of ignition “on”, only use 1 minitap connected to the FOG FR circuit, and connect this lead to both relay location #87, and #85. Don’t get mad at me if your battery dies… :)

****** KEEP READING TO SEE HOW I LIT UP THE FOG LED...
 

Attachments

  • 026.jpg
    026.jpg
    83.7 KB · Views: 39,144
  • 027.jpg
    027.jpg
    57.3 KB · Views: 38,978
  • 028.jpg
    028.jpg
    75 KB · Views: 38,870
  • 029.jpg
    029.jpg
    68.9 KB · Views: 38,589
  • 036.jpg
    036.jpg
    70.8 KB · Views: 38,887
  • 039.jpg
    039.jpg
    77 KB · Views: 39,222
  • 031.jpg
    031.jpg
    93.9 KB · Views: 38,262
  • 032.jpg
    032.jpg
    101.9 KB · Views: 38,349
Last edited:
Very nice write up and mod! Since you can't trick the computer into lighting up the dash how about just tying a LED into the fog light power circuit and positioning it behind the dash fog light icon?
 
Very nice write up and mod! Since you can't trick the computer into lighting up the dash how about just tying a LED into the fog light power circuit and positioning it behind the dash fog light icon?


Thanks guys! That was an option I discussed with Nashman69g as well. Problem is, to really see the LED "tunnel" you need to take the dash overlay (the guage faces) off which means removing the needles. I have done it before on other vehicles, but at this point I'm not willing to go there.....yet? This will bug me enough to figure it out eventually!
 
Last edited:
sigh.. do I wish you lived closer to me... i'd pay you to do this on my truck. heh..

You can do it! PM me if you have issues...

Look- I am an idiot on this stupid computer, and a couple of PM's from Johnny Utah, Harper7, and 2 hrs with Sp8ball helped me document this lengthy (for me) post with no issues! If wiring is foreign to you- rely on others on the forum. We will get you through it!!
 
ANTMAN MOD #4.1

Lighting up the FOG indicator from the FOG MOD

Well, it took all of 24 hrs, and the "Fog LED not lighting up" thing bugged me enough to do something about it. I took the dash apart -again- and buried an LED in there behind the FOG indicator. I used an orange LED, mostly because I didn't have any green available, and the electronics store is 30 mins away. What do you guys think about it? I'm not sure yet, may just throw a green one in there since all the real work is done for this...


The entire dash comes apart without any tools, except for a phillips screwdriver- thanks Toyota!

Here's what you need to pull off:

*The plastic panel where your fan switch is located

*The panel to the right of the steering column that houses the useless "party mode" button

*The panel to the left of the steering column that has your mirror controls

All of these panels pull towards you- use your muscles!- to come off


The steering column screws, under the steering wheel, need to come off and then you can pull the black plastic guage surround off. it's connected to the top of the steering column plastic with a piece of vinyl.

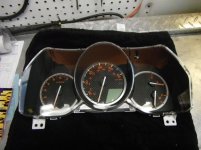
4 screws remove the cluster, and the plug is on top. Here's what you end up with...
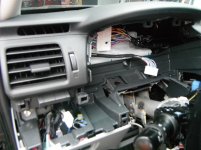

001.jpg


002.jpg


003.jpg


The top of the cluster has molded in black plastic tabs holding it on. Simply take a small screwdriver and- patiently- work your way around the cluster to remove it.
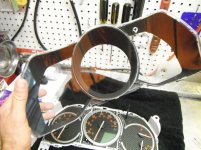
005.jpg


Remember this- every time you look at your dash you will notice any dirt, dust, or fingerprints you get in here! Be careful...
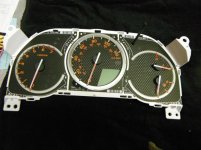

004.jpg

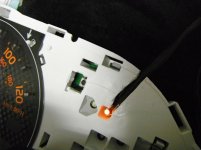
I used a hobby knife to cut a slot for the LED , and it's wires. You can't access this area without removing the needles for the guages, so this was the only way to get it in there! I cleaned up this cut significantly, before I was done- forgot to take a picture...
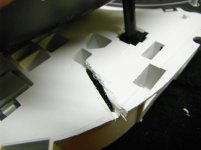
006.jpg


Here's a LINK on how to make LED's like this one that's buried in the slot. Note: The long black push-button that goes through the hole in the guage face pulls right off, and snaps back in easily. This made the job alot easeir once I figured that out :)


008.jpg

I messed around with the positioning of the LED, to try to get the lighting as even as possible.


Now everything can go back together. The ground to the LED gets connected to the ground in the FOG MOD writeup, and the hot-lead ties into relay terminal#30.


Here is the result, whenever the fogs are on...
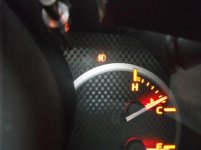
010.jpg
 

Attachments

  • 001.jpg
    001.jpg
    82.3 KB · Views: 13,812
  • 002.jpg
    002.jpg
    74.2 KB · Views: 13,784
  • 003.jpg
    003.jpg
    81.3 KB · Views: 13,764
  • 005.jpg
    005.jpg
    108.6 KB · Views: 13,729
  • 004.jpg
    004.jpg
    90.1 KB · Views: 13,684
  • 006.jpg
    006.jpg
    45.8 KB · Views: 13,708
  • 008.jpg
    008.jpg
    63.7 KB · Views: 13,676
  • 010.jpg
    010.jpg
    72.1 KB · Views: 14,105
Very nice write up and mod! Since you can't trick the computer into lighting up the dash how about just tying a LED into the fog light power circuit and positioning it behind the dash fog light icon?

Well, I only did it because of your constant nagging about burying an LED in there...:lol:
 
Well, I only did it because of your constant nagging about burying an LED in there...:lol:

Very cool. I wonder how many warranties you've voided so far! j/k. Looks great. (I know you will end up getting the green LED, it's driving you crazy already isn't it?) ;)
 
Although I'll never ever ever do a quarter of the mods you've done, you, sir, are an inspiration. Very impressed to say the least.

It's going to break your heart when you sell this thing in the future. lol
 

Members online

Forum statistics

Threads
278,305
Messages
3,554,044
Members
248,016
Latest member
Advally Service

Trending content

Back
Top