
You are using an out of date browser. It may not display this or other websites correctly.
You should upgrade or use an alternative browser.
You should upgrade or use an alternative browser.
Apohl17's AventuRunner Build Thread - V8 4th Gen
- Thread starter apohl17
- Start date


apohl17
New member
ok fine, its pretty cool and i like it too
Awww thanks mate :iagree::banana::cheers:
apohl17
New member
Alright, here come a bunch of retrofit pics.... Prepare your eyeballs.
So the plan is simple. :haha: Now that I have both housings apart and lenses off, I can start to play with the guts of these retros. Basically, I will be replacing my stock projectors with Morimoto D2S 5.0 Bi-Xenons, replacing the stock high beams with Profile Hi-Lens LED's, and incorporating one (or maybe two) amber halos and some cheap "demon eye" LED's while I'm in there.
Comparing the stock TYC (left) and Morimoto D2S 5.0 (right):
<a data-flickr-embed="true" href="https://www.flickr.com/photos/185141496@N07/49191227681/in/dateposted-public/" title="Retro"><img src="https://live.staticflickr.com/65535/49191227681_c884546080_b.jpg" width="1024" height="576" alt="Retro"></a><script async src="//embedr.flickr.com/assets/client-code.js" charset="utf-8"></script>
Note the bigger lens diameter, solenoid-actuated cutoff shield (this is what makes it a bi-xenon -- high bam capability):
<a data-flickr-embed="true" href="https://www.flickr.com/photos/185141496@N07/49191424977/in/dateposted-public/" title="Retro"><img src="https://live.staticflickr.com/65535/49191424977_47be8a330c_c.jpg" width="450" height="800" alt="Retro"></a><script async src="//embedr.flickr.com/assets/client-code.js" charset="utf-8"></script>
So the plan is simple. :haha: Now that I have both housings apart and lenses off, I can start to play with the guts of these retros. Basically, I will be replacing my stock projectors with Morimoto D2S 5.0 Bi-Xenons, replacing the stock high beams with Profile Hi-Lens LED's, and incorporating one (or maybe two) amber halos and some cheap "demon eye" LED's while I'm in there.
Comparing the stock TYC (left) and Morimoto D2S 5.0 (right):
<a data-flickr-embed="true" href="https://www.flickr.com/photos/185141496@N07/49191227681/in/dateposted-public/" title="Retro"><img src="https://live.staticflickr.com/65535/49191227681_c884546080_b.jpg" width="1024" height="576" alt="Retro"></a><script async src="//embedr.flickr.com/assets/client-code.js" charset="utf-8"></script>
Note the bigger lens diameter, solenoid-actuated cutoff shield (this is what makes it a bi-xenon -- high bam capability):
<a data-flickr-embed="true" href="https://www.flickr.com/photos/185141496@N07/49191424977/in/dateposted-public/" title="Retro"><img src="https://live.staticflickr.com/65535/49191424977_47be8a330c_c.jpg" width="450" height="800" alt="Retro"></a><script async src="//embedr.flickr.com/assets/client-code.js" charset="utf-8"></script>
apohl17
New member
First step: take the original mounting bracket (which features the stock cutoff shield, since it is a single-xenon projector, or "low-beam only")
<a data-flickr-embed="true" href="https://www.flickr.com/photos/185141496@N07/49191229906/in/dateposted-public/" title="Retro"><img src="https://live.staticflickr.com/65535/49191229906_1f9bde6553_b.jpg" width="1024" height="576" alt="Retro"></a><script async src="//embedr.flickr.com/assets/client-code.js" charset="utf-8"></script>
Time to disassemble the Morimoto... And get this bracket cut out!
<a data-flickr-embed="true" href="https://www.flickr.com/photos/185141496@N07/49190727018/in/dateposted-public/" title="Retro"><img src="https://live.staticflickr.com/65535/49190727018_c8ef72c315_c.jpg" width="450" height="800" alt="Retro"></a><script async src="//embedr.flickr.com/assets/client-code.js" charset="utf-8"></script><a data-flickr-embed="true" href="https://www.flickr.com/photos/185141496@N07/49191226006/in/dateposted-public/" title="Retro"><img src="https://live.staticflickr.com/65535/49191226006_64efb6caaf_c.jpg" width="450" height="800" alt="Retro"></a><script async src="//embedr.flickr.com/assets/client-code.js" charset="utf-8"></script><a data-flickr-embed="true" href="https://www.flickr.com/photos/185141496@N07/49191421832/in/dateposted-public/" title="Retro"><img src="https://live.staticflickr.com/65535/49191421832_9a81d5dfc0_c.jpg" width="450" height="800" alt="Retro"></a><script async src="//embedr.flickr.com/assets/client-code.js" charset="utf-8"></script>
<a data-flickr-embed="true" href="https://www.flickr.com/photos/185141496@N07/49191229906/in/dateposted-public/" title="Retro"><img src="https://live.staticflickr.com/65535/49191229906_1f9bde6553_b.jpg" width="1024" height="576" alt="Retro"></a><script async src="//embedr.flickr.com/assets/client-code.js" charset="utf-8"></script>
Time to disassemble the Morimoto... And get this bracket cut out!
<a data-flickr-embed="true" href="https://www.flickr.com/photos/185141496@N07/49190727018/in/dateposted-public/" title="Retro"><img src="https://live.staticflickr.com/65535/49190727018_c8ef72c315_c.jpg" width="450" height="800" alt="Retro"></a><script async src="//embedr.flickr.com/assets/client-code.js" charset="utf-8"></script><a data-flickr-embed="true" href="https://www.flickr.com/photos/185141496@N07/49191226006/in/dateposted-public/" title="Retro"><img src="https://live.staticflickr.com/65535/49191226006_64efb6caaf_c.jpg" width="450" height="800" alt="Retro"></a><script async src="//embedr.flickr.com/assets/client-code.js" charset="utf-8"></script><a data-flickr-embed="true" href="https://www.flickr.com/photos/185141496@N07/49191421832/in/dateposted-public/" title="Retro"><img src="https://live.staticflickr.com/65535/49191421832_9a81d5dfc0_c.jpg" width="450" height="800" alt="Retro"></a><script async src="//embedr.flickr.com/assets/client-code.js" charset="utf-8"></script>
apohl17
New member
A short while later: some dremel and drill press love, a beer, and lots of little modifications, including grinding off the stamped indents on the reverse side of the plate (not shown):
<a data-flickr-embed="true" href="https://www.flickr.com/photos/185141496@N07/49191376262/in/dateposted-public/" title="Retro"><img src="https://live.staticflickr.com/65535/49191376262_7605071a9b_c.jpg" width="450" height="800" alt="Retro"></a><script async src="//embedr.flickr.com/assets/client-code.js" charset="utf-8"></script><a data-flickr-embed="true" href="https://www.flickr.com/photos/185141496@N07/49190677543/in/dateposted-public/" title="Retro"><img src="https://live.staticflickr.com/65535/49190677543_5585a941de_c.jpg" width="450" height="800" alt="Retro"></a><script async src="//embedr.flickr.com/assets/client-code.js" charset="utf-8"></script><a data-flickr-embed="true" href="https://www.flickr.com/photos/185141496@N07/49191370742/in/dateposted-public/" title="Retro"><img src="https://live.staticflickr.com/65535/49191370742_1460ee7840_c.jpg" width="450" height="800" alt="Retro"></a><script async src="//embedr.flickr.com/assets/client-code.js" charset="utf-8"></script>
So here is where I started to second guess myself....
<a data-flickr-embed="true" href="https://www.flickr.com/photos/185141496@N07/49191376262/in/dateposted-public/" title="Retro"><img src="https://live.staticflickr.com/65535/49191376262_7605071a9b_c.jpg" width="450" height="800" alt="Retro"></a><script async src="//embedr.flickr.com/assets/client-code.js" charset="utf-8"></script><a data-flickr-embed="true" href="https://www.flickr.com/photos/185141496@N07/49190677543/in/dateposted-public/" title="Retro"><img src="https://live.staticflickr.com/65535/49190677543_5585a941de_c.jpg" width="450" height="800" alt="Retro"></a><script async src="//embedr.flickr.com/assets/client-code.js" charset="utf-8"></script><a data-flickr-embed="true" href="https://www.flickr.com/photos/185141496@N07/49191370742/in/dateposted-public/" title="Retro"><img src="https://live.staticflickr.com/65535/49191370742_1460ee7840_c.jpg" width="450" height="800" alt="Retro"></a><script async src="//embedr.flickr.com/assets/client-code.js" charset="utf-8"></script>
So here is where I started to second guess myself....
apohl17
New member
This bracket took me a couple hours to tweak. Is it perfect? No. Does it incorporate enough rotational adjustment for cutoff leveling? Yep, shore does. But I saw an issue...
<a data-flickr-embed="true" href="https://www.flickr.com/photos/185141496@N07/49190673088/in/dateposted-public/" title="Retro"><img src="https://live.staticflickr.com/65535/49190673088_17ba3f813a_c.jpg" width="800" height="450" alt="Retro"></a><script async src="//embedr.flickr.com/assets/client-code.js" charset="utf-8"></script>
<a data-flickr-embed="true" href="https://www.flickr.com/photos/185141496@N07/49190671298/in/dateposted-public/" title="Retro"><img src="https://live.staticflickr.com/65535/49190671298_04bb4e157c_b.jpg" width="1024" height="576" alt="Retro"></a><script async src="//embedr.flickr.com/assets/client-code.js" charset="utf-8"></script>
After mounting it up back in the housing and test fitting the chrome shroud, I did not have much clearance between the projector lens and the plastic. Secondly, I was worried that spacing the lens forward the thickness of the bracket was goign to affect tuning and clarity of these puppies.
So I did the rational thing:
<a data-flickr-embed="true" href="https://www.flickr.com/photos/185141496@N07/49191365072/in/dateposted-public/" title="Retro"><img src="https://live.staticflickr.com/65535/49191365072_4f903b9e3c_b.jpg" width="1024" height="576" alt="Retro"></a><script async src="//embedr.flickr.com/assets/client-code.js" charset="utf-8"></script>
<a data-flickr-embed="true" href="https://www.flickr.com/photos/185141496@N07/49190673088/in/dateposted-public/" title="Retro"><img src="https://live.staticflickr.com/65535/49190673088_17ba3f813a_c.jpg" width="800" height="450" alt="Retro"></a><script async src="//embedr.flickr.com/assets/client-code.js" charset="utf-8"></script>
<a data-flickr-embed="true" href="https://www.flickr.com/photos/185141496@N07/49190671298/in/dateposted-public/" title="Retro"><img src="https://live.staticflickr.com/65535/49190671298_04bb4e157c_b.jpg" width="1024" height="576" alt="Retro"></a><script async src="//embedr.flickr.com/assets/client-code.js" charset="utf-8"></script>
After mounting it up back in the housing and test fitting the chrome shroud, I did not have much clearance between the projector lens and the plastic. Secondly, I was worried that spacing the lens forward the thickness of the bracket was goign to affect tuning and clarity of these puppies.
So I did the rational thing:
<a data-flickr-embed="true" href="https://www.flickr.com/photos/185141496@N07/49191365072/in/dateposted-public/" title="Retro"><img src="https://live.staticflickr.com/65535/49191365072_4f903b9e3c_b.jpg" width="1024" height="576" alt="Retro"></a><script async src="//embedr.flickr.com/assets/client-code.js" charset="utf-8"></script>
apohl17
New member
Let's just say, it was a LOT less work making the second bracket pair by making them in two pieces, fitting over the lens mount. My cluttered workbench:
<a data-flickr-embed="true" href="https://www.flickr.com/photos/185141496@N07/49190663488/in/dateposted-public/" title="Retro"><img src="https://live.staticflickr.com/65535/49190663488_3ee04ff4c6_b.jpg" width="1024" height="576" alt="Retro"></a><script async src="//embedr.flickr.com/assets/client-code.js" charset="utf-8"></script>
Much better.
<a data-flickr-embed="true" href="https://www.flickr.com/photos/185141496@N07/49190663928/in/dateposted-public/" title="Retro"><img src="https://live.staticflickr.com/65535/49190663928_2b3a2dd042_c.jpg" width="450" height="800" alt="Retro"></a><script async src="//embedr.flickr.com/assets/client-code.js" charset="utf-8"></script><a data-flickr-embed="true" href="https://www.flickr.com/photos/185141496@N07/49190903216/in/dateposted-public/" title="Retro"><img src="https://live.staticflickr.com/65535/49190903216_d68941fe2e_c.jpg" width="450" height="800" alt="Retro"></a><script async src="//embedr.flickr.com/assets/client-code.js" charset="utf-8"></script><a data-flickr-embed="true" href="https://www.flickr.com/photos/185141496@N07/49191356222/in/dateposted-public/" title="Retro"><img src="https://live.staticflickr.com/65535/49191356222_51fdcc019f_c.jpg" width="450" height="800" alt="Retro"></a><script async src="//embedr.flickr.com/assets/client-code.js" charset="utf-8"></script>
Note the demon eye mounted with one bolt and a zip tie. Gotta love the cheap $10 eBay "wILL fIt d2S pRoJeCtoRs" LED's... Even if they die, i'll just forget they were there!
<a data-flickr-embed="true" href="https://www.flickr.com/photos/185141496@N07/49190663488/in/dateposted-public/" title="Retro"><img src="https://live.staticflickr.com/65535/49190663488_3ee04ff4c6_b.jpg" width="1024" height="576" alt="Retro"></a><script async src="//embedr.flickr.com/assets/client-code.js" charset="utf-8"></script>
Much better.
<a data-flickr-embed="true" href="https://www.flickr.com/photos/185141496@N07/49190663928/in/dateposted-public/" title="Retro"><img src="https://live.staticflickr.com/65535/49190663928_2b3a2dd042_c.jpg" width="450" height="800" alt="Retro"></a><script async src="//embedr.flickr.com/assets/client-code.js" charset="utf-8"></script><a data-flickr-embed="true" href="https://www.flickr.com/photos/185141496@N07/49190903216/in/dateposted-public/" title="Retro"><img src="https://live.staticflickr.com/65535/49190903216_d68941fe2e_c.jpg" width="450" height="800" alt="Retro"></a><script async src="//embedr.flickr.com/assets/client-code.js" charset="utf-8"></script><a data-flickr-embed="true" href="https://www.flickr.com/photos/185141496@N07/49191356222/in/dateposted-public/" title="Retro"><img src="https://live.staticflickr.com/65535/49191356222_51fdcc019f_c.jpg" width="450" height="800" alt="Retro"></a><script async src="//embedr.flickr.com/assets/client-code.js" charset="utf-8"></script>
Note the demon eye mounted with one bolt and a zip tie. Gotta love the cheap $10 eBay "wILL fIt d2S pRoJeCtoRs" LED's... Even if they die, i'll just forget they were there!
apohl17
New member
And one more for now - a sneak peek with the Profile cannons in the high beam bowl. These fit with absolutely no modification necessary, just a grommet and a nut on the back! Right On :rockon:
<a data-flickr-embed="true" href="https://www.flickr.com/photos/185141496@N07/49190659878/in/dateposted-public/" title="Retro"><img src="https://live.staticflickr.com/65535/49190659878_89afbb0bbe_b.jpg" width="1024" height="576" alt="Retro"></a><script async src="//embedr.flickr.com/assets/client-code.js" charset="utf-8"></script>
P.S. don't mind my chewed up housing - it was a ***** to get these apart. It'll all form back into shape when I'm done (and look halfway decent around the edge)... I hope :lmao:
<a data-flickr-embed="true" href="https://www.flickr.com/photos/185141496@N07/49190659878/in/dateposted-public/" title="Retro"><img src="https://live.staticflickr.com/65535/49190659878_89afbb0bbe_b.jpg" width="1024" height="576" alt="Retro"></a><script async src="//embedr.flickr.com/assets/client-code.js" charset="utf-8"></script>
P.S. don't mind my chewed up housing - it was a ***** to get these apart. It'll all form back into shape when I'm done (and look halfway decent around the edge)... I hope :lmao:
apohl17
New member
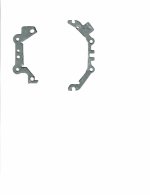
apohl17
New member
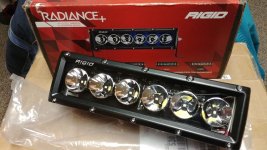
So I joined the T4R secret santa this year (link here) and I could have never asked for such a generous gift from my santa [MENTION=125466]OutBreak[/MENTION]. Things like this make you realize there are still awesome people out there!
...And this T4R community is "da bomb" :clap2::clap2::clap2::clap2:
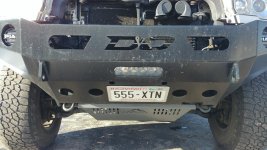
Now, where to fit the thing on the rig...Maybe hidden in the bumper until I get a winch? :lmao:
...And this T4R community is "da bomb" :clap2::clap2::clap2::clap2:
Now, where to fit the thing on the rig...Maybe hidden in the bumper until I get a winch? :lmao:
Attachments
apohl17
New member
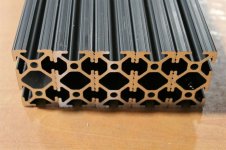
My 80/20 1020 series crossbars came in. Snagged 5 of them on the 'bay as well for much cheaper than Sherpa would sell me the cut-to-length crossbars... (sorry guys) :shrug:
I plan on cutting one to length and putting it up front to stiffen the section of the rack near the wind deflector and use two (or four) for a beefy RTT mounting design I have been cooking up!
As always, material is nice to have, and to play with.
:flamethrwoer2::llama:
I plan on cutting one to length and putting it up front to stiffen the section of the rack near the wind deflector and use two (or four) for a beefy RTT mounting design I have been cooking up!
As always, material is nice to have, and to play with.
:flamethrwoer2::llama:
Attachments

That_Titanium_4RNR
New member
My 80/20 1020 series crossbars came in. Snagged 5 of them on the 'bay as well for much cheaper than Sherpa would sell me the cut-to-length crossbars... (sorry guys) :shrug:
I plan on cutting one to length and putting it up front to stiffen the section of the rack near the wind deflector and use two (or four) for a beefy RTT mounting design I have been cooking up!
As always, material is nice to have, and to play with.
:flamethrwoer2::llama:
Care to share a link?
apohl17
New member
Link to Ebay - 80/20 Inc ProductsCare to share a link?
Every week or so they have been selling lots of 48" 1020 Black Series bars, which is the exact crossbar used on the racks, just 1" longer than needed. Right now they don't have any on there, but follow the search and all of the sudden, they will have a few sets again. Click on completed listings and you will see what I am talking about!
I scored an auction of 5 crossbars for $65 shipped! Cheapest I have seen was a set of 4 for ~$40...

Kryptoroxx
New member
This was very helpful even though I am mounting the 5.0 in the high beam area. Honestly I should have just gotten 2 5.0 but I wanted to do the yota thing so I went with the rx350 because it has such a great wide low beam.This bracket took me a couple hours to tweak. Is it perfect? No. Does it incorporate enough rotational adjustment for cutoff leveling? Yep, shore does. But I saw an issue...
<a data-flickr-embed="true" href="https://www.flickr.com/photos/185141496@N07/49190673088/in/dateposted-public/" title="Retro"><img src="https://live.staticflickr.com/65535/49190673088_17ba3f813a_c.jpg" width="800" height="450" alt="Retro"></a><script async src="//embedr.flickr.com/assets/client-code.js" charset="utf-8"></script>
<a data-flickr-embed="true" href="https://www.flickr.com/photos/185141496@N07/49190671298/in/dateposted-public/" title="Retro"><img src="https://live.staticflickr.com/65535/49190671298_04bb4e157c_b.jpg" width="1024" height="576" alt="Retro"></a><script async src="//embedr.flickr.com/assets/client-code.js" charset="utf-8"></script>
After mounting it up back in the housing and test fitting the chrome shroud, I did not have much clearance between the projector lens and the plastic. Secondly, I was worried that spacing the lens forward the thickness of the bracket was goign to affect tuning and clarity of these puppies.
So I did the rational thing:
<a data-flickr-embed="true" href="https://www.flickr.com/photos/185141496@N07/49191365072/in/dateposted-public/" title="Retro"><img src="https://live.staticflickr.com/65535/49191365072_4f903b9e3c_b.jpg" width="1024" height="576" alt="Retro"></a><script async src="//embedr.flickr.com/assets/client-code.js" charset="utf-8"></script>
Sent from my SM-G965U using Tapatalk
apohl17
New member
Right on! The RX projector is a thing of legend when it comes to that respect, for sure. Hopefully it's worth all of the extra work for ya! Even so, this isn't a dainty project, and I commend you for taking it on for your fellow yota peeps :rockon:This was very helpful even though I am mounting the 5.0 in the high beam area. Honestly I should have just gotten 2 5.0 but I wanted to do the yota thing so I went with the rx350 because it has such a great wide low beam.
Sent from my SM-G965U using Tapatalk
apohl17
New member
Can't wait to have cleaner and more powerful headlights...
<a data-flickr-embed="true" href="https://www.flickr.com/photos/185141496@N07/49051139001/in/photostream/" title="1112"><img src="https://live.staticflickr.com/65535/49051139001_80ebd926f4_b.jpg" width="1024" height="768" alt="1112"></a><script async src="//embedr.flickr.com/assets/client-code.js" charset="utf-8"></script>
<a data-flickr-embed="true" href="https://www.flickr.com/photos/185141496@N07/49051139001/in/photostream/" title="1112"><img src="https://live.staticflickr.com/65535/49051139001_80ebd926f4_b.jpg" width="1024" height="768" alt="1112"></a><script async src="//embedr.flickr.com/assets/client-code.js" charset="utf-8"></script>
apohl17
New member
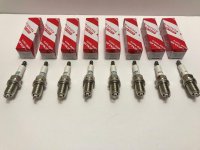
Well, the SK20R11 plugs came in, but they be... "not lookin' right", as they say. I referenced the thread: https://www.toyota-4runner.org/4th-...spark-plugs-ex-denso-sk20r11.html#post3302737
to determine a few things about the plugs I ordered, then returned them and ordered a more expensive set of TT's from a more reputable seller (hopefully)... We'll see how those look!
DON'T BUY THESE (seller autopartconnection on ebay):
1. No iridium weld presence at the electrode tip or blue tinge
2. Incorrect laser printing compared to glazed OEM print
3. Machining defects present, including slag bridging the spark gap on one... See pics below!
8pc NEW Denso Iridium Power Spark Plugs Toyota Lexus 90919-01210 SK20R11 3297 | eBay
<a data-flickr-embed="true" href="https://www.flickr.com/photos/185141496@N07/49220228597/in/album-72157711510133311/" title="Retro2"><img src="https://live.staticflickr.com/65535/49220228597_f135d5dff5_c.jpg" width="450" height="800" alt="Retro2"></a><script async src="//embedr.flickr.com/assets/client-code.js" charset="utf-8"></script><a data-flickr-embed="true" href="https://www.flickr.com/photos/185141496@N07/49220002791/in/album-72157711510133311/" title="Retro2"><img src="https://live.staticflickr.com/65535/49220002791_66ef69831a_c.jpg" width="450" height="800" alt="Retro2"></a><script async src="//embedr.flickr.com/assets/client-code.js" charset="utf-8"></script><a data-flickr-embed="true" href="https://www.flickr.com/photos/185141496@N07/49219522053/in/album-72157711510133311/" title="Retro2"><img src="https://live.staticflickr.com/65535/49219522053_497fe341ec_c.jpg" width="450" height="800" alt="Retro2"></a><script async src="//embedr.flickr.com/assets/client-code.js" charset="utf-8"></script>
to determine a few things about the plugs I ordered, then returned them and ordered a more expensive set of TT's from a more reputable seller (hopefully)... We'll see how those look!
DON'T BUY THESE (seller autopartconnection on ebay):
1. No iridium weld presence at the electrode tip or blue tinge
2. Incorrect laser printing compared to glazed OEM print
3. Machining defects present, including slag bridging the spark gap on one... See pics below!
8pc NEW Denso Iridium Power Spark Plugs Toyota Lexus 90919-01210 SK20R11 3297 | eBay
<a data-flickr-embed="true" href="https://www.flickr.com/photos/185141496@N07/49220228597/in/album-72157711510133311/" title="Retro2"><img src="https://live.staticflickr.com/65535/49220228597_f135d5dff5_c.jpg" width="450" height="800" alt="Retro2"></a><script async src="//embedr.flickr.com/assets/client-code.js" charset="utf-8"></script><a data-flickr-embed="true" href="https://www.flickr.com/photos/185141496@N07/49220002791/in/album-72157711510133311/" title="Retro2"><img src="https://live.staticflickr.com/65535/49220002791_66ef69831a_c.jpg" width="450" height="800" alt="Retro2"></a><script async src="//embedr.flickr.com/assets/client-code.js" charset="utf-8"></script><a data-flickr-embed="true" href="https://www.flickr.com/photos/185141496@N07/49219522053/in/album-72157711510133311/" title="Retro2"><img src="https://live.staticflickr.com/65535/49219522053_497fe341ec_c.jpg" width="450" height="800" alt="Retro2"></a><script async src="//embedr.flickr.com/assets/client-code.js" charset="utf-8"></script>
apohl17
New member
Retrofit continuation:
So in my 4th weekend straight of playing around with all the bits and pieces, I found an interesting way to mount the halos. I realized that a 90mm halo basically "friction fits" around the Hi-Lens LED made by Profile! I opened up the back end of each one to run the halo wiring through the body as it makes the wiring nice, through the hollow threaded mount. A couple dabs of epoxy and it will be concentric, aligned, and fits the situation well.
<a data-flickr-embed="true" href="https://www.flickr.com/photos/185141496@N07/49220223852/in/album-72157711510133311/" title="Retro2"><img src="https://live.staticflickr.com/65535/49220223852_42ae4772a2_c.jpg" width="450" height="800" alt="Retro2"></a><script async src="//embedr.flickr.com/assets/client-code.js" charset="utf-8"></script><a data-flickr-embed="true" href="https://www.flickr.com/photos/185141496@N07/49219987826/in/album-72157711510133311/" title="Retro2"><img src="https://live.staticflickr.com/65535/49219987826_d0861b65a3_c.jpg" width="450" height="800" alt="Retro2"></a><script async src="//embedr.flickr.com/assets/client-code.js" charset="utf-8"></script><a data-flickr-embed="true" href="https://www.flickr.com/photos/185141496@N07/49219988031/in/album-72157711510133311/" title="Retro2"><img src="https://live.staticflickr.com/65535/49219988031_452cb13552_c.jpg" width="450" height="800" alt="Retro2"></a><script async src="//embedr.flickr.com/assets/client-code.js" charset="utf-8"></script>
I toyed around with installing the halo backwards to have it look like this:
<a data-flickr-embed="true" href="https://www.flickr.com/photos/185141496@N07/49227696598/in/dateposted-public/" title="49220223447_3725fd8024_o"><img src="https://live.staticflickr.com/65535/49227696598_ec5569bbda_b.jpg" width="1024" height="576" alt="49220223447_3725fd8024_o"></a><script async src="//embedr.flickr.com/assets/client-code.js" charset="utf-8"></script>
But then realized how long it might take me to hide the wiring, and the fact of the matter is... it looks slick as snot forwards as well. :rockon:
<a data-flickr-embed="true" href="https://www.flickr.com/photos/185141496@N07/49228143376/in/dateposted-public/" title="49219511673_d1e622f611_o"><img src="https://live.staticflickr.com/65535/49228143376_c425c654d0_b.jpg" width="1024" height="576" alt="49219511673_d1e622f611_o"></a><script async src="//embedr.flickr.com/assets/client-code.js" charset="utf-8"></script>
So in my 4th weekend straight of playing around with all the bits and pieces, I found an interesting way to mount the halos. I realized that a 90mm halo basically "friction fits" around the Hi-Lens LED made by Profile! I opened up the back end of each one to run the halo wiring through the body as it makes the wiring nice, through the hollow threaded mount. A couple dabs of epoxy and it will be concentric, aligned, and fits the situation well.
<a data-flickr-embed="true" href="https://www.flickr.com/photos/185141496@N07/49220223852/in/album-72157711510133311/" title="Retro2"><img src="https://live.staticflickr.com/65535/49220223852_42ae4772a2_c.jpg" width="450" height="800" alt="Retro2"></a><script async src="//embedr.flickr.com/assets/client-code.js" charset="utf-8"></script><a data-flickr-embed="true" href="https://www.flickr.com/photos/185141496@N07/49219987826/in/album-72157711510133311/" title="Retro2"><img src="https://live.staticflickr.com/65535/49219987826_d0861b65a3_c.jpg" width="450" height="800" alt="Retro2"></a><script async src="//embedr.flickr.com/assets/client-code.js" charset="utf-8"></script><a data-flickr-embed="true" href="https://www.flickr.com/photos/185141496@N07/49219988031/in/album-72157711510133311/" title="Retro2"><img src="https://live.staticflickr.com/65535/49219988031_452cb13552_c.jpg" width="450" height="800" alt="Retro2"></a><script async src="//embedr.flickr.com/assets/client-code.js" charset="utf-8"></script>
I toyed around with installing the halo backwards to have it look like this:
<a data-flickr-embed="true" href="https://www.flickr.com/photos/185141496@N07/49227696598/in/dateposted-public/" title="49220223447_3725fd8024_o"><img src="https://live.staticflickr.com/65535/49227696598_ec5569bbda_b.jpg" width="1024" height="576" alt="49220223447_3725fd8024_o"></a><script async src="//embedr.flickr.com/assets/client-code.js" charset="utf-8"></script>
But then realized how long it might take me to hide the wiring, and the fact of the matter is... it looks slick as snot forwards as well. :rockon:
<a data-flickr-embed="true" href="https://www.flickr.com/photos/185141496@N07/49228143376/in/dateposted-public/" title="49219511673_d1e622f611_o"><img src="https://live.staticflickr.com/65535/49228143376_c425c654d0_b.jpg" width="1024" height="576" alt="49219511673_d1e622f611_o"></a><script async src="//embedr.flickr.com/assets/client-code.js" charset="utf-8"></script>


