Auxiliary Fuel Tank

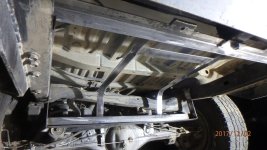
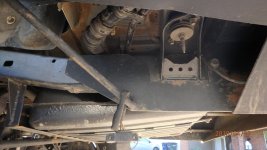
And here it is roughly mocked in place


<a data-flickr-embed="true" href="https://www.flickr.com/photos/156493849@N03/35687751370/in/dateposted-public/" title="fullsizeoutput_333"><img src="https://farm5.staticflickr.com/4323/35687751370_1593239acd_b.jpg" width="1024" height="768" alt="fullsizeoutput_333"></a><script async src="//embedr.flickr.com/assets/client-code.js" charset="utf-8"></script>


<a data-flickr-embed="true" href="https://www.flickr.com/photos/156493849@N03/35268914813/in/dateposted-public/" title="IMG_4522"><img src="https://farm5.staticflickr.com/4319/35268914813_22fab346d7_b.jpg" width="1024" height="768" alt="IMG_4522"></a><script async src="//embedr.flickr.com/assets/client-code.js" charset="utf-8"></script>


So


Sent from my iPhone using Tapatalk
 
It seems like one of the biggest complaints among the 3rd Gen owners is the lack of fuel capacity and range. I’ve never been able to get more than 14.5 gallons in my tank, when you add in 36” tires, heavy beadlock wheels and a thirsty supercharger I honestly feel like I’m driving an electric car with a very limited range. I’m constantly thinking about whether I have enough fuel to run “this” trail, and if I need to carry an extra gas can.


Lately I’ve been running longer trails in more remote terrain, so the need for extra fuel has become a major concern. A standard gas can isn’t really cutting it anymore, and I hate the idea of multiple gas cans on the roof. The only real option (in my opinion) was to install an auxiliary fuel tank where the old spare tire used to live. This is not going to be a step-by-step write up, there are too many variables between other rigs. I just wanted to document how I extended my fuel range and share some of my idea’s.


I originally planned on building a custom auxiliary fuel tank from scratch, but my goal for this summer is to wheel more and wrench less. So I looked around and found a fuel tank at a decent price that should fit pretty well, it’s not perfect but your not going to find that without making your own.


This is the tank I found on Summit Racing, it’s a pretty basic 16 gallon steel tank but it does have baffles and being that it’s steel I can modify it as needed.


https://www.summitracing.com/parts/tnk-ut-n-2


<a data-flickr-embed="true" href="https://www.flickr.com/photos/156493849@N03/35268947873/in/dateposted-public/" title="IMG_4515"><img src="https://farm5.staticflickr.com/4299/35268947873_43d0f71f78_b.jpg" width="768" height="1024" alt="IMG_4515"></a><script async src="//embedr.flickr.com/assets/client-code.js" charset=“utf-8"></script>


<a data-flickr-embed="true" href="https://www.flickr.com/photos/156493849@N03/35237171414/in/dateposted-public/" title="IMG_4517"><img src="https://farm5.staticflickr.com/4316/35237171414_3aba4914e2_b.jpg" width="768" height="1024" alt="IMG_4517"></a><script async src="//embedr.flickr.com/assets/client-code.js" charset="utf-8"></script>


For reference I trimmed the rear of my frame rails when I built my bumper, and I have a one inch body lift. It’s possible that there is a better fitting tank out there, and there might be a better fitting tank for people who have not trimmed their frame rails but this seemed to work pretty good for me. Using this tank in conjunction with the stock tank will give me a capacity of around 30 gallons!


Before I get too excited though, I first have to install it and that’s going to take some work. Step one was to remove the factory crossmember and reroute some of the wiring I had perviously installed. I wanted to get the tank as high as possible, so I cut a small section of the factory body bracing out. This allowed me to get the tank another inch or two higher.


<a data-flickr-embed="true" href="https://www.flickr.com/photos/156493849@N03/35268907663/in/dateposted-public/" title="fullsizeoutput_331"><img src="https://farm5.staticflickr.com/4330/35268907663_f784a8c237_b.jpg" width="1024" height="768" alt="fullsizeoutput_331"></a><script async src="//embedr.flickr.com/assets/client-code.js" charset=“utf-8"></script>


<a data-flickr-embed="true" href="https://www.flickr.com/photos/156493849@N03/35943576991/in/dateposted-public/" title="IMG_4252"><img src="https://farm5.staticflickr.com/4314/35943576991_7cb272e68e_b.jpg" width="1024" height="768" alt="IMG_4252"></a><script async src="//embedr.flickr.com/assets/client-code.js" charset="utf-8"></script>



So am I to understand that this upgrade fit where the spare used to be?


Sent from my iPhone using Tapatalk
 
Trying to follow the plumbing - does the ball valve turn off and on the vent line?

I was hoping you would come up with a different filler mounting location but you ended up with about the only spot - unless you want the tank hanging way down.

It's hard to follow in the pictures, but it goes...

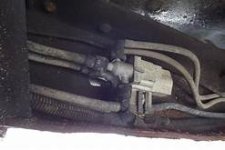
Aux tank > Aux filter > Fuel Pump > Ball Valve > Outlet to stock fuel filler

The red valve isolates the stock fuel system, the brass knob opens the aux tank vent.

The location is not ideal, buts it's not as bad as you might think. The main issue is you have to pump the fuel slow otherwise it clicks the pump off or runs out the filler. It was the best I could come up with, without cutting into the body. But once the fuel is in there it works just like I hoped it would, it transfers the fuel quick and it's great not having fuel cans all over the 4Runner.
 
Last edited:
Would a vid in operation too much to ask?

As I understand it, when the main tank is low, you open the ball valve to fill the main tank and it vents like normal?
 
Last edited:
As I have been thinking about the plumbing more I am wondering if a set of one-way check valves would work to keep the computer thinking it is a closed system.

Do a non-vented filler/vent and then in between the tanks have a one-way fuel valve from aux to main tank and a one-way vent valve from main to aux tank. I want to try and make a setup where I don't have to crack filler caps to transfer.
 
I come from the FJ80 world. Built and drove one all over the southwest and recently sold it for something that gets better than 10mpg and has airbags; a 1998 sr5 5 speed. I love it. Anyhow, all the 80 guys drool at the aux tank set up, and they too spend $$$ for the y-filler neck and OEM dual-tank parts. I could buy another truck, fill it with gas, and tow it for cheaper than it would have cost to put the aux tank in there. Anyhow, it got me thinking...

Why not do everything you did to mount the tank, but cut out all the filler and venting and pump junk and just use it as a big ol' spare gas can? I know its not as awesome or as on-the-go as your set up, but it sure would take a whole lot of pain out of the process. grab a drill mounted siphon and just pump gas from one tank to the other.

I may be totally off with this idea, but it sure could be an easier way to add 16 gallons of fuel down low without throwing a bunch of extra components into the eval system!
 
As I have been thinking about the plumbing more I am wondering if a set of one-way check valves would work to keep the computer thinking it is a closed system.

Do a non-vented filler/vent and then in between the tanks have a one-way fuel valve from aux to main tank and a one-way vent valve from main to aux tank. I want to try and make a setup where I don't have to crack filler caps to transfer.

Unfortunately one way check valves won't work because the vents flow in both directions depending on if your adding or removing fuel. You could tie the vents together and have a single valve, but that's about as good as it gets (without getting overly complicated).
 
I come from the FJ80 world. Built and drove one all over the southwest and recently sold it for something that gets better than 10mpg and has airbags; a 1998 sr5 5 speed. I love it. Anyhow, all the 80 guys drool at the aux tank set up, and they too spend $$$ for the y-filler neck and OEM dual-tank parts. I could buy another truck, fill it with gas, and tow it for cheaper than it would have cost to put the aux tank in there. Anyhow, it got me thinking...

Why not do everything you did to mount the tank, but cut out all the filler and venting and pump junk and just use it as a big ol' spare gas can? I know its not as awesome or as on-the-go as your set up, but it sure would take a whole lot of pain out of the process. grab a drill mounted siphon and just pump gas from one tank to the other.

I may be totally off with this idea, but it sure could be an easier way to add 16 gallons of fuel down low without throwing a bunch of extra components into the eval system!

Lets be honest, this isn't for everyone. A single gas can wasn't cutting it, and strapping 15 gallons of fuel on my roof wasn't an option for me. I wanted a way to carry an extra tanks worth of fuel and transfer it over to the main tank, in a cost effective way.

Most of the work involved in this project was fitting the tank in place. The pump and filler were the quickest part of the project, and probably only cost about $200. I couldn't imagine going through all the work to fit the tank and not being able to transfer the fuel over easily, but that's just my opinion.

I probably made the simplest transfer system possible, if you had the time and money you could add a second fuel gauge, and electronic purge valves. You could transfer a tank of fuel with the press of a button, and not even get out of the truck.
 
Unfortunately one way check valves won't work because the vents flow in both directions depending on if your adding or removing fuel. You could tie the vents together and have a single valve, but that's about as good as it gets (without getting overly complicated).

I will have to draw it out. I am thinking of 3 vent lines.
 
Great project Dirtco!

I have a Carter fuel pump like that leftover from a previous build and I'm contemplating an auxiliary tank when I replace my stock bumper and relocate my spare

How has this been working out for you?

Sent from my Pixel XL using Tapatalk
 
Really diggin this Dirtco. Been thinking had myself about how to get more fuel range.

During My last trip to Death Valley, each time we were on our way off a trail and heading to a gas station, my fuel light was on. Definitely not a good feeling when you are out on the middle of nowhere. I had two cans on the roof but that puts the weight up high so the runner starts to feel too heavy with an additional 8 gallons on the roof rack.

I have plans to build a swing down 4 gal rotopax holder for the spare tire location that would hold two or three cans. I couldn’t think of another way to get additional fuel and be able to keep the weight low. Still planning to go through with the build as I already have all the components to make it work. However, your layout for the auxiliary tank and plumbing, really gets me thinking if I want to tackle something similar.
 
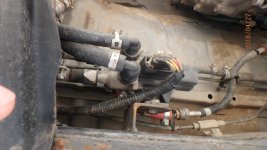
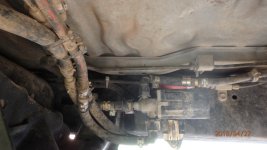
I found the ford tank way cheap and more of an oem look. Rather then going through the hassle of setting up a transfer system between the original and aux tanks I found using the fords duel tank switching system ideal because it gives you the choice of tanks on the fly and the fuel gauge switches with the tank. 19.5 to 20 gals of fuel if one takes the time to do the Ford Toyota tank combination to run Toyota pump and sending unit.
 

Attachments

  • P4270044.jpg
    P4270044.jpg
    137.6 KB · Views: 2,098
  • P4270046.jpg
    P4270046.jpg
    131.3 KB · Views: 2,127
  • P4270047.jpg
    P4270047.jpg
    131.9 KB · Views: 2,009
  • P4270049.jpg
    P4270049.jpg
    133.5 KB · Views: 2,251
I found the ford tank way cheap and more of an oem look. Rather then going through the hassle of setting up a transfer system between the original and aux tanks I found using the fords duel tank switching system ideal because it gives you the choice of tanks on the fly and the fuel gauge switches with the tank. 19.5 to 20 gals of fuel if one takes the time to do the Ford Toyota tank combination to run Toyota pump and sending unit.
Sounds impressive. Did you document/write it up anywhere or can you furnish more details as to what year and vehicle tank and hardware you used, how mounted and what modifications to the 4runner were required?

Sent from my Pixel XL using Tapatalk
 
A member on here midcoma did a wonderful write up on the fuel tank and how to join the Ford and Toyota units into one: http://www.toyota-4runner.org/3rd-gen-t4rs/194378-ford-f150-gas-tank-swap-into-2000-4runner.html

I built a mounting system specific to my bumper so one would need to figure out this aspect based on their set up... I still need to make some armor. I like how high the ford tank can mount, leaving space so armor wont be low hanging.
PC020018.jpg
P4270043.jpg

I don't know the list of models for which all the parts used can be interchanged but what I took said out of was: I used the duel selector valve out of a 88 f150, making sure to save the plastic connectors P#6C3Z9189A I believe.
fordduelvalve.jpg

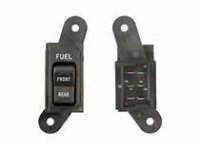
The Fuel Tank Selector Switch and connector from a 92 f250: (Dorman P# 901-301)
forddueltankselector.jpg
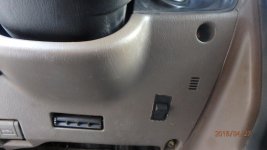
I mounted my where i could easy change tanks on the fly when I run a tank dry (my original post has a pic). The metal bracing on the back side of the Toyota cover also gave me a place to fasten the switch.

I used the f150 and 4runers wiring diagrams and wired/rewired appropriately. For the wiring I used an extra 4runners harness and repined the connectors to keep it clean looking by adding the necessary new wiring. I ran the wiring for the ford valve to said and through/with access hole under the passenger seat. I had to add wiring for the new fuel pump and sending unit. The selector switch is where the system changes between the fuel gauge and the active fuel pump.

I'm being vague on the wiring as I don't have my notes with me, if I can find them or when i get some time I can try and write/draw something up if peeps need.

This is just what I did, not saying its the best option, sure there r other that have found better ways.
 

Attachments

  • fordduelvalve.jpg
    fordduelvalve.jpg
    6.8 KB · Views: 1,849
  • forddueltankselector.jpg
    forddueltankselector.jpg
    3.7 KB · Views: 1,750
  • PC020018.jpg
    PC020018.jpg
    137.9 KB · Views: 3,175
  • P4270043.jpg
    P4270043.jpg
    135.7 KB · Views: 3,517
[MENTION=222826]clearock[/MENTION] what did you do for the fuel filler? I am coming to the conclusion I will probably have to put mine in the wheel well but wondering what other people have done. I have all the dual tank stuff ready to go in this weekend but haven't figured out the filler neck problem yet.
 
I ran the fill point to my rear bumper, it was a pretty tight and quick (short distance from the fuel cap) turn to maintain the downward slop to the fuel cell required to keep the fuel flowing into the tank and not come back towards the nozzle and cause the auto shut off of the pump. In addition, i had some issues with the vapor return hose because the of the tight turn radius (fuel would run into said and the air from the tank couldn't escape and to equalizes the pressure), to solve the above two issues i ended up using a diesel fill neck and welded to another fill tube and cut them to fit what i needed (by using the large bore diesel filler neck i can watch the fuel going in and change the angle and speed of the fuel as needed), i ended up running the vent hose into the wheel well and put a manual valve that i open when filling and shutting after to allow for normal filling speed of the tank.
 
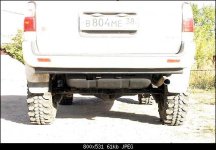
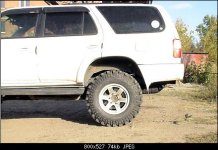
It's in Russian, but it gives a good idea what the overseas colleagues are doing with the JDM HS imports. It's 7 pages of semi-OEM install of a OEM aux fuel tank with OEM parts and some mods on the Hilux Surf. Maybe i've posted it before somewhere on this forum, can't remember.

Сурф-185.. Еще есть плюс сего девайса. Улучшится развесовка, будет устойчивей на гребенке.. Страница 4

Tank (23gallons/90l), brackets, and parts are taken from TLC 90 Prado, as it is the same frame as the 4Runner just different body, and has an aux tank for some GENERAL markets, like the ME/SA. I know this guy has body lift, but it depends what you want to do.

Parts you can sure order from here and there. To find right part numbers, I like to use http://toyotamarket.ru, but
Toyota | Genuine Parts Catalogs | PartSouq Auto Parts Around the World is also good.
Hope it helps

Pavel
 

Attachments

  • DSC01642.jpg
    DSC01642.jpg
    26.4 KB · Views: 1,239
  • DSC01650.jpg
    DSC01650.jpg
    26.8 KB · Views: 1,462
  • DSC01653.jpg
    DSC01653.jpg
    30.6 KB · Views: 1,318
Last edited:

Members online

Forum statistics

Threads
278,313
Messages
3,554,090
Members
248,016
Latest member
Advally Service

Trending content

Back
Top