Bay_Runner's Build Thread

Bay_Runner

New member
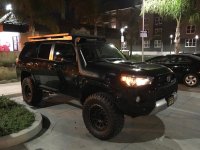
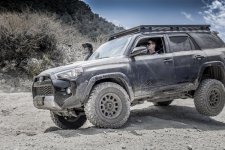
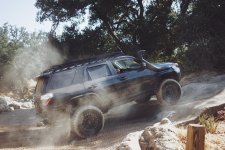
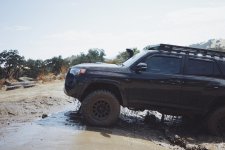
2016 Toyota 4Runner Trail Edition Premium - Build & Adventures


Welcome to my attempt at a build thread. This is the first Toyota I've owned, my two previous vehicles were an 07 Infiniti G35 and a 02 Jeep Grand Cherokee lifted 4.5 inches. I'm happy to be back in a truck and I'm finding the 4Runner to be capable of everything I need it for.

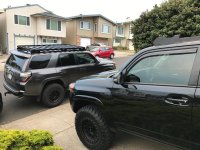
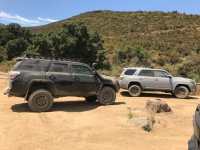
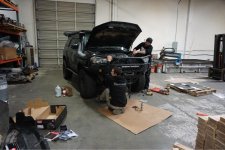
How she sat in the beginning:
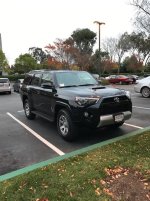
image1.jpg

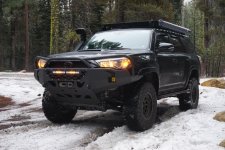
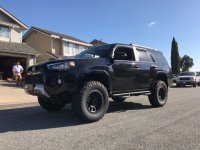
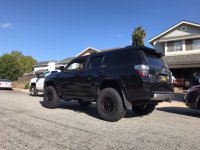
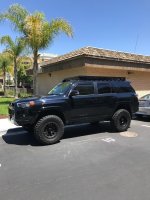
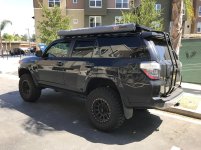
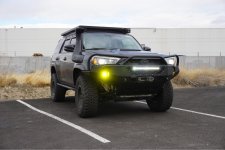
How she sits now:

IMG_3806.jpg


Current Modifications:

Suspension/Wheels:
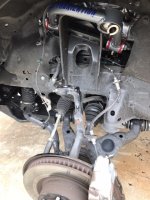
- Old Man Emu BP-51 internal bypass shocks and coilovers
- Total Chaos Upper Control Arms
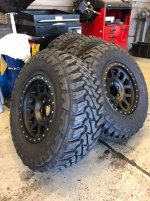
- Toyo Open Country M/T's 295/70R17
- Stealth Custom Series Ray10 17x8.5

Exterior:
- McQueen Prototype Designs Fiberglass Fenders
- ARB Safari Snorkel
- Frontrunner Slimline II Roof Rack
- ARB Awning
- Gobi ladder
- WeatherTech Window Deflectors

Armor & Recovery:
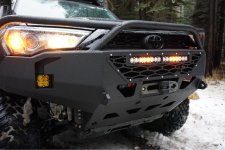
- Relentless Fabrication Predator full replacement bumper
- Warn VR-10S
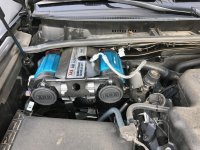
- ARB Twin Compressor + Manifold w/ bandi mount
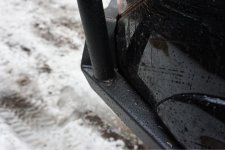
- Pelfreybilt Sliders

Electrical:
- Odyssey Group 31M
- sPod HD
- Blue Sea fuse box
- Renogy 100W solar suitcase

Lighting:
- Baja Designs S8 20" lightbar
- Baja Designs Squadron Sports
- XenonDepot 4300K HID's w/ Philips Bulbs
 

Attachments

  • image1.jpg
    image1.jpg
    64.4 KB · Views: 360
  • IMG_3806.jpg
    IMG_3806.jpg
    136 KB · Views: 246
Last edited:
Register to hide this ad
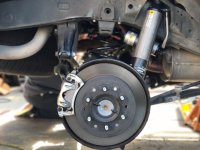
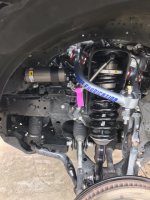
First things first - I wanted to make moves on getting the suspension done and build the 4Runner up from there. I did plenty of research through these stages, and wanted a setup that would perform off road without sacrificing ride quality on the road. While I would have liked to go King's for shocks and coilovers, I eventually decided on the Old Man Emu BP-51 kit thinking I could upgrade if and when I added the additional weight to justify it. I also decided to go with Total Chaos UCA's. For wheels and tires - I had experience running BFG KM2's on my Jeep but this go around I went with Toyo Open Country M/T's in 295/70R17. Wheels - I meddled back and forth whether to go black on black or not for a long time, but I eventually decided on the look of Method Race Wheels 309's. I knew I'd have to do a body mount chop and ordered Metal Tech 4x4's kit.

10.jpg


Installation:


TC.jpg

tc2.jpg

IMG_1099.JPG


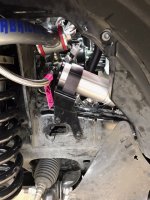
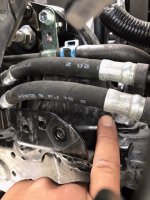
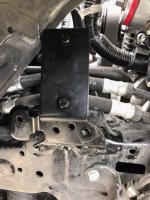
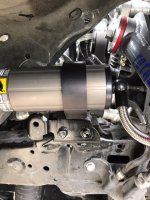
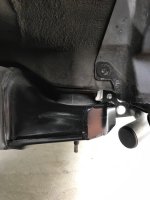
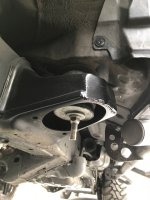
Things went smoothly with the suspension install until we reached the point of needing to mount the front driver's side coilover reservoir. The bracket that was sent to me from ToyTec was an exact mirror image of the passenger side bracket, which for those of you with KDSS, will not work. I was fully aware of the BP-51 kit and it's intended use for the FJ before purchasing (there may be a 4Runner kit out now), but I knew that the only difference would be this mount. I made sure to double and triple check with David prior to ordering the kit that the bracket included would work with KDSS, but after calling him back during the install as well as talking to the technicians at ARB, we decided to move forward with fabbing our own mounting bracket.


kdss 2.jpg

KDSS Lines clearly in the way of the mounting bracket

mount.jpg

Made some changes to the bracket ToyTec sent

mounted.jpg

Fabbed bracket

full.jpg

End Product
 

Attachments

  • TC.jpg
    TC.jpg
    121 KB · Views: 872
  • tc2.jpg
    tc2.jpg
    117.9 KB · Views: 858
  • IMG_1099.JPG
    IMG_1099.JPG
    99.9 KB · Views: 843
  • kdss 2.jpg
    kdss 2.jpg
    115.7 KB · Views: 862
  • mount.jpg
    mount.jpg
    114.6 KB · Views: 849
  • mounted.jpg
    mounted.jpg
    114.7 KB · Views: 838
  • 10.jpg
    10.jpg
    61.9 KB · Views: 862
  • full.jpg
    full.jpg
    109.3 KB · Views: 846
Last edited:
Moving on to the finished product of the body mount chop...

bmc.jpg

bmc2.jpg

Tires and wheels all mounted up... donezo!

IMG_1087.JPG

IMG_1088.JPG

Overall I'm a very happy camper with the outcome of the suspension - still have slight rubbing when I'm at full lock in reverse, but nothing a little trimming can't solve. Ride quality is excellent.
 

Attachments

  • bmc.jpg
    bmc.jpg
    79 KB · Views: 832
  • bmc2.jpg
    bmc2.jpg
    92.1 KB · Views: 829
  • IMG_1087.JPG
    IMG_1087.JPG
    114.9 KB · Views: 844
  • IMG_1088.JPG
    IMG_1088.JPG
    117.2 KB · Views: 852
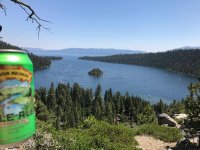
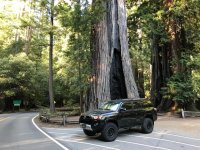
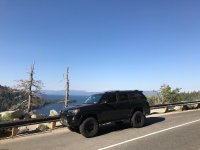
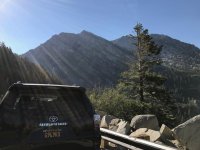
Took advantage the long weekend to do some much needed wandering and hit Big Basin for some hiking, Garden of Eden in Santa Cruz, and Emerald Bay in Tahoe for a day trip. I was sadly not able to do any camping and most of the driving was limited to pavement, but still felt good to celebrate America's birthday outdoors. Cheers!

IMG_1573.jpg
Big Basin

IMG_1589.jpg
Quick pit stop on the way back from Big Basin

IMG_1590.jpg
Garden of Eden - Henry Cowell State Park

IMG_1640.jpg
Tahoe

IMG_1673.jpg
Emerald Bay

IMG_1677.jpg
Tahoe

IMG_1652.jpg
Happy Hour
 

Attachments

  • IMG_1589.jpg
    IMG_1589.jpg
    133 KB · Views: 719
  • IMG_1640.jpg
    IMG_1640.jpg
    147.1 KB · Views: 712
  • IMG_1673.jpg
    IMG_1673.jpg
    133.2 KB · Views: 719
  • IMG_1677.jpg
    IMG_1677.jpg
    136 KB · Views: 719
  • IMG_1652.jpg
    IMG_1652.jpg
    138.2 KB · Views: 709
  • IMG_1573.jpg
    IMG_1573.jpg
    140 KB · Views: 715
  • IMG_1590.jpg
    IMG_1590.jpg
    138.3 KB · Views: 728
Last edited:
Looks great. I dig the Method wheels!


Sent from my iPhone using Tapatalk

I was hesitant on going all black at first, but I'm very pleased with how they came out in both aspects of looks and performance. Race proven is never a bad thing :thumb:

Your BMC came out really clean!!! Nice build so far


Sent from my iPhone using Tapatalk

Much appreciated! I sadly cannot take credit for the welding work, it would look much more amateur if I had tried my hand at it. If you ever need a guy in the Bay Area, give me a shout!
 
I was hesitant on going all black at first, but I'm very pleased with how they came out in both aspects of looks and performance. Race proven is never a bad thing :thumb:


Much appreciated! I sadly cannot take credit for the welding work, it would look much more amateur if I had tried my hand at it. If you ever need a guy in the Bay Area, give me a shout!

Only if you were down in Southern CA. I'm having a difficult time finding someone who can do my BMC as clean as yours.
 
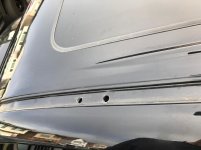
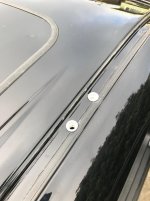
Time to get caught up! Got the Frontrunner Slimline II Rack installed last week and I couldn't be happier. A few photos below of the install,thank you to a fellow t4r.org member up in Daly City for helping with the rivnuts:


IMG_1762.jpg

rivnuts.jpg

IMG_1771.jpg

complete rack.jpg


Went full send after the successful roof rack install and decided to keep drilling holes in my car. Spent a couple of late nights this week getting the safari snorkel installed as well as installing my ARB dual compressor + manifold. Couldn't be more happy with my @bandi mount. Will post more photos later today - more garage time after work today to get my ARB Differential Breather installed.


IMG_1850.jpg

IMG_1865.jpg

IMG_1870.jpg
 

Attachments

  • IMG_1762.jpg
    IMG_1762.jpg
    122 KB · Views: 527
  • rivnuts.jpg
    rivnuts.jpg
    124.6 KB · Views: 499
  • IMG_1771.jpg
    IMG_1771.jpg
    137.4 KB · Views: 495
  • complete rack.jpg
    complete rack.jpg
    136.1 KB · Views: 487
  • IMG_1850.jpg
    IMG_1850.jpg
    134.1 KB · Views: 481
  • IMG_1865.jpg
    IMG_1865.jpg
    132.2 KB · Views: 484
  • IMG_1870.jpg
    IMG_1870.jpg
    133.2 KB · Views: 482
Last edited:
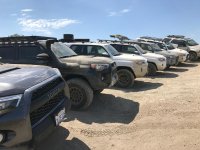
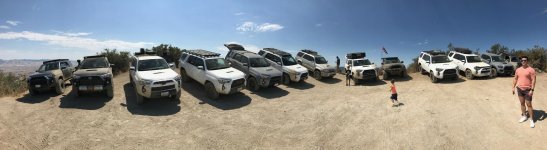
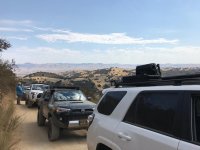
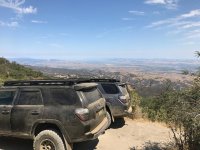
Went out to Hollister Hills this weekend with [MENTION=130461]1G3runner[/MENTION] and a few other trucks. In attendance were ten 5th gens, two Tacomas, one 3rd gen 4runner, and a Chevy Avalanche. Felt good to get off pavement for a bit!


IMG_2023.jpg

IMG_2013.jpg

IMG_2016.jpg

IMG_1950.jpg

IMG_1963.jpg

IMG_1940.jpg

IMG_1966.jpg

IMG_1989.jpg
 

Attachments

  • IMG_2023.jpg
    IMG_2023.jpg
    142.2 KB · Views: 451
  • IMG_2013.jpg
    IMG_2013.jpg
    142 KB · Views: 437
  • IMG_2016.jpg
    IMG_2016.jpg
    131.8 KB · Views: 446
  • IMG_1950.jpg
    IMG_1950.jpg
    135.4 KB · Views: 465
  • IMG_1963.jpg
    IMG_1963.jpg
    160.5 KB · Views: 441
  • IMG_1940.jpg
    IMG_1940.jpg
    127.7 KB · Views: 451
  • IMG_1966.jpg
    IMG_1966.jpg
    135.7 KB · Views: 450
  • IMG_1989.jpg
    IMG_1989.jpg
    137.5 KB · Views: 454
Last edited:
Electrical/Battery Setup

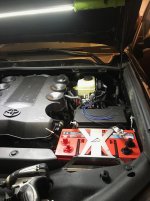
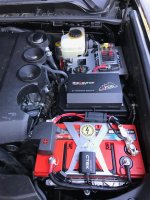
I teetered back and forth between going single vs dual battery setup - I decided for my needs only a single battery would be necessary, along with a solar setup to help keep the battery charged. I went with an Odyssey Group 31M battery and used Pelfreybilt's battery cage.

battery.jpg


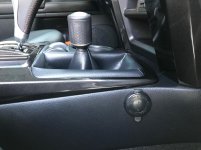
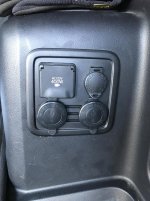
I wanted a central switch system that would have a central switch panel and a clean way to keep a mess of wires from cluttering my engine bay. I chose to power my ARB dual compressor + manifold and future light/winch upgrades by the sPod HD. All items that need to be wired hot will go to a Blue Sea fuse block supported by the Pelfreybilt fuse panel. Also added: 1 Blue Sea 1045 USB charger in the front and 2 in the rear, and a CTEK battery monitor that runs to my iPhone via bluetooth. Huge shout out to Mitch at Adventure Wired for the extremely clean install, I had a blast watching him and helping where I could.


IMG_2473.jpg


blue sea.jpg


Rest of the switches reserved.. stay tuned :tongue:


IMG_2469.jpg


ARB Compressor + Manifold (post trail run)


IMG_2470.jpg


Finished product:


battery3.jpg
 

Attachments

  • battery.jpg
    battery.jpg
    138.2 KB · Views: 372
  • IMG_2473.jpg
    IMG_2473.jpg
    136.1 KB · Views: 374
  • blue sea.jpg
    blue sea.jpg
    136.7 KB · Views: 391
  • IMG_2469.jpg
    IMG_2469.jpg
    130.3 KB · Views: 378
  • IMG_2470.jpg
    IMG_2470.jpg
    148 KB · Views: 442
  • battery3.jpg
    battery3.jpg
    147.6 KB · Views: 439
It's been a long while since I've updated this thread. The last few months have been full of awesome trips and some changes to the truck.

A few additions:

ARB Awning - I wanted an ARB awning to provide a little bit of shelter and shade when camping and going on trips, so I decided to go with the 2000 opposed to the 2500. It provides a good amount of shade and sits flush with the roof rack (lengthwise.)

IMG_2581.jpg


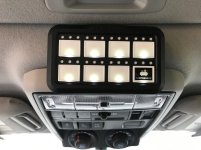
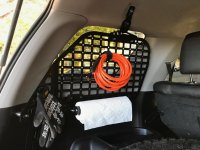
Rago Fabrication Modular Storage Panel - I snagged a good deal from the folks at Rago Fabrication during one of their garage sales, and added their modular storage panel for my drivers side. The idea behind just one side was to leave as much visibility over my shoulder in the passenger's blind spot. Install was extremely easy and so far I've found it useful in holding a few different things.

IMG_3829.jpg


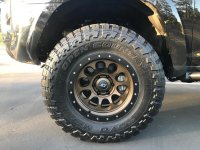
Stealth Custom Series Ray10's 17x8.5 - I loved my Methods, but bronze Ray10's have been a long time want for me. The opportunity presented itself for me to snag a set and I took advantage - I love the look and the offset provides a little bit wider stance, which I like since I'm not running spacers currently.

IMG_3341.jpg


I also installed XenonDepot's 4300K HID's w/ Philips Bulbs after not being able to stand the factory bulbs any longer. Some quick adjustments to adjust the beams a little lower, and night time visibility is much better.
 

Attachments

  • IMG_2581.jpg
    IMG_2581.jpg
    136.5 KB · Views: 582
  • IMG_3829.jpg
    IMG_3829.jpg
    137.9 KB · Views: 379
  • IMG_3341.jpg
    IMG_3341.jpg
    136.7 KB · Views: 364
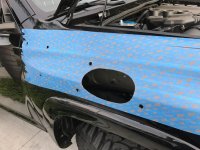
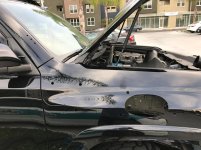
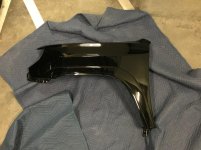
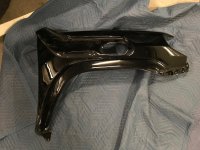
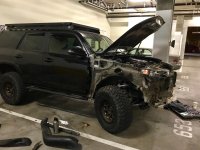
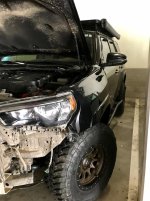
McQueen Prototype Designs Fiberglass Fenders

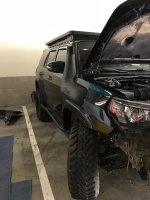
I owe @weeee a big thank you for not only helping in the design of these fenders for our 5th gen 4Runners, but for driving my set back up to the bay from LA and helping me with the install - I would have been in the garage for a few hours longer without his help. I'm currently running 295's and fitment is snug with a bit of rub against the factory fender liner when at full lock in reverse, and as you might expect there's quite a bit more rubbing when on the trail and articulation becomes a factor. While I don't intend to baja race my 4Runner, I wanted to have some extra room in the front for peace of mind when wheeling, and to free up some space to go up in tire size as well.

The McQueen Fiberglass fenders provide 3" of additional clearance and are compatible with the ARB snorkel.


IMG_3442 (1).jpg


IMG_3441 (1).jpg


IMG_3642.jpg


IMG_3623 (1).jpg


IMG_3624.jpg


The fenders fit snug and are extremely well made, not to mention look nearly factory at first glance.
 

Attachments

  • IMG_3442 (1).jpg
    IMG_3442 (1).jpg
    130.3 KB · Views: 356
  • IMG_3441 (1).jpg
    IMG_3441 (1).jpg
    131.4 KB · Views: 362
  • IMG_3642.jpg
    IMG_3642.jpg
    130.9 KB · Views: 417
  • IMG_3623 (1).jpg
    IMG_3623 (1).jpg
    130.8 KB · Views: 364
  • IMG_3624.jpg
    IMG_3624.jpg
    137.1 KB · Views: 364
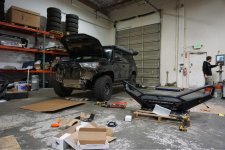
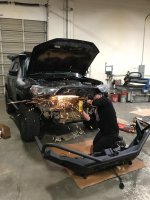
Relentless Fabrication Predator Bumper

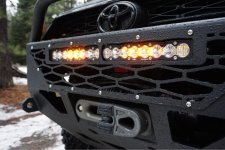
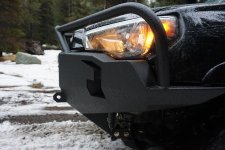
To complete the front end makeover I went with Relentless Fabrication's new Predator bumper. It's a full replacement bumper and is full steel which I wanted for strength while winching. Shrockworks and CBI were also of interest to me and I had actually initially planned to pick up @weeee's Shrockworks bumper, but managed to squeak in Relentless' pre order group just in time. My biggest concern with the bumper was the amount of space between the fender and the hoops on their bumper, since the hoops are mounted right where the fenders begin to bulge. Knowing there might need to be some troubleshooting to accommodate the fenders, I took Friday to drive to their shop in Reno to get it installed. Fitment with the fenders ended up being seamless as if they were made to be a perfect match. I can't say enough about how awesome Eric and Brittany are, and how top notch Relentless' craftsmanship is.

To go in the bumper I chose Amber BD Squadron Sports Wide Cornering, a BD Driving/Combo S8 lightbar, Warn VR-10s winch with wireless controller, and Factor 55 Fairlead as well as Flatlink E.


IMG_3822.jpg

IMG_3782.jpg

IMG_3823.jpg

IMG_3810.jpg
 

Attachments

  • IMG_3822.jpg
    IMG_3822.jpg
    134.2 KB · Views: 354
  • IMG_3823.jpg
    IMG_3823.jpg
    132.4 KB · Views: 342
  • IMG_3810.jpg
    IMG_3810.jpg
    125.7 KB · Views: 398
  • IMG_3782.jpg
    IMG_3782.jpg
    132.7 KB · Views: 338
Last edited:
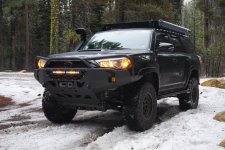
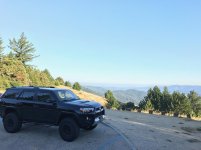
After the install, I decided to hit a few trails in Tahoe National Forest. With weather becoming increasingly inclement and a good bit of ice on most of the fire roads, I didn't stay for long but had a good time and got some more shots of the bumper in the wild.

IMG_3806.jpg

IMG_3827.jpg

IMG_3826.jpg

DSC00125.jpg


The original area of concern I had with the fender bulge being in the way of the hoops. Perfect fit!

IMG_3825.jpg
 

Attachments

  • IMG_3806.jpg
    IMG_3806.jpg
    136 KB · Views: 394
  • IMG_3827.jpg
    IMG_3827.jpg
    129.8 KB · Views: 346
  • IMG_3826.jpg
    IMG_3826.jpg
    131.8 KB · Views: 366
  • DSC00125.jpg
    DSC00125.jpg
    133.1 KB · Views: 343
  • IMG_3825.jpg
    IMG_3825.jpg
    93.8 KB · Views: 334

Members online

Forum statistics

Threads
278,309
Messages
3,554,066
Members
248,016
Latest member
Advally Service

Trending content

Back
Top