BackOff
New member
Hi everybody.
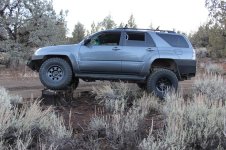
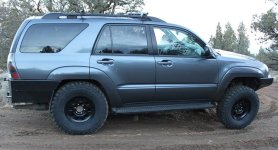
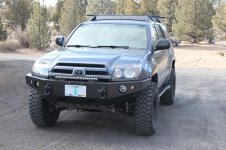
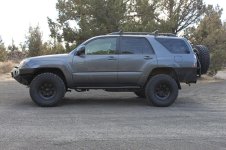
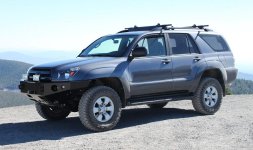
Wanted to share my Black-N-Blue 2004 v6 SR5 4Runner. For your entertainment...and ultimately mine.
It is ever changing it seems...its a sickness.
I have the personality of 80 grit sandpaper, a bit rough, still happy to answer any questions as best I can.
Actually this T4R is Galactic grey.
Perfectly happy with this 4runner from day 1.
It is my third one... i like 4runners.
I do ramble on sometimes...
First was a 1986 T4R, first year of the front IFS.
I thought that was a real nice ride coming from a 1980 toy short bed pickup with 33" Buckshots, lifted. The back breaker, had a metal bar in the bench seat that was a killer.
Then a 1985 toy pickup with 35" Kelly Safari DTR, lifted. The thumb breaker. Tires had so much leverage that the steering wheel would spin so fast (out wheeling) it would slam your thumbs. Needed a steering stabilizer.
Second 4Runner was a 1992 v6 SR5, bought new, one owner, the 3.slow motor. Great T4R but the motor was a dog. Head gasket blew out around 90k on that one if i remember the mileage right, 50 miles from town, dealer repair. It sits collecting dust in the garage, poor old thing. I have an old Chevy v8 that i allways wanted to stuff in there, but never did. I had all sorts of plans for it but kinda gave up on that idea after getting this 2004. These guys had all the toys back then... Northwest Off-Road Specialties, INC.
Was a '89 supra (that was a great car) and a '98 Tacoma (terrible rear suspension, air bags and a fiberglass canopy helped) in there somewhere.
This current T4R was purchased as a certified new vehicle back in 2004. Seat covers and rubber floor matts out the door day one. Pulled all the chrome badging off that day, -Toyota 4runner SR5-. Tires and ground clearence was about the only thing i thought was lacking.
I looked for aftermarket parts but there was nothing at the time.
Sure glad these machines have some sort of fan base now.
My wheeling consists mostly of high speed desert and forest roads and towing, not so much extreme rock crawling.
All was good untill some nutty little deer decided to body slam the front of my 4runner 1 week before X-Mas 2010. The deer jumped jump up off the ground... after rebounding from that surface also... and ran off, never looked back. I almost got rear-ended in the whole deal.
Thats part of where the name came from, its color and its bruises.
Merry xmas...I say that with sarcasm but it was the begining of the mods, so maybe a good thing?
I was going 10-15mph, it ripped the bumper all up on one corner and broke both the headlights mounts (plastic of headlights) and the bumper trim piece between the bumper and grill. Also pushed the driverside fender in some.
After looking for a new replacement bumper i came across these guys...toyota120...and Shrockworks.
Then found T4R.org and yotatech.com.
Then the modifications began.
Spend to much time on these sites and this is what happens.
Nearly all done solo in my garage, with the great info here and over on that other site of course. I am not a mechanic just mechanically inclined with a box of tools. All bolt on no welding. All the info can be found on these sites so not much point of me explaining any installs in depth. This thread is allready getting a bit long winded as it is.
Work safe!
Been a work in progress over the last few years...man how time flies.
Not any real hurry, i upgrade as time, patience and money allow.
Wanted a vehicle to get me there and back again, nothing too crazy...
Listed in general order of installment, as far as i can recall that is.
The parts and #'s (if i can find them)
+ K&N series 63 AirCharger.
part # K/N-63-9023 kit, RC-5100 filter only
+ Optima yellow top.
part # OPT8040-218 D35
Died 11/2017...lasted about 6.5 years. Optmia Yellow top leak - Toyota 4Runner Forum - Largest 4Runner Forum
+ Duracell SLI35/85AGM. 12/2017
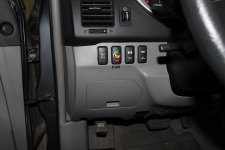
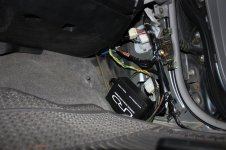
+ OLD stuff...Rancho quickLIFT 9000xl with MyRide remote control. (adj shocks on the fly)(Rockauto.com)
part #RS999914 front R, RS999913 front L, RS999305 rear, RS70080 rear 1.5" coil spring spacer.(used spacer until i switched to the SAW coils)
New front shocks, #RS999760 with Moog FJC coils.
+ Elka 2.5/remote res. front and rear.
+ Light Racing upper control arms (Specialty Products Company)(SPC).
part # LR-25480 pair
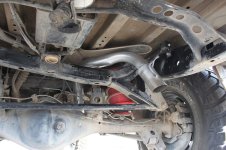
+ Air Lift 1000 rear air springs/bags.
Started with the stock size then when to longer part # AIR-46132, 5.38"x10.5"
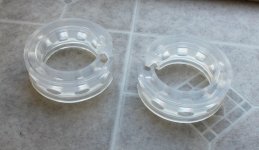
+ Sway-A-Way rear coils, +1.5", +12% spring rate. (Toped with 1/4" UHD plastic cut to disk shape)
part # SAW 102-1575-195
+ Rear sway bar links, 2nd gen T4R, 1" longer.
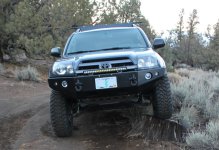
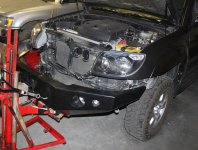
+ Shrockworks front bumper.
+ Warn M8000 (from 1992) with Promark synthetic winch rope 5/16" 92ft.
+ Rear diff breather extension to fuel door area.
+ Yakima RailGrab .58" bars
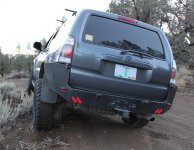
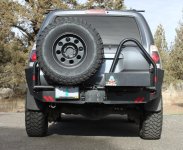
+ Aluminess rear bumper. Last of 5.
+ Depo Black bezel head and tail lights.
+ Front sway bar relocated then removed.
On and off 4 times one year. Back on after 285's to help the on-road manners...and off after the Moog FJC coils...again....gone after the Elkas for sure!
+ Wheelers front bump stops.
part # WHE 01SUPERBUMPKIT
Too soft/squished flat
+ 2nd gen EnergySuspension bumps with 1/2" UHMW spacer
+ Bora hubcentric wheel spacers .750". REMOVED (MB wheels)
1/4" spacer on current wheels, to clear front caliper...gone
+ Drilled/slotted rotors.
Prime Choice PR41329L and R, PR41296L and R
PowerStop Evolution ceramic pads 16-606, 16-976
+ Smoker kit
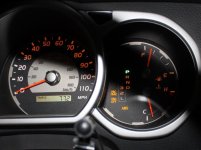
+ Scan Gauge 2.
+ MB 72wheels, -16 offset, 16x7 then/now American Racing 16x8 -10 offset.
Black chrome E-T Gorilla Nuts and hubcentric spacers 108-106.
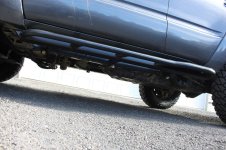
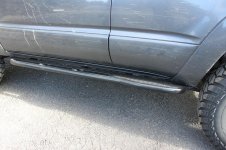
+ White Knuckle Off Road DOM sliders with rear step/kick-out.
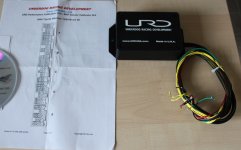
+ URD MAF Sensor Calibrator. Cool little gadget.
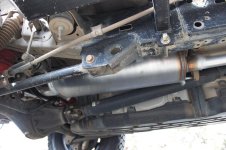
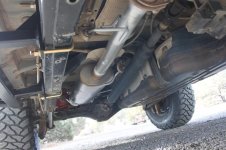
+ Magnaflow 24" muffler, custom made cat-back with axle dump (resonator delete). First work done by a local shop. Nice work.
Added a nice growl, sounds really good to me. Feels faster. No gravel-can sound when you let off the throttle.
+ 70mm Throttle Body
#22030-31060 TB, from car-part.com, 2014 T4R 10k miles
+ URD 70mm TB adapter
+ RCI skids full steel set w/fuel tank and upper rear trailing arm skids
After this adventure Central Oregon Off-Road Day (Around Bend, OR) - Toyota 4Runner Forum - Largest 4Runner Forum obviously good insurance...
+ XTP intake manifold spacer
+Icon LCA Skids
+Anti Rodent Screen
+1/2" UHMW Plastic Body Lift (diy)
+Rockmen rear lower links
List keeps growing.
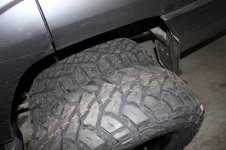
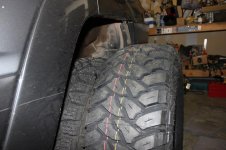
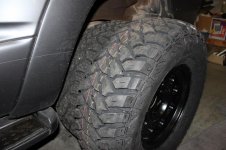
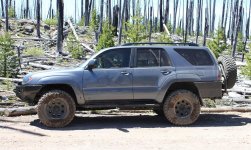
Finally added a set of 285/75/16r Kenda Klever MT.
Low cost sold me on them. Tire is 64lbs on the bathroom scale. With the MB 72 wheel at 22lbs. 86lbs is starting to get kinda heavy.
So far so good, these things hook-up, great in the snow...WAY WAY better than the Hankook MTs.
No Pics stock, but thats no fun anyway. Just the lift and tires helps alot.
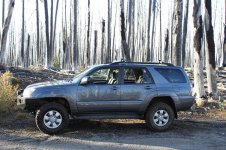
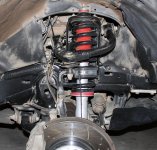
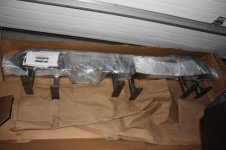
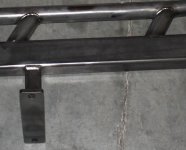
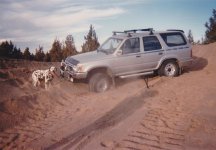
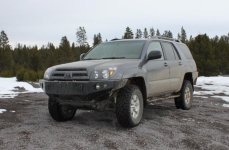
Here is the QuickLift installed, brought the 2004 (stock size tires) up to a stock 1992 (31x10.5x15) height. Picture 2.
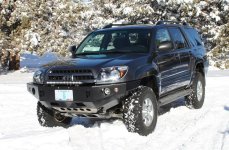
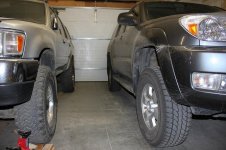
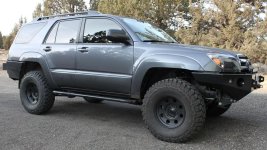
Shrockworks install, did this two times, just for the fun of it...not really, i needed to get a little more space between the fender and bumper, because it was rubbing. Very heavy bumper 150lbs it seemed like. Had a bumper jack from somewhere. Made the job smooth. Blue headlights in this shot too. Picture 3.
Have fun out there!
Tread lightly!
Thank you T4R.org and toyota120.com and yotatech.com, i could not have done it with out all the great info.
And now a couple pics.
Wanted to share my Black-N-Blue 2004 v6 SR5 4Runner. For your entertainment...and ultimately mine.
It is ever changing it seems...its a sickness.
I have the personality of 80 grit sandpaper, a bit rough, still happy to answer any questions as best I can.
Actually this T4R is Galactic grey.
Perfectly happy with this 4runner from day 1.
It is my third one... i like 4runners.
I do ramble on sometimes...
First was a 1986 T4R, first year of the front IFS.
I thought that was a real nice ride coming from a 1980 toy short bed pickup with 33" Buckshots, lifted. The back breaker, had a metal bar in the bench seat that was a killer.
Then a 1985 toy pickup with 35" Kelly Safari DTR, lifted. The thumb breaker. Tires had so much leverage that the steering wheel would spin so fast (out wheeling) it would slam your thumbs. Needed a steering stabilizer.
Second 4Runner was a 1992 v6 SR5, bought new, one owner, the 3.slow motor. Great T4R but the motor was a dog. Head gasket blew out around 90k on that one if i remember the mileage right, 50 miles from town, dealer repair. It sits collecting dust in the garage, poor old thing. I have an old Chevy v8 that i allways wanted to stuff in there, but never did. I had all sorts of plans for it but kinda gave up on that idea after getting this 2004. These guys had all the toys back then... Northwest Off-Road Specialties, INC.
Was a '89 supra (that was a great car) and a '98 Tacoma (terrible rear suspension, air bags and a fiberglass canopy helped) in there somewhere.
This current T4R was purchased as a certified new vehicle back in 2004. Seat covers and rubber floor matts out the door day one. Pulled all the chrome badging off that day, -Toyota 4runner SR5-. Tires and ground clearence was about the only thing i thought was lacking.
I looked for aftermarket parts but there was nothing at the time.
Sure glad these machines have some sort of fan base now.
My wheeling consists mostly of high speed desert and forest roads and towing, not so much extreme rock crawling.
All was good untill some nutty little deer decided to body slam the front of my 4runner 1 week before X-Mas 2010. The deer jumped jump up off the ground... after rebounding from that surface also... and ran off, never looked back. I almost got rear-ended in the whole deal.
Thats part of where the name came from, its color and its bruises.
Merry xmas...I say that with sarcasm but it was the begining of the mods, so maybe a good thing?
I was going 10-15mph, it ripped the bumper all up on one corner and broke both the headlights mounts (plastic of headlights) and the bumper trim piece between the bumper and grill. Also pushed the driverside fender in some.
After looking for a new replacement bumper i came across these guys...toyota120...and Shrockworks.
Then found T4R.org and yotatech.com.
Then the modifications began.
Spend to much time on these sites and this is what happens.
Nearly all done solo in my garage, with the great info here and over on that other site of course. I am not a mechanic just mechanically inclined with a box of tools. All bolt on no welding. All the info can be found on these sites so not much point of me explaining any installs in depth. This thread is allready getting a bit long winded as it is.
Work safe!
Been a work in progress over the last few years...man how time flies.
Not any real hurry, i upgrade as time, patience and money allow.
Wanted a vehicle to get me there and back again, nothing too crazy...
Listed in general order of installment, as far as i can recall that is.
The parts and #'s (if i can find them)
+ K&N series 63 AirCharger.
part # K/N-63-9023 kit, RC-5100 filter only
+ Optima yellow top.
part # OPT8040-218 D35
Died 11/2017...lasted about 6.5 years. Optmia Yellow top leak - Toyota 4Runner Forum - Largest 4Runner Forum
+ Duracell SLI35/85AGM. 12/2017
+ OLD stuff...Rancho quickLIFT 9000xl with MyRide remote control. (adj shocks on the fly)(Rockauto.com)
part #RS999914 front R, RS999913 front L, RS999305 rear, RS70080 rear 1.5" coil spring spacer.(used spacer until i switched to the SAW coils)
New front shocks, #RS999760 with Moog FJC coils.
+ Elka 2.5/remote res. front and rear.
+ Light Racing upper control arms (Specialty Products Company)(SPC).
part # LR-25480 pair
+ Air Lift 1000 rear air springs/bags.
Started with the stock size then when to longer part # AIR-46132, 5.38"x10.5"
+ Sway-A-Way rear coils, +1.5", +12% spring rate. (Toped with 1/4" UHD plastic cut to disk shape)
part # SAW 102-1575-195
+ Rear sway bar links, 2nd gen T4R, 1" longer.
+ Shrockworks front bumper.
+ Warn M8000 (from 1992) with Promark synthetic winch rope 5/16" 92ft.
+ Rear diff breather extension to fuel door area.
+ Yakima RailGrab .58" bars
+ Aluminess rear bumper. Last of 5.
+ Depo Black bezel head and tail lights.
+ Front sway bar relocated then removed.
On and off 4 times one year. Back on after 285's to help the on-road manners...and off after the Moog FJC coils...again....gone after the Elkas for sure!
+ Wheelers front bump stops.
part # WHE 01SUPERBUMPKIT
Too soft/squished flat
+ 2nd gen EnergySuspension bumps with 1/2" UHMW spacer
+ Bora hubcentric wheel spacers .750". REMOVED (MB wheels)
1/4" spacer on current wheels, to clear front caliper...gone
+ Drilled/slotted rotors.
Prime Choice PR41329L and R, PR41296L and R
PowerStop Evolution ceramic pads 16-606, 16-976
+ Smoker kit
+ Scan Gauge 2.
+ MB 72wheels, -16 offset, 16x7 then/now American Racing 16x8 -10 offset.
Black chrome E-T Gorilla Nuts and hubcentric spacers 108-106.
+ White Knuckle Off Road DOM sliders with rear step/kick-out.
+ URD MAF Sensor Calibrator. Cool little gadget.
+ Magnaflow 24" muffler, custom made cat-back with axle dump (resonator delete). First work done by a local shop. Nice work.
Added a nice growl, sounds really good to me. Feels faster. No gravel-can sound when you let off the throttle.
+ 70mm Throttle Body
#22030-31060 TB, from car-part.com, 2014 T4R 10k miles
+ URD 70mm TB adapter
+ RCI skids full steel set w/fuel tank and upper rear trailing arm skids
After this adventure Central Oregon Off-Road Day (Around Bend, OR) - Toyota 4Runner Forum - Largest 4Runner Forum obviously good insurance...
+ XTP intake manifold spacer
+Icon LCA Skids
+Anti Rodent Screen
+1/2" UHMW Plastic Body Lift (diy)
+Rockmen rear lower links
List keeps growing.
Finally added a set of 285/75/16r Kenda Klever MT.
Low cost sold me on them. Tire is 64lbs on the bathroom scale. With the MB 72 wheel at 22lbs. 86lbs is starting to get kinda heavy.
So far so good, these things hook-up, great in the snow...WAY WAY better than the Hankook MTs.
No Pics stock, but thats no fun anyway. Just the lift and tires helps alot.
Here is the QuickLift installed, brought the 2004 (stock size tires) up to a stock 1992 (31x10.5x15) height. Picture 2.
Shrockworks install, did this two times, just for the fun of it...not really, i needed to get a little more space between the fender and bumper, because it was rubbing. Very heavy bumper 150lbs it seemed like. Had a bumper jack from somewhere. Made the job smooth. Blue headlights in this shot too. Picture 3.
Have fun out there!
Tread lightly!
Thank you T4R.org and toyota120.com and yotatech.com, i could not have done it with out all the great info.
And now a couple pics.
Attachments
Last edited: