
You are using an out of date browser. It may not display this or other websites correctly.
You should upgrade or use an alternative browser.
You should upgrade or use an alternative browser.
Black-N-Blue (build thread)
- Thread starter BackOff
- Start date

BackOff
New member
Wanted to mention, keep forgetting.
Poking my fingers into the frame, working under the T4R...I have a good 1/2" of mud/dirt/dust in the frame rails...EEEEKKK!
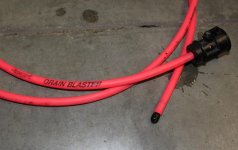
Noticed this drain-snake thing hanging on the wall. For home drains.
Poked it into the frame rails any where I could, has a jet out the front and spinning head jets... looked like 10lbs. of dirt came out!
Poking my fingers into the frame, working under the T4R...I have a good 1/2" of mud/dirt/dust in the frame rails...EEEEKKK!
Noticed this drain-snake thing hanging on the wall. For home drains.
Poked it into the frame rails any where I could, has a jet out the front and spinning head jets... looked like 10lbs. of dirt came out!
Attachments
BackOff
New member
A few days ago I started to get a terrible clunk, on heavy bumps in the road.
Sounded like it was a hammer hit to the frame in the front or under my left foot area, thought it was my failing front suspension.
Tracked it down to the rear lower control arm, the front bolts needed snugged down, after the skids install. FIXED!...no I guess it was not.
That lead me to finally do something about the weak front shocks/coils.
Have been tip-toeing around so I don't rip the fenders off with the tires.
Put the 265/75/16r Duratracs back on for better clearance and still hits the UCA on the wheel-well with a 1/4" spacer under the Wheelers Superbump.
Put the stock bumpstops back on after doing some measuring, they give 1" of space UCA/wheel-well, before compressing and they are hard so don't mash much. Superbumps are another matter apparently. Was touching the LCA.
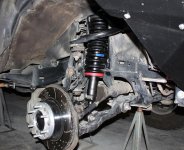
Stuck a set of the Moog FJ coils onto a RS999760 shock (same as the QuickLift). Ditched the swaybar...again.
Had to use the 'no spring compressor' method, worked better than I thought it would. The FJ coils are so close together that you cant get the tool out of the coil after its assembled, tried with 2 different tools.
Guess I should have tried that with the Tacoma shock/OME2886 coils that are sitting here in the garage. Maybe I still will.
Getting some serious T4R lean on the driver side now. I did install the longer coil on the driver side.
Ride is about 100% better.
When I got done it was right at 23" axle to fender all 4 wheels.
Today after an aggressive drive, bumps, corners and some bad roads, its settling more than I would have thought it would so fast.
Driver front= 21 5/8" EDIT...wait now, it is 22"! Guess I should have parked and loaded the runner the same way as the first measurement.
Pass front= 22"
Rear=23"
Some coils info.
---------------------------------------------------------------------
Stock OEM T4R V6
Driver: 13 1/2" long, 16mm thick, 8.4lbs, 7 coils.
Passenger: 13 1/4" long, 15mm thick, 6.4lbs, 6 coils.
MOOG FJ
Driver: 14 7/8" long, 17mm thick, 15.1lbs, 10 coils.
Passenger: 14 1/4" long, 17mm thick, 15lbs, 10 coils.
Rancho coil (QuikLift)
Driver: 14 3/8" long, 17mm thick, 12.1lbs, 9 coils.
Passenger: 13 3/4" long, 17mm thick, 12lbs, 9 coils.
OME 2886
Driver: 16" long, 17.8mm thick, 13.1lbs, 10 coils.
Passenger: 15 7/8" long, 17.5mm thick, 13lbs, 10 coils.
----------------------------------------------------------------------
Cycled the suspension with out the bumps and shock.
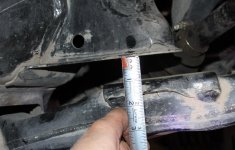
Looked like 1" at the bump and 15 3/8" hub to fender edge. UCA touching wheel-well.
Sounded like it was a hammer hit to the frame in the front or under my left foot area, thought it was my failing front suspension.
Tracked it down to the rear lower control arm, the front bolts needed snugged down, after the skids install. FIXED!...no I guess it was not.
That lead me to finally do something about the weak front shocks/coils.
Have been tip-toeing around so I don't rip the fenders off with the tires.
Put the 265/75/16r Duratracs back on for better clearance and still hits the UCA on the wheel-well with a 1/4" spacer under the Wheelers Superbump.
Put the stock bumpstops back on after doing some measuring, they give 1" of space UCA/wheel-well, before compressing and they are hard so don't mash much. Superbumps are another matter apparently. Was touching the LCA.
Stuck a set of the Moog FJ coils onto a RS999760 shock (same as the QuickLift). Ditched the swaybar...again.
Had to use the 'no spring compressor' method, worked better than I thought it would. The FJ coils are so close together that you cant get the tool out of the coil after its assembled, tried with 2 different tools.
Guess I should have tried that with the Tacoma shock/OME2886 coils that are sitting here in the garage. Maybe I still will.
Getting some serious T4R lean on the driver side now. I did install the longer coil on the driver side.
Ride is about 100% better.
When I got done it was right at 23" axle to fender all 4 wheels.
Today after an aggressive drive, bumps, corners and some bad roads, its settling more than I would have thought it would so fast.
Driver front= 21 5/8" EDIT...wait now, it is 22"! Guess I should have parked and loaded the runner the same way as the first measurement.
Pass front= 22"
Rear=23"
Some coils info.
---------------------------------------------------------------------
Stock OEM T4R V6
Driver: 13 1/2" long, 16mm thick, 8.4lbs, 7 coils.
Passenger: 13 1/4" long, 15mm thick, 6.4lbs, 6 coils.
MOOG FJ
Driver: 14 7/8" long, 17mm thick, 15.1lbs, 10 coils.
Passenger: 14 1/4" long, 17mm thick, 15lbs, 10 coils.
Rancho coil (QuikLift)
Driver: 14 3/8" long, 17mm thick, 12.1lbs, 9 coils.
Passenger: 13 3/4" long, 17mm thick, 12lbs, 9 coils.
OME 2886
Driver: 16" long, 17.8mm thick, 13.1lbs, 10 coils.
Passenger: 15 7/8" long, 17.5mm thick, 13lbs, 10 coils.
----------------------------------------------------------------------
Cycled the suspension with out the bumps and shock.
Looked like 1" at the bump and 15 3/8" hub to fender edge. UCA touching wheel-well.
Attachments
Last edited:
Great build
just got my wife's 2003 T4R. 268,000 mi. Great for all those miles very little repair work. I'm going exactly where you are now with this 4RNR. Wanna get 32" - 34" wheels under it. Use for hunting in SD ND Mont. Replaced seats with Lexus seats, upgraded radio to include phone and Sirius. Replacing carpet with vinyl this weekend. Then new shocks with lift, paint matt black where the clear coat has cooked off I (in AZ - 108 today), plate bumper. Hope it looks as good as yours when done.
just got my wife's 2003 T4R. 268,000 mi. Great for all those miles very little repair work. I'm going exactly where you are now with this 4RNR. Wanna get 32" - 34" wheels under it. Use for hunting in SD ND Mont. Replaced seats with Lexus seats, upgraded radio to include phone and Sirius. Replacing carpet with vinyl this weekend. Then new shocks with lift, paint matt black where the clear coat has cooked off I (in AZ - 108 today), plate bumper. Hope it looks as good as yours when done.
BackOff
New member
just got my wife's 2003 T4R. 268,000 mi. Great for all those miles very little repair work. I'm going exactly where you are now with this 4RNR. Wanna get 32" - 34" wheels under it. Use for hunting in SD ND Mont. Replaced seats with Lexus seats, upgraded radio to include phone and Sirius. Replacing carpet with vinyl this weekend. Then new shocks with lift, paint matt black where the clear coat has cooked off I (in AZ - 108 today), plate bumper. Hope it looks as good as yours when done.
Thanks
Good luck on your T4R build, you know were to come if you have any questions.
I did mean T4R.org, BTW, not like I have a clue...
Last edited:
BackOff
New member
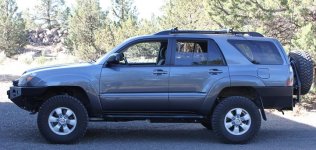
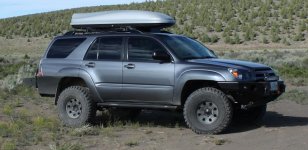
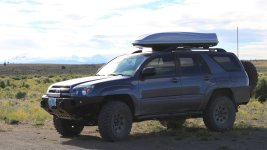
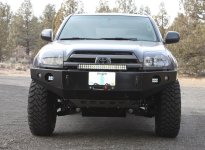
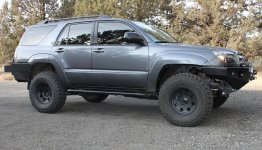
FJC Moog front coils with the 285s.
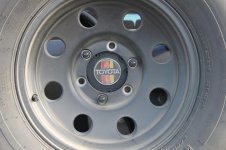
and...these are American Racing 16x8 rims with a standard backspacing, 4.5 I think.
Tinted the front windows too. Not me, some guy with 30 years experience. Tint of Class...BTW. Really nice. I actually destroyed a sheet that I attempted...don't ask.
Edit...was a Shadow32 on the front...not quite the same as the rear OEM tint, just a tiny bit darker, I think it was the edge of 'legal' here in Oregon.
and...these are American Racing 16x8 rims with a standard backspacing, 4.5 I think.
Tinted the front windows too. Not me, some guy with 30 years experience. Tint of Class...BTW. Really nice. I actually destroyed a sheet that I attempted...don't ask.
Edit...was a Shadow32 on the front...not quite the same as the rear OEM tint, just a tiny bit darker, I think it was the edge of 'legal' here in Oregon.
Attachments
Last edited:
BackOff
New member
Replaced the rear diff fluid, almost destroyed the plug with a 12 point socket.
Some reading on T4R.org...use a 6 point...that did it.
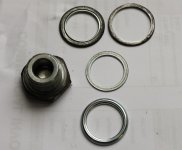
Got new washers at the dealer...not the same as was on it... 2 washers on the fill plug? Different size washers from the dealer.
Top fill.
Middle drain.
bottom new/both.
Some reading on T4R.org...use a 6 point...that did it.
Got new washers at the dealer...not the same as was on it... 2 washers on the fill plug? Different size washers from the dealer.
Top fill.
Middle drain.
bottom new/both.
Attachments
BackOff
New member
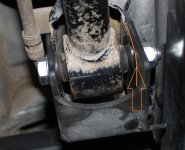
Wanted to mention a small issue I was having with the RCI rear upper control arm link skid, what a mouthful.
The bolt came loose 3 times, driver side.
Looking at it closely I noticed that the red Loctite never dried and looked like it might have been acting as a lubricant...super old stuff.
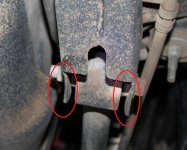
Also the RCI skid was made to fit the bottom rear size of the mount at the frame, it is flared slightly outward. When you snug down the bolt it pinches the skid, like this.../ \.
I bent the flared section on the frame mount flat. Red circles in first pic. Its just a small triangular section. Then added a large flat washer to the inside, between skid and frame mount. Orange arrow/area in 2nd pic. Then used some new locktite. 500miles still good
I think that fixed it.
Now I am getting, have had for 9-12 months, this weird bouncing like sensation at speed 50+ it seems worse. Feels like a wheel weight or bent rim.
Rotated tires, put the old stock wheels with the Duratracs back on, tried different wheels, replaced the shocks...still bouncing.
So what next?
Bent something? Drive line, axle or what.
Oh yeah...Damn that PhotoBucket. I deleted my account, have to rebuild thread...GAH!:50cal:
The bolt came loose 3 times, driver side.
Looking at it closely I noticed that the red Loctite never dried and looked like it might have been acting as a lubricant...super old stuff.
Also the RCI skid was made to fit the bottom rear size of the mount at the frame, it is flared slightly outward. When you snug down the bolt it pinches the skid, like this.../ \.
I bent the flared section on the frame mount flat. Red circles in first pic. Its just a small triangular section. Then added a large flat washer to the inside, between skid and frame mount. Orange arrow/area in 2nd pic. Then used some new locktite. 500miles still good
I think that fixed it.
Now I am getting, have had for 9-12 months, this weird bouncing like sensation at speed 50+ it seems worse. Feels like a wheel weight or bent rim.
Rotated tires, put the old stock wheels with the Duratracs back on, tried different wheels, replaced the shocks...still bouncing.
So what next?
Bent something? Drive line, axle or what.
Oh yeah...Damn that PhotoBucket. I deleted my account, have to rebuild thread...GAH!:50cal:
Attachments
Last edited:

flipflopnfly
New member
Wanted to mention, keep forgetting.
Poking my fingers into the frame, working under the T4R...I have a good 1/2" of mud/dirt/dust in the frame rails...EEEEKKK!
Noticed this drain-snake thing hanging on the wall. For home drains.
Poked it into the frame rails any where I could, has a jet out the front and spinning head jets... looked like 10lbs. of dirt came out!
Had the same when I bought the 2008. Rails were packed up to the access holes, front to rear. I wedged a spray nozzle into various places, left it running while I had a beer, then another, and another. It took a looong time to get it all flushed out.
BackOff
New member
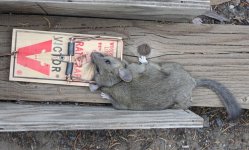
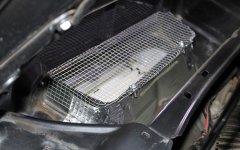
...this is why you need to do that 'anti-rodent screen'.
That rat trap is 7 inches long!
These things are a serious pain in the ass.
Forget about having a garden.
These traps, with a half of a peanut wedged into the trigger pan work pretty good. Drill a hole in the middle and secure the trap with a nail or screw, helps contain the energy of the spring.
If that's to much for anyone I will remove it.
That rat trap is 7 inches long!
These things are a serious pain in the ass.
Forget about having a garden.
These traps, with a half of a peanut wedged into the trigger pan work pretty good. Drill a hole in the middle and secure the trap with a nail or screw, helps contain the energy of the spring.
If that's to much for anyone I will remove it.
Attachments
BackOff
New member
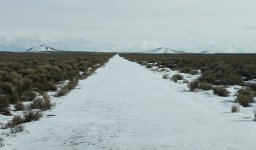
Fixing that PhotoBucket thing...
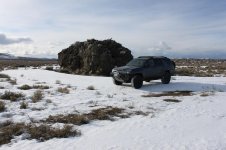
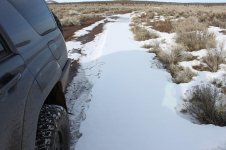
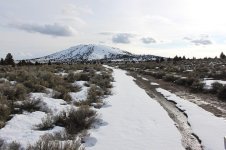
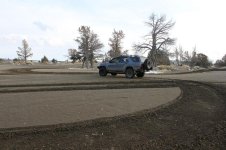
Came across a few OK pictures...after I complain about too many peeps in the world in the first post...
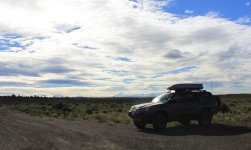
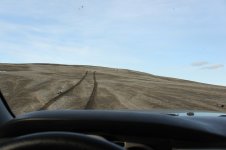
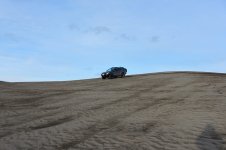
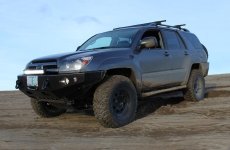
Christmas Valley run in February...first tracks.
Came across a few OK pictures...after I complain about too many peeps in the world in the first post...
Christmas Valley run in February...first tracks.
Attachments

Doozi
New member
Now I need to add this DIY 1/2" body lift.
Chopped out of 1/2" UHMW plastic. I need a little bit more bumpers to body space.
How much bumper-to-body space did you have? I'm considering doing this.
Thanks,
~Doozi
BackOff
New member
How much bumper-to-body space did you have? I'm considering doing this.
Thanks,
~Doozi
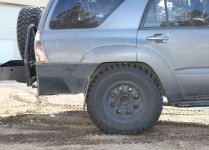
This is 3/8"...until you flex it. Then it hits the body.
Attachments
Last edited:
Doozi
New member
This is 3/8"...until you flex it. Then it hits the body.
Did you get your body lift installed yet? I'm curious to see what the bumper gaps look like.
BackOff
New member
Did you get your body lift installed yet? I'm curious to see what the bumper gaps look like.
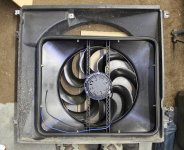
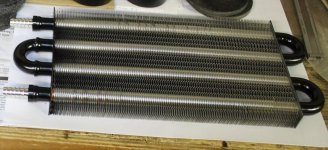
Not yet, had a couple minor fails, that electric fan and trans cooler.
Kinda got discouraged I guess and was procrastinating.
Dislocated shoulder last Sunday, wow does that ever suck.
I will get a pic up as soon as I get it done maybe a week or 2.
Bought a way to small E-fan BlackMagic 188 and the cooler came seriously bare-bones,was pictured with a nice little rock guard/mount...guess that was extra. Having second thoughts on that E-fan after seeing another members fan blow up and kill his radiator.
Attachments
BackOff
New member
4 months later...
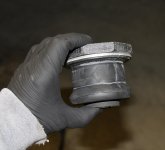
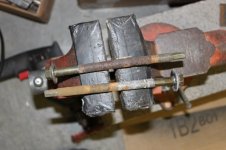
1/2" DIY body-lift installed fairly smooth.
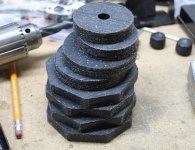
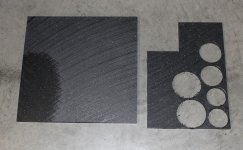
$20 for the UHMW plastic with some to spare. That's 2 sheets in the pic for reference.
Hole saw was making so much heat and friction that I ended up just cutting 4 of the larger ones into octagonal shape with a hand saw.
31/64" drill bit was perfect for the bolt holes.
First real rust I have found on this 4runner, driver side mount at the rear seat area. #3 mounts. Driver side bolt/sleeve and frame mount rusted. Passenger side was full of the nastiest black water...YUK! SMELL BAD
That rubber the body mounts are made from really stinks bad like weird funky locker-room BO and old cheese burgers...gross.
I would like to replace most of the sleeves and a couple bolts but the cost is stupid for these body mount parts, I just cleaned it all up painted the worst of it and reused all the parts. Light coat of grease is all it got.
The front mounts are all chewed up at the bolt hole and will have to replace them in the near future.
I just did this for clearance issues so far so good.
Compared to some of you guys this is probably laughable as far as rust is concerned. I feel lucky.
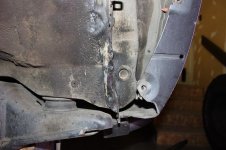
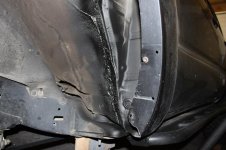
Fixed my botched body seam 'fix' I had done when I installed these 285's, was not enough and I was getting some speed siping going at full compression. Cutting the tires. It looks like I may have split the driver side seam open on the first sledge hammer attack. I tried to squeeze it all back together using 3 Vise-Grip pliers, then fold it flat starting it with the 3 pliers attached, actually worked pretty good.
Pulled the fender liners too just for good measure.
1/2" DIY body-lift installed fairly smooth.
$20 for the UHMW plastic with some to spare. That's 2 sheets in the pic for reference.
Hole saw was making so much heat and friction that I ended up just cutting 4 of the larger ones into octagonal shape with a hand saw.
31/64" drill bit was perfect for the bolt holes.
First real rust I have found on this 4runner, driver side mount at the rear seat area. #3 mounts. Driver side bolt/sleeve and frame mount rusted. Passenger side was full of the nastiest black water...YUK! SMELL BAD
That rubber the body mounts are made from really stinks bad like weird funky locker-room BO and old cheese burgers...gross.
I would like to replace most of the sleeves and a couple bolts but the cost is stupid for these body mount parts, I just cleaned it all up painted the worst of it and reused all the parts. Light coat of grease is all it got.
The front mounts are all chewed up at the bolt hole and will have to replace them in the near future.
I just did this for clearance issues so far so good.
Compared to some of you guys this is probably laughable as far as rust is concerned. I feel lucky.
Fixed my botched body seam 'fix' I had done when I installed these 285's, was not enough and I was getting some speed siping going at full compression. Cutting the tires. It looks like I may have split the driver side seam open on the first sledge hammer attack. I tried to squeeze it all back together using 3 Vise-Grip pliers, then fold it flat starting it with the 3 pliers attached, actually worked pretty good.
Pulled the fender liners too just for good measure.
Attachments
BackOff
New member
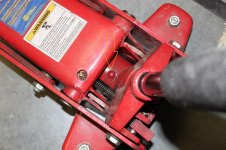
My floor-jack has not been working very good, pump and pump and pump forever to get it to go up an inch.
Discovered there is a little rubber plug on the top, looks like a big rivet like thing, pop that out and fill with jack oil. WOW does that ever work better!
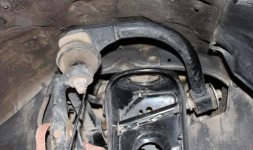
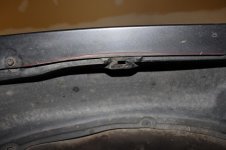
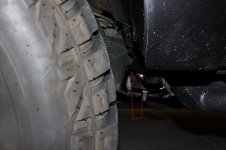
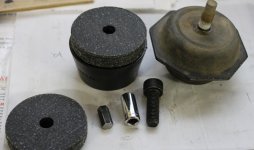
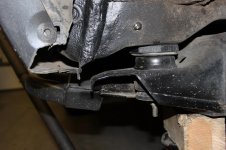
More trimming, hitting the inner edge of the fender with the tire (cut at the red line/before liner pull/trim)...did the body mount chop...finally, and added some poly bump-stops for a 2nd gen, with 1/2" spacer. I was flattening the superbumps and the OEM bumps are very firm, thought I would try something different.
Discovered there is a little rubber plug on the top, looks like a big rivet like thing, pop that out and fill with jack oil. WOW does that ever work better!
More trimming, hitting the inner edge of the fender with the tire (cut at the red line/before liner pull/trim)...did the body mount chop...finally, and added some poly bump-stops for a 2nd gen, with 1/2" spacer. I was flattening the superbumps and the OEM bumps are very firm, thought I would try something different.
Attachments
Last edited:

DeathMetalTony
New member
Nice Build . . .
BackOff
New member
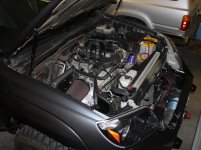
Shake down run was beautiful...NO RUB! Finally. Whoooo Hooooo!
After pulling the fender liners I hit a large cow pie, the other day, was that ever a mess! No pics of that, yuck. Open range cattle grazing out here east of Bend.
Liners are going back in, I had the passenger side on for the speed run and it didn't hit so I guess that extra 1/2" BL and the bump stops did the trick . BTW no other modifications where necessary after the 1/2" BL.
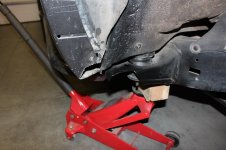
All the discussion here about the safety feature of the front body mounts, ie: keeping you safe from the wheel assembly being driving into the cab in the event of an accident, I tried to remove as little as I had to. Grinder with a cutoff disc made short work of it, touched it up with the grinder disc to get any sharp edges.
Am thinking the sliders are going to help in that event of an accident too.
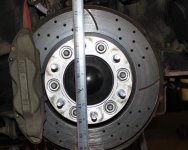
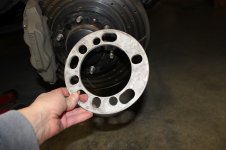
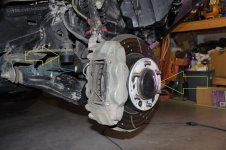
Yes I am using 1/4" wheel spacers on the front, to clear the caliper, works just dandy. Band clamp for the leaking cv boots...need to address that issue in the near future with a rebuild I am thinking...not leaking any more.
After pulling the fender liners I hit a large cow pie, the other day, was that ever a mess! No pics of that, yuck. Open range cattle grazing out here east of Bend.
Liners are going back in, I had the passenger side on for the speed run and it didn't hit so I guess that extra 1/2" BL and the bump stops did the trick . BTW no other modifications where necessary after the 1/2" BL.
All the discussion here about the safety feature of the front body mounts, ie: keeping you safe from the wheel assembly being driving into the cab in the event of an accident, I tried to remove as little as I had to. Grinder with a cutoff disc made short work of it, touched it up with the grinder disc to get any sharp edges.
Am thinking the sliders are going to help in that event of an accident too.
Yes I am using 1/4" wheel spacers on the front, to clear the caliper, works just dandy. Band clamp for the leaking cv boots...need to address that issue in the near future with a rebuild I am thinking...not leaking any more.
Attachments
Last edited:
Similar threads
- Replies
- 1
- Views
- 5K


- Replies
- 2
- Views
- 9K


