Black out Chrome logos...

SShink

New member
I am going to black out the Chrome logos front/back on my 2013 Trail...
I will probably lightly bead blast. prime with an etching primer and paint.

My question is, how hard is it (how much of a pain in the arse) to remove the front/rear emblems and is there anything I need to be extra cautions about breaking any of those infamous Toyota clips?

Thanks,
SDS
 
Register to hide this ad
I am going to black out the Chrome logos front/back on my 2013 Trail...
I will probably lightly bead blast. prime with an etching primer and paint.

My question is, how hard is it (how much of a pain in the arse) to remove the front/rear emblems and is there anything I need to be extra cautions about breaking any of those infamous Toyota clips?

Thanks,
SDS

The front badge is simple...open hood, remove cover on top of radiator, reach in and squeeze the tabs. It is not glued.

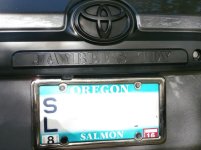
The rear...I ended up using an old credit card to slowly lift it away from the hatch handle. It was glued on pretty good, but yours being new, should peel off fairly easy. The letters: 4 R U N N E R should be easily removed using the credit card method.

One thing I will warn you about concerning "black out" of the badges...make sure that they are well scuffed (sanded). I thought I had done a good job on mine..had them painted at a Body/Paint Shop, when I tried removing them from the masked surface, the edges of the black paint chipped off. They were returned to my "Body/Paint Guy" (neighbor) and he really blasted them before re-painting with epoxy base. They are great looking now. Even did the small logos on the wheel hubs.
 
a heat gun or hot blow drier will work wonders for taking off the back logos. if you plan to use a heat gun, make sure you do not have it set too high, otherwise you can melt the other trim pieces :flamethrwoer2:
 
Plastidip and a toothpick. You don't have to remove the emblem on the back, just spray it, outline the emblem with a toothpick, peel off the rest.
 
The front badge is simple...open hood, remove cover on top of radiator, reach in and squeeze the tabs. It is not glued.

The rear...I ended up using an old credit card to slowly lift it away from the hatch handle. It was glued on pretty good, but yours being new, should peel off fairly easy. The letters: 4 R U N N E R should be easily removed using the credit card method.

One thing I will warn you about concerning "black out" of the badges...make sure that they are well scuffed (sanded). I thought I had done a good job on mine..had them painted at a Body/Paint Shop, when I tried removing them from the masked surface, the edges of the black paint chipped off. They were returned to my "Body/Paint Guy" (neighbor) and he really blasted them before re-painting with epoxy base. They are great looking now. Even did the small logos on the wheel hubs.
I am tracking and like your permanent/robust methodology...so is the adhesive a foam tape like 3M VHB, or is it actually glue? What did you do to re-attach/re-align the rear emblems?
 
I am tracking and like your permanent/robust methodology...so is the adhesive a foam tape like 3M VHB, or is it actually glue? What did you do to re-attach/re-align the rear emblems?

OEM is foam tape. I picked up a roll of 3m vehicle trip tape and cut it to fit. There are dimples in the other plastic trim pieces and corresponding protrusions on the letters.
 
Last edited:
freshly removed letters
IMG_20120730_160830.jpg~original


applying 3m tape
IMG_20120731_191345.jpg~original
 
OEM is foam tape. I picked up a roll of 3m vehicle trip tape and cut it to fit. There are dimples in the other plastic trim pieces and corresponding protrusions on the letters.

I did not have any "protrusions" on my letters, just 3M tape.
See the attached PDF for dimensioned placement of the "4 R U N N E R" letters.
 

Attachments

another vote for plasti-dip

Plasti-Dip worked wonders for mine.

Worked good on mine. I was leary about driving through a full service carwash but everyting stayed put. I just plasti-dipped the entire logo. I wanted it all black.

I still have to do the front emblem so I was glad to see your post about removing it. Rain in forecast for the weekend so this project will probably be delayed again.
 
PDF = way over the top...Excellent! I am an Industrial Designer and really appreciate this level of detail.
I am actually considering carefully masking the entire area around the rear emblems either with masking tape or liquid mask. In that scenario, I'd use self etching primer (which sticks like mad to vacuum metalizing) and then SEM black trim paint over the top.
Being of the "factory is always best" school, taking the emblems off seems to be opening a can of worms.

Thanks!
 
PDF = way over the top...Excellent! I am an Industrial Designer and really appreciate this level of detail.
I am actually considering carefully masking the entire area around the rear emblems either with masking tape or liquid mask. In that scenario, I'd use self etching primer (which sticks like mad to vacuum metalizing) and then SEM black trim paint over the top.
Being of the "factory is always best" school, taking the emblems off seems to be opening a can of worms.

Thanks!

Well,
I removed the "4Runner" because I am replacing it with a custom billet (waiting for warm enough weather to install). But, I wanted to black out the "4Runner" logo for re-installation on the glovebox door. Still waiting for better weather but if I can figure out how to remove the glovebox door, I can apply that in the warmth of the house. I made a "story board" with the width of the letters and the spec'd spacing. I just need to square and locate on the door, then carefully apply the letters per the guide marks. Will post pics when done.

Best of luck with your project. :thumb3:

Turns out, decided against applying to the glove box so....
Here's the pics:

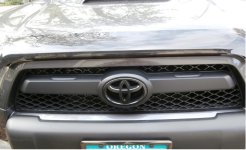
Front Logo Blacked-Out
Logo_Front.jpg

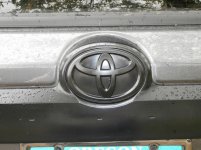
Rear Logo Blacked-Out
Logo_Rear.jpg

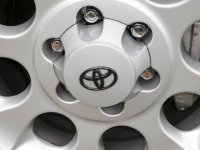
Black Wheel Hub Logos
Wheel Hub.jpg

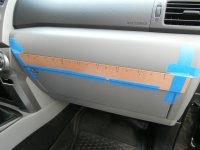
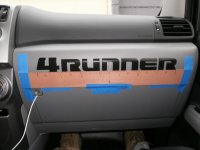
Getting The Dash Ready
Dash_01.jpg

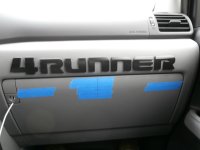
Letters Lined Up With Spacing Template
Dash_02.jpg

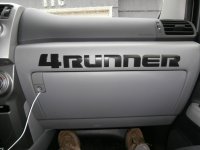
Making Sure They Are Centered Above The Glove box
Dash_03.jpg

Final Shot...I'm Luvin' It
Dash_04.jpg
 

Attachments

  • Logo_Front.jpg
    Logo_Front.jpg
    130.9 KB · Views: 9,198
  • Logo_Rear.jpg
    Logo_Rear.jpg
    133.4 KB · Views: 6,749
  • Wheel Hub.jpg
    Wheel Hub.jpg
    133.5 KB · Views: 6,355
  • Dash_01.jpg
    Dash_01.jpg
    143 KB · Views: 6,308
  • Dash_02.jpg
    Dash_02.jpg
    124.4 KB · Views: 8,654
  • Dash_03.jpg
    Dash_03.jpg
    127.7 KB · Views: 7,693
  • Dash_04.jpg
    Dash_04.jpg
    128.1 KB · Views: 6,633
Last edited:
Everyone has their style. I personally would never put it there, looks way out of place.

Best part is that my opinion doesn't matter, it is your truck. You might not like the way I have done things to my truck and that is ok.
 
For: SShink

I had a custom badge made by Billet Badges - billet aluminum custom emblems and badges
Owner Steve Smart was very easy to deal with.

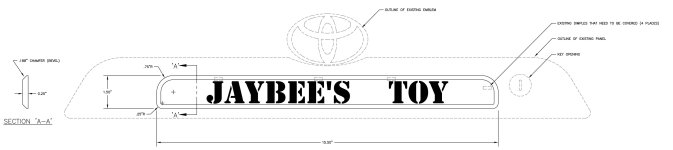
Here is a drawing that I made for production...
JayBees Toy Billet.jpg

And here is what the rendering looks like...
jaybees billet.jpg

It was designed to cover the dimples that were un-covered when the "4RUNNER" letters were removed. I did have to bend it to fit the garnish, as the area is not perfectly flat.
Bent Badge_02.jpg

As I said earlier, it is too cold here in the PNW to apply the badge. Need to wait for some 70 degree weather.

Will post pics of the install then.
 

Attachments

  • JayBees Toy Billet.jpg
    JayBees Toy Billet.jpg
    126.4 KB · Views: 1,457
  • jaybees billet.jpg
    jaybees billet.jpg
    112.6 KB · Views: 1,384
  • Bent Badge_02.jpg
    Bent Badge_02.jpg
    122 KB · Views: 1,425
Last edited:
Remove entire black piece?

Can you remove interior rear door panel and the remove the entire black piece from the hatch on a 2013 Trail Edition? If it's possible (and not a disaster pain in the arse) I might take the whole thing off, bead blast it and just paint everything (logos, etc) with SEM trim black. That would eliminate the need to remove the letters and the emblem.
 
Finally Installed

My Custom Billet installed. Had to wait till the weather got warmer.

JayBees Toy.jpg
 

Attachments

  • JayBees Toy.jpg
    JayBees Toy.jpg
    131.3 KB · Views: 1,479

Members online

Forum statistics

Threads
278,307
Messages
3,554,056
Members
248,016
Latest member
Advally Service

Trending content

Back
Top