
You are using an out of date browser. It may not display this or other websites correctly.
You should upgrade or use an alternative browser.
You should upgrade or use an alternative browser.
Black798's 98 limited build thread
- Thread starter Black798
- Start date

Black798
New member
Damn that stuff is pricey. What I did was once I had the weld points on the frame marked I ground just the little are I would need and I also primed the backside of the plates with ace rust stop. After I welded them on I sprayed the weld with some flat black spray paint. Hopefully the spray paint finish holds up alright on the frame and sliders. I was originally going to bed liner the sliders but figured that it would be kinda hard to touch up once they get drug across some rocks.
Black798
New member
Swaybar End Links
Well tonight I decided to start working on the rear suspension to make it accommodate the lift sense I was waiting on parts for the limit straps. So after I installed the new OME 906 coils I could tell I was getting less stuff and droop than stock. At first I figured oh its the shocks, well to test that I disconnected the lower shock mount on both sides and tested the flex. It improved but was still was off of stock numbers by almost an inch. But after looking I could tell the swaybar links were binding up and limiting it. So tonight I extended them by about half an inch. I determined that number by seeing where the swaybar sat level at ride height. It was a pretty easy process of remove the links cut and sleeve them so they were slightly longer. It took about an hour and the hardest part was honestly getting the links off the bar. They arent perfect but they cost me nothing but time and should work untill I have the money to get a set of discos from MStudt. To fix the shock situation I am looking at getting a set of Rancho RS5000x shocks fitted for a stock fourth gen because the fourth gen shocks are almost 3 inches longer
Before
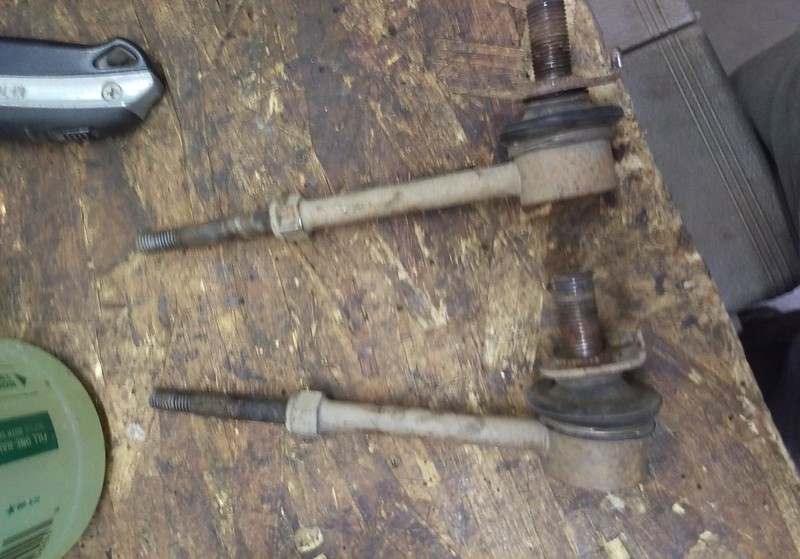 IMAG0205 by Phoenix Black, on Flickr
After
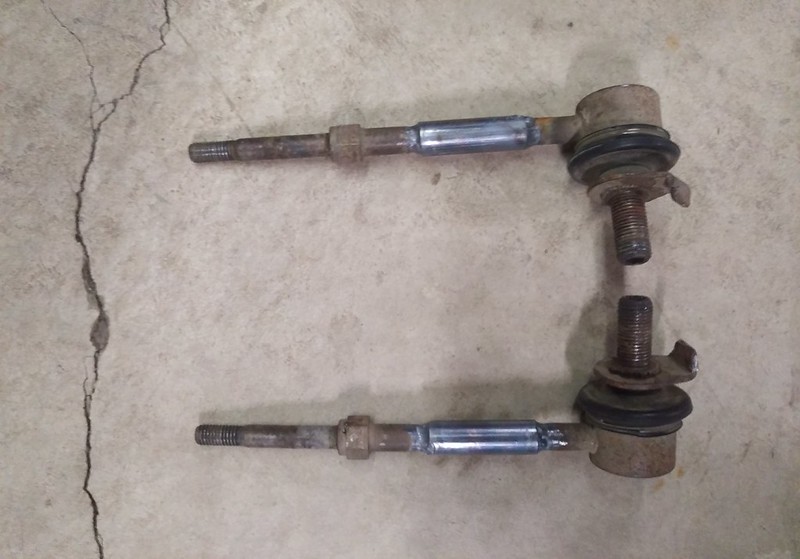 IMAG0208 by Phoenix Black, on Flickr
EDIT: the rear sway bar has since been removed for additional flex
Tomorrows to do list is:
Install the links, finish painting sliders, install limit straps in the front.
Well tonight I decided to start working on the rear suspension to make it accommodate the lift sense I was waiting on parts for the limit straps. So after I installed the new OME 906 coils I could tell I was getting less stuff and droop than stock. At first I figured oh its the shocks, well to test that I disconnected the lower shock mount on both sides and tested the flex. It improved but was still was off of stock numbers by almost an inch. But after looking I could tell the swaybar links were binding up and limiting it. So tonight I extended them by about half an inch. I determined that number by seeing where the swaybar sat level at ride height. It was a pretty easy process of remove the links cut and sleeve them so they were slightly longer. It took about an hour and the hardest part was honestly getting the links off the bar. They arent perfect but they cost me nothing but time and should work untill I have the money to get a set of discos from MStudt. To fix the shock situation I am looking at getting a set of Rancho RS5000x shocks fitted for a stock fourth gen because the fourth gen shocks are almost 3 inches longer
Before
IMAG0205 by Phoenix Black, on FlickrAfter
IMAG0208 by Phoenix Black, on FlickrEDIT: the rear sway bar has since been removed for additional flex
Tomorrows to do list is:
Install the links, finish painting sliders, install limit straps in the front.
Last edited:
Black798
New member
Finishing up suspension
Got off to a good start this morning by painting and installing the extended sway bar links. I then disconnected the shocks to go test the flex and found I gained two inches of droop. It is now enough that at full droop the rear coil will get loose in the perch. I also took measurments and determined that a stock 4th gen shock will work perfect for the rear to allow for maximum flex so those will be getting ordered soon.
Full droop
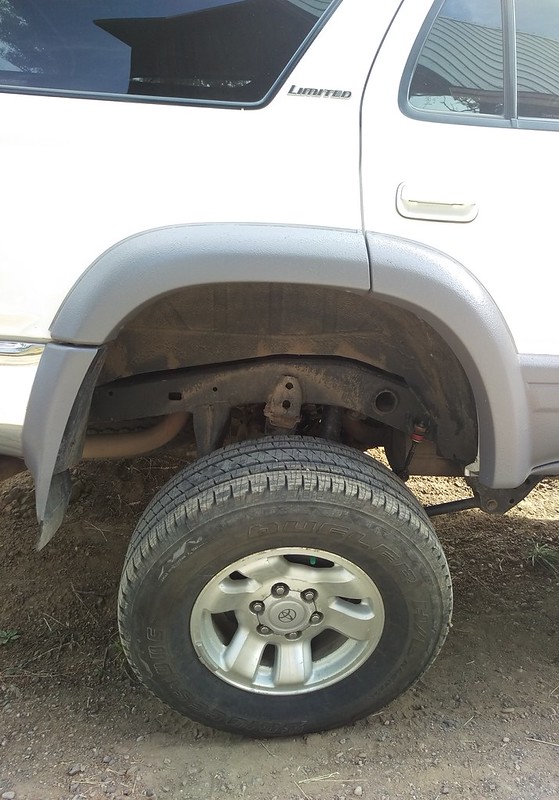 IMAG0210 by Phoenix Black, on Flickr
Next up on the list was to square away the front suspension. So I took to installing the limit straps. It was a pretty straightforward job and I think it was successful but will have to do some more testing to be sure. By limiting the suspension to a max of 24 inches (hub to fender) of droop vs the 25 it had before I was able to make the max cv angle 16 vs 27 degrees. I also was able to test it out and didnt break any axles. The only complaint I have is that I wish I had of gone with a 9 inch strap vs a 10 inch. This is just because it would allow for more adjust ability sense right now I am at the max adjustment so I will probably change those out sometime depending on how this works.
All the parts lined up
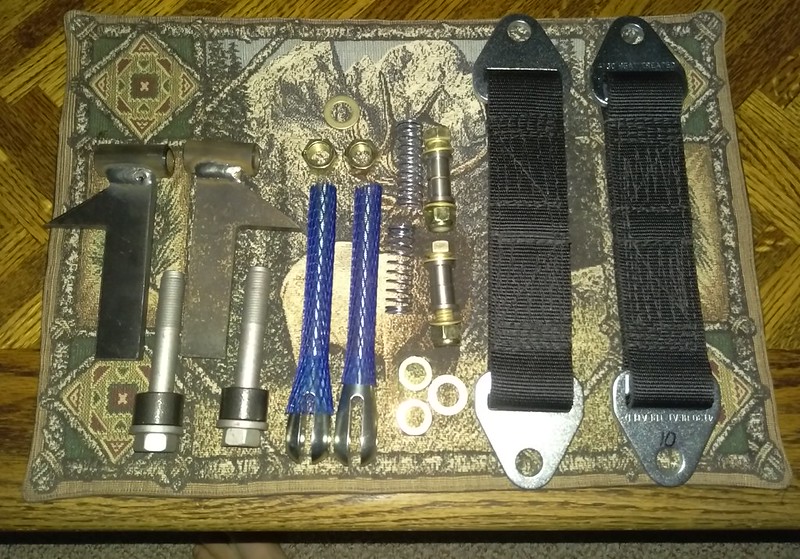 IMAG0209 by Phoenix Black, on Flickr
Definitely not my best welds but they should do
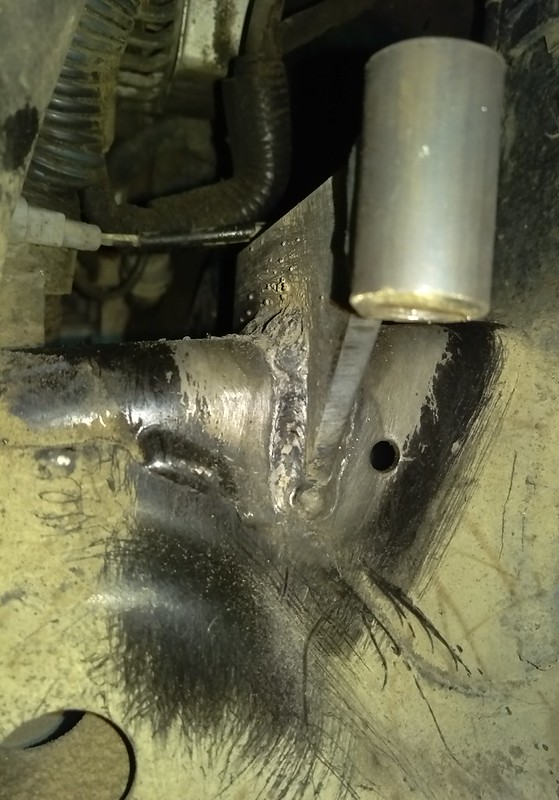 IMAG0211 by Phoenix Black, on Flickr
Overall setup ( the strap is actually at a much smaller angle than it looks like)
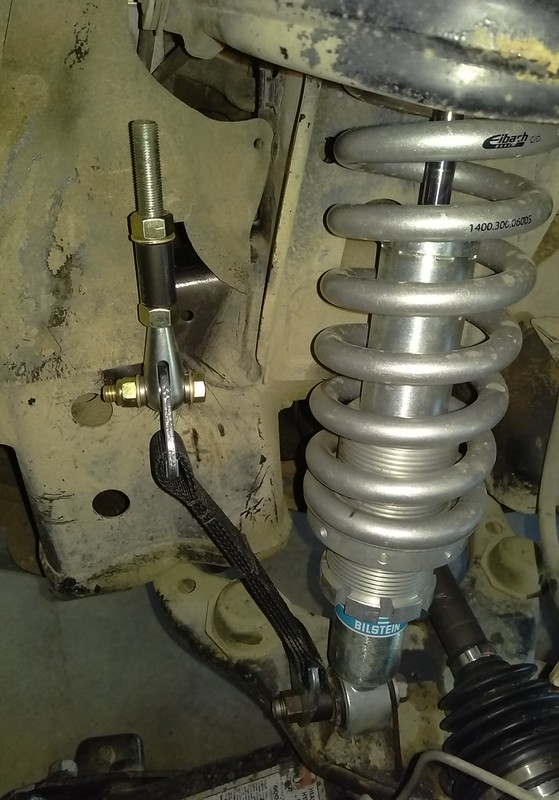 IMAG0213 by Phoenix Black, on Flickr]
Got off to a good start this morning by painting and installing the extended sway bar links. I then disconnected the shocks to go test the flex and found I gained two inches of droop. It is now enough that at full droop the rear coil will get loose in the perch. I also took measurments and determined that a stock 4th gen shock will work perfect for the rear to allow for maximum flex so those will be getting ordered soon.
Full droop
IMAG0210 by Phoenix Black, on FlickrNext up on the list was to square away the front suspension. So I took to installing the limit straps. It was a pretty straightforward job and I think it was successful but will have to do some more testing to be sure. By limiting the suspension to a max of 24 inches (hub to fender) of droop vs the 25 it had before I was able to make the max cv angle 16 vs 27 degrees. I also was able to test it out and didnt break any axles. The only complaint I have is that I wish I had of gone with a 9 inch strap vs a 10 inch. This is just because it would allow for more adjust ability sense right now I am at the max adjustment so I will probably change those out sometime depending on how this works.
All the parts lined up
IMAG0209 by Phoenix Black, on FlickrDefinitely not my best welds but they should do
IMAG0211 by Phoenix Black, on FlickrOverall setup ( the strap is actually at a much smaller angle than it looks like)
IMAG0213 by Phoenix Black, on Flickr]
Last edited:
Black798
New member
Sliders finally done
Last thing I wanted to get done today was finishing the sliders and getting them where they belong. After the first round of painting with ace satin black I decided they would need to be repainted. The finish was so soft that I could scrape it off with my finger nail. So I sanded them back to bare metal and put down two coats of Rustoleum hammered black. This stuff is hands down the best paint Ive ever used. It drys fast, looks like powdercoat, has a really hard finish, and covers really well. I was able to do two coats on both sliders plus the limit strap mounts with 1 can and I still have some left. So anyway here is the final fit and finish.
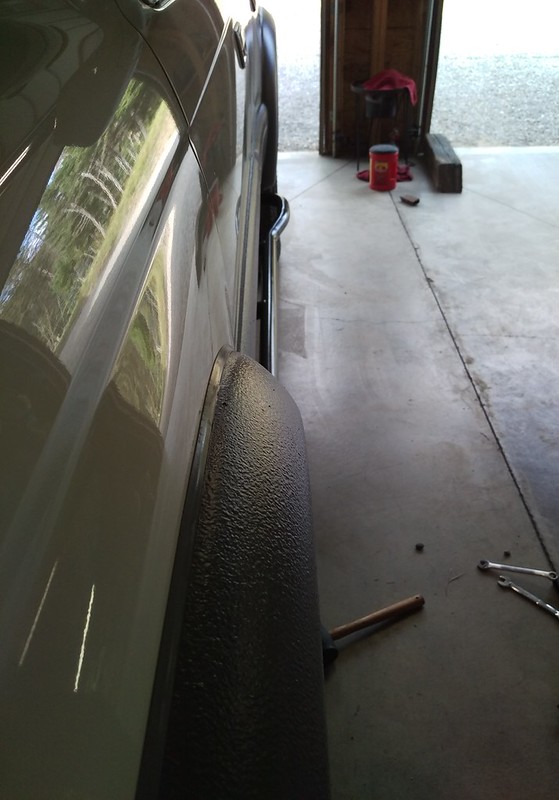 IMAG0220 by Phoenix Black, on Flickr
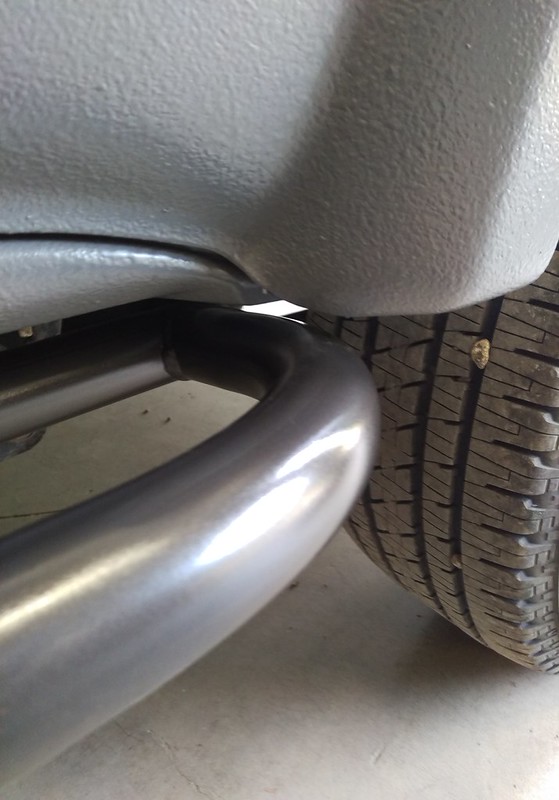 IMAG0222 by Phoenix Black, on Flickr
Last thing I wanted to get done today was finishing the sliders and getting them where they belong. After the first round of painting with ace satin black I decided they would need to be repainted. The finish was so soft that I could scrape it off with my finger nail. So I sanded them back to bare metal and put down two coats of Rustoleum hammered black. This stuff is hands down the best paint Ive ever used. It drys fast, looks like powdercoat, has a really hard finish, and covers really well. I was able to do two coats on both sliders plus the limit strap mounts with 1 can and I still have some left. So anyway here is the final fit and finish.
IMAG0220 by Phoenix Black, on FlickrIMAG0222 by Phoenix Black, on Flickr
Last edited:
Black798
New member
Cargo box remodel begins
In the interest of keeping things moving forward I've decided to start on redoing the cargo drawer system to better suite my needs. The drawers that I currently have were given to me by my uncle who originally had them in his first gen t4r. These things have seen a lot of use and look a little weathered but the design is a pretty solid one. The main problems I have with them currently is that
1) The drawers have no solid latch so they slide and bang around a lot
2) The entire frame sits too tall and takes away a lot of cargo room
3) The small pocket behind the seats is too small for really anything.
Here is the current design.
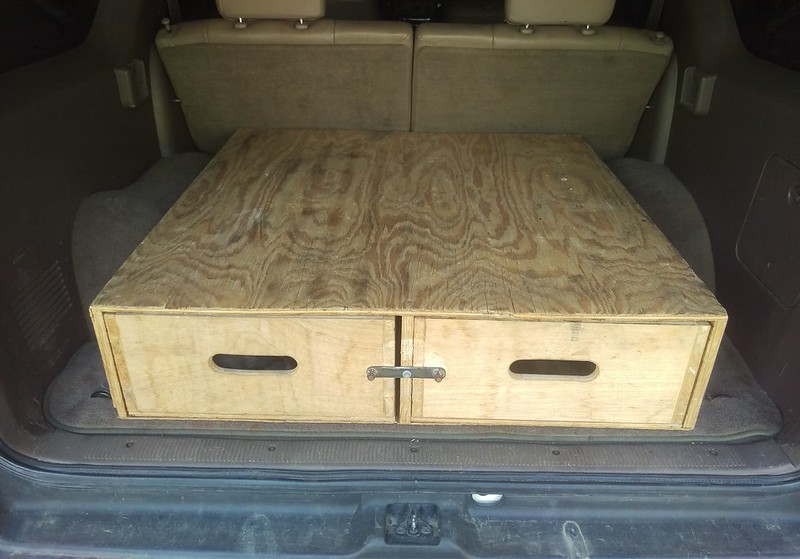 IMAG0226 by Phoenix Black, on Flickr
So what Im planning on doing is lowering the whole thing so it is flush with the top of the wheel well, adding a sliding bolt latch on each drawer, enlarging the pocket behind the rear seats so it can be used to store recovery gear and other small things, and most likely adding carpet on the top and in the drawers to improve the overall fit and finish. Unfortunatly since I have school starting this week so progress will be slow but I hope to have this done before the end of next week.
If anybody that has built one of the storage systems has any advice on things that would be nice to add to these Im open to suggestions.
Here it is all taken apart.
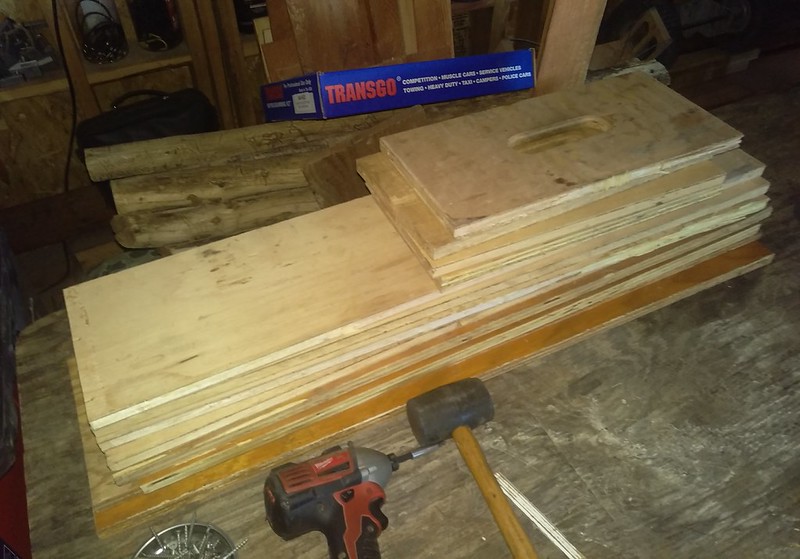 IMAG0229 by Phoenix Black, on Flickr
In the interest of keeping things moving forward I've decided to start on redoing the cargo drawer system to better suite my needs. The drawers that I currently have were given to me by my uncle who originally had them in his first gen t4r. These things have seen a lot of use and look a little weathered but the design is a pretty solid one. The main problems I have with them currently is that
1) The drawers have no solid latch so they slide and bang around a lot
2) The entire frame sits too tall and takes away a lot of cargo room
3) The small pocket behind the seats is too small for really anything.
Here is the current design.
IMAG0226 by Phoenix Black, on FlickrSo what Im planning on doing is lowering the whole thing so it is flush with the top of the wheel well, adding a sliding bolt latch on each drawer, enlarging the pocket behind the rear seats so it can be used to store recovery gear and other small things, and most likely adding carpet on the top and in the drawers to improve the overall fit and finish. Unfortunatly since I have school starting this week so progress will be slow but I hope to have this done before the end of next week.
If anybody that has built one of the storage systems has any advice on things that would be nice to add to these Im open to suggestions.
Here it is all taken apart.
IMAG0229 by Phoenix Black, on Flickr
Last edited:
Black798
New member
Checking thing off the list
Got a few things checked off this week. I sent the truck in for an alignment on on Wednesday so now it tracks nice and straight. I also got the rancho rs5000 rear shocks installed. The ones that I used are stock length off of a 4th gen. These things flex really well, good enough that at full droop the coils start to get pretty loose, so ill be extending the bump stops sometime to make sure I dont loose a spring. And despite the poor reviews from members on here I think these shocks ride really well, they're nice and firm but not harsh and they handle washboard great. I would definitely recommend them.
Before and after alignment
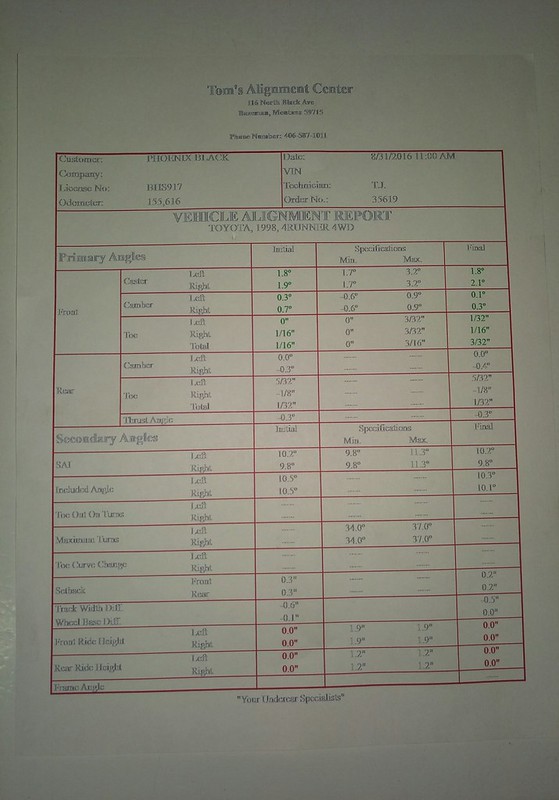 IMAG0234_1 by Phoenix Black, on Flickr
Shocks installed
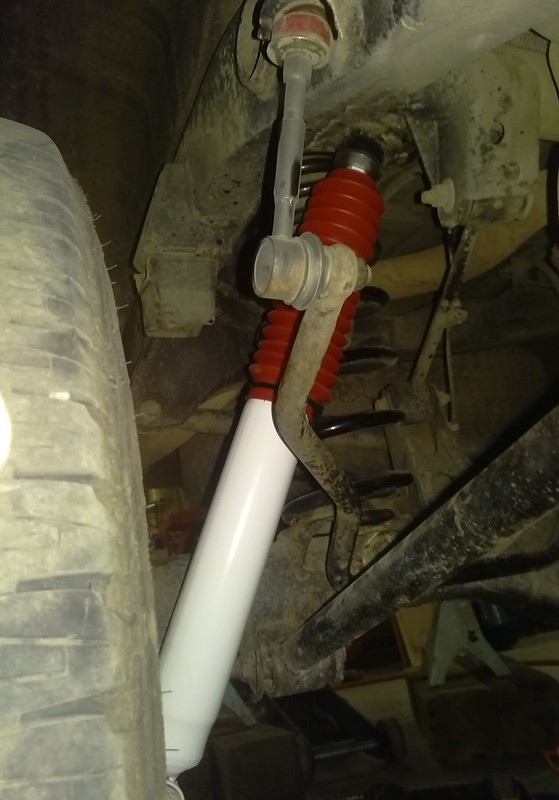 IMAG0236 by Phoenix Black, on Flickr
Got a few things checked off this week. I sent the truck in for an alignment on on Wednesday so now it tracks nice and straight. I also got the rancho rs5000 rear shocks installed. The ones that I used are stock length off of a 4th gen. These things flex really well, good enough that at full droop the coils start to get pretty loose, so ill be extending the bump stops sometime to make sure I dont loose a spring. And despite the poor reviews from members on here I think these shocks ride really well, they're nice and firm but not harsh and they handle washboard great. I would definitely recommend them.
Before and after alignment
IMAG0234_1 by Phoenix Black, on FlickrShocks installed
IMAG0236 by Phoenix Black, on Flickr
Last edited:
Black798
New member
Cargo box done and thoughts on towing
Also finished up the cargo box yesterday afternoon.
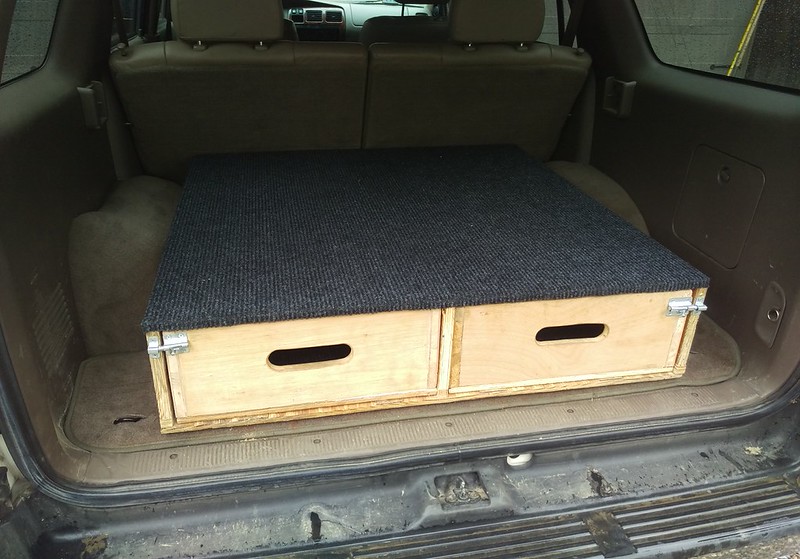 IMAG0246 by Phoenix Black, on Flickr
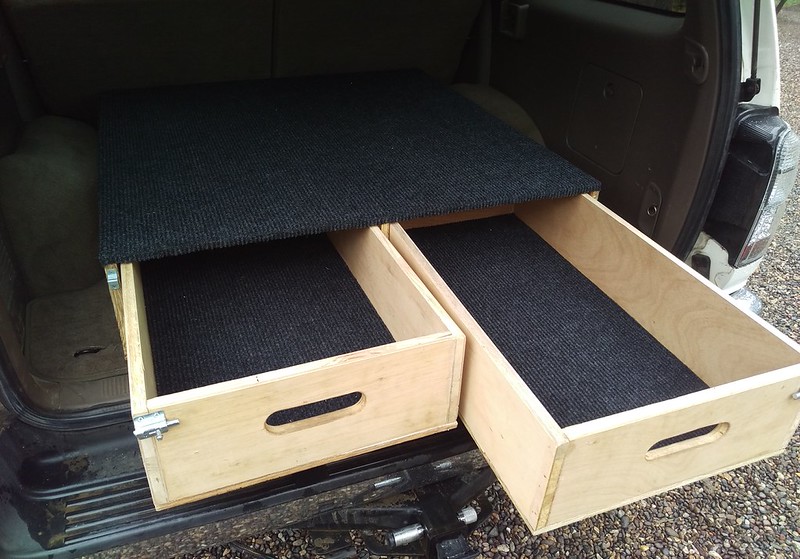 IMAG0247 by Phoenix Black, on Flickr
Last major thing this weekend was towing 3000 lbs of rock with the runner. I was pleasantly surprised with how the truck handled it, it was definitely working the motor pretty hard and I was wishing I had the supercharger. But the best part was the trans temps never got over 185. The only time they were that high was when I was pulling a 2 mile 8% grade in first gear. Otherwise they hovered around 140. So the tranny cooler is working perfect.
Also found that my k&n filter has been leaking for over a year :redbrick:
I never really liked the design of the filter because the cage just never wanted to stay on. But apparently it has been leaking around the bottom corners because the filter just doesn't fit in the box right. I checked and I do have the right one. So this pos will be going back and getting replaced by an afe.
Also finished up the cargo box yesterday afternoon.
IMAG0246 by Phoenix Black, on FlickrIMAG0247 by Phoenix Black, on FlickrLast major thing this weekend was towing 3000 lbs of rock with the runner. I was pleasantly surprised with how the truck handled it, it was definitely working the motor pretty hard and I was wishing I had the supercharger. But the best part was the trans temps never got over 185. The only time they were that high was when I was pulling a 2 mile 8% grade in first gear. Otherwise they hovered around 140. So the tranny cooler is working perfect.
Also found that my k&n filter has been leaking for over a year :redbrick:
I never really liked the design of the filter because the cage just never wanted to stay on. But apparently it has been leaking around the bottom corners because the filter just doesn't fit in the box right. I checked and I do have the right one. So this pos will be going back and getting replaced by an afe.
Last edited:
Black798
New member
The mounts and extended shock mount bolts came from sonoran steel, the straps and clevises came from poly performance.
Havent heard a peep from the sliders other than rocks bouncing off them. I think I may add a plate to the mounts to tie into the bottom of the frame though because when I lift the truck with them I can see it still flexing the frame.
Havent heard a peep from the sliders other than rocks bouncing off them. I think I may add a plate to the mounts to tie into the bottom of the frame though because when I lift the truck with them I can see it still flexing the frame.
Last edited:
Black798
New member
AFE filter arrives
So my afe air filter showed up today so that I could get rid of the k&n. Overall the afe has a much better quality fit and finish. It blocks all the light when held up to a flashlight unlike the k&n which had little holes all over in the filter media. And the best part is it actually seals properly. I highly recommend the afe drop in filter and that anyone running a k&n check to make sure they're filter is actually sealing. I currently have a fitment issue filled with k&n but I dont see it really going anywhere. But I was able to get a full refund at autozone so I really dont care at this point.
afe seal
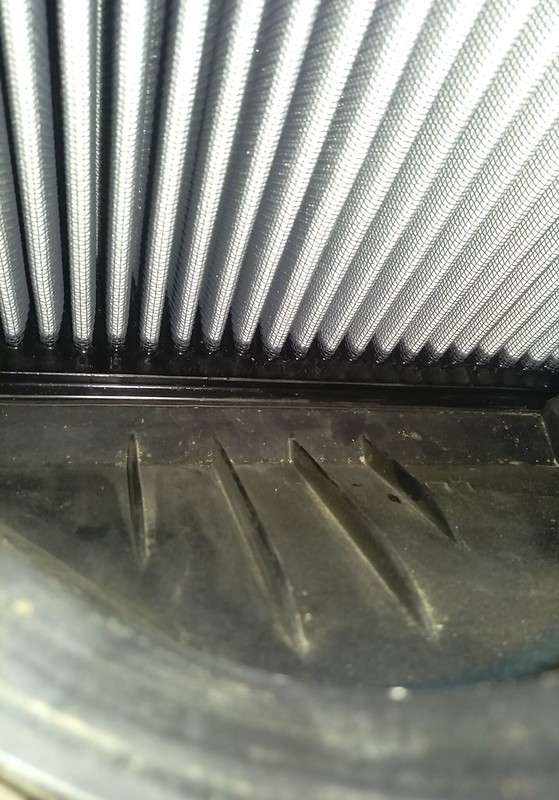 IMAG0287 by Phoenix Black, on Flickr
On the k&n that lower lip would never seat leaving about an 1/8th inch gap along the bottom for dirt to come in
Also finished modeling the lower control arm mount skids so those will be getting built soon.
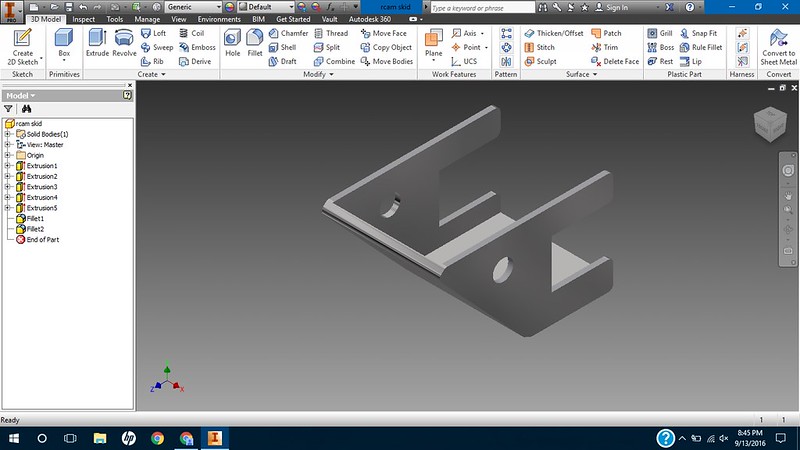 rcam skid model by Phoenix Black, on Flickr
And started looking for some new all terrains to replace the bridgestones that I have now because they are absolutely horrible in anything offroad. Right now its coming down to the BFG at ko2, general grabber at2, and the kuhmo roadventure at 51, the latter looking like the winner due to cost and the good reviews. Id love a set of bfgs but theyre just too expensive for me right now. So let me know what you think about these tires.
So my afe air filter showed up today so that I could get rid of the k&n. Overall the afe has a much better quality fit and finish. It blocks all the light when held up to a flashlight unlike the k&n which had little holes all over in the filter media. And the best part is it actually seals properly. I highly recommend the afe drop in filter and that anyone running a k&n check to make sure they're filter is actually sealing. I currently have a fitment issue filled with k&n but I dont see it really going anywhere. But I was able to get a full refund at autozone so I really dont care at this point.
afe seal
IMAG0287 by Phoenix Black, on FlickrOn the k&n that lower lip would never seat leaving about an 1/8th inch gap along the bottom for dirt to come in
Also finished modeling the lower control arm mount skids so those will be getting built soon.
rcam skid model by Phoenix Black, on FlickrAnd started looking for some new all terrains to replace the bridgestones that I have now because they are absolutely horrible in anything offroad. Right now its coming down to the BFG at ko2, general grabber at2, and the kuhmo roadventure at 51, the latter looking like the winner due to cost and the good reviews. Id love a set of bfgs but theyre just too expensive for me right now. So let me know what you think about these tires.
Last edited:

Black798
New member
Rear end finally done
So I spent this afternoon finalizing everything in the rear suspension and getting it dialed in. First up was to extend the bump stops down 2 inches to accommodate the longer rear shocks so I made some drop brackets using some 1/8th inch plate and 2x1x1/8 square tubing.
Welded together
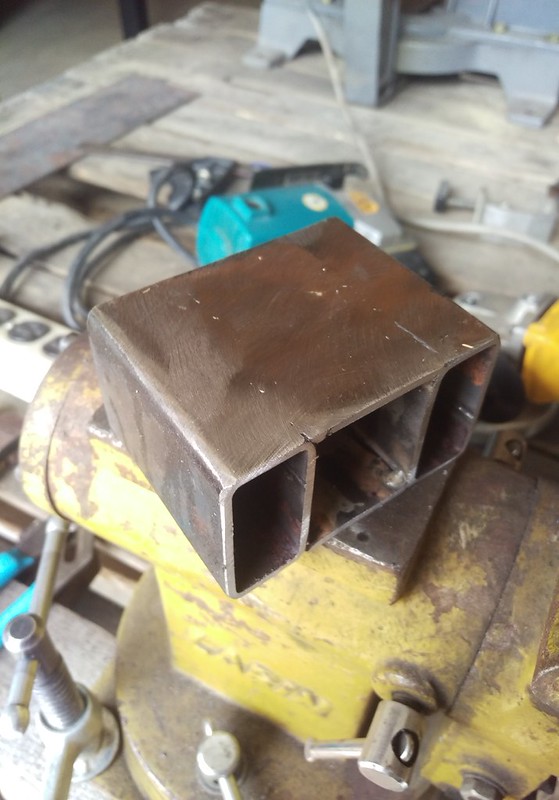 IMAG0298 by Phoenix Black, on Flickr
Ended with this
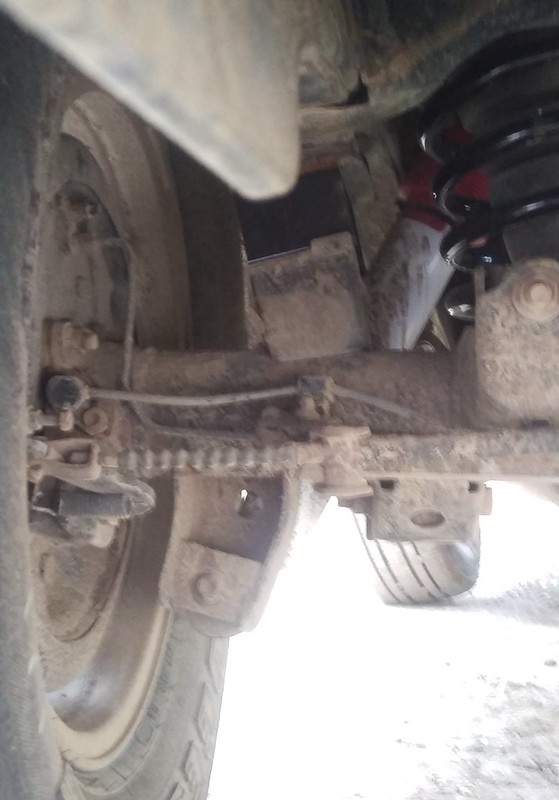 IMAG0300 by Phoenix Black, on Flickr
While I had the thing in the air I also took the time to secure the bumpstops into the upper spring perch with some wire so when the coils get loose at full flex they will reseat properly and I wont be chasing them down the trail.
Thats about everything that will be happening this week aside from maybe washing it, next week should be the diff breather or lcam skids depending on how much time I have
So I spent this afternoon finalizing everything in the rear suspension and getting it dialed in. First up was to extend the bump stops down 2 inches to accommodate the longer rear shocks so I made some drop brackets using some 1/8th inch plate and 2x1x1/8 square tubing.
Welded together
IMAG0298 by Phoenix Black, on FlickrEnded with this
IMAG0300 by Phoenix Black, on FlickrWhile I had the thing in the air I also took the time to secure the bumpstops into the upper spring perch with some wire so when the coils get loose at full flex they will reseat properly and I wont be chasing them down the trail.
Thats about everything that will be happening this week aside from maybe washing it, next week should be the diff breather or lcam skids depending on how much time I have
Last edited:
Black798
New member
Extended diff breather install
I finally decided to use the parts hat have been sitting on my workbench for the last three months and extend the rear diff breather up to the gas filler cap.
What is it and why:
The stock rear differential breather on the 4runner stubs out at the top of the axle housing, for daily driving this isn’t an issue but when crossing deep water this breather “plug” can become submerged. When this happens the rapid change in temperature causes a vacuum in the axle housing that can either suck water through the one way breather plug or the wheel bearing seals. By extending the breather plug up and replacing it with a different style of breather the axle is allowed to both “inhale” and “exhale” through the plug rather than just exhale, preventing the entry of water through the wheel bearing seals.
Parts needed and cost:
Toyota union P/N 90404-51319
Toyota Plug, Breather P/N 90930-03136
6 feet of 3/8in fuel line
8 inches of 5/8in heater hose (this is optional but I used it to insulate the breather line from rubbing)
Zip ties
Teflon tape
2 3/8in hose clamps
The two Toyota parts cost me about 17$ at the dealer and the 3/8 fuel line was 10$ at autozone. I had the rest of the things laying around from other projects. Total cost should be around 30$
Basic Procedure:
I followed this write-up so refer to this for more detail.
The basic things that need to be done are, remove the stock breather and replace it with the Union (I also wrapped the union threads with Teflon tape to provide a better seal), route the fuel line up to the gas cap and through the gasket, install the breather plug and your done.
In the write-up I linked they remove one of the clips securing a plastic shroud, I found that this isn’t needed and you can just run the fuel line next to the other pipes by pulling it up with a piece of wire.
Another little side note is make sure that you leave enough slack in the fuel line to allow for your axle to droop.
Pictures:
Connection at diff
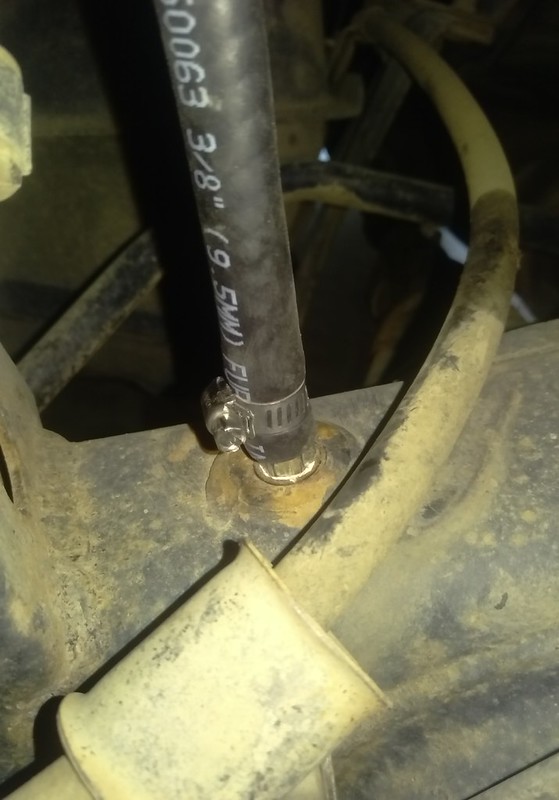 IMAG0325 by Phoenix Black, on Flickr
Hose routing
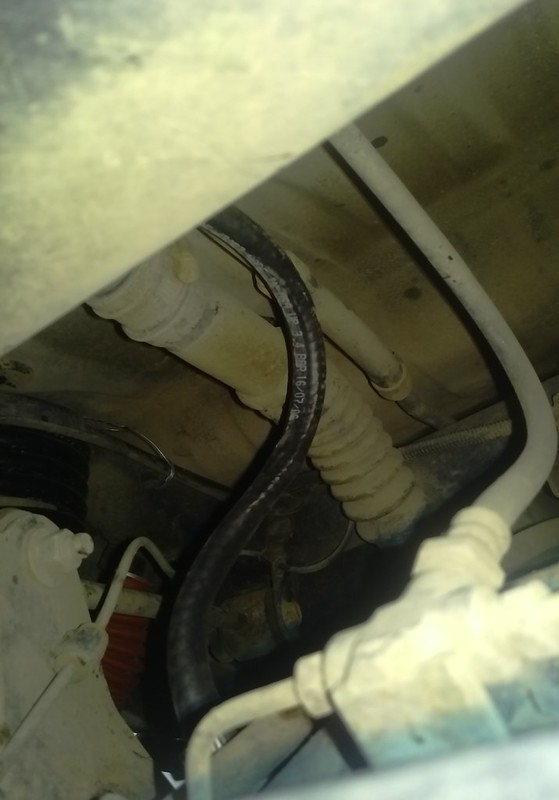 IMAG0327 by Phoenix Black, on Flickr
Connection at gas cap
IMAG0327 by Phoenix Black, on Flickr
I finally decided to use the parts hat have been sitting on my workbench for the last three months and extend the rear diff breather up to the gas filler cap.
What is it and why:
The stock rear differential breather on the 4runner stubs out at the top of the axle housing, for daily driving this isn’t an issue but when crossing deep water this breather “plug” can become submerged. When this happens the rapid change in temperature causes a vacuum in the axle housing that can either suck water through the one way breather plug or the wheel bearing seals. By extending the breather plug up and replacing it with a different style of breather the axle is allowed to both “inhale” and “exhale” through the plug rather than just exhale, preventing the entry of water through the wheel bearing seals.
Parts needed and cost:
Toyota union P/N 90404-51319
Toyota Plug, Breather P/N 90930-03136
6 feet of 3/8in fuel line
8 inches of 5/8in heater hose (this is optional but I used it to insulate the breather line from rubbing)
Zip ties
Teflon tape
2 3/8in hose clamps
The two Toyota parts cost me about 17$ at the dealer and the 3/8 fuel line was 10$ at autozone. I had the rest of the things laying around from other projects. Total cost should be around 30$
Basic Procedure:
I followed this write-up so refer to this for more detail.
The basic things that need to be done are, remove the stock breather and replace it with the Union (I also wrapped the union threads with Teflon tape to provide a better seal), route the fuel line up to the gas cap and through the gasket, install the breather plug and your done.
In the write-up I linked they remove one of the clips securing a plastic shroud, I found that this isn’t needed and you can just run the fuel line next to the other pipes by pulling it up with a piece of wire.
Another little side note is make sure that you leave enough slack in the fuel line to allow for your axle to droop.
Pictures:
Connection at diff
IMAG0325 by Phoenix Black, on FlickrHose routing
IMAG0327 by Phoenix Black, on FlickrConnection at gas cap
IMAG0327 by Phoenix Black, on Flickr
Last edited:
Black798
New member
Update
Haven't updated this much recently because not much has really happened, just daily driving and enjoying the 4runner. This last week I did take care of some things though, I installed a set of 10mm trim packers in the back to gain 3/8 of an inch of lift and to help with the appearance when fully loaded with gear. I also wrapped the steering wheel in 550 cord because it was starting to get a hole in the top and as a side benefit I now have almost 100ft of paracord that can easily be taken off and used if need be.
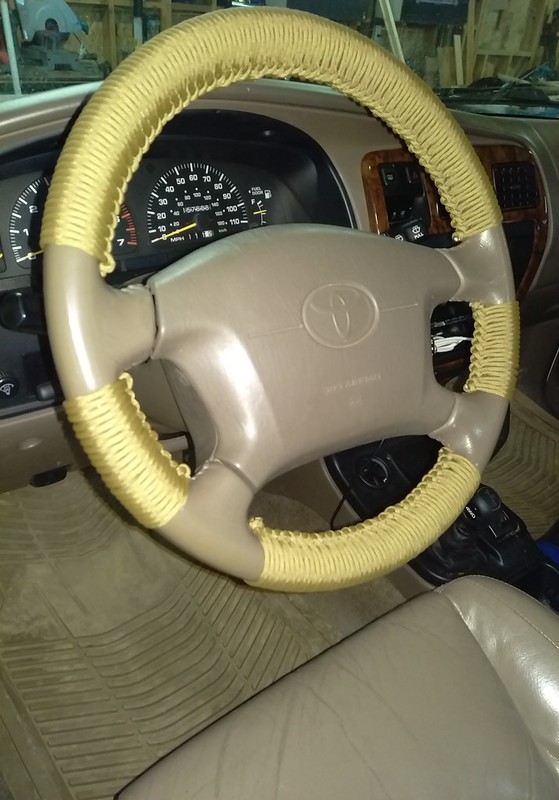 IMAG0461 by Phoenix Black, on Flickr
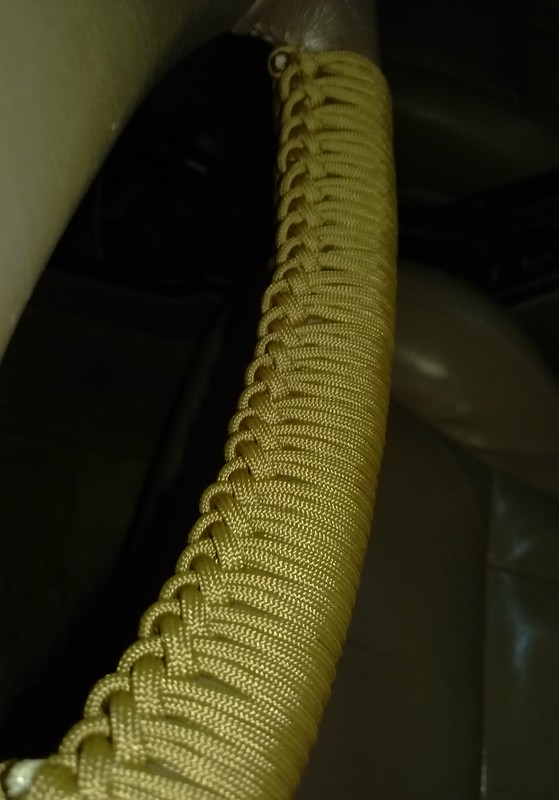 IMAG0462 by Phoenix Black, on Flickr
Also got in on the October discount tire sale and picked up a set of 265/70/16 falken wildpeak at3w's for 428$ out the door that will go on during springbreak. Just ordered them now to save a bit of money. So far I really like these tires, they seem like a cross between a duratrac and KO2 so it will be interesting to see how they preform.
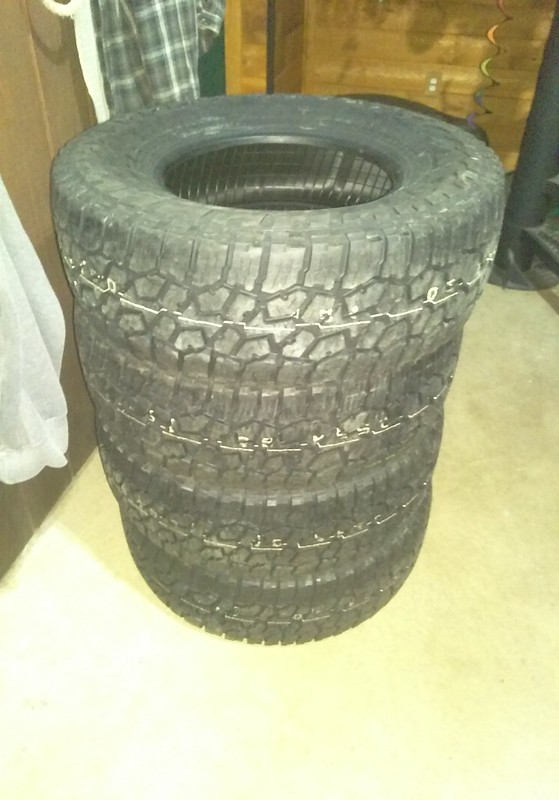 IMAG0475 by Phoenix Black, on Flickr
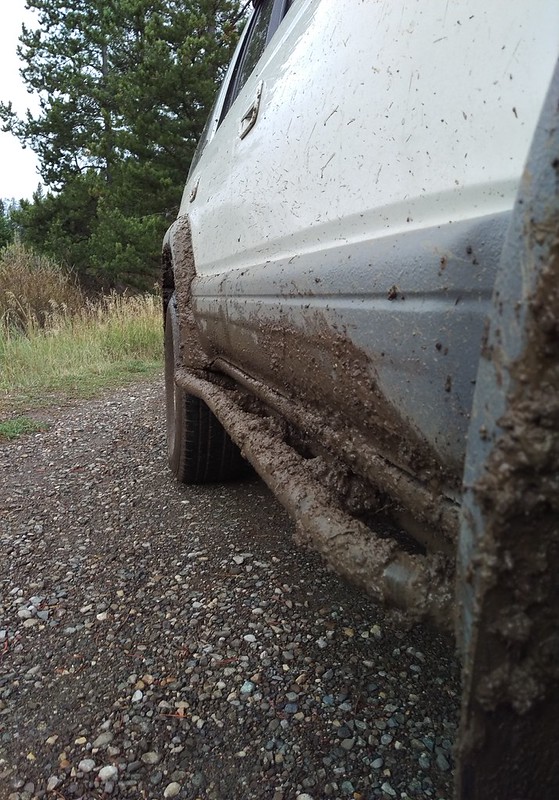
Last weekend I also got out with some friends for some fun in the hills and the mud. Definitely not my favorite type of wheeling because of all the cleanup but it was still fun to get out of town for awhile and put the runner through its paces, I also got a nice lesson on recovery in the rain. Long story short my buddy tried to turn around on a pretty narrow spot in the road and he started sliding of the road since he doesn't have any weight in the back of his truck, and of course right on cue it started pouring rain. It ended up taking 45 minutes of tugging and re rigging to get him back on the road but all ended well. Unfortunately I didn't get any pictures of it except for back down at the trail head. Also made me realize how much I HATE mud. Never again am I doing that. My friends dont care but they dint ever clean up after they do that.
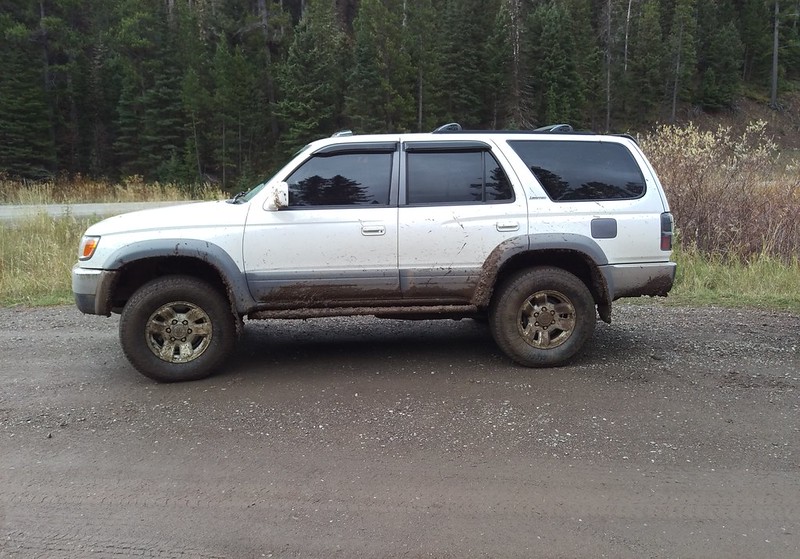 IMAG0421 by Phoenix Black, on Flickr
 IMAG0425 by Phoenix Black, on Flickr
Haven't updated this much recently because not much has really happened, just daily driving and enjoying the 4runner. This last week I did take care of some things though, I installed a set of 10mm trim packers in the back to gain 3/8 of an inch of lift and to help with the appearance when fully loaded with gear. I also wrapped the steering wheel in 550 cord because it was starting to get a hole in the top and as a side benefit I now have almost 100ft of paracord that can easily be taken off and used if need be.
IMAG0461 by Phoenix Black, on FlickrIMAG0462 by Phoenix Black, on FlickrAlso got in on the October discount tire sale and picked up a set of 265/70/16 falken wildpeak at3w's for 428$ out the door that will go on during springbreak. Just ordered them now to save a bit of money. So far I really like these tires, they seem like a cross between a duratrac and KO2 so it will be interesting to see how they preform.
IMAG0475 by Phoenix Black, on FlickrLast weekend I also got out with some friends for some fun in the hills and the mud. Definitely not my favorite type of wheeling because of all the cleanup but it was still fun to get out of town for awhile and put the runner through its paces, I also got a nice lesson on recovery in the rain. Long story short my buddy tried to turn around on a pretty narrow spot in the road and he started sliding of the road since he doesn't have any weight in the back of his truck, and of course right on cue it started pouring rain. It ended up taking 45 minutes of tugging and re rigging to get him back on the road but all ended well. Unfortunately I didn't get any pictures of it except for back down at the trail head. Also made me realize how much I HATE mud. Never again am I doing that. My friends dont care but they dint ever clean up after they do that.
IMAG0421 by Phoenix Black, on FlickrIMAG0425 by Phoenix Black, on Flickr
Last edited:

Black798
New member
Planning on having the wildpeaks mounted in early March before I head to Moab for spring break. Have to get through the winter ice first so I'll have a set of blizzaks on until then.
I went with the limit straps because a 1 inch diff drop only corrects for a 1/2 inch of cv angle because of the way it moves the diff and because of the extended travel coil overs it wouldn't be enough. I wanted to make it so that my cv joints would be close to their strength at the stock angle. So the limit straps give a positive stop and allow me to tune the front end a little better and keep the ball joints from being the stop which should help them last a little longer. I could probably let it travel a little more, which I probably will later this year, but so far with the travel I get in the rear I don't really find myself wishing for more down travel in the front. I'd rather have better up travel but for that I'll need to make some sway bar discos when funds allow.
I went with the limit straps because a 1 inch diff drop only corrects for a 1/2 inch of cv angle because of the way it moves the diff and because of the extended travel coil overs it wouldn't be enough. I wanted to make it so that my cv joints would be close to their strength at the stock angle. So the limit straps give a positive stop and allow me to tune the front end a little better and keep the ball joints from being the stop which should help them last a little longer. I could probably let it travel a little more, which I probably will later this year, but so far with the travel I get in the rear I don't really find myself wishing for more down travel in the front. I'd rather have better up travel but for that I'll need to make some sway bar discos when funds allow.
Black798
New member
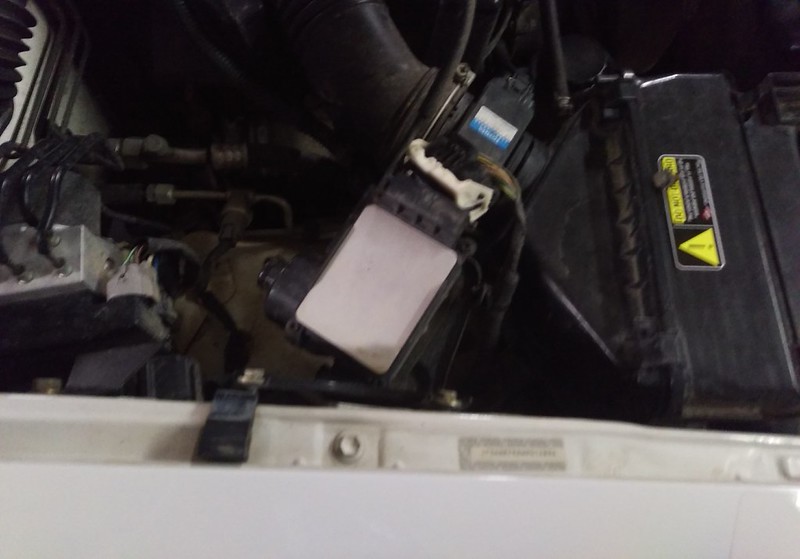
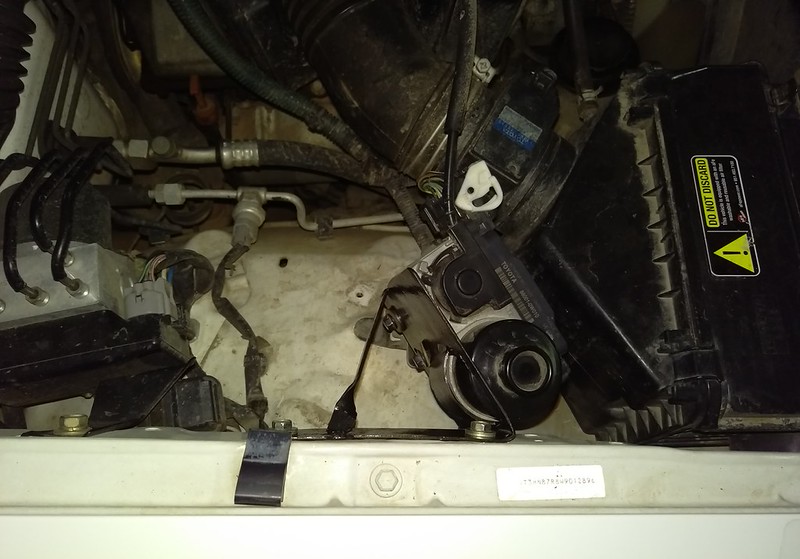
Spent a few hours today making a bracket to move the cruise control motor and making some room in the engine bay for things to come.
Before
 IMAG0509 by Phoenix Black, on Flickr
After
 IMAG0510 by Phoenix Black, on Flickr
Before
IMAG0509 by Phoenix Black, on FlickrAfter
IMAG0510 by Phoenix Black, on Flickr
Last edited:
Similar threads


- Replies
- 2
- Views
- 3K

- Replies
- 2
- Views
- 2K


