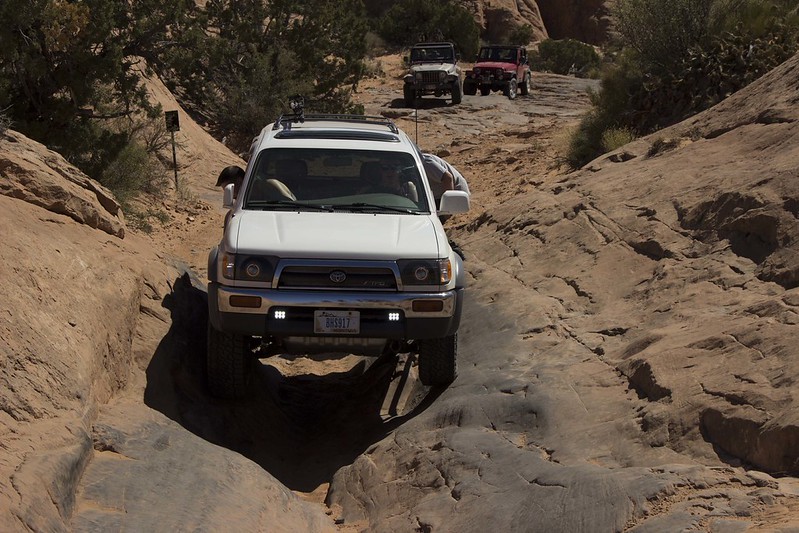
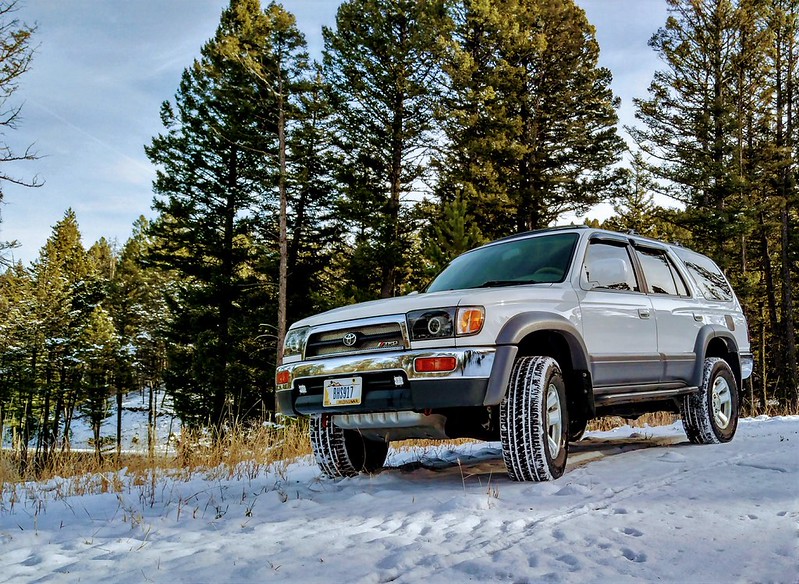
Black798's 98 limited build thread

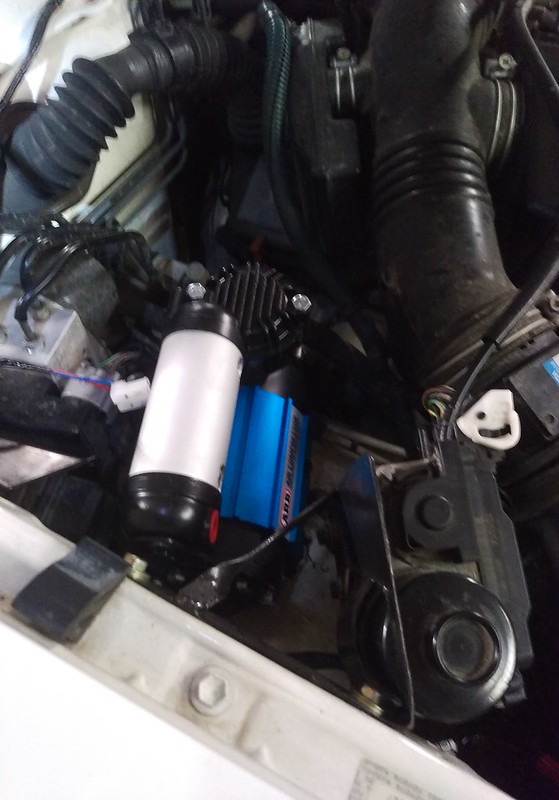
Today I was finally able to put the added space in the engine bay to use with the install of my arb compressor. All, I have to say about this thing is that its build quality is top notch and it is worth the cost.
IMAG0553 by Phoenix Black, on Flickr

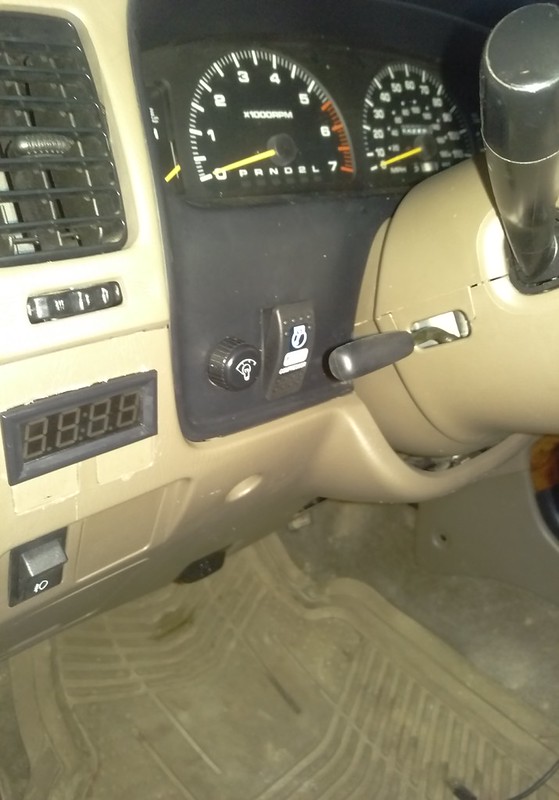
I choose to mount the switch where the factory e locker switch would be untill I have the need for more switches. I think then Ill make a new switch panel to go in the area where the fog light switch is.
IMAG0556 by Phoenix Black, on Flickr

And how it sits as of late.
IMAG0518 by Phoenix Black, on Flickr
 
Last edited:
Thanks! Slow and steady definitely is the mantra with this build. It might not be the most built up one out there but it gets me from point A to B and is damn good at it. I wouldn't really see the fun in going from stock to fully built overnight anyway, especially since you never really "finish" building one of these.
 
New LBJs and custom transmission mount.

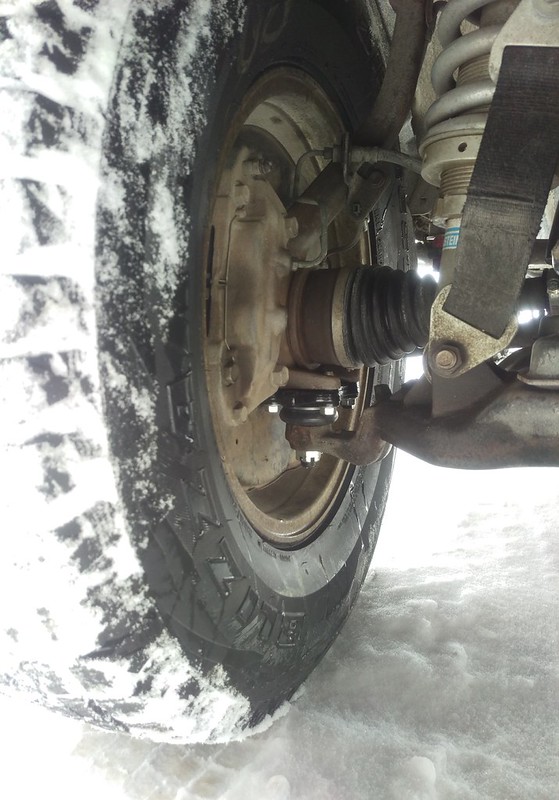
Yesterday I installed some new OEM toyota lower ball joints and bolts. When /I got the old joints off they still felt tight even with 160,000 miles on them, but after seeing some of the LBJ failure horror stories I feel a lot better driving around on new ones that I know the history of. I think the hardest part of this job was getting the OTRE to release, a word of advice to anyone doing this, either get the right tool, or just beat on the lower ball joint around the OTRE stud to get it to come loose (I did this and it took a good bit of beating).

I also finally found what has been clunking in my front end when I would spin the tires in 4wd. Turns out when the dealer replaced the front diff mounts before they sold the 4runner to me, they forgot one of the top cushions that holds the diff still. So without that every time the driveline would get under load the diff would start to beat on the cross member. After watching how it was moving I now also think this may have contributed to my cv breakage since it was allowing for close to an inch of movement on the driver side.

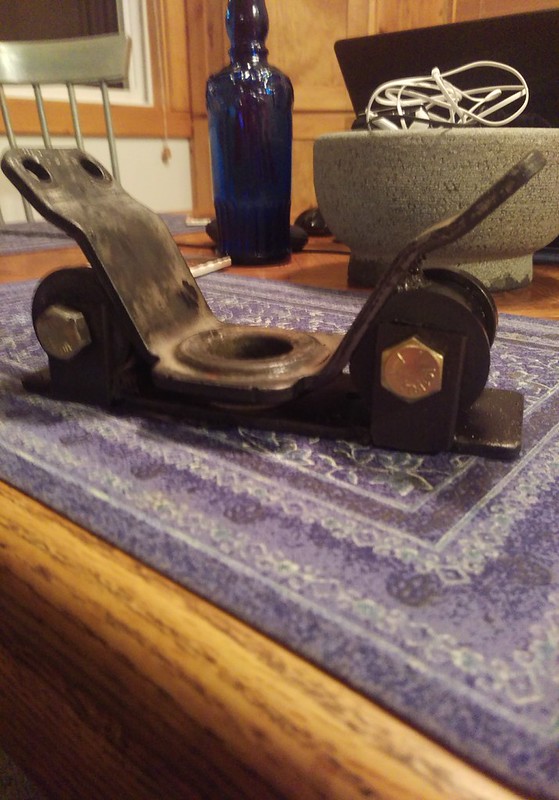
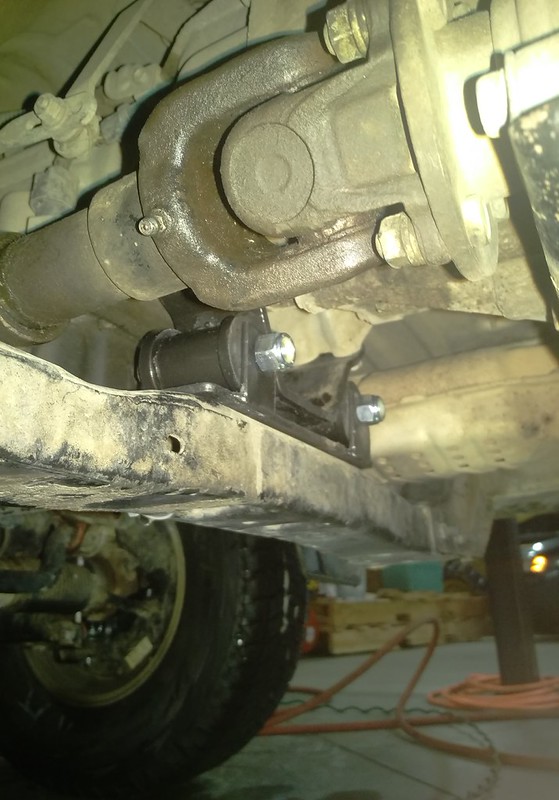
I also made a new transmission mount. I knew the original has been worn out for a while but I really didn't want to replace it with a stock mount seeing as this truck is going to be seeing a lot more 4 low action and just general abuse than a stock mount is designed for. I searched for a long time to find a poly mount for the auto trans but I couldn't find on. I decided I would just make one similar to the innovations manual trans mount.

After driving for a while with this new mount the increase in vibration is hardly noticeable. When idling and just slightly off idle there is a noticeable increase in vibration but with the radio on you cant hear it at all, also anywhere above 1200 rpms and you would have a very hard time noticing any vibration changes at all. Another benefit of this mount is that my shifters dont move all over the place now. I would say there is some finish work that needs to be done too clean it up but Im going to wait until the weather warms up to do it. So now onto the pictures.

Lower ball joint
IMAG0579 by Phoenix Black, on Flickr

Trans mount
IMAG0580 by Phoenix Black, on Flickr
IMAG0581 by Phoenix Black, on Flickr
 
Last edited:
Have you replaced your otre's already or just decided to leave the old ones in?


Sent from my iPhone using Tapatalk
 
Have you replaced your otre's already or just decided to leave the old ones in?

I havent replaced them and decided not to now since I just had an alignment a few months ago and didnt want too have another 60$ bill. But I checked them and they were still tight and full of grease. Everything else other than the rack guide is tight so Ill let them ride a little longer
 
Coming along nicely! How is the flares bedliner coating holding up?

Thanks. So far Im really impressed with the mostaliner. It has taken some pretty hard hits from sticks and brush and a lot of rock hits inside the fender wells, it even stood up to one of the flares on the rear bumper being torn off and it doesnt show it at all. The only place where I have had an issue is where I got lazy on prep work and didnt sand the base well enough, but It isnt noticable
 
Added a few things to the 4runner in the past couple weeks. First was a set of weathertech floor liners in the front to help keep the carpet nice. These are great, I think a little expensive for what they do theyre job very well.

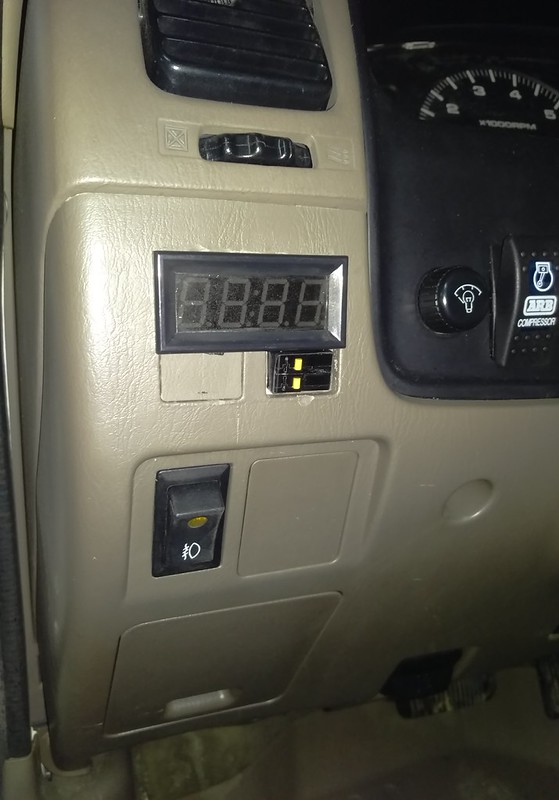
I also took care of the abs disable. Ive been driving around without it on for probably 3 months and wanted to give myself more options when wheeling and to make the car more predictable should someone besides me drive it.
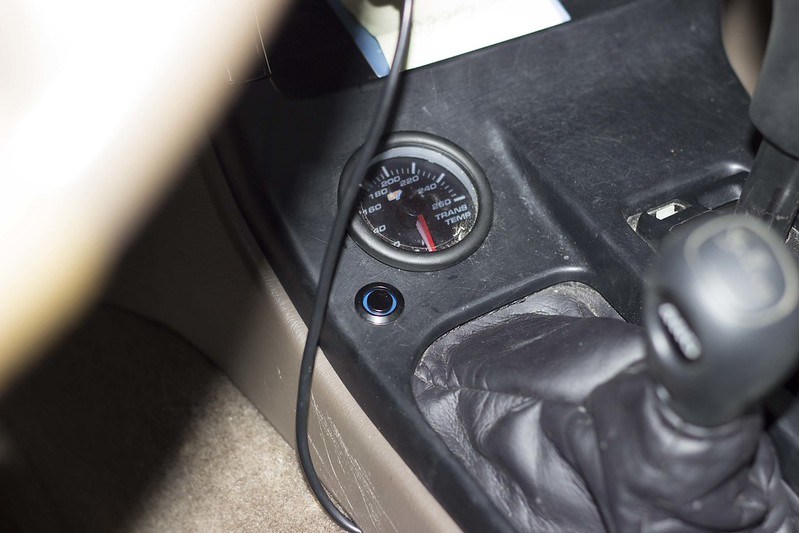
I followed this write up but changed it just a little. I used two momentary normally closed switches mounted under the thermometer and also did all of the wiring inside the cab at the ABS computer sense all the necessary wires are located there.
Switch on top disables ABS and the lower one resets it. After doing this I realized that if you wanted to you could do this with a single rocker switch which I may end up doing as my switches get rearranged down the road.

IMAG0617 by Phoenix Black, on Flickr

The next things on the list are to add an auxiliary fan for the trans cooler and to finish the front sway bar links before I head to Moab for spring break.
 
Last edited:
I've been wanting to do something similar to my flares/door moldings! Was thinking like line x as well as coating a future off road bumper with line x


Sent from my iPhone using Tapatalk
 
How hard was the drawer system?

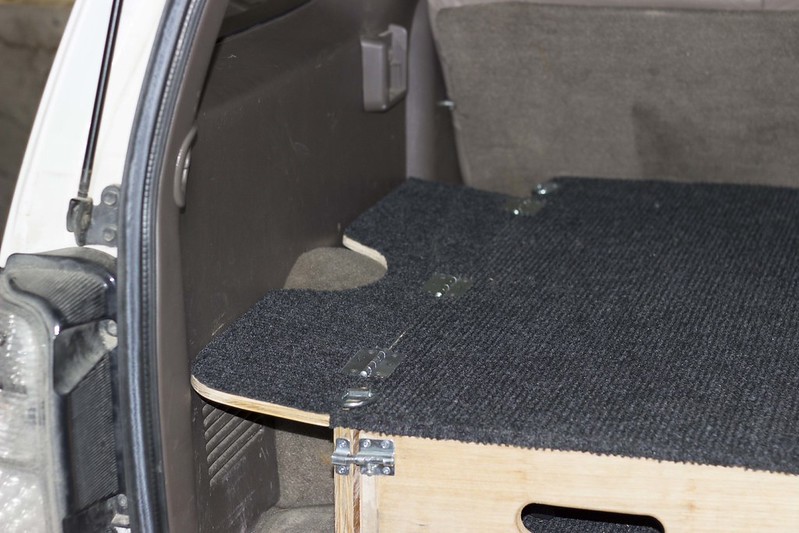
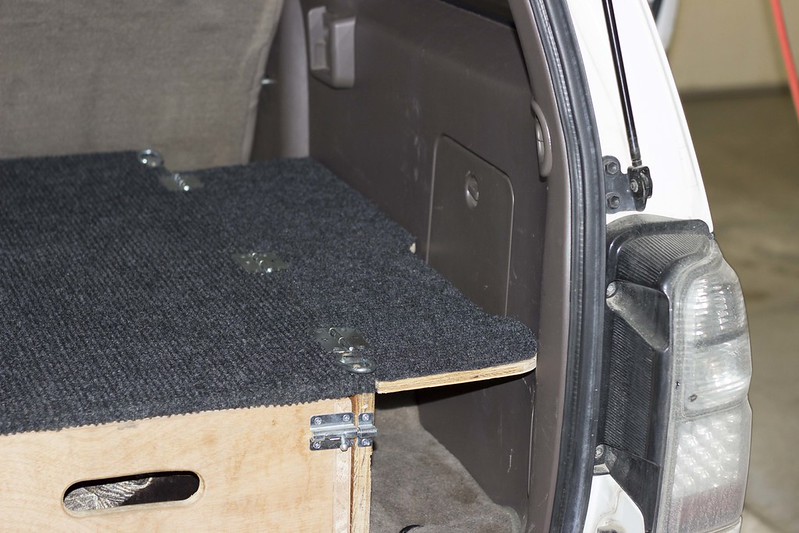
The drawer system wasn't really too hard as long as you have the right tools and some time. I worked on it for like an hour a day and was done in less than a week but Ive also had a decent amount of experience building cabinets and stuff so it was pretty similar.

I will say though that when I redesigned it I thought this would be a final design and have everything I needed but after having it this way for a few months I can already see some things I would want to change to make it more functional so my best suggestion is over plan it.

I've been wanting to do something similar to my flares/door moldings! Was thinking like line x as well as coating a future off road bumper with line x

I haven't had any personal experience with line x so I cant speak for its durability but the trucks I have seen with it seem like they are holding up very well but the line x is much thicker and more expensive than the Monstaliner which so far is working great.
 
Awesome! Have definitely thought of doing something similar for camping, and books for college [emoji28]


Sent from my iPhone using Tapatalk
 
It's definitely a worthwhile investment. If anything I feel like it's a bit of a theft deterrent since you look in the window and just see black carpet. When in reality the whole driver side drawer is filled with recovery gear
 
Getting ready for Moab

So march 10th through the 15th Ill be heading down to moab with my parents and a friend to go run some trails and possibly meet up with some other forum members. Currently the plan is that my parents are going to rent a jeep since our other truck has two cracked leaf springs and my buddy and I are going to drive the runner. The past few weeks I've been doing quite a bit to get ready for the trip.

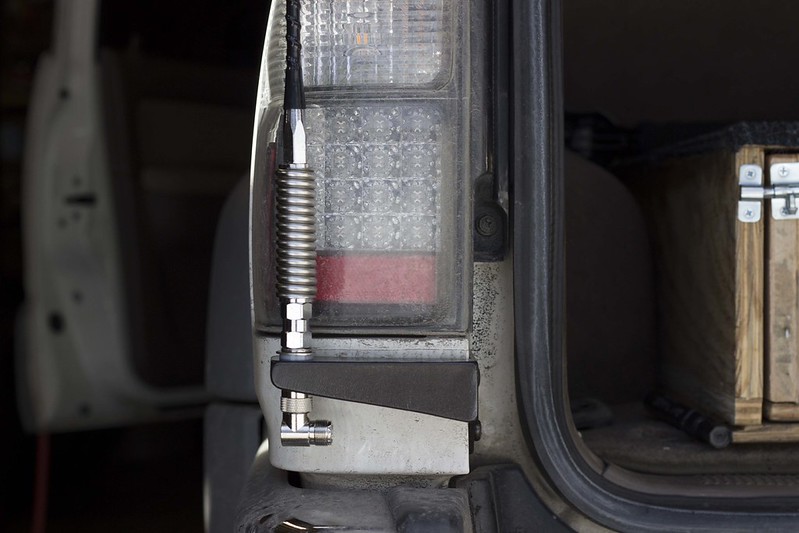
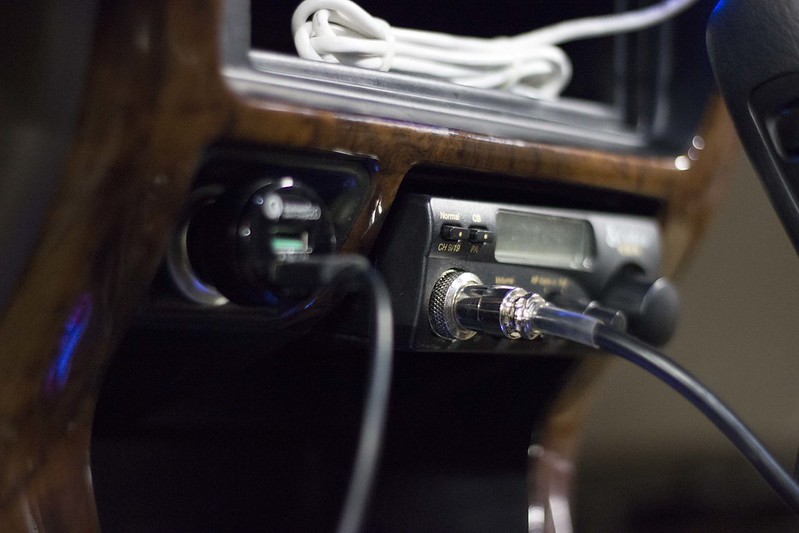
First I built an antenna mount and installed a cobra cb in the ashtray location
IMG_1152 by Phoenix Black, on Flickr
IMG_1171 by Phoenix Black, on Flickr

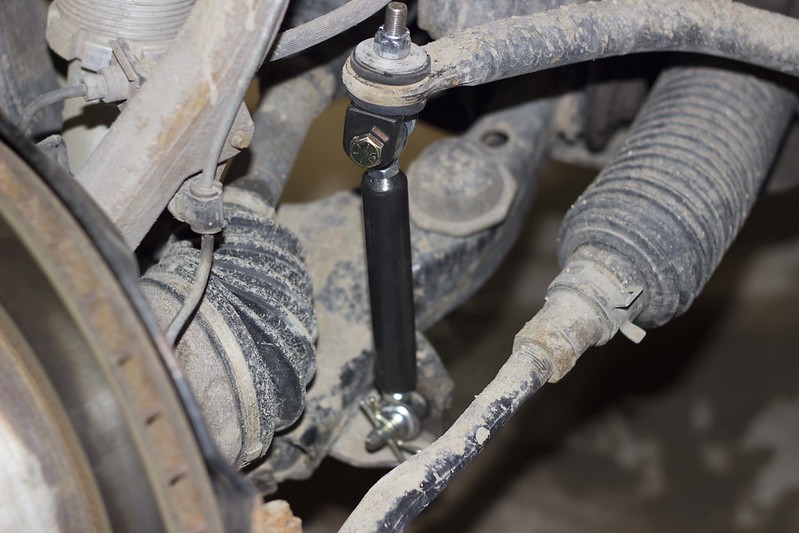
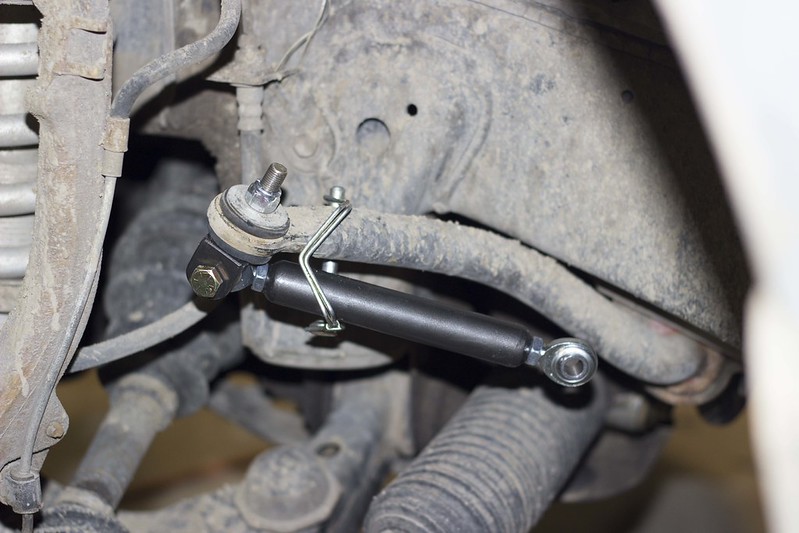
Next I finished a project that I started almost 4 months ago and just never had time to finish, front sway bar discos.
IMG_1192 by Phoenix Black, on Flickr
IMG_1193 by Phoenix Black, on Flickr
normally the links would be held up by a small buckle strap but i just had the pin on hand for the picture

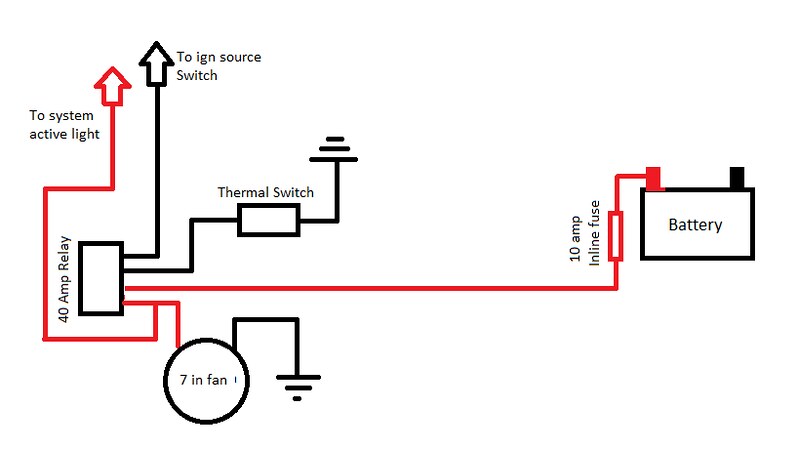
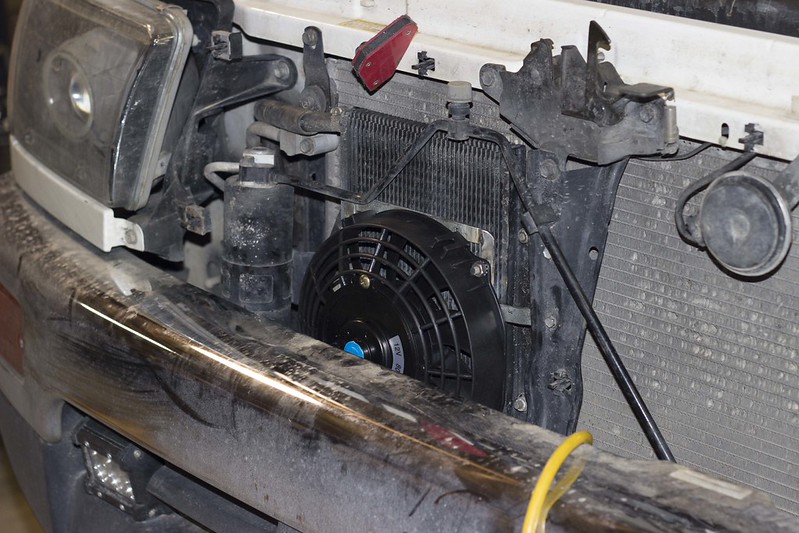
Also decided to add a 7 inch e fan to get the most out of my trans cooler at slower speeds. Still haven't wired it but it will automatically come on at 185 and shut off at 175 and have a kill switch mounted next to the temp gauge. The switch will also have an indicator light for when the fan is active.
The wiring will look like this:
Trans fan diagram by Phoenix Black, on Flickr
IMG_1194 by Phoenix Black, on Flickr
IMG_1407 by Phoenix Black, on Flickr

Things I still have to do are, repaint the sliders (currently waiting on the primer to dry), get tires mounted and balanced (happening tomorrow morning), make some lcam skids, and wire the e fan. Ill put more pics up as things come together
 
Last edited:
More stuff for Moab

Spent the better part of Saturday wiring the efan. It is currently set up to come on at 185 and shut off at 175 with the temp sender being in the return line right after cooler so it only comes on when the cooler starts falling behind. I also added a switch next to the temp gauge to shut it down for water crossings or whatever. The switch also has an indicator led so I know when the fan is running.

I also added some sides and tie downs to the cargo box to give a little more room and make everything more effective and trimmed the tailpipe back so it sits above the frame.
IMG_1406 by Phoenix Black, on Flickr
IMG_1405 by Phoenix Black, on Flickr

Still have to put the sliders on and wash/wax it but other wise it is ready.
 
Last edited:
Moab Trip Report/Picture Dump

Well I got back from Moab around 11 last night and the trip couldn't have gone better. The 4runner averaged 21 mpg on the way down and back and 17 mpg overall with all the rock crawling. Nothing ended up breaking and everything preformed flawlessly, the worst thing that happened was replacing a fuse in the rental jeep. The sway bar disconnects were fast and easy, transmission mount kept everything solid, the trans fan kept the pan at a max of 170 and an average of about 150, the new tires hooked up and preformed great, and the sliders saved me a couple times but more on that later. I was amazed with the truck in general, It walked right up everything I pointed it at and was only denied on one line over the whole weekend which was pre launch pad on poison spider mesa, I was very close to making it but just couldn't get enough stick

We got into town on Saturday around 4, my parents went to pick up the rental jeep and check into the hotel and my buddy and I headed to area bfe to setup the tent, I was really surprised that besides us there was only one other group out there all weekend. We ran, in this order, fins n things, hells revenge, top of the world, and poison spider mesa and all I can say is pictures do not do these trails justice. The ascents and descents on hells revenge were insane. My gps recorded the steepest being a 63% grade.

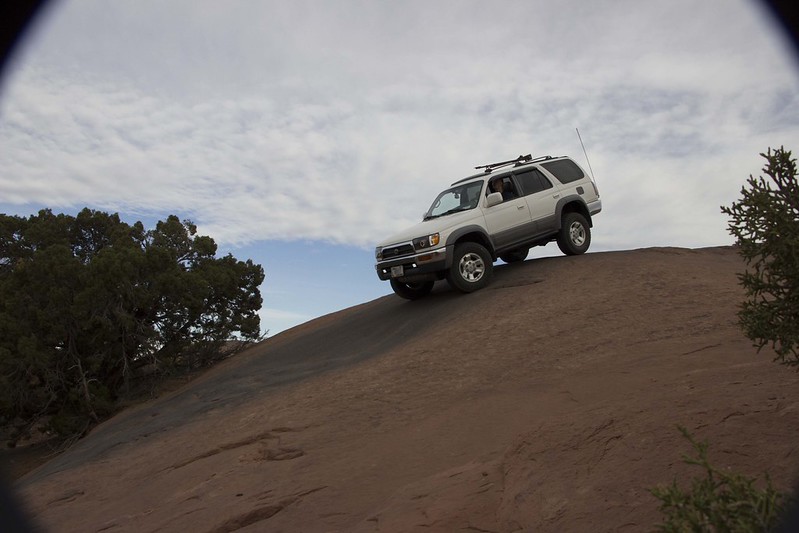
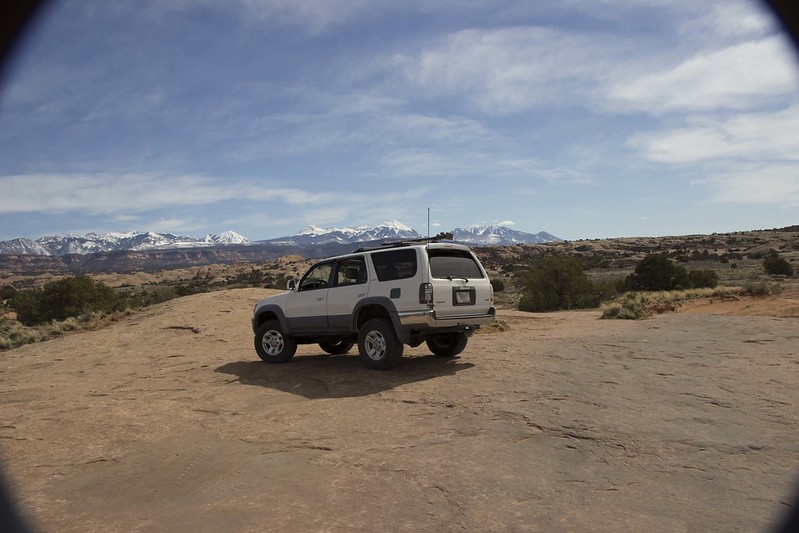
First up fins n things, basically the shakedown run for the 4runner and to get used to driving on slick rock. We started out slow but made better time on the second section and were done in about 4 hours.

Headed down the first fin
IMG_1763 by Phoenix Black, on Flickr

End of the trail
IMG_2155 by Phoenix Black, on Flickr

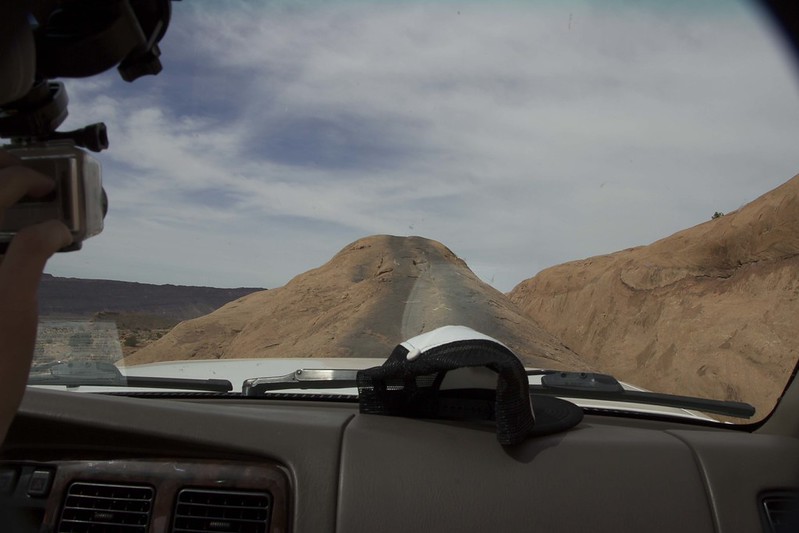
After finishing out fins n things we headed down to the hells revenge parking lot and ate lunch and then headed out onto the next trail.
Headed up the gate keeper
IMG_2167 by Phoenix Black, on Flickr

Walking up one of the first technical sections
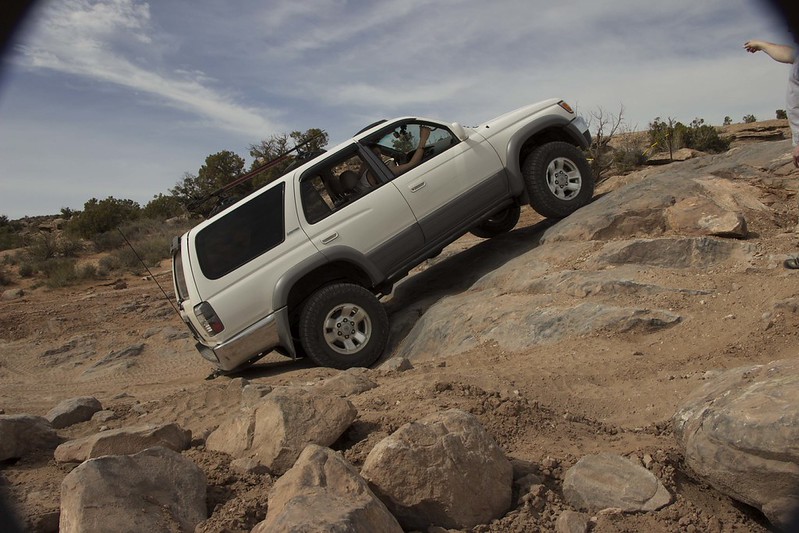
IMG_2316 by Phoenix Black, on Flickr

On the way up to the hot tubs
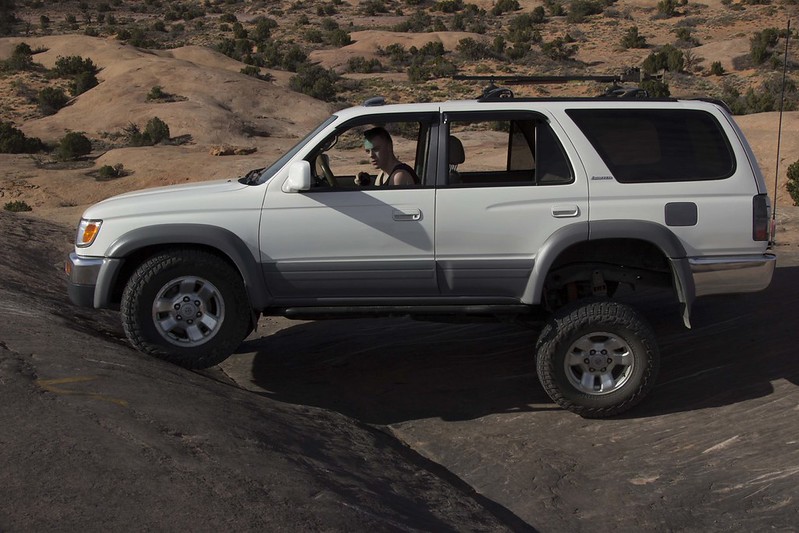
IMG_2441 by Phoenix Black, on Flickr

After going around the abyss we parked and walked up to the hot tubs to check them out and see the other group that was up there which was also from t4r. Got to meet some really cool people and see some of my favorite builds.
4th gen going up the side
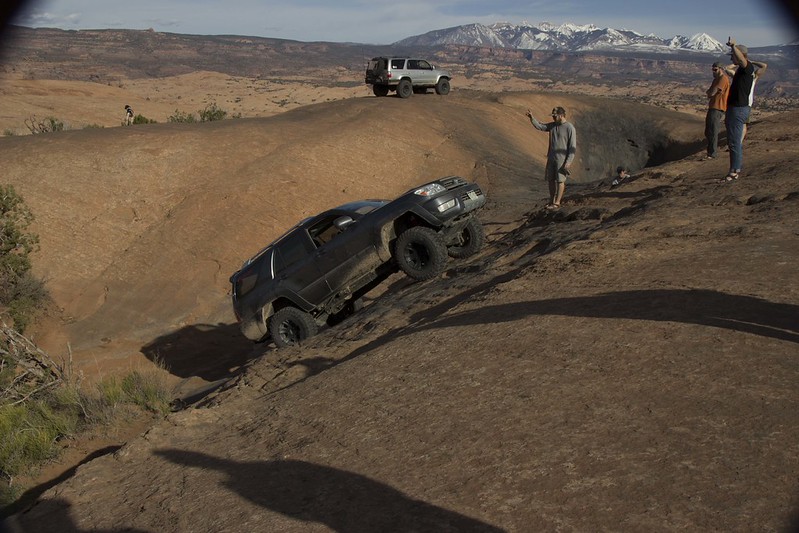
IMG_2519 by Phoenix Black, on Flickr

[MENTION=107971]derpiful[/MENTION] thought you might enjoy this one
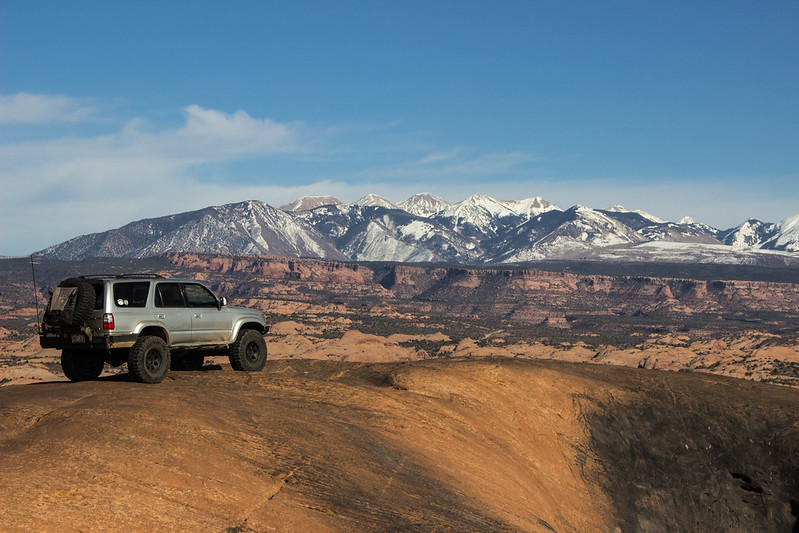
derpiful by Phoenix Black, on Flickr

Going through one of the tubs
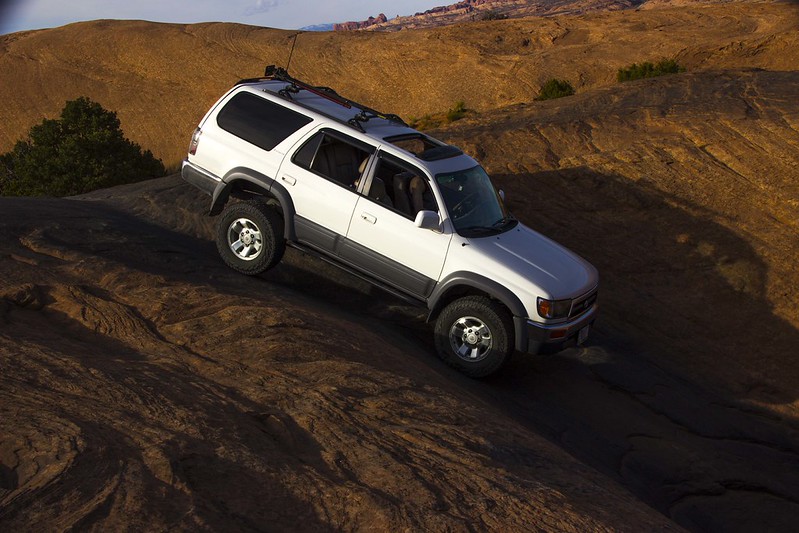
Going in hot tub by Phoenix Black, on Flickr
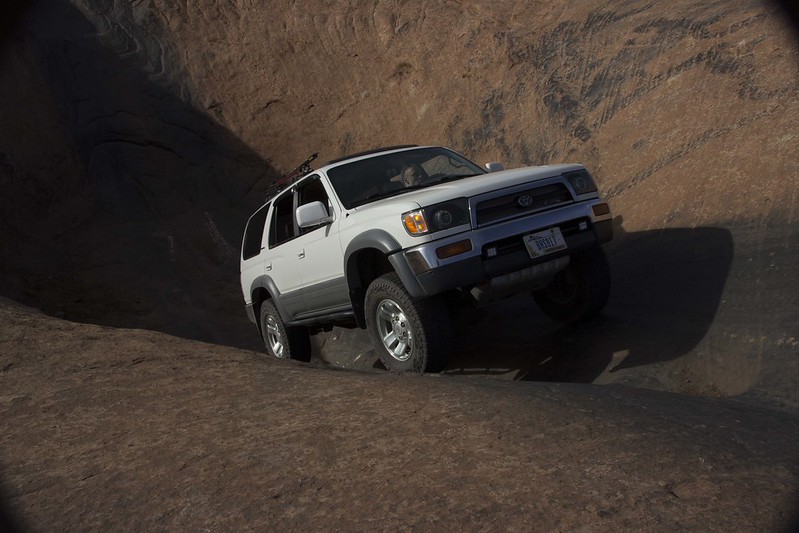
IMG_2547 by Phoenix Black, on Flickr

Thats what we call "a can of corn"
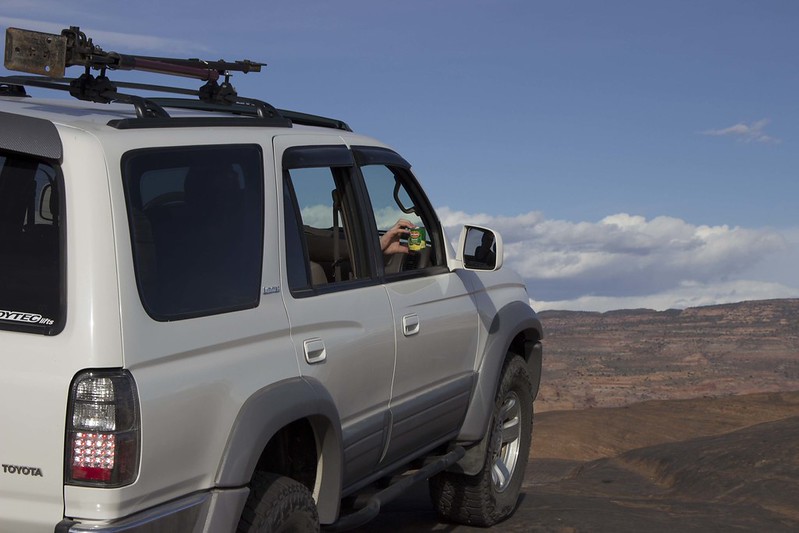
IMG_2552 by Phoenix Black, on Flickr

The rest of the trail wasnt too bad after dropping off the dragons tale which sucked because some dumb*** in a jeep decided to go up even though they saw me starting my way down, but we made up a lot of time on our way out. Also went down one section that really crossed me up.
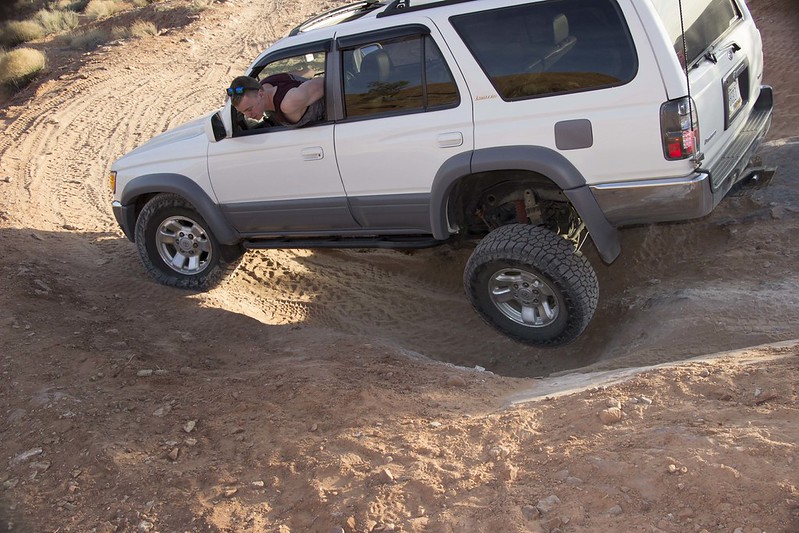
IMG_2611 by Phoenix Black, on FlickrOther side
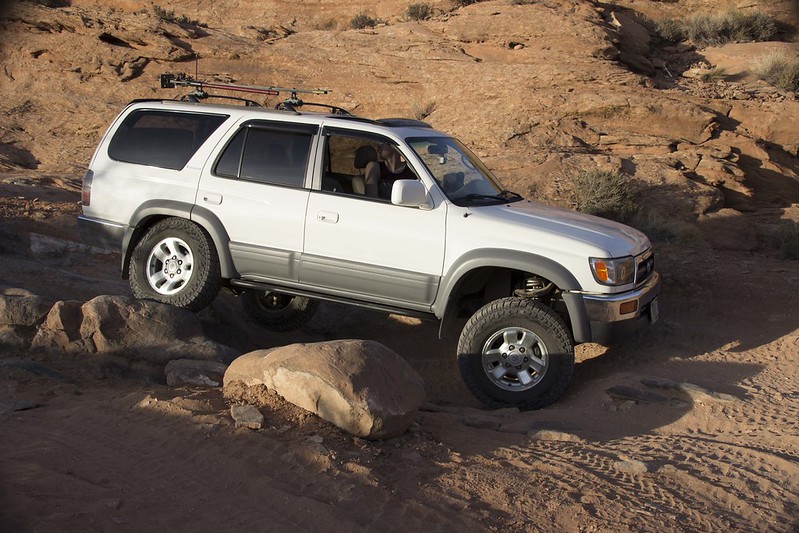
IMG_2616 by Phoenix Black, on Flickr
After that we headed into town and headed to Milts for a quick bite to eat before heading to bfe for the night.

The next morning we fueled up and headed for top of the world, this was one of the trails I was determined to finish because I really wanted to park out on that edge.

You can see the summit right behind the saddle that is in the middle, looks kinda like a set of rifle sights
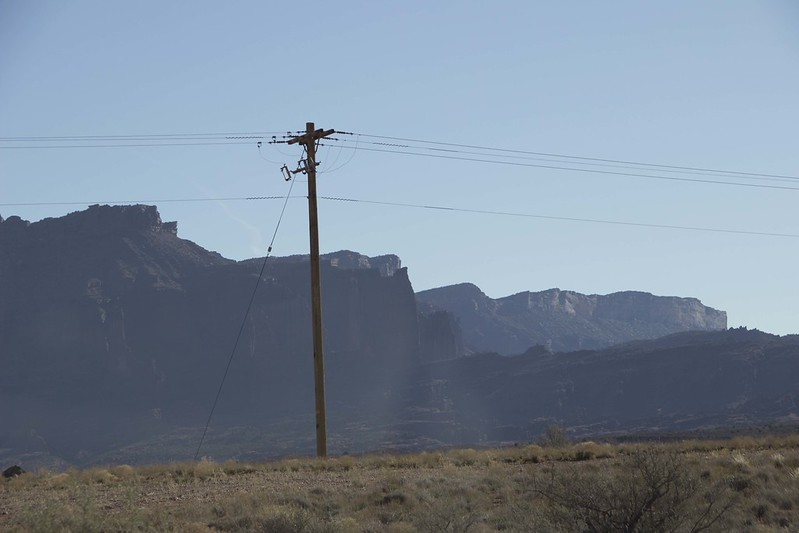
IMG_3357 by Phoenix Black, on Flickr

At the top, this was by far the scariest part of the trip, I was numb driving out on this even with a spotter and I didn't get as close to the edge as most.
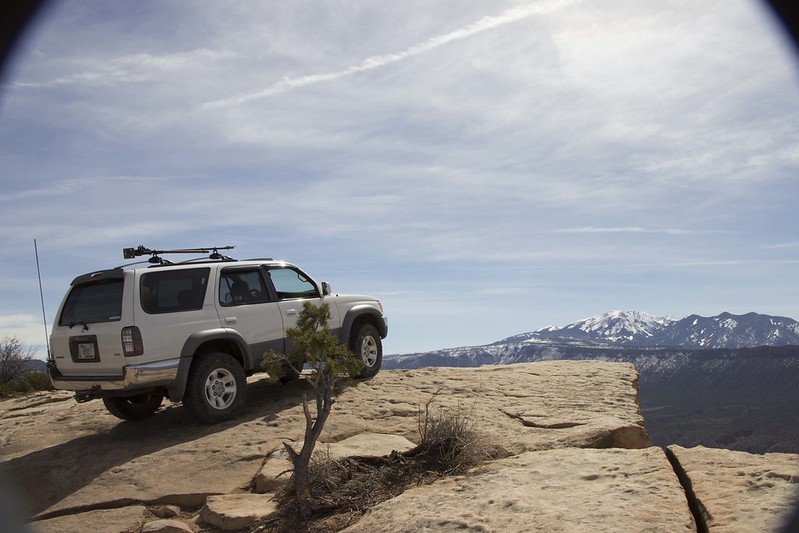
IMG_3061 by Phoenix Black, on Flickr
Overall this was a great trail but it was pretty apparent that it getting dug out pretty bad in some spots and getting harder each year. The run went smooth except for one spot on the way down when I slid off my line and ended up with a sharp shelf right up against my driver side rear rim. We opted to use the winch on the jeep to provide a side pull to the back while I backed up and used the slider to pivot my rear end away from the rock. After that I was very glad I got the kickout because without it I would probably have a nice gouge in my rim or door.

The last trail we did was poison spider mesa. When my parents had picked up the jeep they had asked the guy running the shop if he thought we could make it and he said no way without some major body damage. We started the trail and everything was going well. I was trying out some harder lines and the truck was going up anything I pointed it at. We reached the pre launch pad and I gave it a few tries on the far left line but the rear end just didn't want to follow. I would get about 3/4 of the way up and the front end would get too light and the truck just started bouncing really bad so in the interest of not breaking a cv I bypassed it and continued on. We reached the waterfall pretty quickly and made quick work of the lower section. We stopped to let a rzr pass, (these things were the most annoying thing on any of the trails). We waited a few minutes and he came back down saying it was getting to gnarly for him. We hiked up and were met with this
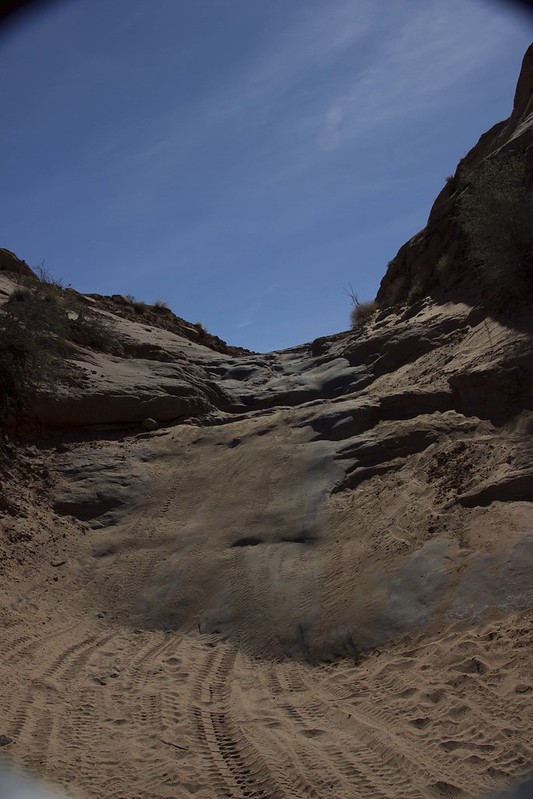
IMG_3175 by Phoenix Black, on Flickr
I wasnt entirely sure I could make this climb because it had a nice slick layer of sand on it which made it difficult to even walk on. Originally we were going to put the jeep up top in case I couldn't make it and we needed to winch the 4runner up but the next section got even more rocky and technical. I was confident I could make it through the second section but the first part was still iffy. We stood around for about an hour trying to decide what to do until this guy came out in a stock jeep.
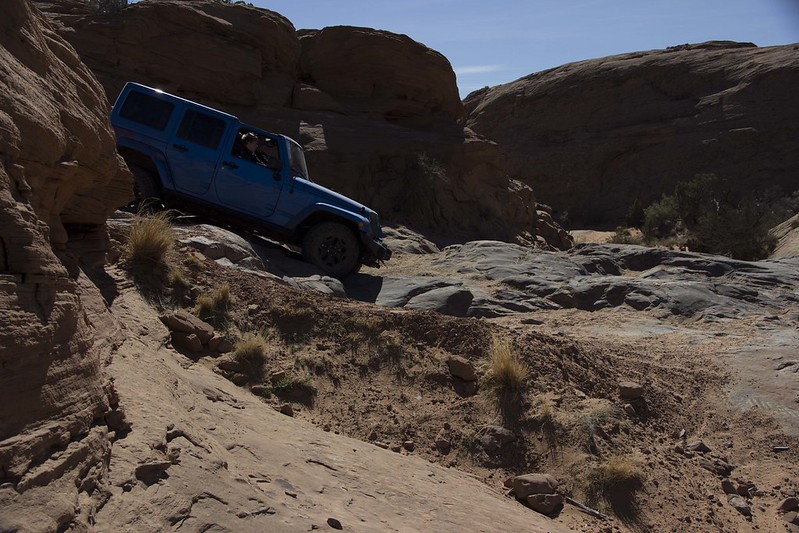
IMG_3189 by Phoenix Black, on Flickr
I talked to him and he said he was open open and that he made it no problem. I was thinking great this should be no problem. But then I saw him go out and he was dragging his bumpers and skids on every rock in sight. I honestly felt bad for the jeep because this guy just didnt know what he was doing. But after he left I said screw it I didnt drive this far to turn around without trying it. I ran down got the 4runner, aired down the tires from 20 to 18 and started up the hill. I was really surprised that it walked right up both sections without even chirping a tire.
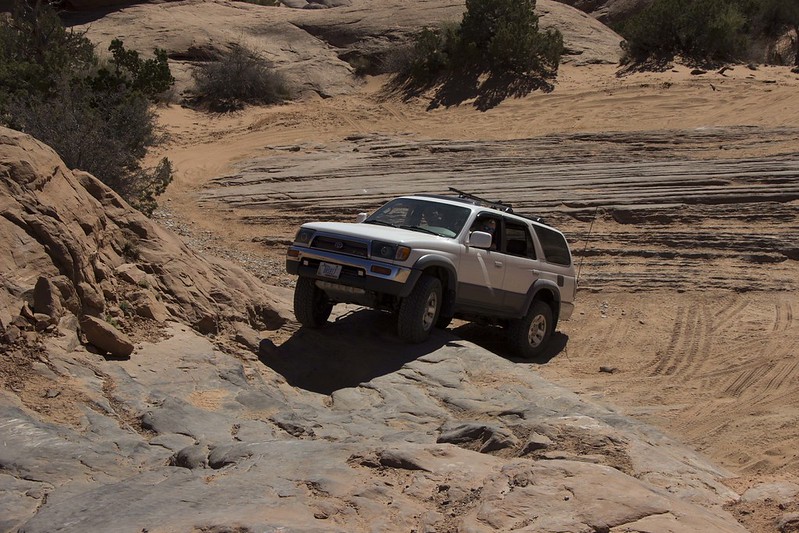
IMG_3203 by Phoenix Black, on Flickr

We continued on to the wedgie and I decided to give it a shot but I let my dad run it in the jeep first to see what it would be like. After watching a jeep on 35s get maxed on its travel I wasnt very optimistic but tried it anyway and the 4runner walked through it like it was nothing. It was especially satisfying since there were a few jeep guys there that were trashing on the 4runner saying there was no way it would make it.
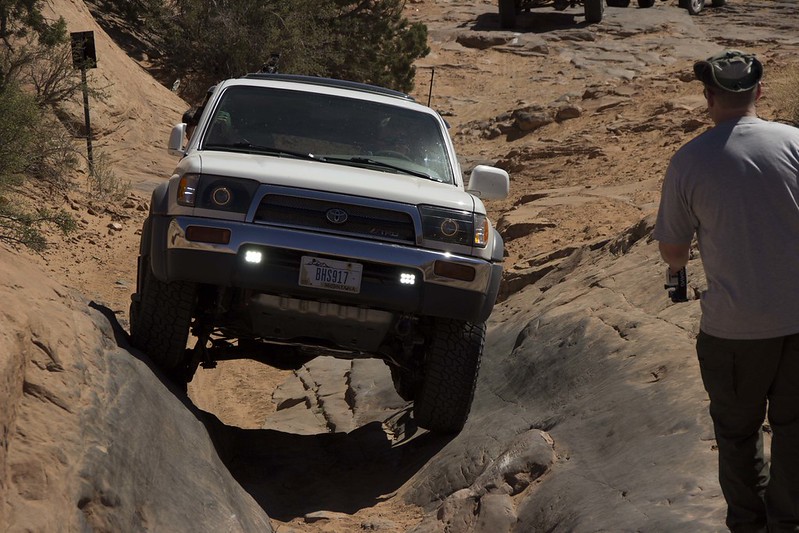
IMG_3231 by Phoenix Black, on Flickr
IMG_3235 by Phoenix Black, on Flickr

We continued on for a little longer and made it to the golden spike turn off but it was getting late and we had to have the jeep back by 6 so we headed back.
On the way out
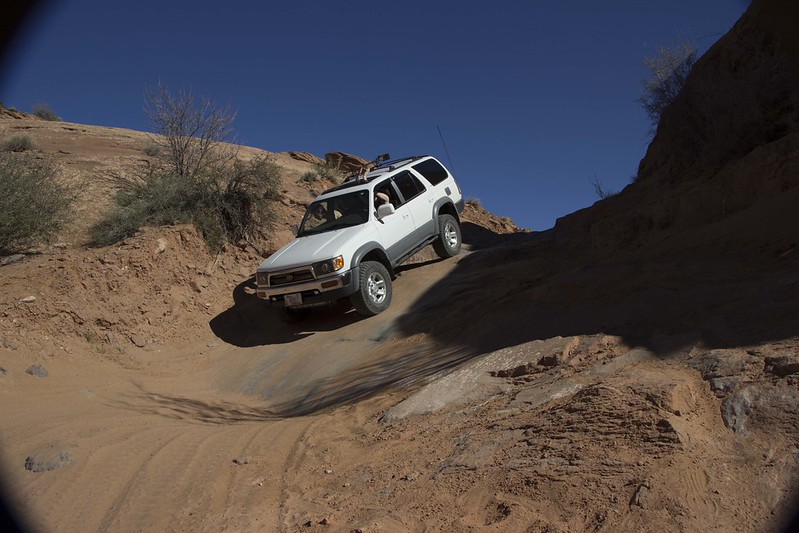
IMG_3328 by Phoenix Black, on Flickr

Hope you all enjoy the pictures. I have plenty more that Im working on uploading so heres the link to the album.
https://www.flickr.com/gp/147275993@N05/Z1RnDe

 
Last edited:
Damage Report

So even though though this was a great trip there were a few things that Id like to change with the 4runner. First up is pretty simple, after looking through the pictures it looks like I could let the front end droop a little more. I didnt really have a problem with the front end being the limiting factor in the lines I could take and I liked how I wasnt paranoid about breaking a cv because the front end was so limited but I think I could probably let 1/2 an inch out of the straps.

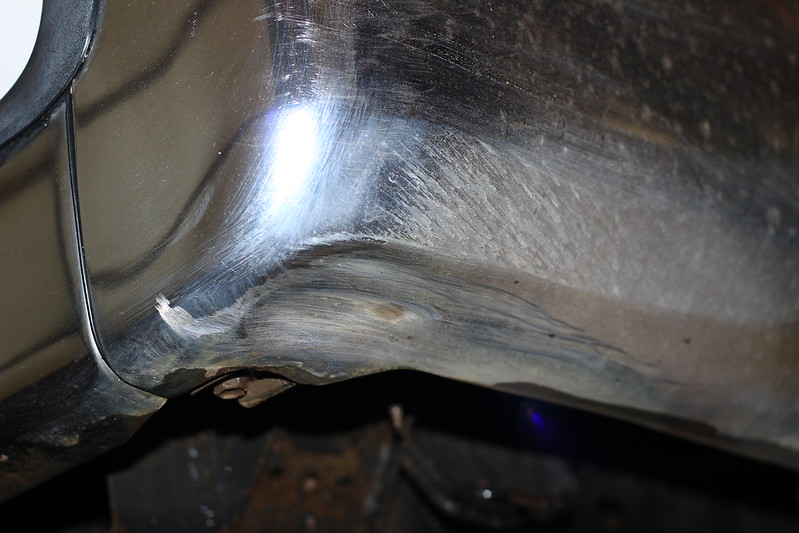
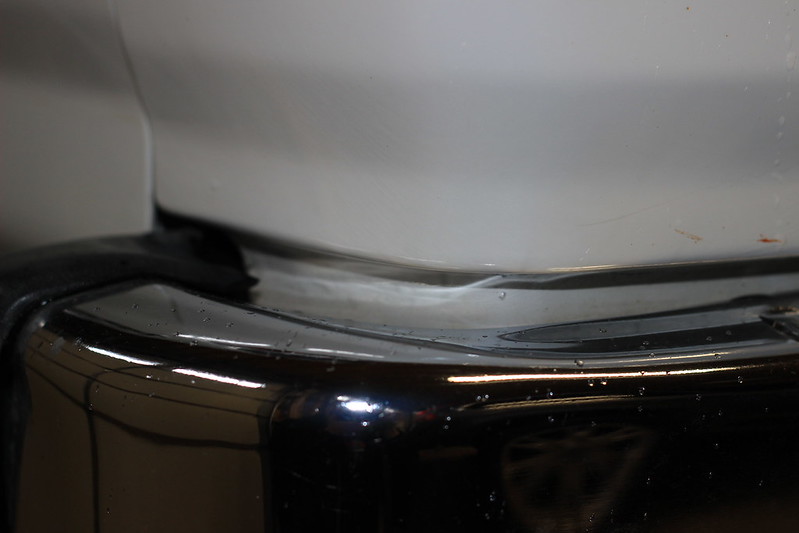
Next up is the spare tire. It wasnt really an issue this time around since i could just throw it in the back of the jeep with the cooler but I could tell if that wasnt an option the tire would have gotten destroyed. I could put it inside the 4runner but I dont like how much space it takes up. Ive been thinking about a tire swing out but I figured Id wait untill the chrome bumper started rusting to change anything around. Well thanks to that section of hells revenge that put me into a decent size wheel stand I ended up crunching the lower passenger rear corner of the bumper. Originally when this happened I dint notice but later on I was looking and noticed the top of the bumper didn't look quite right. I looked a little closer and found that somehow the bumper hit the body pretty hard and it really tweaked it down. Im not sure when this happened because I looked at the pictures and it didnt happen when I crushd the bottom because I could se in the picture it was already scrwed up.

I think for now Ill leave it but hopefully in the next few months I will be able to build a new rear bumper with a swing out to kill one bird with two stones.

The damage...
In the second picture you can see how both the plastic trim and bumper are tweaked pretty far
IMG_3448 by Phoenix Black, on Flickr
IMG_3444 by Phoenix Black, on Flickr

This is also pretty similar to the skid situation which is pretty sad. Im still running the stock skids and it wasn't terrible but the did take a few good hits along with the two cross members this trip. Id love to upgrade these to 3/16 steel but I dont think I wheel enough to justify the weight or cost. So what I think I am going to do is use some spare steel I have to reinforce the stock skids some and just be conscious of their limits.

Next up is the differentials. I was really impressed with how well the truck did open/open but I was really dissapointed that I was denied on the pre launch pad. Sure I could say leave it and just take easier lines, but Id also like to be able to do some more challenging trails, not only in Moab but in Colorado and Montana. So the plan now is to add an arb air locker in the rear this year. I think I am going to stick with the stock 4:10 gearing to keep my fuel economy up or if I can find a cheap 4:30 front diff I may go that route and do a slight regear. I think Im going to opt out of the front locker though just because of cost. Because I know if I add a locker up front Im going to want the front to be just as reliable as the rear which means lotus cv shafts and I cant justify $1200 in axles.

The last problem I found on this trip was the rear springs. Granted we had a lot of weight going to moab, 4 people camping gear a pretty large cooler and all of the other gear but it seemed like I was bottoming out a lot. I know this is because of the rear bumpstop spacers but I need them to be as long as they are because of the shocks Im running and I really like how it flexes out back right now. So Im now debating what spring to replace the 906's with to accommodate the new bumper and some extra weight. It will either be the toytec superflexes or OME 891s. If anyone thats running these could give their input that would be great.

So in short the future plans now are:
rear air locker
new rear bumper
new rear coils
possible front bumper
reinforce skids.
 
Last edited:

Members online

Forum statistics

Threads
278,310
Messages
3,554,080
Members
248,016
Latest member
Advally Service

Trending content

Back
Top