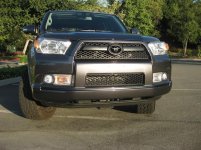
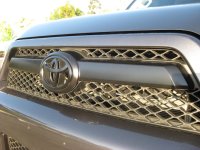
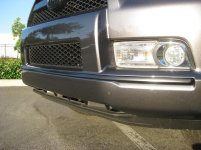
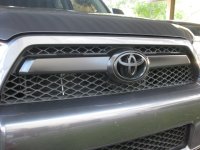
Blacking Out the Runner's Chrome

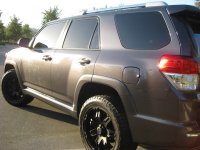
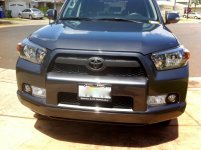
The roof rack caps, front/back Toyota logos and the upper grille piece are easy.

The chrome strips on the SR5 rocker panel are a little more time consuming. You need to remove the rocker panel with 6 bolts on each side, then pop off the blue clips that hold the chrome strips in place. You can do this easily with one person.

For the front and back bumper chrome strips, I believe you need to take off the bumper to access the chrome strips. Also the back chome array with the 4RUNNER lettering is a pain to remove as well. You need to remove the tailgate, cut the plastic seal, remove the backup camera(if you have it) and then unscrew.I painted these all by taping them off. All the above piece chrome pieces were removed.
 
Helpful thread!

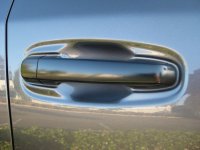
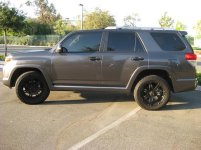
Continued with some of the mod projects today. Debadged and blacked the chrome. I only had time to black the front emblem/grill and chrome strip, and the door handles. Rear chrome strip is definitely next (leaving rear emblem/garnish chrome). Not too sure if I will black the rocker strips and roof rails cause I might get sliders and a new rack.

Big thanks to doodman for his awesome writeup!
 

Attachments

  • IMG_1896.jpg
    IMG_1896.jpg
    79 KB · Views: 11,179
  • IMG_1898.JPG
    IMG_1898.JPG
    134.1 KB · Views: 10,473
  • IMG_1900.jpg
    IMG_1900.jpg
    63.8 KB · Views: 10,906
  • IMG_1907.JPG
    IMG_1907.JPG
    109.3 KB · Views: 10,730
  • IMG_1902.JPG
    IMG_1902.JPG
    104.9 KB · Views: 10,422
  • IMG_1905.JPG
    IMG_1905.JPG
    114.8 KB · Views: 10,496
  • IMG_1906.jpg
    IMG_1906.jpg
    66.3 KB · Views: 25,722
Looks good! After 6 months, I just repainted the bottom front & rear chrome strips and the front grille piece. I opted to exchange the foglight covers for the TE ones. Blends in nicely with my flat black. Too bad Toyota doesnt sell the front grille piece because I would exchange that as well, but you need to buy a whole new upper grille!
 
Looks good! After 6 months, I just repainted the bottom front & rear chrome strips and the front grille piece. I opted to exchange the foglight covers for the TE ones. Blends in nicely with my flat black. Too bad Toyota doesnt sell the front grille piece because I would exchange that as well, but you need to buy a whole new upper grille!

How much were the TE foglight covers?
 
did anyone do the blackout on a black sr5 and if so would you go flat or satin? I found myself two cans of flat but i'm hesitant against the glossy black of the 4runner...any thoughts?
 
did anyone do the blackout on a black sr5 and if so would you go flat or satin? I found myself two cans of flat but i'm hesitant against the glossy black of the 4runner...any thoughts?

Flat black is what I have. Love it. Fits the TE fog lamps nicely as well. I did 3 coats of flat black, 2 coats of clear coat matte finish. Holds up nicely.
 
did you get the krylon matte finish because thats 45/can... worth it?

WHAT?!?! That is the worst price I have ever heard of. Go to Joann Fabrics. 7.43/can for krylon fusion for plastic - flat black and krylong fusion clear coat - matte.

Make sure you get the kind for plastic.
 
RE: MAG10 - Project "Black Out"

Great MOD write-up, I've learned a lot in short time. Thank you all for the intel.

It has been several months since many of you have done the trim black out with the Krylon Fusion paint. For those that have done the flat black w/ the clear coat are you happy w/ the paint durability?

I'm about to tackle this project and have strongly considered applying the Krylon as noted in this thread, *with the addition of a base primer; ie: Ahesion Promoter - Clear Primer; mfg = Dupli-Color.

I'm by no means a "painter", and to be honest found this product when searching online for the actual paint. On Amazon the paint+primer+clear coat was noted as a suggested set of products that others have purchased.

Front/Back/Side modling:
My thought process with questions noted by **[/B]
1. drop cloth/playing card/tape off
2. clean really well - let dry
3. delicately sand with wet 320
4. clean really well - dry with blow dryer
5. apply 3-4 very light coats of primer - let dry 1-2hrs
6. clean really well - dry with blow dryer
7. apply 7-8 very light coats of paint - let dry 1-2hrs
** 8. do you clean the painted surface before applying the clear coat?
** 9. apply 7-8 very light coats of clear coat?

I have a daily 50mi round trip Monday-Friday. It's common to have a LOT of bug guts and debri on my front end. To prevent premature paint chip/damage, for the front pieces I plan completing the application with 1 full day of not driving to allow for drying/curing. At that point my thought is to tape off, with wax paper for non-stick covered by a heavy layer of newspaper, the painted area for 7-10 days when driving to allow for a full paint cure.

Is there anything anyone would recomend doing differently now that you'd done it?

Thanks for the input!

-b
 
Last edited:
On a dark colored car, the black looks great but I've been troubled on what to do on blizzard pearl. If I get up the courage, I'm thinking of buying a new set of all the ugly chrome trim pieces including door handles and having them professionally painted blizzard pearl to match the car.

The final expensive step would be to send the headlights off to be converted to HID projectors, and have the reflectors also painted blizzard pearl. I think it would look pretty cool.
 
nice truck

hey where did you those step bars? also how did you do the driving lights and grills? what the tires and rims? thanks
 
i got sexy lights

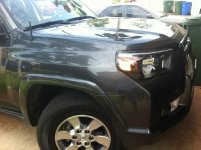
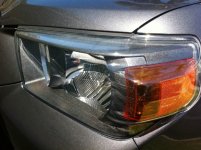
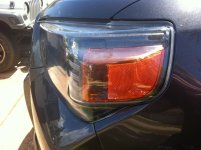
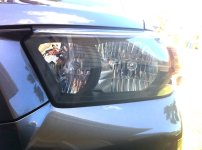
I finally got a free day and took the front of the truck off to get the last of the chrome pieces and take my headlights apart. I was super nervous about rippen them apart but I love the results. I used krylon that is close to the mag grey, looks awesome.
 

Attachments

  • IMG_1768.jpg
    IMG_1768.jpg
    132.8 KB · Views: 9,745
^^ that's the only pic!? I think you're the first on this forum to black the headlights (with the exception of philsey, but his are in a league of their own). Post more pics! i think more members with SR5's and Limiteds need to do this mod! good job!
 
I finally got a free day and took the front of the truck off to get the last of the chrome pieces and take my headlights apart. I was super nervous about rippen them apart but I love the results. I used krylon that is close to the mag grey, looks awesome.

Please give us more! A front end shot and maybe a headlight alone shot would be great. Been curious about the possibility of this mod.
 
I did this mod on my 09 Tundra. It is pretty easy to do but very nerve racking sticking your headlight in the oven. I'll do it to the 4runner once it warms up a little outside. Still in the teens here.
 
Here are some more pics. I can't stop looking at these lights now. FAVORITE mod so far.
 

Attachments

  • IMG_1777.JPG
    IMG_1777.JPG
    123 KB · Views: 8,705
  • IMG_1773.JPG
    IMG_1773.JPG
    120.4 KB · Views: 6,421
  • IMG_1776.JPG
    IMG_1776.JPG
    122.1 KB · Views: 6,464
  • IMG_1783.JPG
    IMG_1783.JPG
    120.5 KB · Views: 6,473

Members online

No members online now.

Forum statistics

Threads
278,309
Messages
3,554,075
Members
248,016
Latest member
Advally Service

Trending content

Back
Top