bpwwer's 2015 Limited build and drive thread

We just finished taking the 'runner on it's first long distance trip. All total, I think it was about 1300 miles. The main goal of the trip was to visit the Camelback Metal Gear shop and get a roof rack installed. Our first stop was Clovis to pick up a skid plate from [MENTION=53960]itsdchz[/MENTION] for [MENTION=106181]SoCal4Run[/MENTION]. Unfortunatlly, [MENTION=53960]itsdchz[/MENTION] wasn't around so we didn't get to meet. But he did leave the skid plate at the front door.
IMG_1151.JPG


Next we drove over the Angeles Crest Highway. We managed to find a couple of spurs that took us off the beaten track and gave us a change to lock the center diff (mostly just for fun). One of the spurs goes up into the downhill ski run area.
IMG_0677.JPG


What surprised us most was how few people were around. It's not that far from L.A. but hardly anyone was around. We had a nice hike and picnic lunch at the visitor center along the way.

The next day we made our way to the Camelback Metal Gear shop and met Alex and his wife Manelle. They are both great people. Not only was the roof rack waiting and ready to install, but they had coffee and donuts. It was obvious that Alex really cares about providing a quality product.
IMG_0701.JPG


Over the next couple of hours we installed the rack and chatted.
IMG_0704.JPG


IMG_0706.JPG


IMG_0708.JPG


IMG_0712.JPG


IMG_0715.JPG


IMG_0716.JPG


It was definitely worth the wait! I'm looking forward to the first chance I get to strap something up there and make use of it.

After this we met up with [MENTION=106181]SoCal4Run[/MENTION] to drop off the skid plate. Too bad the timing was better or we could have had lunch/dinner and spent some time chatting. But our friends said that if we didn't head back before 3pm, we'd be stuck in bad (bad even for L.A.) traffic.

After spending some time with friends and doing a little site seeing (A Warner Bros. tour) our time in L.A. was over and we left via HWY 1 heading up the coast.

The 4Runner performed great, it was comfortable and the navigation worked well when used it. In fact, it was such a nice drive that I forgot to take any pictures of the 4Runner along the way (plus it was pretty dirty by this time).
 
New fairing for the roof rack

The original ABS fairing has had issues. It's slightly better with the fairing than without it but, it bangs and rattles a lot between about 35mph and 65mph. It has also started looking a bit snake like with some nice curves between the mounting points. So time to try something new.

I ordered a 12" x 48" sheet of 1/8" 5052 aluminum from an ebay seller. I was looking for the best price with the lowest shipping and it totaled about $46.

The first step was to cut the sheet in half on the table saw giving me two 5 15/16" x 48" pieces. I then drilled a hole in the center and mounted it up on the rack using just that one center mount.

step1.jpg


I then used a sharpie mounted to a block of wood to scribe the roof line. I cut the curve with a band saw and mounted it back up again.

step2.jpg


My block wasn't tall enough to do this in one pass, so I made another scribe line and another pass with the band saw.

step3.jpg


This looked pretty good so I also marked it for the other two mounting holes and started the finish work. I cut a 1" radius curve on the top corners and just knocked off the square corners on the bottom. This and smoothing out the bottom was done on an oscillating sander. I drilled out the other two mounting holes.

I then primed it and put one code of satin black engine enamel (I had a partial can of this sitting around, but only one coat's worth). I then added a couple of coats of plasti-dip to the front side. Here's the finished result.

step4.jpg


I think I spent about 30 minutes on each step, so I probably have about 2 hours total into this. We took a trip down to Tiburon so we could bike around Angle Island and was able to test it out at all speeds up to about 80mph no more banging or rattling.

Now that I a template, I'll probably try and make another. I'd like to experiment with bending the ends back a bit to make it a bit sleeker looking.

Here's a picture of the scribe block with sharpie. It's just a small block of wood with a hole that the sharpie press fits into. I did sand and wax the bottom of the block so it's nice and smooth. I don't trust that the clear coat is harder than walnut :)

scribe.jpg
 
Last edited:
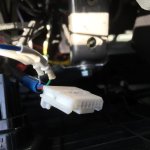
I like your solution for the wind deflector. Did you ever find out what this connector is for? I'm looking for ignition switched power for my new fuse block and was hoping to not have to add a fuse in the fuse box if possible.
 

Attachments

  • dash connector.jpg
    dash connector.jpg
    73.6 KB · Views: 1,355
Do you have any night shots of the light bar output? I've got an LE 4X4 as well, and I'm really looking into getting a light bar in the same location.
 
Do you have any night shots of the light bar output? I've got an LE 4X4 as well, and I'm really looking into getting a light bar in the same location.

No, but I guess I could try and get some. The location behind those slats in the grill do limit the output some and because it's set back like that, the bumper limits how much it can illuminate close to the front.

On the positive side, it's pretty easy to install one there. Access is pretty good.
 
LED headlights

We do a fair amount of driving at night up in the foothills where deer and other animals are common. Like many here, we've been underwhelmed by the light output of the headlights. So, I finally decided to do something about it. I picked up a H11 Xtreme LED Pro Headlight Kit from [MENTION=12905]XenonDepot[/MENTION]

Installation was easy as they fit right in place of the old bulbs.
led_headlights_1.jpg


In fact, if you try, you can cram all the wires and driver box inside housing, but that doesn't leave much room for air/cooling and is not recommended. I ended up drilling a hole in the dust cover. The result is nice and clean.
led_headlights_2.jpg


The pattern on the garage door matched that of the halogens, just brighter. So far I've only taken it out for a quick test at night and the amount of light projected has increased. The pattern looks good with the same cut-off. I did check to make sure I'm not lighting up the interior of cars in front of me. No pictures out the front as you can find a number of comparisons of these vs. other lights out there. We should be giving them a full test in a few days when we head up to our cabin in the boonies.

And lastly, the mandatory picture of the front with the new lights installed.
led_headlights_3.jpg


The only problem, these now make the high beams look really yellow.
 
Thank you so much for taking the time to post up pictures and feedback our our new H11 Xtreme LED pro kit!

How do you have the heat sink spread out in the actual housing?

I don't think mine look quite that pretty but I did try to spread them out pretty good. I didn't want to mess with them too much as I had already twisted them up some when I had the driver and wires all in there too. My technique was to fold them over into the housing and then fan them out kind of like playing cards.

I found this way pretty functional:


Thanks! That's a good reference.
 
New wheels and tires!

The first change I wanted to make after purchase was going to be tires. That was before I knew that the number of AT tires that were rated to fit the Limited's narrow rims was effectively zero. For the past 5 years, I've been looking at wheels and tires while I waited for the OEM tires to wear (being cheap and not wanting to throw out perfectly usable tires). That time has come.

Thanks to FN Wheels and America's Tires I now have a set of f(x) Pro 17x8 medium graphite wheels and Cooper AT3 LT tires.

4runner_fxpro.jpg


Much better look!
 

Members online

Forum statistics

Threads
278,316
Messages
3,554,120
Members
248,016
Latest member
Advally Service

Trending content

Back
Top