Build Thread?

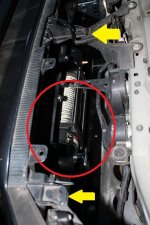
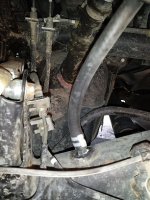
I wonder if this bolt (Arrow) could be replaced with one a 1/4" shorter. Maybe I don't have it installed properly. I haven't played the radio for a couple weeks listening for any errant noises under there.

If you can find something that's 7/16 x 2-1/4" that should work. A 2" is a bit short, and the next size up for me is the 2-1/2" you have.
 
If you can find something that's 7/16 x 2-1/4" that should work. A 2" is a bit short, and the next size up for me is the 2-1/2" you have.
And there he is.... Thanks Mike! These Links are very well done sir. My ACE hardware here usually has whatever I need. Definitely going to try a set of your Discos soon tho!
 
Diff Breather ext.

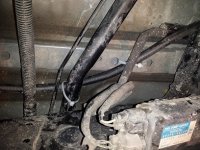
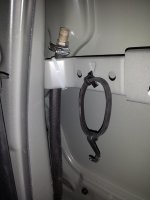
Did my Rear Diff Breather yesterday underneath my dirty ass truck. Thank you [MENTION=50366]jgedmond[/MENTION] and [MENTION=1913]hoeftm2002[/MENTION] for the knowledge. I shorted myself on 3/8" fuel line, so I routed it up close to the underside of the bed (leaving slack for axle flex) and zip tied it in random secure areas and didn't cinch em very tight, just enough to keep the hose in place.
 

Attachments

  • 138867 - Copy.jpeg
    138867 - Copy.jpeg
    77.6 KB · Views: 993
  • 138868.jpeg
    138868.jpeg
    85.2 KB · Views: 1,010
  • 138872.jpeg
    138872.jpeg
    44.5 KB · Views: 972
Torque Pro

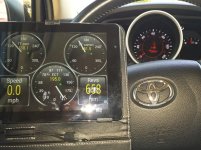
I know this is an old tune for most of you. Did the Torque Pro app this morning. Thank you [MENTION=90026]JeremyB[/MENTION] !!!
Pretty cool stuff with the 2 different Trans temp sensors, Engine Coolant sensor and Coolant sensor. Found an old tablet I had laying around that will serve as my new gauge cluster- just got find a way to mount it in the cab. Tested the Converter sensor by hitting it with manual shifting and some rpms. It definitely registers changes quicker than the pan sensor.
 

Attachments

  • 20160107_114157.jpg
    20160107_114157.jpg
    108.3 KB · Views: 987
Wet Okole and a Baja Rack

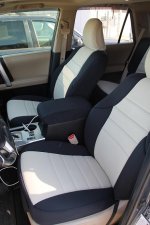
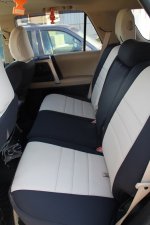
Got a couple things done yesterday. Wet Okole fit is top notch.
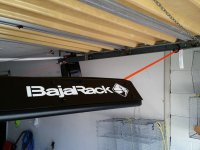
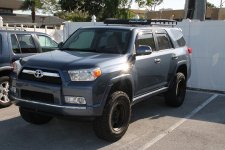
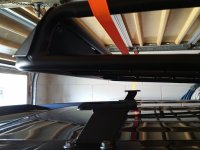
Hung my Baja Rack from the garage door tracks and pulled the Runner underneath, and lowered it right on to the brackets.
 

Attachments

  • IMG_3235.JPG
    IMG_3235.JPG
    69.7 KB · Views: 943
  • IMG_3236.JPG
    IMG_3236.JPG
    71.6 KB · Views: 932
  • Baja Rack 1.jpg
    Baja Rack 1.jpg
    59 KB · Views: 961
  • IMG_3233.JPG
    IMG_3233.JPG
    114.5 KB · Views: 1,021
  • Rack 4.jpg
    Rack 4.jpg
    71.2 KB · Views: 936
Got a couple things done yesterday. Wet Okole fit is top notch.
Hung my Baja Rack from the garage door tracks and pulled the Runner underneath, and lowered it right on to the brackets.

Any tips for installing the lower seat covers? I put mine in not long ago but getting it to go behind the plastic was quite difficult. Looks like you did a better job....I'm planing on re-adjusting mine again soon.
 
Any tips for installing the lower seat covers? I put mine in not long ago but getting it to go behind the plastic was quite difficult. Looks like you did a better job....I'm planing on re-adjusting mine again soon.
It wasn't real easy, but I just fed the straps and buckles in their respective spots in relation to the seat, and then tucked it in like a shirt. The plastic valance around the seat is probably more pliable down here in Florida, mid to high 80s yesterday, so that may be one reason it didn't fight me. I'm tall and have long arms, so that helps as well. Good Luck!
 
Got a couple things done yesterday. Wet Okole fit is top notch.
Hung my Baja Rack from the garage door tracks and pulled the Runner underneath, and lowered it right on to the brackets.

Detour>>>>

Are those crabs traps I see....
All lobster traps are wooden, aren't they?
 
Shrockworks Front Bumper install

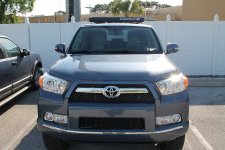
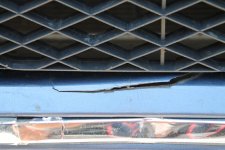
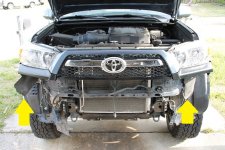
Finally found the time to install my bumper. Install was done by myself so a big Thank you [MENTION=51186]philsey[/MENTION] for the bumper removal. A few pics as to why I needed a bumper. These are the previous owners scars:
 

Attachments

  • 1.JPG
    1.JPG
    108.6 KB · Views: 889
  • 2 (2).JPG
    2 (2).JPG
    92 KB · Views: 899
  • 3 (3).JPG
    3 (3).JPG
    112.4 KB · Views: 914
  • 4.JPG
    4.JPG
    91.4 KB · Views: 855
  • 6.JPG
    6.JPG
    105.3 KB · Views: 896
Last edited:
Shrockworks Front Bumper install

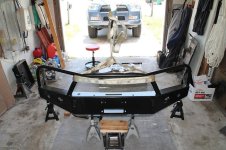
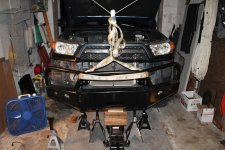
Now before I started the removal of the old, I wanted to make sure I had a good working system for getting this bumper into place by myself.
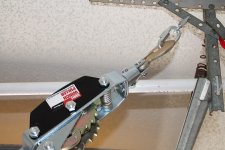
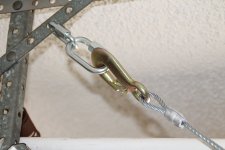
My garage door is hung from some pretty stout brackets, so I hung my winch puller from them.
DISCLAIMER: I NEVER SUPPORTED THE WEIGHT OF THE BUMPER FROM THE WINCH PULLER! DO NOT ATTEMPT THIS WITHOUT A FLOOR JACK TO SUPPORT THE WEIGHT OF THE BUMPER!!! WINCH PULLER IS FOR STABILIZATION ONLY!!
I purposely left the vehicle winch out of the bumper until I had it bolted in, to keep the 200 plus lbs. of weight off of my lift system.
 

Attachments

  • 14.JPG
    14.JPG
    92.3 KB · Views: 938
  • 15.JPG
    15.JPG
    71.1 KB · Views: 949
  • 12.JPG
    12.JPG
    122.9 KB · Views: 979
  • 13.jpg
    13.jpg
    89 KB · Views: 934
Last edited:
Shrockworks Front Bumper install

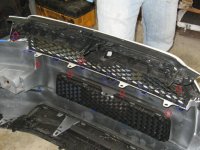
So I don't have a lot of detail of the removal or the install, but I do have a couple tips: Take your time and save all factory fasteners and hardware. The first pic I stole from [MENTION=51186]philsey[/MENTION] (agree with philsey, removal of upper and lower is easier to do with them still attached to each other) to show the tabs on the grill that are important fastening points that match up with the new grill support.
Once you have the old bumper off, remove the center factory brace and install your grill support.
Philsey.JPG
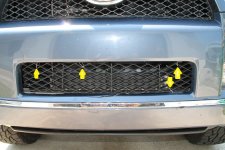
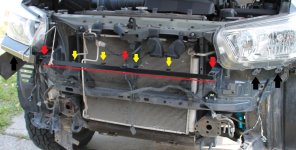
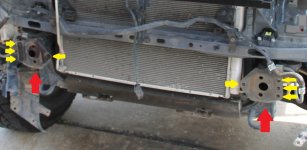
This is the new grill support in place. The Red arrows are factory bracket fasteners and you will reuse the bolts in them for the new support.
Yellow arrows are where the tabs on the grill will fasten to and black arrows indicate 2 of the fastening points for the headlight trim pieces (TIP: you can see I used string to help keep trim piece supported until fasteners are started). grill and trim supports.jpg
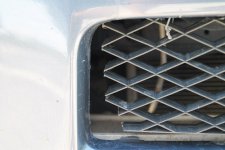
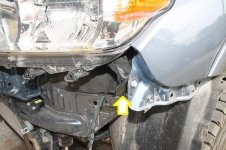
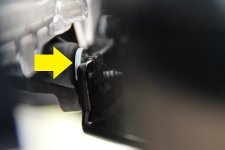
The single yellow and white arrow (3rd fastener for headlight trim) is where the small angle bracket is fastened inside the fender with factory bolt. Last picture is a tip from Shrockworks (washer in between trim piece and fastener point below headlights) which helps quite a bit with alignment. All of these fastening points can be damaged during your removal of the old bumper so be careful. Now mock everything up, leave all your fasteners loose, and make sure its level and centered. All parts center off the grill as far as I can tell, and can be shifted around a little, so as to get everything to line up.
 

Attachments

  • Philsey.JPG
    Philsey.JPG
    88 KB · Views: 988
  • grill and trim supports.jpg
    grill and trim supports.jpg
    133.6 KB · Views: 952
  • IMG_3252.jpg
    IMG_3252.jpg
    54.8 KB · Views: 921
  • IMG_3259.JPG
    IMG_3259.JPG
    50.3 KB · Views: 898
Last edited:
Shrockworks Front Bumper install

These mounting pads are for the factory bumper (red arrows) and where the SW brackets bolt to with your reused 8 factory bolts (yellow arrows 4 ea side).
 

Attachments

  • IMG_3251.JPG
    IMG_3251.JPG
    109 KB · Views: 904
Last edited:
Shrockworks Front Bumper install

Here is everything for the grill assembly mocked up and shifted around. Fasteners are still loose until bumper is bolted on and everything can be set for the final alignment. TIP: Rubber flaps (yellow arrows) hanging down underneath the headlights I pulled from behind the headlight assy. so I could align my screw driver with the trim fasteners.
SW frame brackets are bolted on here as well. Take your time at this point to make sure truck end is ready for install.
 

Attachments

  • IMG_3258.JPG
    IMG_3258.JPG
    126.5 KB · Views: 936
Last edited:
Shrockworks Front Bumper install

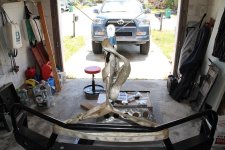
Here is everything slowly going together. Single car garage made it tricky getting the door open and out of the Runner after I pulled it in.
Lifting the bumper was done in small increments until I got it close and the floor jack rolled it right in. Hmmmm, never checked how much an engine hoist rental would cost. Hindsight is 20/20 as they say and there wasn't much room in there for a lift.
When I had it bolted up, I took the top 3 fasteners loose from the grill and dropped my Super Winch in the area with red circle. This I don't recommend doing yourself, I'm 6'6" and my long arms don't hurt the cause in this application. I will have to do a Solenoid relocate on this particular winch, but it works.
 

Attachments

  • IMG_3261.JPG
    IMG_3261.JPG
    121.5 KB · Views: 910
  • IMG_3275.JPG
    IMG_3275.JPG
    98 KB · Views: 885
Last edited:
Shrockworks Front Bumper install

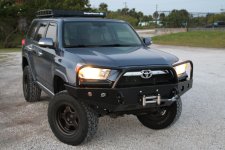
Here is the first drive out for coffee.
Last Tip:
SW has 4 holes that you need to drill for "3/8 check bolts" through the bumper and frame bracket that ties everything together and helps keep it there. Before I drilled the holes, I wanted to get it out for a drive, hit a couple speed bumps, shake everything out, and get a final alignment of all the pieces/parts.
Thanks to EVERYONE who Runs/Moderates/ and Contributes to this Forum!!
All of these mods are stuff I learned about, and how to achieve, RIGHT HERE AT T4R.ORG
 

Attachments

  • IMG_3267.jpg
    IMG_3267.jpg
    131.5 KB · Views: 915
  • IMG_3269.jpg
    IMG_3269.jpg
    132.9 KB · Views: 914
  • IMG_3273.jpg
    IMG_3273.jpg
    120.2 KB · Views: 917
Last edited:
Here is the first drive out for coffee.
Last Tip:
SW has 4 holes drilled for "3/8 check bolts" through the bumper and frame bracket that tie everything together, but I wanted to get it out for a drive, hit a couple speed bumps, shake everything out, and get a final alignment of all the pieces/parts.
Thanks to EVERYONE who Run/Moderate/ and Contribute to this Forum!!
All of these mods are stuff I learned about and how to achieve RIGHT HERE AT T4R.ORG

Love it! Hopefully get to see it in person at Lazy Springs next month!
 
Unfortunately,
I'm booked with work during the whole month of May. What's going on? Don't know much about S.FLA wheeling spots. Lazy Springs? Googling.....

It's the event that Florida 4Runners is hosting on May 21st. I've saw the other photos you posted of your truck on the Facebook page. I'm new to S. FL as well but it's a recreation park with 4wd trails, fishing, camping etc. Hope to see you at one of their other events, I'm going to try and make it up to central/n Florida soon.
 
Lazy Springs

Thanks Cymon!!
I am going to try and get out somewhere for some Camping and Wheelin in the next couple weeks, after I get my skids on and replace a CV axle.
 

Members online

Forum statistics

Threads
278,305
Messages
3,554,042
Members
248,016
Latest member
Advally Service

Trending content

Back
Top