Build Thread

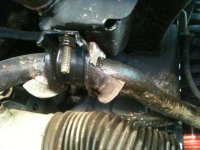
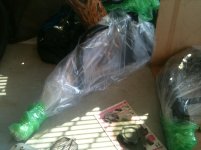
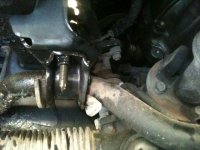
Old Swaybar bushings.
old bushing.jpgold bushing2.jpg
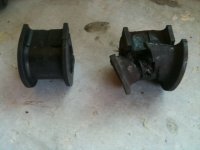
Old vs New
old vs new bushing.jpg
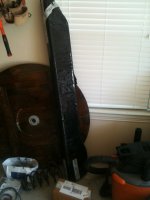
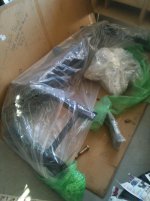
Old Swaybar. (The reason I replaced the entire thing instead of just the top bushings is because the bottom boot was completely torn. Plus on RockAuto was about a $7 part and the bushings alone were $5.)
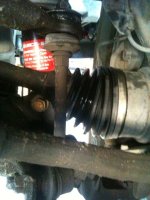
old swaybar 1.jpg
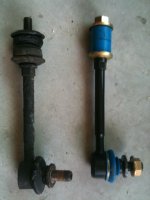
Old vs New
old vs new swaybar.jpg

Analysis:
The engine is slightly louder with the deckplate mod, but can't really tell a difference in HP. Hopefully it will improve MPG which was the primary reason I did it. Perhaps when the ISR mod is complete it will make it make a HP difference.

New plugs/wires/ignition coils...not real noticeable difference. Like I said earlier I wasn't having any issues, just a good maintenance thing to do...Plus from looking at the old plugs...It was time. I wasn't sure going into it if they had ever been changes...I assumed it bc those things just don't last that long. I know its been atleast 127K since they have been changed and that is if they were changed the day before I bought it, which I doubt they were. Needless to say they had been changed bc they were all DENSO plugs. While no immediate performance was gained...maybe I'll improve MPG which is always good.

The pictures of the swaybar and swaybar bushings speak for themselves. This was something that really needed to be changed.

I didn't get around to the inner/outer tie rods of the 10mm spacer. I got a late start and has to clean up around 4 bc we were going out with friends. All this took 4-5 hours including stopping in between each step to wash my hands to take pictures. Probably could have knocked 1 hr off if i wasn't taking pictures, but lets be honest...post are more fun with pictures.

Here are some "How To" links which may be helpful.
How to Change Spark Plugs
SwayBar Bushings/End Links
ISR MOD
Deckplate MOD
 

Attachments
  • old bushing.jpg
    old bushing.jpg
    135.1 KB · Views: 700
  • old bushing2.jpg
    old bushing2.jpg
    128.3 KB · Views: 713
  • old swaybar 1.jpg
    old swaybar 1.jpg
    116.8 KB · Views: 694
  • old vs new bushing.jpg
    old vs new bushing.jpg
    93.8 KB · Views: 689
  • old vs new swaybar.jpg
    old vs new swaybar.jpg
    85.3 KB · Views: 711
Last edited:
(Didn't get to the ISR Mod. I'm having a hell of a time finding a metal tube that fits. I may have to find a muffler shop that can stretch and fit one for me. Is that what most of you guys have done?)

Yeah, I think most people will buy a piece of 2.5" OD tube and get it widened at the ends. I went here:

Order Aluminum 6061 Tube in Small Quantities at OnlineMetals.com

and had them cut a piece of 2.75" OD aluminum pipe to a length of 5.5". It's a local shop, so I just picked it up. Think it cost me around $11-12. Then I painted it with high-heat paint and then installed it. Fit like a glove.

photo3.jpg~original
 
Last edited:
Geeze...Your engine looks like it just came out off the showroom floor. How often do you clean that bad boy?

Lol. I've only cleaned it twice. Once right after I bought it and once recently. I like to do a good spring full detail of any vehicle I have.
 
These were waiting for me when I got home today. In the words of the great Deon Sanders... "Oh! What a day!!!"
cb mount.jpg

sliders.jpg

Special thanks to driffter33 and 4xinnovations

Not sure when I'll get around to installing the sliders. Hopefully it will be sooner than 8 months. Here's looking at you Hepar
 

Attachments

  • cb mount.jpg
    cb mount.jpg
    131.3 KB · Views: 640
  • sliders.jpg
    sliders.jpg
    78.8 KB · Views: 662
Hey, they do make good conversation starters when sitting in sight. I convinced one of my friends that they were art pieces made by a super famous artist.
 
A few updates...

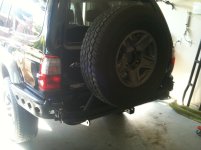
I bought Outdoor Logic's rear swingout bumper and it is now here and powdercoated...

swing out.jpg

swing out 2.jpg

Hope Rc4r can make it over to help me put it on this weekend. I need the garage space.

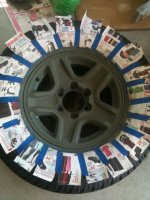
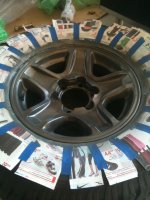
Also bought a 5Star wheel from SCRunner and put a new Toyo Open Country A/T 265/75/16 on it for the swing out. I decided to go ahead and paint it. The rest will follow shortly.
(Primed)
wheel primed.jpg

(Painted)
wheel painted.jpg

Those of you who have done this already...what do you recommend doing with the lug nuts? Paint them to match? or leave them alone since they will scratch wheel you take them on/off?
 

Attachments

  • swing out 2.jpg
    swing out 2.jpg
    120 KB · Views: 1,399
  • swing out.jpg
    swing out.jpg
    109.5 KB · Views: 1,297
  • wheel primed.jpg
    wheel primed.jpg
    133.1 KB · Views: 1,316
  • wheel painted.jpg
    wheel painted.jpg
    131.5 KB · Views: 1,274
A few updates...

I bought Outdoor Logic's rear swingout bumper and it is now here and powdercoated...

View attachment 51021

View attachment 51020

Hope Rc4r can make it over to help me put it on this weekend. I need the garage space.

Also bought a 5Star wheel from SCRunner and put a new Toyo Open Country A/T 265/75/16 on it for the swing out. I decided to go ahead and paint it. The rest will follow shortly.
(Primed)
View attachment 51022

(Painted)
View attachment 51023

Those of you who have done this already...what do you recommend doing with the lug nuts? Paint them to match? or leave them alone since they will scratch wheel you take them on/off?

looks good. when do you want to put it on?
 
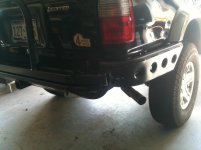
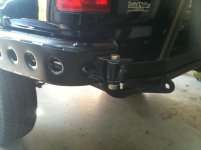
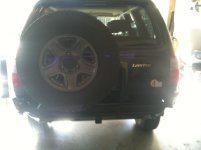
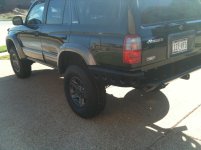
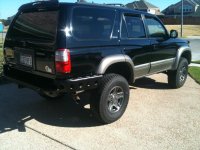
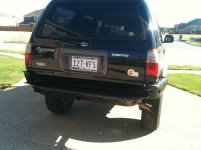
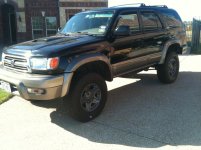
Here are some pictures of the rear bumper swing-out and the newly painted wheels. (I dont like the wheels on my truck now. I think the color looks funny with my trim color, & I'm open to suggestions.) Thanks to RC4R for help with the install. That factory rear bumper has alot more to it to remove than I had imagined. I broke a few bolts off during the process. Including one in the trailer hitch(it's still there).

The best part of all is I gained over 5 1/2 inches in clearance.
19 1/2 ground to trailer hitch to 25 1/8th :trophy:


New Rear Bumper 4.jpg

New Rear Bumper 8.jpg

New Rear Bumper 7.jpg

New Rear Bumper 6.jpg

Currently running it without the swing arm. I am working through a few logistical things with it. There is also a Jerry Can holder that isn't seen in these pictures. I'll post more when I get it all up and running.

New Rear Bumper 5.jpg

New Rear Bumper 3.jpg

New Rear Bumper 2.jpg

New Rear Bumper 1.jpg
 

Attachments

  • New Rear Bumper 4.jpg
    New Rear Bumper 4.jpg
    97.4 KB · Views: 1,172
  • New Rear Bumper 8.jpg
    New Rear Bumper 8.jpg
    88.1 KB · Views: 3,580
  • New Rear Bumper 7.jpg
    New Rear Bumper 7.jpg
    65 KB · Views: 1,098
  • New Rear Bumper 6.jpg
    New Rear Bumper 6.jpg
    100.9 KB · Views: 1,262
  • New Rear Bumper 5.jpg
    New Rear Bumper 5.jpg
    129.9 KB · Views: 1,192
  • New Rear Bumper 3.jpg
    New Rear Bumper 3.jpg
    135.1 KB · Views: 3,261
  • New Rear Bumper 2.jpg
    New Rear Bumper 2.jpg
    121.5 KB · Views: 1,700
  • New Rear Bumper 1.jpg
    New Rear Bumper 1.jpg
    133.1 KB · Views: 1,373
I'm jealous..
It looks mean
and
That's the only thing on my rig I don't have!


Have you thought about color matching your flares the same color as your rims?
That could turn out really good
 
Last edited:
I'm jealous..
It looks mean
and
That's the only thing on my rig I don't have!


Have you thought about color matching your flares the same color as your rims?
That could turn out really good

I have thought about it but the thing that originally drew me to this runner was the color scheme. Plus I would just end up painting it myself and I know that would look crappy after a few months, paint peeling, etc.

I think I'm gonna test a few different paints to try to match the trim. I know that might not be the popular choice but it would be unique and I think I would like it. Which let's be honest...that's all that matters right? Once I get a front bumper...it might tie it all together with the current wheel color, but who wants to wait for that, am I right?
 
Man the build looks great!
If you ever need a hand feel free to give me a shout.
Other than that we should try and hook up sometime.
Keep up the great work.
 
Man the build looks great!
If you ever need a hand feel free to give me a shout.
Other than that we should try and hook up sometime.
Keep up the great work.

Sure thing man. Same to you on the lending a hand.

Here are a few pictures from this weekend...
a6cd087e-5b14-be52.jpg

a6cd087e-5b35-7813.jpg

a6cd087e-5b5d-8a74.jpg

a6cd087e-5b86-cd16.jpg
 
It looks great man!

Did you get a new sway bar end-link? I noticed the one on the right looks brand new. If so is it Toyota or aftermarket?

That rear bumper is pretty cool. Are you going to do something with that exhaust tip, I'd suggest getting a Tundra TRD tip $72.
 
I take it the swing out is still not finished

No I still have not bought the drill bit. They suggested drilling out the bushings not the hole on the bumper which makes a little more sense. I also have to figure out how to make the pin on the passengers side slide in since the head on it is too big...
a6cd0a14-58e6-844a.jpg

I don't want to grind it off straight and have it look like a low rent ghetto toothless hooker. I can't seem to find a hitch pin with a smaller head so I guess it's up to me and my mad fab skills to get this one right(I have little fab skills).

EDIT:
Does anyone have suggestions?
 

Members online

Forum statistics

Threads
278,305
Messages
3,554,042
Members
248,016
Latest member
Advally Service

Trending content

Back
Top