CB6 build thread and Trip Reports

cbevington6

New member
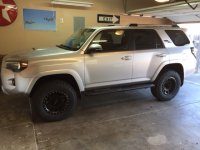
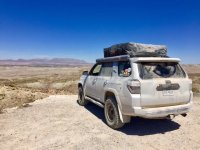
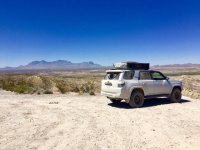
Hi all, I just picked up a new 2017 ORP (Non KDSS), and do I have plans for this thing. I mainly wanted to use this so I can keep track of my progress and trips, and maybe a "searcher" out there can reference it if needed in the future, like I have done and will keep doing with everyone else's builds. Feel free to offer any advice you might have! Cheers :yo:

Mods Installed:
Interior LED's
Cargo LED's
Basic bi*ch Plasti-dipped emblems
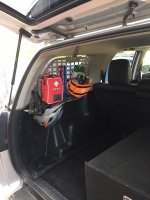
Interior Bike Rack
WeatherTechs
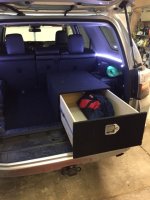
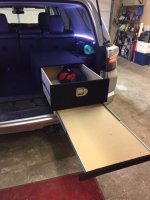
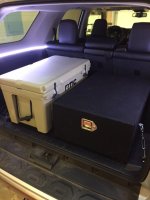
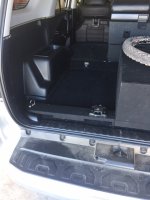
Cargo box w/ slide out table
Method NV's (17x8.5 0mm OS)
275/70-17 BFG KO2's
Bilstein 5100's
Dobinsons C59-599 Rear Coils
Rago modular panels
JBA Upper Control Arms

Part time additions:
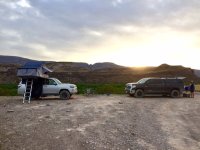
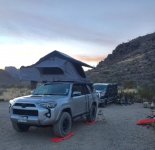
Roam Adventure Co. Roof Top Tent
ARB 2000 Awning w/ custom made brackets to fit rtt crossbars.

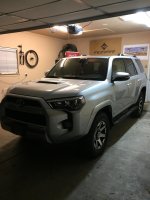
Stock pic/Current pic
 

Attachments
  • 4runner1.jpg
    4runner1.jpg
    122 KB · Views: 827
  • 1.jpg
    1.jpg
    100.1 KB · Views: 361
  • 7.jpg
    7.jpg
    77.7 KB · Views: 374
  • rago2.jpg
    rago2.jpg
    84.9 KB · Views: 265
Last edited:
Register to hide this ad
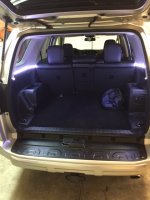
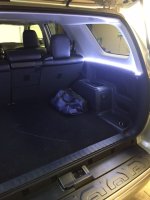
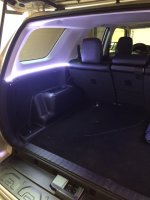
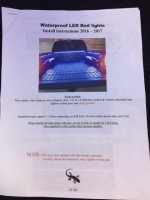
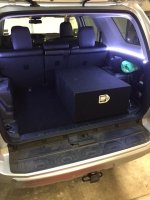
I kept the bed lights from my Tacoma and adapted them to run in the cargo area. Not very knowledgeable in wiring, but I got these to work with a switch hidden in the back.
 

Attachments

  • IMG_1005.JPG
    IMG_1005.JPG
    109.3 KB · Views: 633
  • IMG_1002.JPG
    IMG_1002.JPG
    104.1 KB · Views: 670
  • IMG_1003.JPG
    IMG_1003.JPG
    100.7 KB · Views: 633
  • IMG_1004.JPG
    IMG_1004.JPG
    93.5 KB · Views: 637
Last edited:
Interior cargo area lights

I like the extra light in the cargo area. I think the location is in your eyes and makes it hard to see things on the floor. They might be better placed on both sides of the back tailgate door on the jambs or shining down from the door when it's open.

Yes, tell us about the interior bike rack. I saw one in a van recently where the front wheel was removed so the bikes could slide in on a track with a sliding anchor for the front forks. It was very secure for the bikes. When I take my bike anywhere. like to work, and I need to leave it secure all day I just remove the front wheel and slide it in sideways. I always cover it with a sheet or tarp so people can't see what it is.
 
I like the extra light in the cargo area. I think the location is in your eyes and makes it hard to see things on the floor. They might be better placed on both sides of the back tailgate door on the jambs or shining down from the door when it's open.

Yes, tell us about the interior bike rack. I saw one in a van recently where the front wheel was removed so the bikes could slide in on a track with a sliding anchor for the front forks. It was very secure for the bikes. When I take my bike anywhere. like to work, and I need to leave it secure all day I just remove the front wheel and slide it in sideways. I always cover it with a sheet or tarp so people can't see what it is.

Lights do a good job of lighting up the whole floor and dont really seem like they're in my eyes at all. The reason i ran them from back to front was due to the length they are, they are made for a Taco bed and fit pretty well there. I've seen some short ones you can buy for the pillars but this was already in hand and does the job well.
 
Last edited:
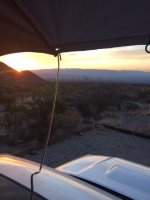
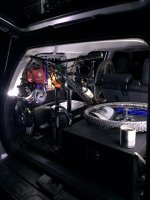
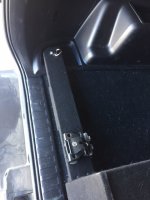
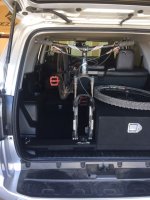
Got the bike rack wrapped up. I used a block off the box, and the d-ring bolt to secure it. its a 1x4 with a fork mount from rocky mounts I had previously used in my Taco bed. Mount is solid and allows me to leave the bike in the car while at work and in town and such.
 

Attachments

  • 6.jpg
    6.jpg
    79.9 KB · Views: 509
  • 7.jpg
    7.jpg
    81.6 KB · Views: 507
  • 8.jpg
    8.jpg
    92.2 KB · Views: 503
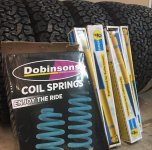
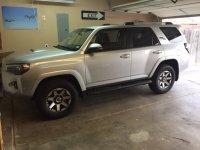
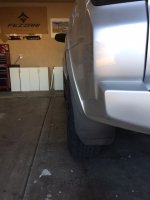
It was a busy weekend! Got Bilstein 5100's on all 4 corners, stock coils up front, and Dobinsons C59-599 coils on the rear. Also swapped out the stock round things with Method NV's (17x8.5 0mm OS) and 275/70 BFG KO2's. Everything went well except I pinched a ball joint boot (rookie move) so I have to swap that out next week.

Before and After pics
 

Attachments

  • 11111.jpg
    11111.jpg
    104.4 KB · Views: 468
  • 1222.jpg
    1222.jpg
    79.8 KB · Views: 469
  • lifta.jpg
    lifta.jpg
    82.4 KB · Views: 474
  • liftb.jpg
    liftb.jpg
    65.8 KB · Views: 464
Trip Report - Big Bend National & State Parks, Texas - April 2018

Some friends and I took off for 4 days to Big Bend National park, and spent a morning in the state park as well riding mountain bikes. This was my first trip planning experience, and we stayed busy the ENTIRE time. For anyone looking to plan a trip to BB I would highly highly recommend it, but be prepared. It is a long way from anything and getting good primitive camp spots can be a bit tricky if you go on a busy weekend. I searched through lots of BB posts on multiple forums so hopefully this post can help someone planning their own trip.

Day 1 - Thursday
We left about 530 in the morning on Thursday in order to get us to the park about 1230 - 1. We hit the northern gate to the park about 1230 after a quick lunch and fill-up in Marathon, but it took another 30ish minutes to get to the Panther Junction visitor center where you have to reserve your backcountry permits, and primitive road campsites IN PERSON. (you cannot reserve primitive sites online, or any further out than 24 hrs before the first night of camping) This makes getting good sites a bit risky if you go on a busy weekend, or arrive late in the day or Friday. We were able to walk right up to the ranger desk and reserve primitive spots for all 3 nights. The only night we did not get the area we wanted was Friday night, and I think we ended up at a pretty nice spot anyways... As soon as we were done we turned around and there was a line of about 20 people waiting for permits.

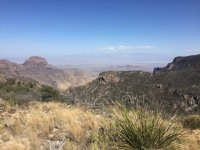
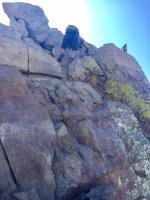
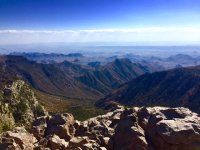
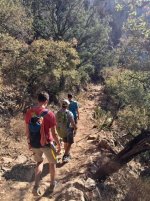
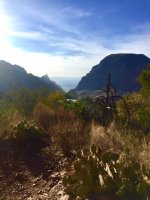
As soon as we got all of our permits we jetted to the Chisos Basin area to hike the Emory Peak summit trail. Emory peak is the tallest peak in the park. The trail took us 4.5 hrs, with about a 20 minute break at the very top. The trail gives some amazing views of the area and is well worth the hike. There a LOTS of step ups the entire way up, and the very end is a scramble up some steep exposed rock. (picture below) The hike down was just as beautiful but much quicker as we were now racing the sun to get to camp.

We left chisos basin area headed for Pine Canyon 1 for the night. About 10 minutes in on Glenn springs road we came to the PC road fork and 30 seconds later we were at camp. It was a great spot with views up the canyon to the west and amazing views of the desert to our east/south. We saw one car the entire time we were there. After a quick dinner and clean up we admired the stars. I've never seen anything like it. We tried our hand at some long exposure milky way shots and then called it after a few beers.
 

Attachments

  • a.jpg
    a.jpg
    103.1 KB · Views: 376
  • c.jpg
    c.jpg
    90.4 KB · Views: 363
  • d.jpg
    d.jpg
    83.9 KB · Views: 363
  • f.jpg
    f.jpg
    84.4 KB · Views: 356
  • g.jpg
    g.jpg
    82.2 KB · Views: 367
  • h.jpg
    h.jpg
    80.4 KB · Views: 388
  • i.jpg
    i.jpg
    71.8 KB · Views: 351
  • j.jpg
    j.jpg
    94.7 KB · Views: 366
Trip Report - Big Bend National & State Parks, Texas - April 2018

Day 2 – Friday
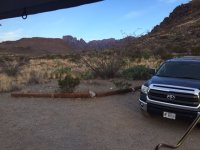
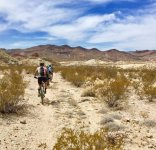
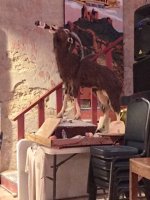
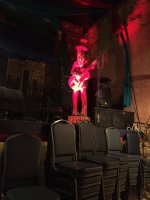
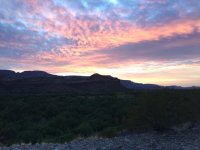
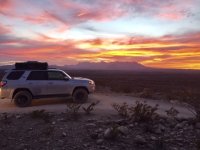
We woke up and started moving around at daylight 730-8. After a quick breakfast we headed torwards Big Bend State Park for some mountain bike riding. (the NP does not allow bikes on trails, only on the roads) It was about an hour drive on pavement through Terlingua and to the Barton Warnock Visitor center just west of the NP. We rode an out and back at 20 miles through the state park. It was HOT, I would not try that in the summer months. After a cool down and some pickles and Gatorade, we headed into Terlingua to check out the Starlight bar and grill. We all got a cold Big Bend Brewery beer and sat next to some interesting figures while we chatted about the last 2 days. We decided to stick with our dinner plans and head out, back towards the NP and Buenos Aires 1 camp site. As soon as we came back into the park we saw the dreaded sign for any new arrivers. “All campsites FULL” We turned onto Maverick road to head south towards BA1 which was just north of the Rio Grande River. Our concerns with this site being so close to old Mexico were shot down by the ranger, and rightfully so. It was an amazing spot with great views all around. We got to camp just before sundown, and enjoyed a beautiful sunset over Santa Elena Canyon walls. Once again, dinner and a few beers and we were all toast so we headed to bed.
 

Attachments

  • 1.jpg
    1.jpg
    82.4 KB · Views: 337
  • 2.jpg
    2.jpg
    125.1 KB · Views: 377
  • 3.jpg
    3.jpg
    84.4 KB · Views: 354
  • 4.jpg
    4.jpg
    74.2 KB · Views: 346
  • 5.jpg
    5.jpg
    51.7 KB · Views: 348
  • 6.jpg
    6.jpg
    71.6 KB · Views: 344
  • 7.jpg
    7.jpg
    76.9 KB · Views: 339
  • 8.jpg
    8.jpg
    84.7 KB · Views: 374
Trip Report - Big Bend National & State Parks, Texas - April 2018

Day 3 – Saturday
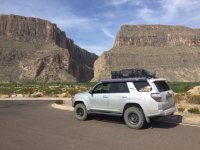
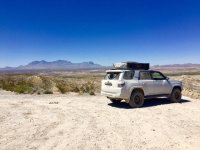
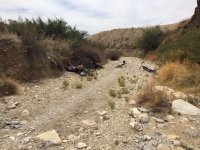
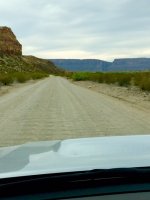
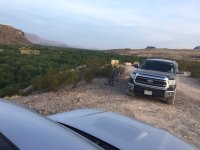
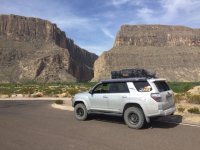
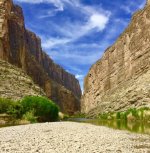
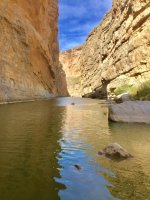
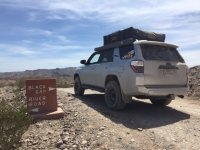
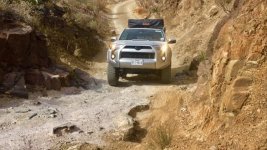
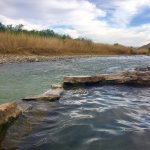
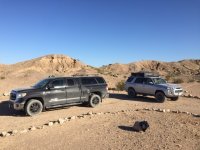
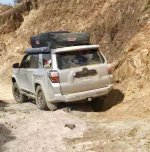
Up about the same time as Friday we ate, cleaned up, and headed for Santa Elena Canyon. First we stopped at the over look then continued on to the trailhead. Pictures DO NOT do this place justice. It is quite amazing the height and narrow width of this canyon. We hiked the 0.5 mile trail into the canyon, which was fairly easy. There is some elevation change involved but it is smooth concrete with rails. The trail takes you along the river right down to a sandy beach at the end of the trail, giving some great views along the way. This is a must see if you are at the NP. We loaded up after a quick lunch and headed back towards the northern end of Glenn Springs road where we would start our day of dirt. Black Gap road was the main activity for the day. GS rd was fairly mellow, but provided some amazing views. It did not take long for us to get to the BG rd turnoff. It immediately dips down into the only water away from the river we saw the entire trip. There were a few technical spot along the road, but nothing that really challenged the T4R. However my buddies Tundra, which is much longer and lower, had some difficulties. There was nothing we couldn’t do carefully and both vehicles handled the road without any damage. The step was my favorite, I went up, down, and then back up again for the experience. We only saw 1 other group of 2 trucks when driving BG. It was an amazing drive and well worth the experience. We drove dirt all the way from the south end of BG road and ended up at the Natural Hot Springs that are on the Rio Grande. It was getting late so most people were leaving and we had very little crowds while we were soaking our sore legs. We took a quick dip in the river to cool off and rinse off and headed towards Ernst Tinaja campground for our final night. Old ore road is much rougher than the other roads and was actually slower, in our case, than Black Gap. We made it to camp with a little light left to set up camp, and get a well deserved dinner and beer. It was not long before we all headed to our tents.
 

Attachments

  • 1.jpg
    1.jpg
    100.1 KB · Views: 325
  • 2.jpg
    2.jpg
    86.2 KB · Views: 352
  • 3.jpg
    3.jpg
    98.5 KB · Views: 377
  • 4.jpg
    4.jpg
    98.7 KB · Views: 357
  • 5.jpg
    5.jpg
    103.1 KB · Views: 345
  • 6.jpg
    6.jpg
    86.9 KB · Views: 325
  • 7.jpg
    7.jpg
    103.5 KB · Views: 351
  • 8.jpg
    8.jpg
    65 KB · Views: 356
Trip Report - Big Bend National & State Parks, Texas - April 2018

Day 4 – Sunday
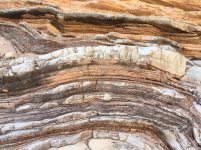
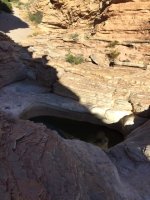
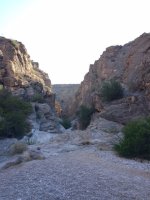
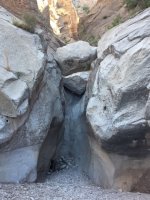
We woke up and took a hike on the Tinaja trail that is 100 yards from the Ernst Tinaja campsite. We hiked for about an hour through a canyon to see some amazing rock formations and Tinajas (natural pools). Once we got back to camp there were already several cars at the trailhead and a National Park maintainer waiting for us. He was a nice guy told us some cool things about the Tinajas, and then promptly asked for our permit. Goes to show, even out a long way from everything they are keeping up with you. We showed him our permit and we all headed out. We took the remaining milage of Old Ore Road out of the park. It was about 20 miles, and took much longer than expected. 2.5 hrs. This road is designated as “maintained” (not “improved”) but it was MUCH slower than all the other dirt roads we had been on. The drive was amazing though, taking us through canyons and back up on ridges for miles and miles. I would defiantly recommend this road to take for any suitable vehicle. Just be aware it is not fast. We aired up once we hit pavement and ate some lunch. That was the end of our park travels as we exited the northern gate we came in and headed back on the 7 hr journey home.

This was an amazing trip and the vastness of Big Bend is unexplainable. I would love to go back again, and could spend a weekend totally different in the same park. The must-see’s in my opinion are the Chisos Basin area/visitor center, even if you don’t hike any trails. The Santa Elena Canyon, and the natural hot springs on the Rio Grande.
 

Attachments

  • 1.jpg
    1.jpg
    101.2 KB · Views: 346
  • 2.jpg
    2.jpg
    78.6 KB · Views: 373
  • 3.jpg
    3.jpg
    114.6 KB · Views: 338
  • 4.jpg
    4.jpg
    94.3 KB · Views: 320
  • 5.jpg
    5.jpg
    119.4 KB · Views: 320
  • 6.jpg
    6.jpg
    81.2 KB · Views: 312
  • 7.jpg
    7.jpg
    77.7 KB · Views: 333
Great trip report and wonderful photos. Sounds like a place to add to the bucket list when we next get out west.
 
Day 4 – Sunday
We woke up and took a hike on the Tinaja trail that is 100 yards from the Ernst Tinaja campsite. We hiked for about an hour through a canyon to see some amazing rock formations and Tinajas (natural pools). Once we got back to camp there were already several cars at the trailhead and a National Park maintainer waiting for us. He was a nice guy told us some cool things about the Tinajas, and then promptly asked for our permit. Goes to show, even out a long way from everything they are keeping up with you. We showed him our permit and we all headed out. We took the remaining milage of Old Ore Road out of the park. It was about 20 miles, and took much longer than expected. 2.5 hrs. This road is designated as “maintained” (not “improved”) but it was MUCH slower than all the other dirt roads we had been on. The drive was amazing though, taking us through canyons and back up on ridges for miles and miles. I would defiantly recommend this road to take for any suitable vehicle. Just be aware it is not fast. We aired up once we hit pavement and ate some lunch. That was the end of our park travels as we exited the northern gate we came in and headed back on the 7 hr journey home.

This was an amazing trip and the vastness of Big Bend is unexplainable. I would love to go back again, and could spend a weekend totally different in the same park. The must-see’s in my opinion are the Chisos Basin area/visitor center, even if you don’t hike any trails. The Santa Elena Canyon, and the natural hot springs on the Rio Grande.
Looks like an awesome trip, have been thinking about making that same trip soon! Question if you don't mind me asking, how do you have tour roof top tent and awning set up to the OEM roof rails? Pics if you could would be greatly appreciated.
 
Looks like an awesome trip, have been thinking about making that same trip soon! Question if you don't mind me asking, how do you have tour roof top tent and awning set up to the OEM roof rails? Pics if you could would be greatly appreciated.

We just did that trip this month so won't be back for a while, even though I'd love to we have other trips planned already to see some other new places. I will get some pics posted of the rtt and awning. I know there is several threads on the tent mounting, but I made my own awning brackets.
 
Looks like an awesome trip, have been thinking about making that same trip soon! Question if you don't mind me asking, how do you have tour roof top tent and awning set up to the OEM roof rails? Pics if you could would be greatly appreciated.

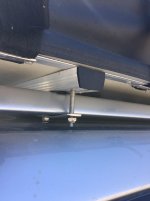
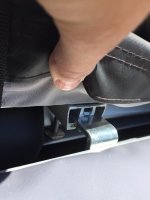
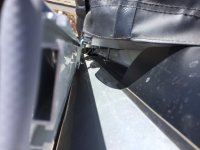
Sorry it took so long to post these pics, but I finally got them up on my computer.....

Tent mounts to the roof rails with the standard hardware, clearance is really close but there is no contact with the roof. I made some awning brackets from some steel corner brackets and used the hardware channel in the tent rails to mount them in.
 

Attachments

  • mount2.jpg
    mount2.jpg
    134.7 KB · Views: 132
  • mount3.jpg
    mount3.jpg
    136.1 KB · Views: 140
  • mount1.jpg
    mount1.jpg
    127.5 KB · Views: 132

Members online

Forum statistics

Threads
278,307
Messages
3,554,054
Members
248,016
Latest member
Advally Service

Trending content

Back
Top