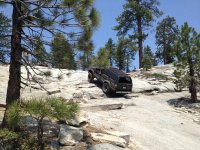
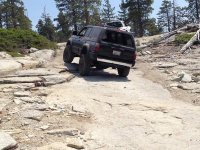
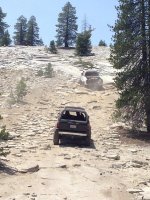
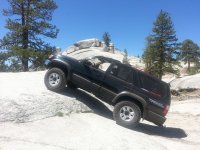
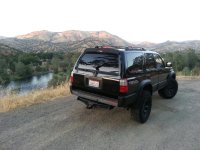
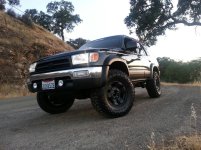
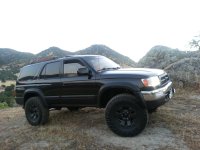
cencalifoothill15's simple build thread

CenCalifoothill15

New member
cencalifoothill15's simple build thread- & Pics*

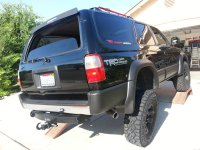
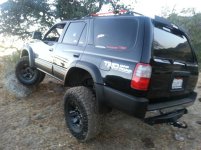
BLACK 1998 LTD 4x4 3.4L auto w/factory E-Locker 224,000+ miles (5th owner)


The following list includes maintenance/Mods/upgrades:

Under the hood/drivetrain maintenance:
-K&N high flow air filter (back to paper filters)
-Toyota/Denso plugs. (4-6-2015)
-KOYO Radiator & new cap w/Toyota Red coolant (12-8-2015)
-AISIN Fan clutch (12-8-2013)
-OEM Thermostat
-Tranny serviced/flushed/new filter (7-23-2014)
-LUCAS Syn tranny oil/engine additives
-New Alternator (3-22-2013)
-New Battery (Duralast Gold) 750cca (1-1-2015)
-Hayden 678 Transmission cooler (Radiator bypassed)
-Hilux 167 Snorkel


Interior/Audio--upgrades/mods:

- KENWOOD KDC-108 headunit
- INFINITY MIDS on all doors w/stock Toyota tweeters
- 12" sub Addictive Audio Kevlar stage 3 in a sealed box
- Massive Audio 1000W mono
- repaired torn FP leather seat. (torn again!)
- x2 TILT gauges, dash & side pillar
- mini compass in gauge cluster
- OEM car seat anchor added
- battery meter
- Cobra CB radio 19 Ultra III
- Torque Pro (Android)


Exterior Mods
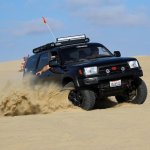
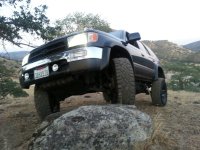
-ARB Front Bumper (Tacoma/Deluxe Bull Bar)
-32" Cree Light-bar on roof rack
-4" GENSSI LED Fog lights (27w) 60*degree flood
-99 OEM Headlights
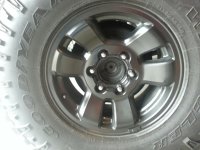
-Painted OEM wheels (3-spoke) Rustoleum Brass Metallic
-Rola Roof Rack w/extension & custom mounts
-Tuff-Stuff high volume air compressor 150 PSI (on board air)
-TG DOM 67" Rock Sliders (welded on)
-3' Firestik CB antenna w/Firestik mount
-48" Hi-Lift
-Amber LED eagle eye's (aux turn signals)
-Ditch-lights with CBI brackets


SUSPENSION/TIRES:

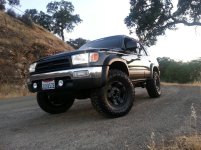
FRONT: (3") Eibach/Toytec coils with Eibach adjustables struts.

REAR: (3.5") TOYTEC SuperFlex coils, w/RC extended travel shocks.

-285/75/16 (E) GoodYear Duratracs
-G2 1.25" Wheel spacers (Hub Centric)
-Tundra 231 Brake upgrade.


THANKS FOR CHECKING OUT MY RIG. :wave:

CHECK OUT MY ALBUMS FOR MORE PICS!


FROM STOCK TO CURRENT PICS-
 

Attachments

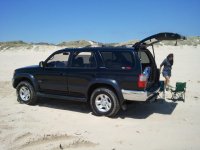
  • Pismo Beach Stock T4R.jpg
    Pismo Beach Stock T4R.jpg
    99.3 KB · Views: 9,915
  • Wonder Valley 2.jpg
    Wonder Valley 2.jpg
    139.6 KB · Views: 9,865
  • a25.jpg
    a25.jpg
    117.4 KB · Views: 4,906
  • a33.jpg
    a33.jpg
    112 KB · Views: 4,779
  • a29.jpg
    a29.jpg
    140 KB · Views: 4,754
  • a85.jpg
    a85.jpg
    138.9 KB · Views: 3,995
  • pine04.jpg
    pine04.jpg
    137 KB · Views: 3,958
  • Screenshot_2017-03-01-21-07-07-1.jpg
    Screenshot_2017-03-01-21-07-07-1.jpg
    147.4 KB · Views: 1,541
Last edited:
Register to hide this ad
update

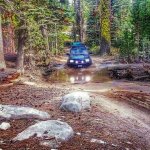
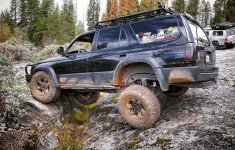
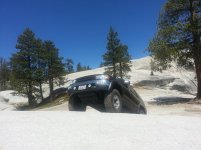
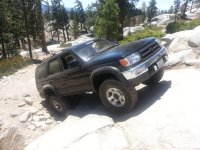
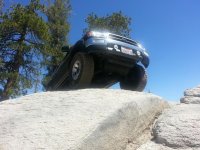
Got the 285/75/16 Goodyear Duratracs on last week, very happy with the look & feel. They Handle very well on road and off, i was very hard on them on my recent trip to Bald Mt. and they performed good. I did rip small chunks off the tread blocks but very minor. They did rub quite a bit in some gnarly areas, especially when i 3 wheelin/tippin. before the trip i did lots of trimming of the fender wall/lower valance and pinch weld.

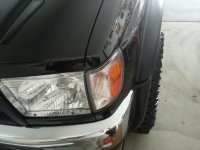
*Also did the 99 headlight upgrade, what a big improvement with night time driving, much more light than my stock 98's. My Rig looks new again!:bluejump:.

I Got my 1.5" wheel spacers in from AllPro, i should install them sometime this week.

need to eliminate the rubbing, till then........ duratracs 1.jpg

20130608_113354_resized.jpg

E-Locker saved the day.jpg

Cliff hanger near Bald Mt..jpg

*Check out my albums for more photoshttp://www.toyota-4runner.org/members/cencalifoothill15.html
 

Attachments

  • duratracs 1.jpg
    duratracs 1.jpg
    135.2 KB · Views: 11,673
  • 20130608_113354_resized.jpg
    20130608_113354_resized.jpg
    136.3 KB · Views: 10,778
  • E-Locker saved the day.jpg
    E-Locker saved the day.jpg
    137.8 KB · Views: 10,844
  • Cliff hanger near Bald Mt..jpg
    Cliff hanger near Bald Mt..jpg
    137.6 KB · Views: 10,743
  • 1st time going up.jpg
    1st time going up.jpg
    71.1 KB · Views: 7,080
  • 1st up.jpg
    1st up.jpg
    69 KB · Views: 7,085
  • 1st time to the top.jpg
    1st time to the top.jpg
    65.9 KB · Views: 7,031
  • ly06.jpeg
    ly06.jpeg
    123.5 KB · Views: 5,897
Last edited:
Update- installed 1.5" wheel spacers

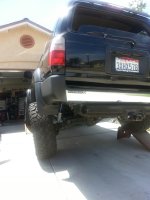
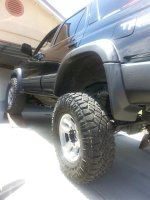
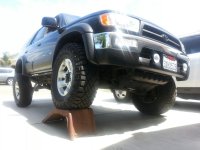
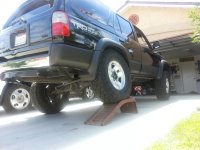
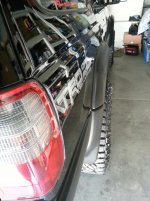
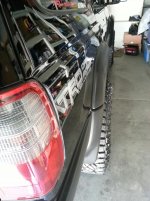
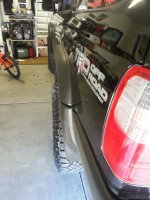
Well finally got around to installing my AllPro 1.5" wheel spacers, and i really love the stance of my rig now. My wheels actually clear my Limited fender flares, I could really feel the difference when making fast sharp turns, the lean/sway has been minimized, the wider stance looks good and feels a lot better with handling.:thumb3

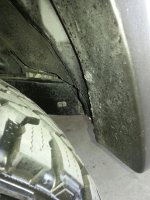
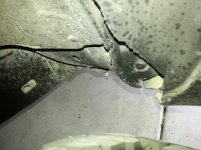
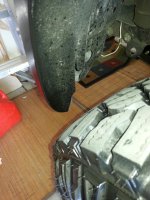
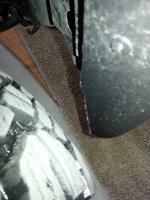
*But before i was able to enjoy this set-up, i did a lot of trimming/cutting of the front/back inner fenders, hack-sawed the pinch-weld as much as possible, then beat the crap out of the remaining pinch-weld metal. Sort of rolled in, then pounded it with a sledge hammer, roll-it some more, etc. then i got a grinder and smoothed out all the rough/jagged edges. I gained all the clearance i needed to turn fully locked in both directions. Now i can do a U-Turn without any rubbing at all! I then spray painted the areas where cut/grinded... looks clean. Here are some driveway shots of some test flexing. Today i picked up some new lug nuts (extented thread) from 4WheelParts, Just to be safe. the rear nuts are fine, however the front studs are shorter, with the extended thread lug nuts I'll be able to get more bite, at least 3-4 more threads. I did use locktite for all wheels.

I'll post more pics later of my hack job.....:bump2:
 

Attachments

  • driveway test flex 1.jpg
    driveway test flex 1.jpg
    125.1 KB · Views: 10,360
  • driveway test flex 2.jpg
    driveway test flex 2.jpg
    128.1 KB · Views: 10,308
  • driveway test flex 3.jpg
    driveway test flex 3.jpg
    124.4 KB · Views: 10,303
  • driveway test flex.jpg
    driveway test flex.jpg
    130 KB · Views: 10,270
My Pinch weld mod & inner fender trimming

Nice start man, i would really like to see how you clearenced your firewall/pinch weld area.

Thanks NateMob! Here's some pictures i took (all after) sorry i now realized that I should have taken some pictures before, during, and after, oh well i'm sure you get the jist of the project. I did cut at least a 3-4 long x 1-2 inches wide strip off the pinch-weld. I took the best pics possible w/my camera.

*Also removed the inner bolt on the inner fender (closest to firewall) on both sides, i did cut out a lot of plastic also.


Here's a close up shot of my pinch welds, I'm going to re-grind some of the edges once i get a proper grinder. I made it happen with what i had, and will probably hit it with a better paint job. You really can't tell that much, i think it came out OKAY considering the limited tools i've have at my disposal. The driver-side came out better than the Passenger side.:surfer:
 

Attachments

  • drivers side pinch weld.jpg
    drivers side pinch weld.jpg
    127.4 KB · Views: 11,018
  • pinch weld close up drivers side.jpg
    pinch weld close up drivers side.jpg
    122 KB · Views: 11,458
  • trimmed inner fender.jpg
    trimmed inner fender.jpg
    131.9 KB · Views: 10,114
  • trimmed inner fender P-side.jpg
    trimmed inner fender P-side.jpg
    130.8 KB · Views: 10,188
  • wheel view from P-side.jpg
    wheel view from P-side.jpg
    133.9 KB · Views: 10,120
Last edited:
More Pics

Here a pic of the Passenger side pinch weld, i forgot to include. Enjoy!:thumb:
 

Attachments

  • pinch weld.jpg
    pinch weld.jpg
    131 KB · Views: 10,321
  • front view of wheel.jpg
    front view of wheel.jpg
    128.5 KB · Views: 10,030
Back to Black-
 

Attachments

  • Paint cans.jpg
    Paint cans.jpg
    128.2 KB · Views: 10,004
  • prepped before paint.jpg
    prepped before paint.jpg
    115.3 KB · Views: 9,967
  • Wheel prepped before paint.jpg
    Wheel prepped before paint.jpg
    120.2 KB · Views: 9,925
  • Last coat on rims.jpg
    Last coat on rims.jpg
    126.3 KB · Views: 10,191
  • finished wheel BLACK.jpg
    finished wheel BLACK.jpg
    127.5 KB · Views: 5,862
Last edited:
Removed 1.5" spacers/installed g2 1.25" spacers

SPACER UPDATE:

*After having these 1.5" (LUG CENTRIC) spacers on now for a week, i realized i made a rookie mistake in buying "Lug centric" spacers. At first I loved the look of them, they really widened the stance, and for in town driving (small town) they handled well, however after taking a recent trip on the freeway i noticed lots a vibration and intense bouncing, once went over 55-65 mph I was not so happy anymore! :faint: After my brief trip on the freeway I did not feel so safe, so i turned back and headed home to get my other car. :censored: pretty pissed at my self...

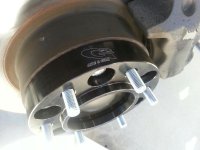
*The next day i went to 4WHEEL parts (couldn't wait for online order) to look for Spidertrax 1.25" (hub centric) but they were out of stock!! :doh: The guy helping me asked if i'd be interested in their "G2" product. $89.99 a pair for 1.25" spacers Black Anodized aluminum (hub centric of course) so i took these home instead. The G2 line seems to be a quality product. Please chime in if you have heard or experienced anything with this product.*

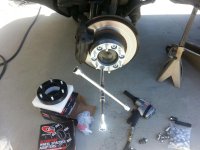
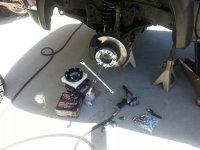
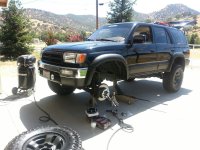
I removed my 1.5" spacers the same day, and installed the G2's... Here's some shots i took during the installation. I also used lots of Lock-tite.

After installing the new spacers, I went back on the freeway and NO MORE SHAKING OR BOUNCING! So happy now, and i'm still pleased with the stance of my Rig. the G2's did the job! They look good too with my Black wheels!

Just make sure when using stock wheels that ya'll get "HUB CENTRIC" spacers! My wheels are centered perfectly-


:girl: this is the only bouncing i like!!

LUG-NUT UPDATE:

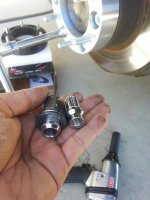
^^^do not use acorn style lug-nuts (gorilla extended thread) with stock toyota wheels! unless you have aftermarket rims.

stick with stock lug-nuts because the the lug-ends are thicker and fill in the space around the stud and wheel-hole which helps to center the wheels. also the washers on the stock lugs act as another crimping force as apposed to the acorn style round sides holding the wheel on.
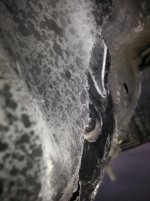
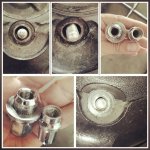
i made the mistake of using these acorn style lug-nuts, because over time they slowly wallowed out the stud holes in my wheels as you can see in the pics. there was metal shavings in and around the stud holes from it rubbing against the acorn lugs. i recently noticed this when i rotated my tires, and caught it in time without ruining my rims.
i thought i needed extended thread lugs while running wheel spacers, which isn't true, in fact my wheels feel solid & centered again. Toyota designed these with a purpose, so when in doubt stick with OEM! *feel free to add any input-

vvv the last pics shows how the acorn lugs started to wallow out the stud holes...
 

Attachments

  • Removing the 1.5 spacers.jpg
    Removing the 1.5 spacers.jpg
    131 KB · Views: 11,415
  • Removing the 1.5 spacers 2.jpg
    Removing the 1.5 spacers 2.jpg
    126.6 KB · Views: 10,338
  • G2 spacer install 1.jpg
    G2 spacer install 1.jpg
    135.9 KB · Views: 10,722
  • G2 wheel spacers install.jpg
    G2 wheel spacers install.jpg
    122 KB · Views: 12,004
  • Gorilla ET lug nuts vs. stock.jpg
    Gorilla ET lug nuts vs. stock.jpg
    120.1 KB · Views: 10,993
  • wheel view from P-side.jpg
    wheel view from P-side.jpg
    133.9 KB · Views: 9,972
  • after 1.25 spacers rear shot.jpg
    after 1.25 spacers rear shot.jpg
    130.8 KB · Views: 10,085
  • stock lugs.jpg
    stock lugs.jpg
    135.5 KB · Views: 4,233
Last edited:
Rims look great david. Glade the g2 wheel spacers worked out that was a great price for them. Did yhou put them on the back as well. I will be painting my wheels soon. How many cans of paint did you use in all?
 
$10 dollar project

Hey Bill thanks man, appreciate it

I did all 4 corners w/the G2's , as soon as I mounted them on, I could tell that there was a better "connection" w/these adapters/spacers. Its solid now... $195 for the set

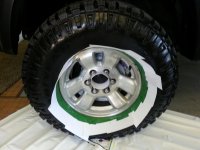
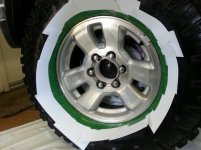
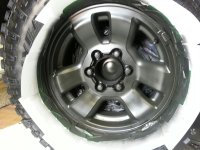
I only used 2 cans... killed both cans -did 4 coats on each wheel.

wheels were a $10 dollar project.

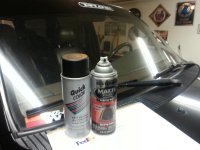
-Rustoleum Matte Black paint can: $6 bucks (Home Depot)
-Quick Color all purpose Flat Black spray paint: $1 buck (Home Depot)
-4x6 index cards got 3 packs for a $1 buck ea. (Dollar Tree)

*already had masking tape and sand paper. Although u can buy this at the dollar store if you don't have it. So maybe a $12 project? Ha ha... I just make things happen one way or another... just glad im not a perfectionist! :) *post some pictures when you're done painting your wheels I'd like to see them
 
thanks for the info. i will post pics when done. i plan to murder mine out, i love the white on black look. after looking at your build thread you got my mod bug a itching... so i blacked out my grill.. have pics in my profile cant get them to load on the thread...
 
Most current pic

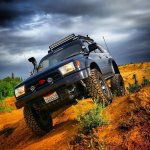
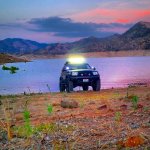
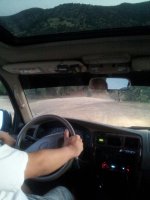
Did a little wheelin w/my wife..... it was her 1st time! She was really nervous at 1st then she found it Exciting!! And if you have a dirty mind... that could go either way! Great view at the top. :bigok:

*These photos were taken at Wonder Valley, CA around my Folks property!

many fun places to wheel!!! I used to live here but didn't have my 4runner back then... miss it out here... although it's only a 15 min drive away! :bolt:

anyway enjoy the pics......
:frog:

Check out my albums for more pics
 

Attachments

  • Wonder Valley 7.jpg
    Wonder Valley 7.jpg
    134 KB · Views: 2,616
  • Wonder Valley 10.jpg
    Wonder Valley 10.jpg
    135.9 KB · Views: 2,602
  • Wonder Valley 15.jpg
    Wonder Valley 15.jpg
    120.7 KB · Views: 2,602
  • Wonder Valley 11.jpg
    Wonder Valley 11.jpg
    133 KB · Views: 2,570
  • Wonder Valley 2.jpg
    Wonder Valley 2.jpg
    139.6 KB · Views: 2,589
  • Wonder Valley 5.jpg
    Wonder Valley 5.jpg
    124.9 KB · Views: 2,584
How do you like the RC shocks now that you've had them a while? They are a much cheaper option, but some have said they wear out very quickly. Also, how do they ride compared to stock or other lift setups you've had/been in?
 
so far.. so good. ..

Compared to stock it's a dream. Good for the money! If they ever go out, I'd like to try the Bilsteins. However I have NO complaints at all. In fact WHEELERS recently upgraded the RC rear (extended travel)Nitros series. To the N.20's I believe that they are stronger than the 9000' series. Only $89.99 a pair. Not bad
 
Compared to stock it's a dream. Good for the money! If they ever go out, I'd like to try the Bilsteins. However I have NO complaints at all. In fact WHEELERS recently upgraded the RC rear (extended travel)Nitros series. To the N.20's I believe that they are stronger than the 9000' series. Only $89.99 a pair. Not bad

I don't mean to thread-jack, mind if I ask though how many miles you've put on the RC rears and what amount of wheeling you've done on them? Sorry, again, and TIA.
 
no prob....

No worries man! So I've only had them on for 5-6000 miles now and they have settled nicely front & back. IMO they work well w/881's in front. And the rears honestly perform good! I've been on a dozen or so light wheelin trips, & 2 hardcore crawlin runs. I think my rig is comfortable w/these. Maybe it's the Superflex coils helping too? Hmmm...

I'll post updates as time goes on.
 

Members online

Forum statistics

Threads
278,306
Messages
3,554,045
Members
248,016
Latest member
Advally Service

Trending content

Back
Top