Complete 2000 4wd, manual, v6 swap into 2wd auto 1999 build/project

UPDATE:

Wow...what a day. Started at around 1 and finished at 8:30.

Started by removing the xfer case bolts , interior trim around the shifter, shifter and 4wd lever, and then the motor mounts.

I forgot about the clutch line until I started pulling it, but I did it slowly so I was able to address what I might have missed. It was rusted heavily , so I cut the line (will opt for stainless braided replacement).

I also missed the ADD vacuum hoses, but those were easy to pull off. Once I started jacking the engine out I was able to get easy access to what looked to be the heater core hoses-popped those off.

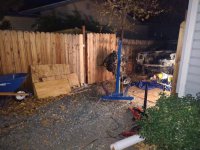
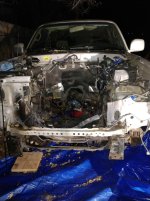
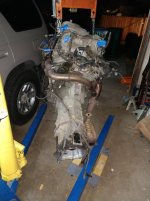
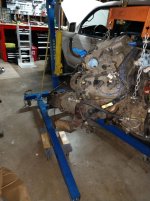
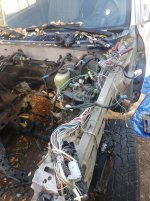
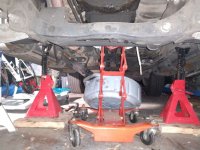
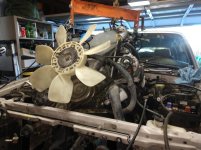
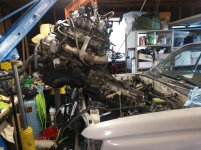
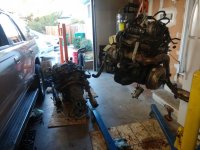
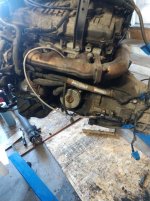
Once I removed it with the trans (mated) the real fight started. It took me about 3 hours to get the engine out of the body and into the garage-not because of the difficulty removing the engine, but because of my gravel side yard. In the struggle I ripped off a wheel from the engine hoist and used a furniture dolly to replace it (it works!)

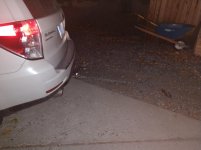
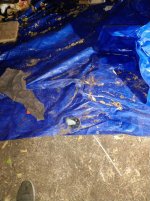
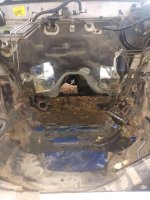
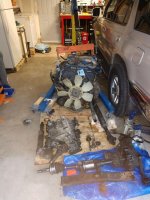
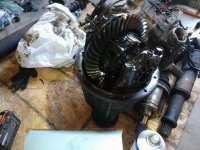
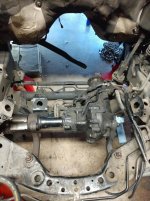
Photos of of the chaos. Tomorrow or Friday il be removing the xfer case, hubs, front diff, CVs,driveshafts and the ADD system. Looks a little rusty, so I might replace that vacuum box if it's cheap.

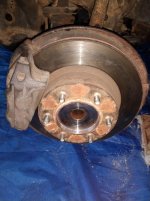
Popped the covers off the hubs to find pristine hardware-really excited. Still have to check the manufacturer to see if they are cheap cvs and spindles .
 

Attachments

  • IMG_20191030_184517993-min.jpg
    IMG_20191030_184517993-min.jpg
    136.3 KB · Views: 563
  • IMG_20191030_184530379-min.jpg
    IMG_20191030_184530379-min.jpg
    128.7 KB · Views: 580
  • IMG_20191030_200106850-min.jpg
    IMG_20191030_200106850-min.jpg
    140.6 KB · Views: 554
  • IMG_20191030_200110152-min.jpg
    IMG_20191030_200110152-min.jpg
    134.9 KB · Views: 570
  • IMG_20191030_195101193-min.jpg
    IMG_20191030_195101193-min.jpg
    126.2 KB · Views: 581
  • IMG_20191030_195053453-min.jpg
    IMG_20191030_195053453-min.jpg
    127.2 KB · Views: 588
UPDATE:

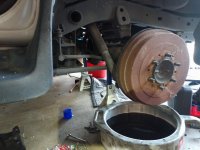
Got all of the mechanical parts I want out of the truck. The hubs look to be aftermarket, so rather than pull them and reinstall in the current truck I'm just going to buy some from Napa and install them into the new hub assembly.

Front diff looks good, but the ADD lines are definitely rusted at the ends. I think I'm going to shorten the metal where it's rusted and extend the end with longer rubber hose...this saves me from having to buy another part.

The driveshafts have surface rust, but nothing too bad. Il be replacing the bolts when I reinstall and running it as is.

The transfer case is in good condition, definitely leaking some though. Will be looking to replace the xfer case gaskets, trans gasket oil pan gasket, rear main seal, and a few other things that are hard to get to while the engine is out. If anyone has any suggestions let me know.

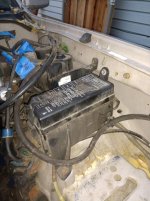
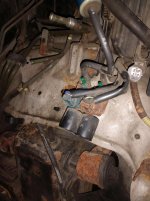
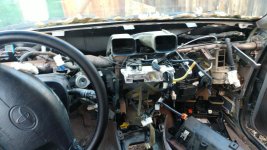
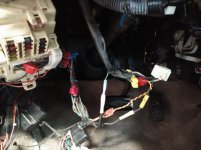
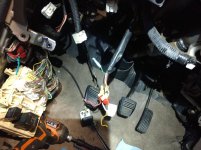
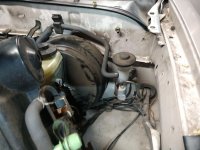
Took photos of what I still need to take. I think the whole drivers side fuse/relay box needs to be swapped out for the add wires, but I'm not 100%. Going to check on that. Obviously the master and slave cylinders , pedal box , and the cluster will be swapped as well.

The donor truck is a rolling chassis now, so itl be ready for towing when the time comes!

Everything I need that's bulky is now in the garage with the new 4runner. I'd really like to clean up the grime oil and dirt off the components before reinstalling....any recommendations of great degreaser?


To say I'm excited to be done working on that rust bucket is an understatement. I have no idea how I didn't break more bolts...pb blaster is your friend!

The hard work outside is now done....finally I can work in a clean garage with some heat!
 

Attachments

  • IMG_20191103_165201547.jpg
    IMG_20191103_165201547.jpg
    123.7 KB · Views: 479
  • IMG_20191103_165323766.jpg
    IMG_20191103_165323766.jpg
    133.4 KB · Views: 456
  • IMG_20191103_165231965.jpg
    IMG_20191103_165231965.jpg
    131.7 KB · Views: 476
  • IMG_20191103_165208997.jpg
    IMG_20191103_165208997.jpg
    131 KB · Views: 524
  • IMG_20191103_165246477.jpg
    IMG_20191103_165246477.jpg
    133.1 KB · Views: 457
  • IMG_20191103_165259410.jpg
    IMG_20191103_165259410.jpg
    130 KB · Views: 477
UPDATE:

Got all of the mechanical parts I want out of the truck. The hubs look to be aftermarket, so rather than pull them and reinstall in the current truck I'm just going to buy some from Napa and install them into the new hub assembly.

The transfer case is in good condition, definitely leaking some though. Will be looking to replace the xfer case gaskets, trans gasket oil pan gasket, rear main seal, and a few other things that are hard to get to while the engine is out. If anyone has any suggestions let me know.

Took photos of what I still need to take. I think the whole drivers side fuse/relay box needs to be swapped out for the add wires, but I'm not 100%. Going to check on that. Obviously the master and slave cylinders , pedal box , and the cluster will be swapped as well.
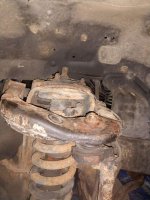
Those hubs look OEM. They just stay sparklingly clean under that dust cover. The uprights/knuckles do look pretty rusted, so I'd use your clean 2WD ones and swap over parts with new bearings/seals.

Don't replace engine seals unless they are leaking (probably just valve cover related parts). Trans pan should be sealed with RTV, not a gasket, and again, only if leaking. A little weaping out the top of the shifter holes on the TC and transmission isn't too unusual. I think Marlin has some parts/seals that may help there. You might need shifter seats for both TC and trans. Leaking on the output flanges is fairly easy to fix too.

The driver's side harness in the engine bay is different between 2WD and 4WD. It is only 3 wires and a few grounds, but it is different.

You may need to swap the dash harness to get the plugs for clutch cancel, etc in the harness. My '99 2WD dash harness had the ADD plug and 4WD signal wires, but nothing for the manual transmission that I could find (didn't bother me, I stayed auto).

-Charlie
 
Those hubs look OEM. They just stay sparklingly clean under that dust cover. The uprights/knuckles do look pretty rusted, so I'd use your clean 2WD ones and swap over parts with new bearings/seals.

Don't replace engine seals unless they are leaking (probably just valve cover related parts). Trans pan should be sealed with RTV, not a gasket, and again, only if leaking. A little weaping out the top of the shifter holes on the TC and transmission isn't too unusual. I think Marlin has some parts/seals that may help there. You might need shifter seats for both TC and trans. Leaking on the output flanges is fairly easy to fix too.

The driver's side harness in the engine bay is different between 2WD and 4WD. It is only 3 wires and a few grounds, but it is different.

You may need to swap the dash harness to get the plugs for clutch cancel, etc in the harness. My '99 2WD dash harness had the ADD plug and 4WD signal wires, but nothing for the manual transmission that I could find (didn't bother me, I stayed auto).

-Charlie


Good to know. Il clean and degrease it all and check out what is actually leaking and if it's required. I bought the valve cover gasket , oil pan gasket, and Il get some RTV for the trans. As far as the hubs , I think I'm going to buy new ones and new bearings. I can get Koyo bearings at Napa for 80ish a piece and new hubs for around the same (I think some were 115 each). I may be mixing up numbers but this is a ball park. Reason being is I finally stripped the head of a bolt that had rusted on the lower control arm mating surface so I cant remove the hub assembly to remove the hub and press in the 2wd ones. The effort to try and do this is not worth the 200 bucks il spend to get new ones and peace of mind.

I found out the automatic is 3.73 and the manual has 4.10 gears, so I will need to swap the rear axle on the trucks.

As far as manual vs auto plugs I'm going to do some research. I'd be willing to bargain that the wires will be the same as yours- but the harness for the manual trans may be different.

Busy with work all week learning some new stuff so I probably won't make much progress until next weekend-but the plan of action is as follows

Remove and replace rear axle
Clean engine/diff/xfer case/axle/trans
Remove pedal box components from donor
Change seals/gaskets/etc on engine/trans/xfer case as needed
Install new hubs/bearings
Install new Bilstein 5100 shocks
Remove 2wd engine/trans/driveshafts/wire harness/ecu
Install diff/add/Cvs/driveshaft
Install new wire harness (drivers side)
Install master cyl/hydraulic lines
Install replacement engine/trans/wire harness/ecu
Install xfer case

There are other items like the instrument cluster dash and interior that will be done when I can.

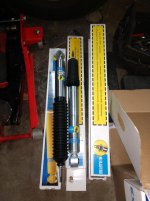
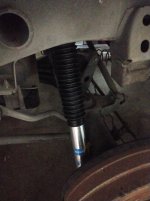
As a little note, picked up Bilstein 5100s for all four corners from....home Depot. I didn't believe they sold them, but with free ship to store and a pretty good price (384 with tax) I figured I'd give it a shot!

Also grabbed some replacement instrument cluster backfaces and 2.5 inch poly spacers from low range off road. The spacers should keep the rear from sagging and looking unbalanced with the 5100s set to 1.5-2 inches of lift in the front. I will probably replace the springs and spacers with other springs later, but this will suit the build for now.

Will post pictures as time goes on.
 
If the rear axle housing from the donor is in rough shape, just swap the 3rd members. It'll give you a chance to check if the rear axle seals are leaking.

Oh, another odd 2WD vs 4WD difference - the rear upper control arms are different (length). Swap those over between the two trucks.

The wiring harness plugs around the engine will be the same, but the harness going to the trans will be very different. The manual trans will only have plugs for reverse lights and the transfer case. The auto has all the sensor and solenoid plugs along with the transfer case plugs.

-Charlie
 
If the rear axle housing from the donor is in rough shape, just swap the 3rd members. It'll give you a chance to check if the rear axle seals are leaking.

Oh, another odd 2WD vs 4WD difference - the rear upper control arms are different (length). Swap those over between the two trucks.

The wiring harness plugs around the engine will be the same, but the harness going to the trans will be very different. The manual trans will only have plugs for reverse lights and the transfer case. The auto has all the sensor and solenoid plugs along with the transfer case plugs.

-Charlie

The rear axle is actually in great shape on both 4runners...Im trying to decide on swapping the axles or 3rd members. looks like the 3rd member swap might be easier to do, plus I can still have a rolling chassis if I dont feel like reinstalling the other diff. I like saving time, and this could definitely save time.
Il have to check out the rear uppers and see what condition they are in-hopefully they are good enough to swap! thank you for the note, I would have missed them for sure.
 
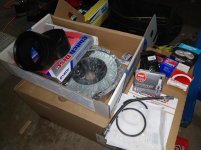
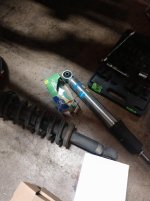
New parts day. Few more things like the trans mount and various bolts I ordered that have to come in, but it's almost all here.

Clutch kit , some gaskets, some bearings, new shocks, 2.5 inch spacers from low range off road, clutch line, spark plugs, new bulbs for the instrument cluster, and more!
 

Attachments

  • IMG_20191106_173316537-min.jpg
    IMG_20191106_173316537-min.jpg
    129.6 KB · Views: 444
  • IMG_20191106_173327498-min.jpg
    IMG_20191106_173327498-min.jpg
    131.5 KB · Views: 439
UPDATE:

had two full days to do work on the 4runners, so I got a lot done. Removed the 3rd member of the donor truck, along with the ADD wiring from the driver side wiring harness.

Ive still got some wire tracing to do for the clutch cancel and the clutch switches, but im thinking thats all I really need to mess with. Because im swapping the whole engine/trans combo into the other 4runner (including wiring harness and ecu) all of the wires to the transmission are there-just need to see if they actually work with the existing wiring.

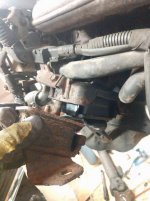
I remove the engine, trans, and started on the driveshaft as well. The engines are now both sitting next to the 4runner to be worked on. I sold the auto trans to someone so that is a nice few bucks to go towards wheel hubs and bearings.

I pulled the trans and engine as one as seen in the photos. tight fit, but with the engine tilt mechanism thing, it wasnt bad. I did all of it solo with no hands to help and it took me no more than a few hours to prep and a few hours to pull.
 

Attachments

  • IMG_20191109_135026445-min.jpg
    IMG_20191109_135026445-min.jpg
    141.3 KB · Views: 407
  • IMG-20191108-WA0000-min.jpg
    IMG-20191108-WA0000-min.jpg
    140.4 KB · Views: 398
  • IMG_20191109_181417983-min.jpg
    IMG_20191109_181417983-min.jpg
    131.6 KB · Views: 420
  • IMG_20191110_142231649-min.jpg
    IMG_20191110_142231649-min.jpg
    132 KB · Views: 393
  • IMG_20191110_142851607-min.jpg
    IMG_20191110_142851607-min.jpg
    131.4 KB · Views: 401
  • IMG_20191110_155330959-min.jpg
    IMG_20191110_155330959-min.jpg
    128.8 KB · Views: 415
Installed the three pedal setup, and started removing the chaos that is an aftermarket security system. Only one wire seems to run through the unit, the rest are wire Taps. Gonna splice it back together and should be good.

Installed the master after cutting a hole in the firewall. Made a paper gasket after tearing the old one.

Bought Koyo bearings at Napa and new 4wd hubs...the spindles on one side are removed and I'm working on the right side today.

Changed out the 3rd member and sealed with gray rtv, hoping I did a good job on it. Cleaned with a razor and break clean before application.

The things I'd like to get done today are

1. Press wheel hubs and bearings into spindles and install

2. Install front diff

3. Install wiring and lines for ADD

4. Cut out center for shifters

5. Cut off horns for new xmember mount

6. Add wiring to my house for a 220v outlet to support my welder


We will see what I get done!

Pictures of work so far.
 

Attachments

  • IMG_20191113_125836697-min.jpg
    IMG_20191113_125836697-min.jpg
    120.6 KB · Views: 384
  • IMG_20191113_161539700-min.jpg
    IMG_20191113_161539700-min.jpg
    133.1 KB · Views: 396
  • IMG_20191113_161548554-min.jpg
    IMG_20191113_161548554-min.jpg
    127.4 KB · Views: 387
  • IMG_20191113_161521159-min.jpg
    IMG_20191113_161521159-min.jpg
    129.5 KB · Views: 386
  • IMG_20191113_161516735-min.jpg
    IMG_20191113_161516735-min.jpg
    138.6 KB · Views: 368
Looks like you're making good steady progress!

Well, I was until today. I am trying to press the wheel bearings out with my press and old rotors. Well the rotor shattered from the press (wheel bearing not budging.) So I'm thinking of what to do...
 
Well, I was until today. I am trying to press the wheel bearings out with my press and old rotors. Well the rotor shattered from the press (wheel bearing not budging.) So I'm thinking of what to do...
They can be a real pain is the a**. Were you able to get the tone ring off? If it's only the bearing, did you remove the snap ring?
 
This, and if using the 2WD knuckles, is the lock ring removed?

-Charlie

I'm a big idiot. I didn't realize that was a threaded lock but in the 2wd hub as I was using my 4wd diagrams.....well 100 dollars later and several hours later I've ordered the 4 pt socket and new rotors for the 4runner .

Now I've got a beat to hell lock nut that I tried to hammer out without the tool ( no luck) that il be hopefully removing Saturday when the socket arrives.

If it strips out of the OEM holes il drill some more.

Luckily only one side is so beat up.

Either way, today was a waste of time ...goes to show how using the right manuals saves you time and money.

Tomorrow I'd like to do the things I planned on doing today, as none of it was accomplished (with the exception of the hubs, have to wait for the tool now).
 
They can be a real pain is the a**. Were you able to get the tone ring off? If it's only the bearing, did you remove the snap ring?

As referenced in post above, I'm an idiot. I did NOT remove the 2wd lock nut.

Sometimes I wonder if I should be allowed to work on anything.
 
A good productive day.

Cut off the Frame crossmember horns from the donor 4runner and cleaned em up nicely to get ready to weld.

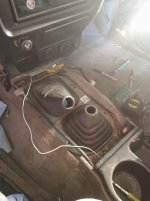
Made a template for the shift boot cutout and cut out the hole in the 2wd 4runner

Trimmed the rusty add metal lines and ran new vacuum hose

Installed front differential and front driveshaft

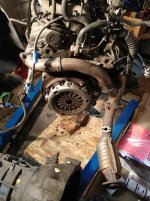
Removed clutch and reinstalled new exedy clutch, throwout bearing, pilot bearing.

Trickiest of all of these jobs was the grinding of the horns as the angle was difficult with the grinder.

I also had to use a mixture of a sawzall, Dremel, tin snips, and a hacksaw to make the cut for the shift hole.

The second trickiest was getting the pilot bearing out. I used the toilet paper soaked in water trick and packed the hole full and hit it with a clutch alignment tool, repeatedly packing with more toilet paper until it was moving bit by bit. THEN... I added more! And repeated. Got it out in less than 10 min.

Sad thing is the clutch was also exedy, and looked fairly new. I saved it so il probably try and get a few bucks for it if anyone wants one on the cheap. I compared thicknesses and it was damn near the same. I figured I may as well change it anyways, but hopefully my loss is someone's gain.
 

Attachments

  • IMG_20191115_150521033-min.jpg
    IMG_20191115_150521033-min.jpg
    138 KB · Views: 516
  • IMG_20191115_150533729-min.jpg
    IMG_20191115_150533729-min.jpg
    124.9 KB · Views: 479
  • IMG_20191115_170844540-min.jpg
    IMG_20191115_170844540-min.jpg
    138.6 KB · Views: 482
  • IMG_20191115_170848630-min.jpg
    IMG_20191115_170848630-min.jpg
    121.9 KB · Views: 486
  • IMG_20191115_180203898-min.jpg
    IMG_20191115_180203898-min.jpg
    126.6 KB · Views: 474
Busy day..got to work on the 4runner for about 7 hours on and off. Fit a quick two hour mountain bike ride and a beer mid day which slowed me down, but was well deserved.

Today I started by replacing the slave cylinder. Was going to reuse the hose until i found it was so rusted it wouldnt even rotate in the fitting-so a quick trip to summit racing and I was able to get the exact stainless hose I wanted in the length I wanted...for super cheap!

While I was there I picked up aisin antifreeze, a new oil filter, and some 8.8 bolts for the driveshaft.

also picked up two new upper strut mounts (front) a loaner spring compressor, and some oil.

I replaced the line with stainless line and will not be using any hard lines if I can. I do need to get one 90 degree fitting and some clamps to drill into the body to keep the line from flopping around, but napa had these for pretty cheap.

Once the slave cyl and lines were in place I moved on to the motor mounts...after several slow wrench turns due to the rusty mounts, I got them both free and replaced with new beck arnley rubbers.

Started removing the suspension so I could change the shocks out and add the spacer. Removed all shocks/struts and installed rear shocks. Going to finish that tomorrow-with the spacer the spring compressors are definitely needed to make it a one man job.

went on my mountain bike ride, had some beers and some bbq...then arrived to two packages at the door.

One was my new flowmeter/gauge for my weld tank, and the other was the 4 pin socket for the retaining ring in the hub.

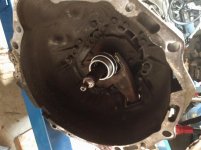
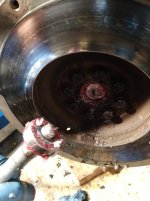
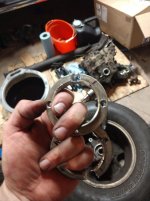
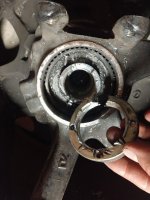
I figured why not take it on before calling it a night-which I quickly regretted. It took me over 3 hours to get both threaded rings removed (EVEN WITH THE TOOL). they were so snug due to years and miles of use that i was using a 2 foot breaker bar and SLAMMING it with my rubber hammer which was giving me 1/2 an inch of rotation each hit. After 45 minutes I got the first one off which was a relief.

The second one however, this one took over two hours. Not only was I having to beat my breaker bar into submission, but the great force from my might hammer (or not so mighty) caused my hammer to split in half in the middle of the wood handle. Well this wasnt going to stop me, so i grabbed my hydraulic jack handle and began beating it into submission.

BUT WAIT...the pins now started to fall out of the socket requiring replacement with a hammer every 3-4 strikes with my almighty tube. "OKAY" I said. patience will lead to success. I kept hitting at it and was slowly making ground for at least 1.5 turns...and then nothing. It was frozen. nothing I could hit it with would move the ring. I accepted the fact that this would now be a surgical procedure. Grinder surgery.

I ground out angles that I thought would work well. I couldnt do exactly what I wanted because I didnt want to damage the outer housing too much, even though it isnt necessarily important (structurally, sure). After grinding away and hitting away, and grinding some more, I still couldnt do it.

So I decided to split the ring. I got my drill and bored out one of the holes until the ring broke in half. I then forced it open with a hammer and old screwdriver. Slowly but surely, and about 15 minutes later...IT WAS FREE.

So now I can sleep well. Il take more pictures tomorrow, but I was just happy to be out of that garage.
 

Attachments

  • IMG_20191116_212201524-min.jpg
    IMG_20191116_212201524-min.jpg
    129.1 KB · Views: 478
  • IMG_20191116_212152944-min.jpg
    IMG_20191116_212152944-min.jpg
    123.4 KB · Views: 458
  • IMG_20191116_212228430-min.jpg
    IMG_20191116_212228430-min.jpg
    132.6 KB · Views: 456
  • IMG_20191116_212212835-min.jpg
    IMG_20191116_212212835-min.jpg
    129.5 KB · Views: 491
  • IMG_20191116_102311630-min.jpg
    IMG_20191116_102311630-min.jpg
    137.4 KB · Views: 453
  • IMG_20191116_083431902-min.jpg
    IMG_20191116_083431902-min.jpg
    133.7 KB · Views: 444
Installing wheel bearings now....do you lightly Grease the outer surface of the wheel bearing? Or is it dry pressed in?? Is assume lubrication, but no mention in manual...
 
Installing wheel bearings now....do you lightly Grease the outer surface of the wheel bearing? Or is it dry pressed in?? Is assume lubrication, but no mention in manual...

I used grease to lessen the amount of force for insertion.

<iframe width="560" height="315" src="https://www.youtube.com/embed/1TpOYj0sUpA" frameborder="0" allow="accelerometer; autoplay; encrypted-media; gyroscope; picture-in-picture" allowfullscreen></iframe>
 

Members online

Forum statistics

Threads
278,317
Messages
3,554,129
Members
248,016
Latest member
Advally Service

Trending content

Back
Top