Complete 2000 4wd, manual, v6 swap into 2wd auto 1999 build/project

I used grease to lessen the amount of force for insertion.

<iframe width="560" height="315" src="https://www.youtube.com/embed/1TpOYj0sUpA" frameborder="0" allow="accelerometer; autoplay; encrypted-media; gyroscope; picture-in-picture" allowfullscreen></iframe>

Awesome!! Love the videos...been watching a bunch of em.

 
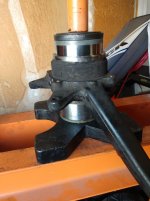
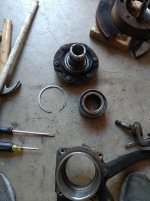
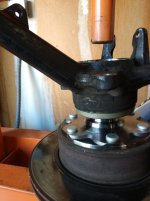
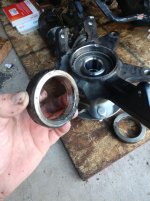
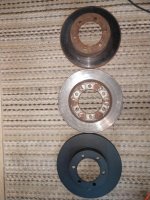
Hard day of work! Started with the wheel bearings and hubs. The hubs pressed out fairly easy, and the wheel bearings were quick to follow. Used the two rotors stacked method to punch out the hubs. Used one hub upside down for the wheel bearings, and it was no problem.

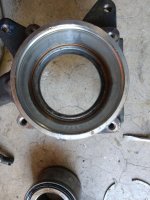
Separated everything and started to rebuild. Pressed the wheel bearings in after a light coating of wheel bearing grease was applied to the inner face of the spindle assembly. Bearings pressed in with ease. Then I mounted the hub on a rotor and pressed the spindle assembly down onto the hub using an adapter that was the circumference of the inner diameter of the wheel bearing, but hollow. Being hollow allows the hub shaft to penetrate through the wheel bearing while pressing.

I then added the ABS ring , and realized something was missing. DAMN.

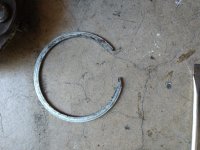
The 4wd hubs have a wheel bearing spacer instead of a lock nut ..and I didn't have this part. It's pressed into the hub (rear).

So, instead of spending 25 bucks a pop and delaying the project, I went to the parts truck. Equipped with an orielly auto wheel bearing kit I rented (400 dollar deposit!!!) I was able to press the hub out about 1/2 of an inch from the rear and snag the spacer. To say I was pleased about my plan working is an understatement!

An hour later and I had my pieces. I also took the rotors off so I could return the new ones I bought. I hate overpaying at local stores , so this made me happy.

I pressed the spacers onto the backs of the hubs and tapped the oil seal in place with a plastic hammer.

While messing with the rotors I pulled , I realized they were larger than the ones on the 4runner thats being built up.

Turns out they both have 16 inch wheels, but the 4wd runner has the larger brakes from the factory.

So I went back to my parts truck and yanked the calipers-free brake upgrade!

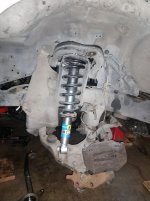
I then decided to knock out the suspension. I rented some coil spring compressers and went to town. My preferred method is to compress enough to take load off top hat, replace shock, place tophat (without rubber bushing) and finger tighten shock hat nut. Then I place the assembly into the vehicle, bolt it in, and jack up the lower control arm.

This method is much easier than trying to wrench down on spring compressors . Once you jack it up to the point where the vehicles weight is on the jack, the spring should be compressed and the top hat nut can be removed, rubber bushing installed, and then tightened up!

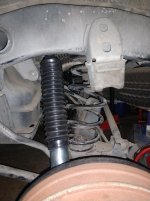
The rear was more of a pain. I disconnected the sway bar to assist in flex, but adding the 2 inch spacer made things pretty difficult . I decided to do a similar tactic in the rear, and compressed the springs slightly with the coil compressors. I then inserted the coils with the spacers and literally sat on the axle in the wheel well looking like golem from Lord of the rings. After so effort and grunting, I got the left side in.

The right side was much easier. Not sure why, but it was. I didn't even detach the sway bar!

Last thing left was to attach the lower shock mount. I couldn't get the bolt to thread with the new bushings, so I called it for the night. Any neat tips or tricks from the gallery?

Anyways...not much left now. I foresee being finished within a week!
 

Attachments

  • IMG_20191117_120322864-min.jpg
    IMG_20191117_120322864-min.jpg
    136.8 KB · Views: 429
  • IMG_20191117_120326350-min.jpg
    IMG_20191117_120326350-min.jpg
    135.2 KB · Views: 435
  • IMG_20191117_124503471-min.jpg
    IMG_20191117_124503471-min.jpg
    128.1 KB · Views: 418
  • IMG_20191117_120320335-min.jpg
    IMG_20191117_120320335-min.jpg
    136.1 KB · Views: 426
  • IMG_20191117_130652818-min.jpg
    IMG_20191117_130652818-min.jpg
    125.9 KB · Views: 434
  • IMG_20191117_161527780-min.jpg
    IMG_20191117_161527780-min.jpg
    135.3 KB · Views: 442
  • IMG_20191117_235541490-min.jpg
    IMG_20191117_235541490-min.jpg
    127.6 KB · Views: 427
  • IMG_20191117_235549358-min.jpg
    IMG_20191117_235549358-min.jpg
    129.5 KB · Views: 424
While messing with the rotors I pulled , I realized they were larger than the ones on the 4runner thats being built up.

Turns out they both have 16 inch wheels, but the 4wd runner has the larger brakes from the factory.

So I went back to my parts truck and yanked the calipers-free brake upgrade!

The rear was more of a pain. I disconnected the sway bar to assist in flex, but adding the 2 inch spacer made things pretty difficult . I decided to do a similar tactic in the rear, and compressed the springs slightly with the coil compressors. I then inserted the coils with the spacers and literally sat on the axle in the wheel well looking like golem from Lord of the rings. After so effort and grunting, I got the left side in.

The right side was much easier. Not sure why, but it was. I didn't even detach the sway bar!

Last thing left was to attach the lower shock mount. I couldn't get the bolt to thread with the new bushings, so I called it for the night. Any neat tips or tricks from the gallery?

Anyways...not much left now. I foresee being finished within a week!
Brakes: That means the 2WD 4Runner was a 15" wheel truck and somebody had changed the wheels sometime in its life. Change out the rear wheel cylinders too (the 16" wheel trucks have larger rear wheel cylinders to match the larger front brakes).

Rear suspension: Loosen the pivot bolts on all 5 links (10 locations). Install new suspension parts, re-tighten the links at ride height. Much less fighting of parts, and you will 're set' the bushings to be unloaded at the new ride height. You should do the same on the front for the upper and lower control arm pivot bolts (same deal for easy install).

-Charlie
 
As referenced in post above, I'm an idiot. I did NOT remove the 2wd lock nut.

Sometimes I wonder if I should be allowed to work on anything.

been there done that lol live and learn. You are not alone. Do not believe everything you read on the internet lol
 
Very nice build thread. :D I know your learning and having all kinds of fun. That is good to see folks really tearing into them. I would have just fixed the fame. However, that is me. Not everyone goes that route which I can completely understand.

I am enjoying this thread though. Keep the updates coming. :D
 
Brakes: That means the 2WD 4Runner was a 15" wheel truck and somebody had changed the wheels sometime in its life. Change out the rear wheel cylinders too (the 16" wheel trucks have larger rear wheel cylinders to match the larger front brakes).

Rear suspension: Loosen the pivot bolts on all 5 links (10 locations). Install new suspension parts, re-tighten the links at ride height. Much less fighting of parts, and you will 're set' the bushings to be unloaded at the new ride height. You should do the same on the front for the upper and lower control arm pivot bolts (same deal for easy install).

-Charlie

been there done that lol live and learn. You are not alone. Do not believe everything you read on the internet lol


Thanks Charlie. Il be doing the fronts for now, then the rears later. The calipers are pretty rusty-going to wire brush and clean the best I can .

As far as the rear shocks, that's a great tip!

STI, you've got that right!

UPDATE:

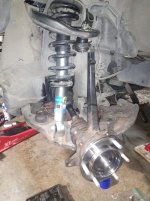
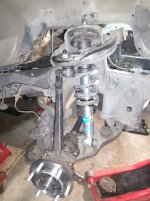
got new upper ball joints installed.

Installed the spindle/ hubs , left CV shaft, and tightened up the rest of the front end. Looks like this 4runner is officially 4wd! (As soon as I throw on the nuts to the axles).
 

Attachments

  • IMG_20191118_191943037-min.jpg
    IMG_20191118_191943037-min.jpg
    133.9 KB · Views: 385
  • IMG_20191118_191950819-min.jpg
    IMG_20191118_191950819-min.jpg
    130.5 KB · Views: 408
Very nice build thread. :D I know your learning and having all kinds of fun. That is good to see folks really tearing into them. I would have just fixed the fame. However, that is me. Not everyone goes that route which I can completely understand.

I am enjoying this thread though. Keep the updates coming. :D
The whole 4runner was rusty, and the rust damage was so extensive that I could punch through the frame in some parts with a screw driver...I COULD have just replaced the whole frame, but all of the components, springs, spindles, accessories, and bottom of body had moderate to severe rust...I couldn't be happy with a build with all that rust slowly eating away at everything!!

I have done frame repairs, and the effort and time it ended up taking made me realize il never do a major repair like that again. I have a write up on it somewhere, maybe tacomaworld.

Glad to see you're enjoying my wrenching adventure! Haha.
 
Good productive day! Found some Tundra calipers (199mm) for 75 bucks..got new autozone duralast gold rotors on a sale they're having currently. 180 for both rotors and ceramic pads, happy enough!

I also decided to buy stainless brake lines for the front. I haven't purchased yet, but I will be doing so tomorrow.

All fluids are purchased and I tightened up the axle nuts to get it ready to roll.

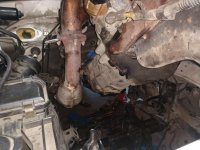
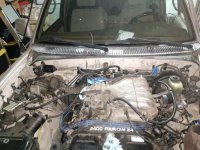
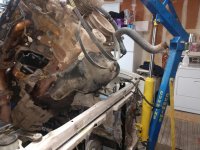
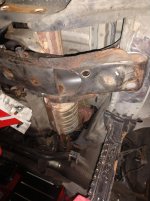
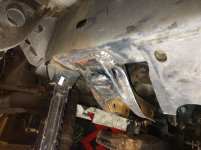
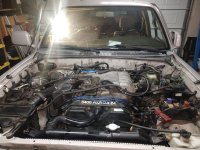
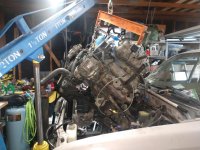
Hoisted the engine up and carefully lowered it in. With no fan or AC compresser, it was truly a relatively easy one man job. The hardest part was the driver side rear motor mount bolt, would have been easier without the CV in the way!

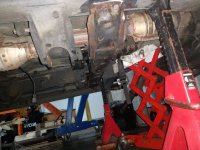
Once it was all bolted up I used a trans jack to jack up the transmission with the new mount and the crossmember installed . I then added the frame horns and placed bolts through them and jacked it up until it was snug on the frame . I measured for equal distance forward and aft and will recheck before welding. Cleaned up the metal after marking, hoisted it back up and realized my plug isn't compatable with my current 220v outlet...

So tomorrow il pick up a few things including an adapter and then get to welding!

After that, brakes wiring, and then working on cleaning up the center console shift area.

Then, adding the accessories back onto the engine

After that, fluids, bleeding, a/c servicing and final torque checks.

Looking forward to hearing this thing start again!
 

Attachments

  • IMG_20191121_110607416-min.jpg
    IMG_20191121_110607416-min.jpg
    139.1 KB · Views: 378
  • IMG_20191121_122538656-min.jpg
    IMG_20191121_122538656-min.jpg
    136 KB · Views: 394
  • IMG_20191121_122546770-min.jpg
    IMG_20191121_122546770-min.jpg
    131.8 KB · Views: 399
  • IMG_20191121_181137877-min.jpg
    IMG_20191121_181137877-min.jpg
    138.1 KB · Views: 365
  • IMG_20191121_122551888-min.jpg
    IMG_20191121_122551888-min.jpg
    133.3 KB · Views: 390
  • IMG_20191121_181150339-min.jpg
    IMG_20191121_181150339-min.jpg
    131.6 KB · Views: 378
  • IMG_20191121_181203278-min.jpg
    IMG_20191121_181203278-min.jpg
    128.3 KB · Views: 381
  • IMG_20191121_181218496-min.jpg
    IMG_20191121_181218496-min.jpg
    130.8 KB · Views: 383
After building an adapter for my welder and stopping at summit to get some braided stainless brake lines for the front, I got to work.

Installed the crossmember horns and welded in place

Installed transfer case and mated to front diff driveshaft


That's all I had time to do today...tomorrow will be a big day. Brakes will be going in place and everything will start to get tightened up.

Going to dive into the wiring as well. First, I want to make sure I can get the correct wiring for the clutch switch to start the vehicle....then il start playing with the 4wd wiring, reverse lights, etc.
 

Attachments

  • IMG_20191122_164456102-min.jpg
    IMG_20191122_164456102-min.jpg
    130.6 KB · Views: 370
changed the plan. Went ahead and completed the engine bay area (90%) so I could work through any troubleshooting that may need to be done, and go figure, theres some issues.

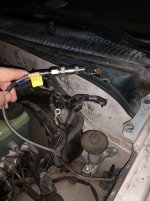
First issue started with the radiator. Apparently it cracked at some point during the removal and install, so I had to swap it out with the automatic rad for now. I threaded bolts in to the oil cooler ports and installed with no issues. I will need to replace at some point as it has some damage from the from end collision it had with a deer. No more leaks in the radiator, but the hose started to leak. Will need to replace the spring type clamps with threaded (I prefer them anyways)

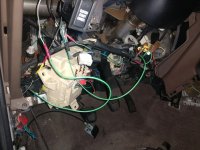
The wiring started this morning. I made a pot of coffee and went to work on the wiring diagrams. I decided to find all of the wires I need for the clutch start cancel, clutch safety switch, and cruise control on the drivers side by locating the connectors and tapping or splicing as needed. This saves me from swapping the whole dash wiring harness.

Downside is this toyota had some aftermarket security system that had at least 10 cheap taps installed. I removed all wires and spliced together the ones that were oem (only 1 needed to be reconnected). I will clean it up more once I finish.


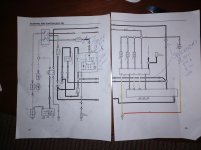
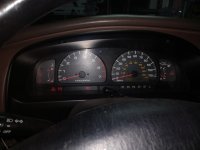
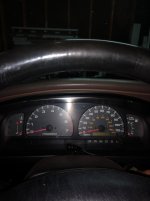
I have attached a photo of the wiring diagram and my additions for help troubleshooting. The cluster photos show before turning key to start, and after...as you can see the lights cut out, power is lost completely.


When I put the battery in and pressed the clutch start cancel, I was happy to find the light illuminated . no p-d-n lights on, and the check engine light was on because of the vehicle not being started.

I went to start, and the power to the vehicle cut out completely after hearing a click from a relay in the front (possibly starter relay).

I then had to revert the key to the off, then acc again to restore power.

I figured the batt could be dead so I swapped with one from the other 4runner with no luck.

I decided a last ditch effort would be to use my subaru battery which has 640 CCA. I figured it might turn it over anyways, but alas, same problem.

Key in, no problem. Accessory no problem. Radio goes on, lights illuminate.

When i attempt to start without the clutch start cancel on or the clutch depressed, it does not fail the system meaning SOME of my wiring should be correct. When i depress the clutch OR use clutch start cancel, there is an audible relay click, no starter engagement, and loss of power.

The power loss is either complete, or the lights dim and flicker slowly after releasing the key from the start position.

Im worried I may have a short somewhere, but I was too tired to continue to look into it tonight.

I used a voltmeter attached to the battery when cycling through the different key positions to see if there was a load being imposed on the batt for start. from my observations the battery started at 11.9-12.5v, momentarily dropped to 11.5 when turning to acc pos (then returned).

When rotating to the start position with no clutch start cancel or clutch depressed, no voltage loss or power drop.

When starting with either switch closed, power loss to vehicle but no change in voltage.

Im wondering if my splicing may be incorrect somewhere. What I did was splice the required wires into the existing wiring on plug 3E. I found the pins to be 1,2 and 3.

as you can see in the diagram, I simply mirrored the A/T wiring with the M/T wiring. Because there is a manual engine harness, it is my understanding that the A/T wires staying in place SHOULDNT have an effect on the starting sequence, as the M/T wiring should be the path of least resistance...but I may be reading the diagram/interpreting it wrong.

I also made a splice at connector 1f. The splice allows the b/y wire to energize the clutch start cancel switch, but also continue through the plug...I believe the problem COULD lie here, or somewhere in the wiring for the P-N switch.

Maybe because I did not remove the P-N switch from the circuit it is causing a problem?


This write up is probably complex and hard to understand due to the way im explaining it, so in summary..

Clutch start sw B-W to clutch start cancel B-W

Clutch start sw B to B wire (PIN 3 connector 3E) leaving A/T wire in place (Tapped)

Clutch St cancel sw B to B wire (PIN 1 connector 3E) leaving A/T wire in place (Tapped)

Clutch st cancel sw B-Y to B-Y wire (PIN 5 connector 1F) leaving B-Y in place (Tapped)

Clutch st cancel AND Clutch start sw B-W spliced to single wire, spliced to
B-W wire from ECU (PIN 6 connector IG1) leaving B-W in place (Tapped).


Im thinking somewhere in there I may need to cut wires and have the circuit go through the clutch switches rather than have the signal tapped off, but im having trouble isolating where that would matter....


looking forward to hearing from the help!
 

Attachments

  • IMG_20191123_212745282-min.jpg
    IMG_20191123_212745282-min.jpg
    124.7 KB · Views: 367
  • IMG_20191123_194059621-min.jpg
    IMG_20191123_194059621-min.jpg
    116.5 KB · Views: 367
  • IMG_20191123_194110693-min.jpg
    IMG_20191123_194110693-min.jpg
    114.6 KB · Views: 363
  • IMG_20191123_191918240-min.jpg
    IMG_20191123_191918240-min.jpg
    132.4 KB · Views: 359
  • IMG_20191123_191857428-min.jpg
    IMG_20191123_191857428-min.jpg
    135.8 KB · Views: 376
Last edited:
Got the battery charged at orielly...threw it in...same problem.

Waited 1 min.


Acc on

Looks good

Start without clutch , no problem

Start with clutch depressed. START AND RUN!

NO CHECK ENGINE LIGHTS no p d r n lights illuminated.

Clutch start cancel works

Mission almost accomplished

THE PROBLEM WAS A CORRODED BATTERY TERMINAL CONNECTOR ON THE CAR SIDE GROUND. AFTER SCRUBBING WITH A WIRE BRUSH AND ADDING DIELECTRIC GREASE ALL IS WELL. CHECK THE SIMPLE THINGS FIRST!
 
Last edited:
Great build thread... Congrats on getting it done.

Just noticed you did this by yourself... Even more impressive. I'm local so if you ever want an extra set of hands in the future let me know.
 
Last edited:
Great build thread... Congrats on getting it done.

Just noticed you did this by yourself... Even more impressive. I'm local so if you ever want an extra set of hands in the future let me know.

Right on!

Where abouts are you? And thanks. Don't have as many pictures as I'd like, but il be posting more after the holidays. If you ever need a hand I'm also willing to help. Ive got a good amount of tools and time ...so not too many jobs too large.

As far as the 4runner, my girlfriend helped me bleed the brakes and clutch, but other than that...blood sweat and tears solo. With this cool air and snow coming in the next few days I'm happy I got all of the parts off of the donor 4runner. The only things left that I want to swap are all of the doors...they have better oem paint and the fender flares so it will save me from ripping off the flares and possibly tearing into em.

Still have to wire the ADD system which is actually a really simple relay ...and then clean up the interior. Really excited to take this thing off road.

I'm up in northwest reno so I'm sure il be getting some good snow these next few days ..looking forward to playing in it a bit.
 
Last edited:
Right on!
Where abouts are you? And thanks. Don't have as many pictures as I'd like, but il be posting more after the holidays. If you ever need a hand I'm also willing to help. Ive got a good amount of tools and time ...so not too many jobs too large.
Thanks! I live in South Reno off of South Meadows, that's the one nice thing about this town is it's not too big and you can be just about anywhere in 15-20 minutes.
I'm up in northwest reno so I'm sure il be getting some good snow these next few days ..looking forward to playing in it a bit.
We didn't get but a couple inches of snow but the ice was crazy on my way to work this morning. I had a little bit of fun in the empty parking lot when I got here. I have 4 days off and no plans, except for turkey day, so if you'd like some help with anything let me know.

John
 
Last edited:
Thanks! I live in South Reno off of South Meadows, that's the one nice thing about this town is it's not too big and you can be just about anywhere in 15-20 minutes.

We didn't get but a couple inches of snow but the ice was crazy on my way to work this morning. I had a little bit of fun in the empty parking lot when I got here. I have 4 days off and no plans, except for turkey day, so if you'd like some help with anything let me know.

John


Sorry, was out of town...but back now! I might need help when I swap the doors but I think it's pretty easy for one person..will advise.

Today I go the driveshaft bolted up, put on the front grill and hood, bled the brakes again (still need more bleeding, too soft), finished mounting the rear shocks and the front sway bar, and put on all 4 wheels and tires.

Next...test drive!

Took it out, engine runs great. No check engine lights. When driving in any gear, no park drive neutral lights on dash. When in reverse, reverse works and the reverse light illuminates. Accelerates a lot faster than the auto that it was before. Shocks and springs feel great. Lift looks good and pretty even . Front will sag more once I add a steel bumper and winch eventually.

Brakes definitely have some air in them somewhere, still very spongy when the vehicle is on.

The power steering pump is squealing pretty loud. Wasn't doing it before the swap, but it's definitely got an issue. Has adequate fluid...belt is tight and the power steering works-just annoying.

Heat/cool mixing rotary knob sticks before the full hot position. Going to have to see if it's getting hung up somewhere.

A/c compressor will not turn on. It has the manual on switch . When turning it on to service it, I get 30psi of refrigerant on the low side and high side. The compressor is not turning on ...needs troubleshooting.

Still need to wire the ADD, but I have the diagrams, relay and wiring-just need to take care of it .

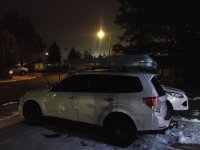
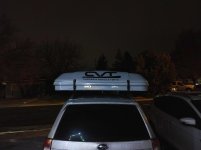
Also picked up a new CVT hardshell tent this week on their black Friday sale for 1200, and a barely used x jack exhaust jack for 100..dark photos show the tent closed up. It will most likely go on the roof of the runner OR on my custom camping/overland trailer ...I don't think I can get in the garage with the tent on the 4runner unless I deflate the tires .


Still need to swap all doors and seats from the other vehicle, and then swap the remaining flares from the rear 1/4 panels. I'm not sure how hard it is to remove them and I'm going to be looking online soon for some info.

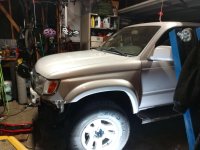
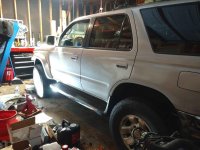
In the photos you can see the front left fender has been swapped , but the doors have not been yet. (Rear flares).
 

Attachments

  • IMG_20191203_172750782_compress76.jpg
    IMG_20191203_172750782_compress76.jpg
    123.1 KB · Views: 311
  • IMG_20191203_172810551_compress34.jpg
    IMG_20191203_172810551_compress34.jpg
    134.2 KB · Views: 316
  • IMG_20191203_172833655_compress97.jpg
    IMG_20191203_172833655_compress97.jpg
    136.5 KB · Views: 308
  • IMG_20191203_172822123_compress55.jpg
    IMG_20191203_172822123_compress55.jpg
    145.8 KB · Views: 313
I have a project like this ready to go when I get the time, I have everything I need. I'm super loaded with work, but I'll have to make it happen. Especially cause the wife is nagging me about the "junk" in her driveway. 2000 4wd/5spd rust bucket swap over to 1998 2wd/auto southern with no rust. The plan is to also convert the dash with console and any 2000 updates.
So I see you kept the transmission on the motor when hoisting it into the new rig, that's what I want to do and was wondering if it could be done without hassle or gaffing anything. Looks like it went ok for you. Thanks for the write up, I'll be referring to it when doing mine.
 
Last edited:
30 psi on both sides tells me that you are too low on refrigerant. You should be seeing 20-35 psi on the low side once the compressor is on and 150-200 psi on the high side depending on ambient temp. I think mine reads around 80 psi on both sides when it's off. You might try checking that the ac compressor is getting power when you hit the ac request switch in the cabin. It should be a 2 wire plug with just a 12v and ground. Try putting a test light at the plug while someone presses the ac request button. Engine has to be running if I remember correctly.

You're making great progress by the way!
 
30 psi on both sides tells me that you are too low on refrigerant. You should be seeing 20-35 psi on the low side once the compressor is on and 150-200 psi on the high side depending on ambient temp. I think mine reads around 80 psi on both sides when it's off. You might try checking that the ac compressor is getting power when you hit the ac request switch in the cabin. It should be a 2 wire plug with just a 12v and ground. Try putting a test light at the plug while someone presses the ac request button. Engine has to be running if I remember correctly.

You're making great progress by the way!

Yeah, well my first problem could be that my 30lb refrigerant tank isnt high enough in pressure, but that really doesnt make sense to me as the tank itself still is half full of liquid!

I was able to get the low side to 35 psi after sitting and waiting for about 45 minutes with the low valve open and regulators connected. Maybe i need to try and do it again.

Im wondering if there is a pressure safety switch that isnt allowing the compressor to kick on because the refrigerant is too low pressure wise?

And thanks! progress is definitely nice. I might do some more work on the car today as well. I really want to get all the doors swapped over...but its cold and snowy and thats never too much fun to work in (parts car is outside).
 
I have a project like this ready to go when I get the time, I have everything I need. I'm super loaded with work, but I'll have to make it happen. Especially cause the wife is nagging me about the "junk" in her driveway. 2000 4wd/5spd rust bucket swap over to 1998 2wd/auto southern with no rust. The plan is to also convert the dash with console and any 2000 updates.
So I see you kept the transmission on the motor when hoisting it into the new rig, that's what I want to do and was wondering if it could be done without hassle or gaffing anything. Looks like it went ok for you. Thanks for the write up, I'll be referring to it when doing mine.

Awesome! its a lot of work. I would say to plan for at least 20 full working days if youre doing it solo. With a friend/shop you can probably do it in about 10 fairly easily.

Big things that suck will become apparent when you start working, but the most difficult is just being patient with all of the little things that you have to get to along the way.

pm me if you have any questions when you start, or message me in here and il try to get back to you quickly. Wiring was fairly easy and I can explain that as needed.

I havent swapped the instrument cluster yet, just because I want to make sure the dealer will reset my mileage for me - Im not sure what the process is or how to get them to correct it, so im waiting until I can get that information. Good luck for when you start though!
 

Members online

Forum statistics

Threads
278,317
Messages
3,554,129
Members
248,016
Latest member
Advally Service

Trending content

Back
Top