Daily Driver Kayak Hauler Build

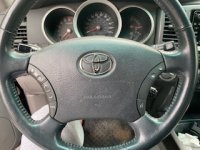
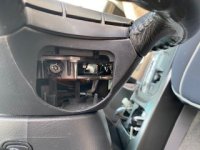
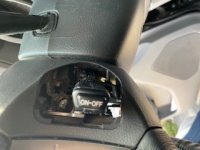
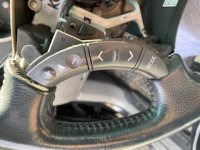
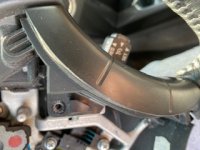
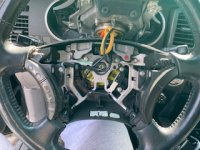
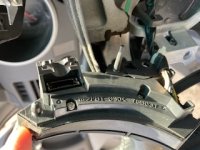
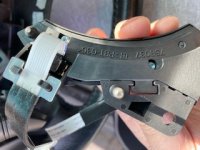
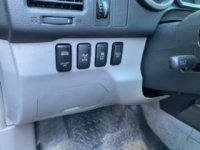
Right Steering Wheel button install

First I like to THANK [MENTION=50507]CookieRoe[/MENTION] for his write up! WIthout it, I think it wouldn't have happened or taken more time. Pictures were difficult to see but not difficult to figure out.

I bought the button and Ribbon online and think it cost me under or around $100. I'm no mechanical wizard like some of you are and I took my time. In total it took me 45 mins to install.

here's the link:
DIY Bluetooth/Voice Command steering wheel button install (pics)........for REAL

It works like it should and I feel like I'm driving in a new car. Personally my set up is way more user friendly than my wife's 2013 GX 460. Here are some of my pictures to help with [MENTION=50507]CookieRoe[/MENTION] s write up. Big shout out! Thank you!!!!


This is where I got my parts, new and cheaper than ebay or amazon:

Cruise Switch - Toyota (84244-35030-B0) | Toyota Parts

Switch Cable - Toyota (84204-58010) | Toyota Parts
 

Attachments

  • image3.jpeg
    image3.jpeg
    32.6 KB · Views: 593
  • image4.jpeg
    image4.jpeg
    25.3 KB · Views: 592
  • image5.jpeg
    image5.jpeg
    23.6 KB · Views: 587
  • image6.jpeg
    image6.jpeg
    30.8 KB · Views: 591
  • image7.jpeg
    image7.jpeg
    25.6 KB · Views: 610
  • image8.jpeg
    image8.jpeg
    35.3 KB · Views: 587
  • image9.jpeg
    image9.jpeg
    29.9 KB · Views: 580
  • image10.jpeg
    image10.jpeg
    27.3 KB · Views: 576
Last edited:
First I like to THANK [MENTION=50507]CookieRoe[/MENTION] for his write up! WIthout it, I think it wouldn't have happened or taken more time. Pictures were difficult to see but not difficult to figure out.

Here are some of my pictures to help with [MENTION=50507]CookieRoe[/MENTION] s write up. Big shout out! Thank you!!!!

Glad to see it helps folks out. Sorry about the pictures. Back then, I had my photos on photobucket (most know what happened to them). Anyway, luckily I transferred all my photos to imgur. Anyway, took a while, but I fixed the pictures. Completely forgot about this thread.
 
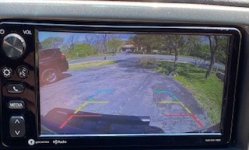
Backup Camera issue SOLVED

With the Stay AT Home Orders, I had some time to chase my backup camera problem. Last November I tried it with:
2016+ Scion Display Audio Backup Camera Kit

This time around I bought:
Amazon.com: PYvideo Backup Camera Kit for Toyota Prius (2015-up), Corolla (2014-up), Scion(2016-up) and More: Car Electronics

I followed the directions and since I was using an OEM Toyota headunit the directions were pretty simple. THE ONLY Difference this time around was I got GREAT advice from [MENTION=82698]Southernbike[/MENTION]. He suggested pull and reinstall the ACC FUSE. VIOLA it working.

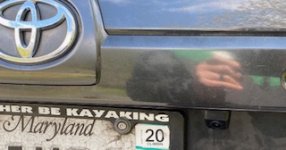
As you can see from the pic below Its a bit off to the side as there's no way to center it. I'm just glad its working and I'll live with it off center.

Here are some pros/cons of both kits. Personally I like the Camera Source one, it comes with better directions and better customer support. I called MULTIPLE Times and a woman was very help and did her best to assist. Sadly it didn't work last year but I believe if I pulled and reinstalled the ACC Fuse it would've worked. I returned the kit then and bought the PYVideo this time around.

Camera Source included drill bit & reverse trigger wire where as PYVideo did not but included a plastic pull tool. They are both plug and play and the Camera Source cables and wires are a bit longer than PYVideo. I barely had enough as I connect the wires from the headunit - under steering wheel, and down the side under the driver's side kick panel all the way to the back- Spare Jack compartment - up to the top to connect to the hatch. There were no slack anywhere

This is the video I followed for the Hatch portion.
YouTube
 

Attachments

  • IMG_4741.jpg
    IMG_4741.jpg
    54.5 KB · Views: 502
  • IMG_4740 (1).jpg
    IMG_4740 (1).jpg
    22.6 KB · Views: 470
Last edited:
Headlight issue

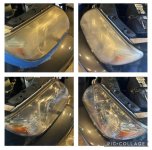
As I'm getting closer to 200K miles, I needed to do something with my headlights. I was foggy and has some scratches. After all the research, I decided to keep it and clean it instead of replacing with modern style headlights. I didn't want to deal with potential leaks and what not. I use SYLVANIA Headlight Restoration Kit. Then added Meguiar's Keep Clear Headlight Coating. Then added an LED bulb.

I'm sure many of you have much better MODS with the headlights. This was cheap. :panda:
 

Attachments

  • IMG_2171.jpg
    IMG_2171.jpg
    83.9 KB · Views: 308
Hood Scoop Light Bar

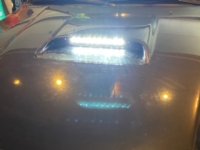
YES I know this has been visited / and written up before but..... C4 stopped selling their brackets. I waited too long. But I found this one on Amazon / Ebay: Its on Ebay as well but didn't want to run the risk if I didn't like the quality, Amazon was easier to return.

iJDMTOY Hood Scoop Mount LED Light Bar Kit Compatible with 2005-2011 Toyota Tacoma, Incl (1) 50W High Power CREE LED Lightbar, Hood Bulge Stainless Steel Mounting Brackets & Wiring Switch

Price was right, I also got a better wiring harness from Nilight as well as the OEM style button. Didn't trust the harness that came with the light. There's a great write up on the Tacoma World. But I figure if anyone still is looking to install one of these for a great price, this is a pretty good option. The bracket is nice and it bolts on with ease. Follow the directions on

Hood Scoop LED lightbar bracket by C4Fab | Tacoma World

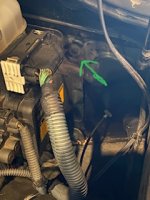
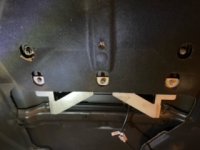
The light is fine for what I needed. You can see from one of the pictures where I pull the wiring harness through the firewall. I pull a rubber Grommet out and there's a hole. Then I drilled a hole in the fabric fire wall. You see the green arrow pointing to the grommet in one of the pictures.

Just in case anyone else was interested. Total cost was around $125?
 

Attachments

  • image4.jpeg
    image4.jpeg
    29 KB · Views: 301
  • image5.jpeg
    image5.jpeg
    26 KB · Views: 296
  • image6.jpeg
    image6.jpeg
    23.3 KB · Views: 300
  • image7.jpeg
    image7.jpeg
    28.6 KB · Views: 298
Another Minor mod.... Thanks to....

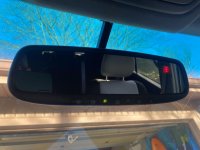
Just doing some minor mods. Figure I give a shout out to [MENTION=67197]4RunnERD[/MENTION] for his amazing post from 2011. Just wanna give a shout out. Got my Subaru Compass, Homelink, Auto Dim mirror off Ebay for $70. Came with all the wires and the plastic covers.

Here's the excellent write up with pictures.

Auto Dimming Mirror Install w/pictures - Toyota 4Runner Forum - Largest 4Runner Forum
 

Attachments

  • mirror.jpg
    mirror.jpg
    70.9 KB · Views: 273

Members online

Forum statistics

Threads
278,316
Messages
3,554,120
Members
248,016
Latest member
Advally Service

Trending content

Back
Top