Drcoffee
Senior Member

The cheapest way to start this project is on Ebay. I found this Tan Homelink rolling code unit for $22 shipped. You'll want at least 6" wires but you can replace it with 18ga wire if it comes too short.This unit came with a Black and Green/Brown wire. It looks like it has 4 wires but its really just 2 wires attached midway along the wire.
Green/Brown is (+)
Black is Ground (-)

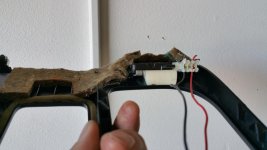
The headliner is about 1/8" thick so without modifying the headliner or the Homelink, you will not get the faceplate to lock into place. The easier choice was to mod the Homelink case. Use the rubber button piece as a template to mark the outer case. Open the Homeling case like a clam shell and cut along your lines and about 1/8" down from the top side. You will want to leave the frame intact to lock closed when you are done. Using a dremmel and cutoff wheel carefully cut out the case and discard the remnants.


On the side view, you can see how the cutout will fit through the headliner.

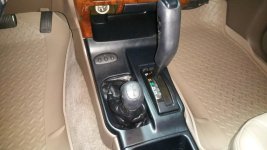
Its time to remove the console. Pop the lens out and you will find a Phillips head screw. remove the screw and remove the console.

You will be able to see that the drivers side houses the sunroof motor and there is a large cavity on the passenger's side. Figure out where you want to install the unit and mark the headliner in pencil or chalk.

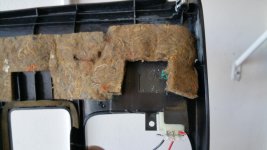
What I did once I found the location, I used stamp ink and dabbed it on the Homelink cutout on the plastic case and pressed it onto the headliner. Then with pencil darkened the outline to cut along.

I used a utility knife to carefully cut the headliner. Its just presed cardboard so don't push too hard. You may go too far. Considering this is a cosmetic piece I would not suggest using an electric tool for this part.

Keep trimming until you get a perfect fit.

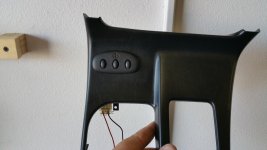
Here is the unit in place.

Now for powering the unit. Decide if you want constant power or switched power. You have your choice here because the map lights are constant on and the sunroof is switched. The pointer is in the second hole on the plug which is switched power. The hole below is constant power. Trace the wires back up 5" to the Y in the harness and tap splice into the wire of choice. I decided to use switched power because I park on the driveway and for security reasons I thought it was the best choice.

Blue/Red = Switched power
Blue/Yellow = constant power

The ground wire was easy. I stripped off 1/2" of the insulation from the black wire and tightened one of the motor mounting bolts down against it as you can see in the picture.


Test that the Homelink is getting power and if it is, press the rubber buttons and faceplate into place. If the face fits loosely, shim it from inside the headliner with something non-metallic.

Tuck all the wires back up in the headliner and re-install the console and lens plate.
This took me about 10 minutes to cut the Homelink housing and about 30 minutes to install. Looks factory and works great. You can find the programming instructions at the Homelink website.
:tea:
Last edited: