DIY: Roof Rack Delete (w/ pics)

When looking at the mounting points, is the only point of leaking at the bolt holes around and inside of the white plastic housings? Just curious if anywhere else needs to be sealed. I really don't want to be worried about water getting in anywhere.

Yes. I just did this mod to my 19' Pro a couple weeks ago and there are no points of entry for water other than the 2 bolt holes at each of the 4 mounting points.
 
Also it should be noted that the 2019 Pro models (that came with the god awful FJ style rack) have no plastic tubes in the mounting holes like past models do, so don't be like me and wonder why they're not there and think something went wrong.
 
Did this yesterday. How tight did everyone tighten down the bolts? I got them tight and then kinda kept going until they wouldn't tighten anymore. Not sure if that was appropriate or not as my torque wrench didn't go down to 14lbs.
 
Did this yesterday. How tight did everyone tighten down the bolts? I got them tight and then kinda kept going until they wouldn't tighten anymore. Not sure if that was appropriate or not as my torque wrench didn't go down to 14lbs.

I just kinda snugged-em-up...

No issues thus far.
 
I removed my rack since I sold it and am upgrading to a Prinsu, and I have to say, I really like the way it looks without the rack!
 
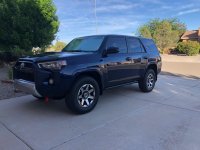
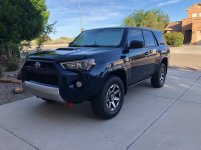
Removed the black roof rack from my '19 TRD OR. The ham fisted baboons at the dealership scratched the hell out of my roof when they installed the crossbars (done prior to purchase). I'll need to get the polishing compound out to see if I can smooth out their "custom" work...:mad2:

The 4Runner looks rather lean and mean without it... at least my 17 year old car nut thinks so...:rockon:
 
BTW, it took about 30 minutes total. I added quite a bit of silicone sealant around the white plastic hole caps and teflon taped the bolts. I'm hoping there will be NO leakage!!!
 
Removed the black roof rack from my '19 TRD OR. The ham fisted baboons at the dealership scratched the hell out of my roof when they installed the crossbars (done prior to purchase). I'll need to get the polishing compound out to see if I can smooth out their "custom" work...:mad2:

The 4Runner looks rather lean and mean without it... at least my 17 year old car nut thinks so...:rockon:

Are you getting rid of your black rails?
 
I know this has been discussed in a few threads but I figured I would do a more detailed write-up for those that have never ventured down that path. So rather than some vague descriptions, here are the detailed steps on removing the 5th Generation Roof Rack. I had more detailed pictures to include throughout this thread, but it said I was limited to only 11 pictures. I originally had 18. Either way, hope it helps those with the questions.

1.) Order your parts: The following parts will be needed to accomplish the roof rack delete. You will need the following:

8pcs - Part# 90119-08C47 (roof bolts w/ rubber washers)
4pcs - Part# 63185-42020 (roof brackets w/ foam pads - TE already have this under the installed roof rack)
4pcs - Part# 75596-35030 (roof plastic covers)

RoofRack2.jpg~original


2.) Plastic Cover Removal: You will notice by the picture that there are two tabs holding the cover in place. These tabs face outward away from the car. On the front covers, the tabs are 3" and 7" measuring from front corner of the cover to the back of the cover. First tab at 3" ....2nd tab at 7". (see picture - You can start with either side first. I started with the driver side).

RoofRack13.jpg~original


3.) Cover Removal: All you need is a flathead screwdriver and a soft rag to pop these off. Carefully wedge the tip of the flathead between the cover and the rubber gasket that it sits on.


Put a rag over the car and slowly pry up the plastic cover.....you will hear it pop when the first tab is free. Move to the 7" mark and pry up/out the 2nd tab until you hear the pop sound. Once both tabs have been released, rotate the plastic cover back towards the roof of the car. This will expose the two bolts holding the roof rack in place.

RoofRack5.jpg~original


RoofRack6.jpg~original


4.) Use a Metric size 12 socket and unbolt the two bolts found under the cover. These are very tight at first and tough to turn as the factory put a type of red threadlocker on the bolt threads. Slowly loosen these and remove the two bolts under the front cover, and under the rear cover.

RoofRack7.jpg~original


This is the difference between the stock bolt (long/silver) and the roof rack delete bolts (black).

RoofRack8.jpg~original


5.) Remove entire driver's side roof rack. Once removed you will see this:

RoofRack9.jpg~original


There will be some bits and pieces of sticky black foam. I used a rag and wiped around the area...just to make sure it was free of any debris. This is important as once you replace this empty hole with the new brackets, a new seal will be made. The black metal brakets have a foam pad at the bottom of each end to prevent any water from entering into the screw holes.

*Note: You might want to put a bit of silicone around the base of these white tubes...just for good measure. The bracket foam pads paired with the rubber washers should do a good job of keeping any water out, but a little extra wouldn't hurt.

6.) Metal Brackets: Now its time to place the new metal brackets in their place. You will notice a little "arrow" imprinted in the bracket. I kept the arrow pointing outward toward the outside of the car. Now anyone can correct me on this as I do not have the repair/service manual, but I believe the arrows should point outward away from the car as this was the position that seemed to fit best.

RoofRack18.jpg~original


RoofRack16.jpg~original


7.) Install new Bolts: Once you have the new metal brackets in place, its now time to install the new bolts. I used a bit of blue medium strenght threadlocker on the end of each bolt to make sure it does not come loose. At the same time it should prevent any moisture from entering through the threads. Some people use build-a-gasket or teflon paste. Your choice. But the combination of the foam pads on the metal brackets and the rubber around the new bolt washer should prevent any water from entering. Use a metric size 11 socket to tighten these bolts in place (These bolt heads are a bit smaller than the stock silver ones. I can't remember the exact size...I'm pretty sure its metric size 11..... its one or two sizes smaller than the stock bolt). I'm not sure how tight they have to be, but usually my motto of "Tight is tight enough" should suffice.

RoofRack10.jpg~original


8.) Install Plastic Clip/Covers: Finally, install the plastic covers. These have arrows molded into them as well. Again, not sure exactly which direction they should go, but I installed them with the side arrow pointing outward away from the car. They seem to fit perfect that way.

THATS IT! Your done. Drink a beer and enjoy the clean look of the rackless 4Runner. :trophy:

Did you turn the black clips the other way so the arrow points towards the inside of runner? The second pic looks different to the first.
 
I used the Teflon tape on the bolts.
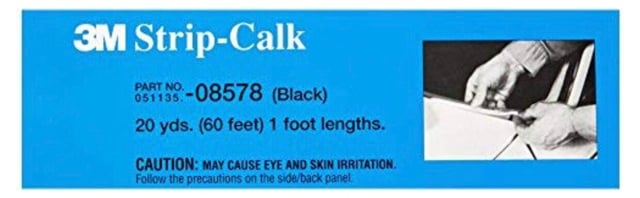
Then I used 3M strip-calk around the white tubes
776d622066e787102a7d4a40136438e0.jpg

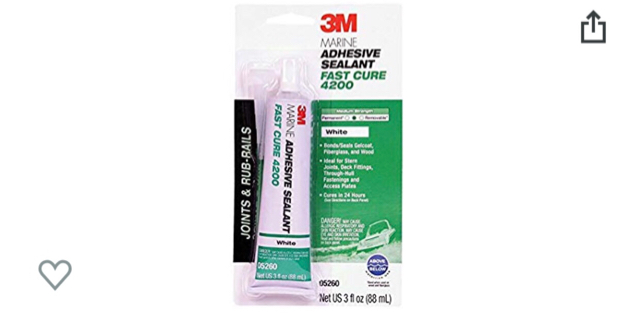
And a dab of the 3M 4200 sealant inside the white tubes
220d649c8153abbcf5d7ab9287049d77.jpg

God knows when I’ll be able to afford a Gobi! I might be rackless forever hahahah


Sent from my iPhone using Tapatalk
 
Removed the black roof rack from my '19 TRD OR. The ham fisted baboons at the dealership scratched the hell out of my roof when they installed the crossbars (done prior to purchase). I'll need to get the polishing compound out to see if I can smooth out their "custom" work...:mad2:

The 4Runner looks rather lean and mean without it... at least my 17 year old car nut thinks so...:rockon:

Sorry for the shaded and dirty pics...
 

Attachments

  • Rack delete 1.jpg
    Rack delete 1.jpg
    134.1 KB · Views: 2,147
  • Rack delete 2.jpg
    Rack delete 2.jpg
    134.2 KB · Views: 2,003
Also it should be noted that the 2019 Pro models (that came with the god awful FJ style rack) have no plastic tubes in the mounting holes like past models do, so don't be like me and wonder why they're not there and think something went wrong.

Might need to remove the rails on my 2019 Pro.

Did you use the delete kit?

Did you unTorx the bolt in any particular order?

Thanks!
 
Might need to remove the rails on my 2019 Pro.

Did you use the delete kit?

Did you unTorx the bolt in any particular order?

Thanks!


Hello and Happy 4th!

Yes I used the delete kit. I'd recommend using it as there will be 8 holes in your roof exposed to the elements unless you have another rack already and will simply switch over using the factor mounting points. I placed a bead of clear RV silicone around each bolt when I put the delete kit in and I've had no leaking issues.

Alright so with the torx bolts:

They suck. Well mine sucked. You'll see when they come out that the factory bolt threads have red threadlocker on them. Very difficult to get moving at first so just be careful not to strip the bolts or break your tool.

The most important thing when removing the bolts is this:

For each mounting point there are two bolts. Underneath the headliner, those two bolts thread into a rectangular shaped backing plate that has a flimsy tack weld holding it onto the frame. This weld can EASILY break loose causing you to potentially lose that plate in the headliner. So, when you remove the bolts, start with one and get it loose, but dont remove it completely. Loosen the other, go back and forth until you feel that both are loosened enough and the plate is still attached. Then, proceed to remove both bolts and clean it up.

Others have spoken about the white nylon tubes that act as a guide for the bolts. Don't bother looking for these, the 19' Pros don't have them, I'd assume because they don't fit underneath the mounting feet for the Pro's FJ-style rack. The lack of those tubes, and the backing plate I spoke of, appear to be exclusive to our Pros only.

If you're going to Gobi for an aftermarket rack, they're tracking the lack of nylon tubes on the 19's and have assured me that their install hardware will work fine without them. I suppose I'll see when mine arrives later this month, and if there's any issues I'll let you know.
 
Last edited:
I know this has been discussed in a few threads but I figured I would do a more detailed write-up for those that have never ventured down that path. So rather than some vague descriptions, here are the detailed steps on removing the 5th Generation Roof Rack. I had more detailed pictures to include throughout this thread, but it said I was limited to only 11 pictures. I originally had 18. Either way, hope it helps those with the questions.

1.) Order your parts: The following parts will be needed to accomplish the roof rack delete. You will need the following:

8pcs - Part# 90119-08C47 (roof bolts w/ rubber washers)
4pcs - Part# 63185-42020 (roof brackets w/ foam pads - TE already have this under the installed roof rack)
4pcs - Part# 75596-35030 (roof plastic covers)

RoofRack2.jpg~original


2.) Plastic Cover Removal: You will notice by the picture that there are two tabs holding the cover in place. These tabs face outward away from the car. On the front covers, the tabs are 3" and 7" measuring from front corner of the cover to the back of the cover. First tab at 3" ....2nd tab at 7". (see picture - You can start with either side first. I started with the driver side).

RoofRack13.jpg~original


3.) Cover Removal: All you need is a flathead screwdriver and a soft rag to pop these off. Carefully wedge the tip of the flathead between the cover and the rubber gasket that it sits on.


Put a rag over the car and slowly pry up the plastic cover.....you will hear it pop when the first tab is free. Move to the 7" mark and pry up/out the 2nd tab until you hear the pop sound. Once both tabs have been released, rotate the plastic cover back towards the roof of the car. This will expose the two bolts holding the roof rack in place.

RoofRack5.jpg~original


RoofRack6.jpg~original


4.) Use a Metric size 12 socket and unbolt the two bolts found under the cover. These are very tight at first and tough to turn as the factory put a type of red threadlocker on the bolt threads. Slowly loosen these and remove the two bolts under the front cover, and under the rear cover.

RoofRack7.jpg~original


This is the difference between the stock bolt (long/silver) and the roof rack delete bolts (black).

RoofRack8.jpg~original


5.) Remove entire driver's side roof rack. Once removed you will see this:

RoofRack9.jpg~original


There will be some bits and pieces of sticky black foam. I used a rag and wiped around the area...just to make sure it was free of any debris. This is important as once you replace this empty hole with the new brackets, a new seal will be made. The black metal brakets have a foam pad at the bottom of each end to prevent any water from entering into the screw holes.

*Note: You might want to put a bit of silicone around the base of these white tubes...just for good measure. The bracket foam pads paired with the rubber washers should do a good job of keeping any water out, but a little extra wouldn't hurt.

6.) Metal Brackets: Now its time to place the new metal brackets in their place. You will notice a little "arrow" imprinted in the bracket. I kept the arrow pointing outward toward the outside of the car. Now anyone can correct me on this as I do not have the repair/service manual, but I believe the arrows should point outward away from the car as this was the position that seemed to fit best.

RoofRack18.jpg~original


RoofRack16.jpg~original


7.) Install new Bolts: Once you have the new metal brackets in place, its now time to install the new bolts. I used a bit of blue medium strenght threadlocker on the end of each bolt to make sure it does not come loose. At the same time it should prevent any moisture from entering through the threads. Some people use build-a-gasket or teflon paste. Your choice. But the combination of the foam pads on the metal brackets and the rubber around the new bolt washer should prevent any water from entering. Use a metric size 11 socket to tighten these bolts in place (These bolt heads are a bit smaller than the stock silver ones. I can't remember the exact size...I'm pretty sure its metric size 11..... its one or two sizes smaller than the stock bolt). I'm not sure how tight they have to be, but usually my motto of "Tight is tight enough" should suffice.

RoofRack10.jpg~original


8.) Install Plastic Clip/Covers: Finally, install the plastic covers. These have arrows molded into them as well. Again, not sure exactly which direction they should go, but I installed them with the side arrow pointing outward away from the car. They seem to fit perfect that way.

THATS IT! Your done. Drink a beer and enjoy the clean look of the rackless 4Runner. :trophy:


GREAT write-up.
Thank you
:guitar2:
 

Members online

No members online now.

Forum statistics

Threads
278,316
Messages
3,554,111
Members
248,016
Latest member
Advally Service

Trending content

Back
Top