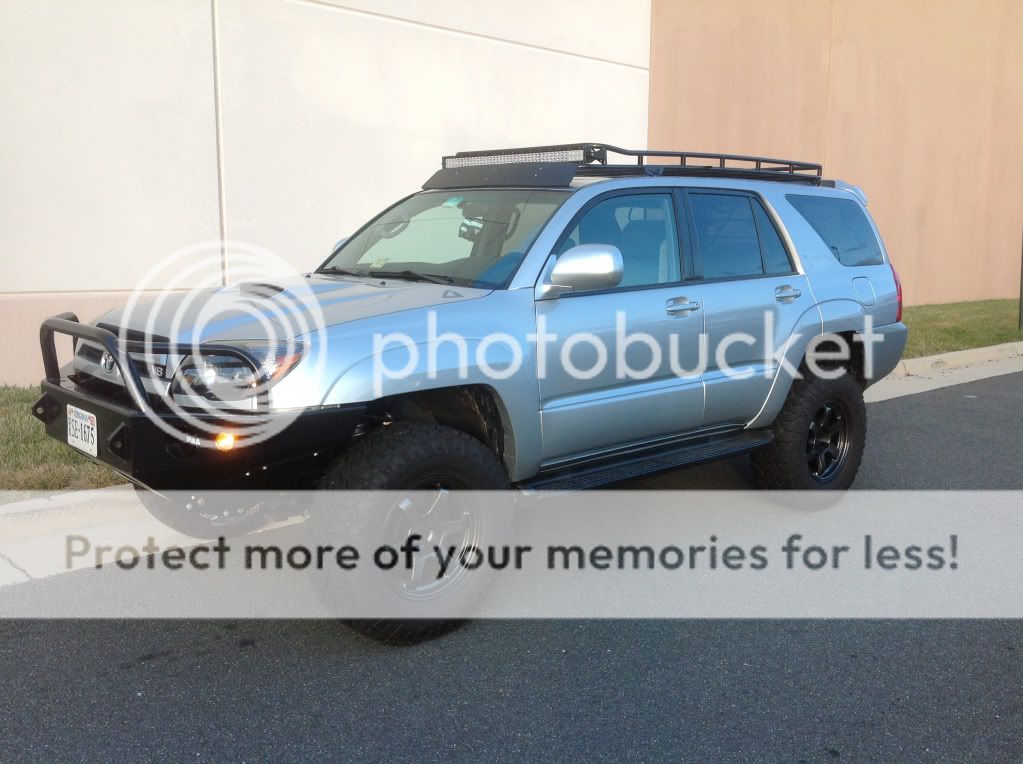
DIY Roof Rack Fairing - Whitson Metalworks

HokieRunner

New member
I've had several requests for a material list and how I made my custom fairing for the Whitson roof rack so here's a quick rundown. It's not a tough project but can be time consuming depending on how well you want the fairing to fit and look.

-----------------------------------
UPDATE: Brian (VA4Runner09) was kind enough to scan my template. You can find the post containing the file in my BUILD THREAD. Just download it and print, trace and cut
-----------------------------------


Materials:

  • 1" flat aluminum stock
  • 1/8" x 12" x 48" lexan sheet
  • 3x stainless steel bolts/washers/nuts to secure brackets to rack
  • 6x stainless steel bolts/nuts to secure bracket to fairing
  • paint/plastidip/vinyl wrap to finish the fairing
  • Edge grip weatherstripping (McMasterCarr) Click for part listing

Started out by machining adjustment slots into the aluminum stock. Then I rounded off the edges and put 45 degree bends into the brackets.


Then drilled out 3 holes in the rack (don't forget to paint the bare metal) and mounted the brackets. Using posterboard and scissors, I shaped a template for the fairing.
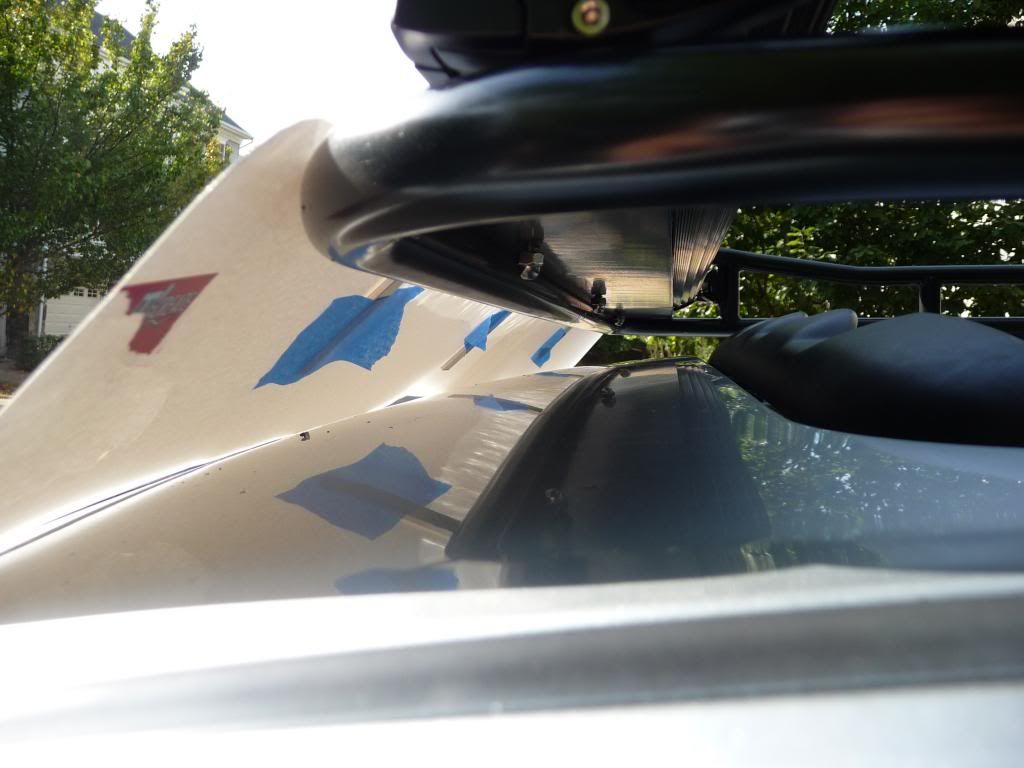

Traced the template onto the lexan and using a jigsaw - cut out the lexan. Sand the edges smooth. Then do another test fit:


Using double sided sticky tape, I positioned the fairing onto the brackets and then removed the entire unit. If you use strong double sided tape, you can mark and drill the fairing/bracket bolt holes in one fell swoop. Then bolt it up for one last test fit.
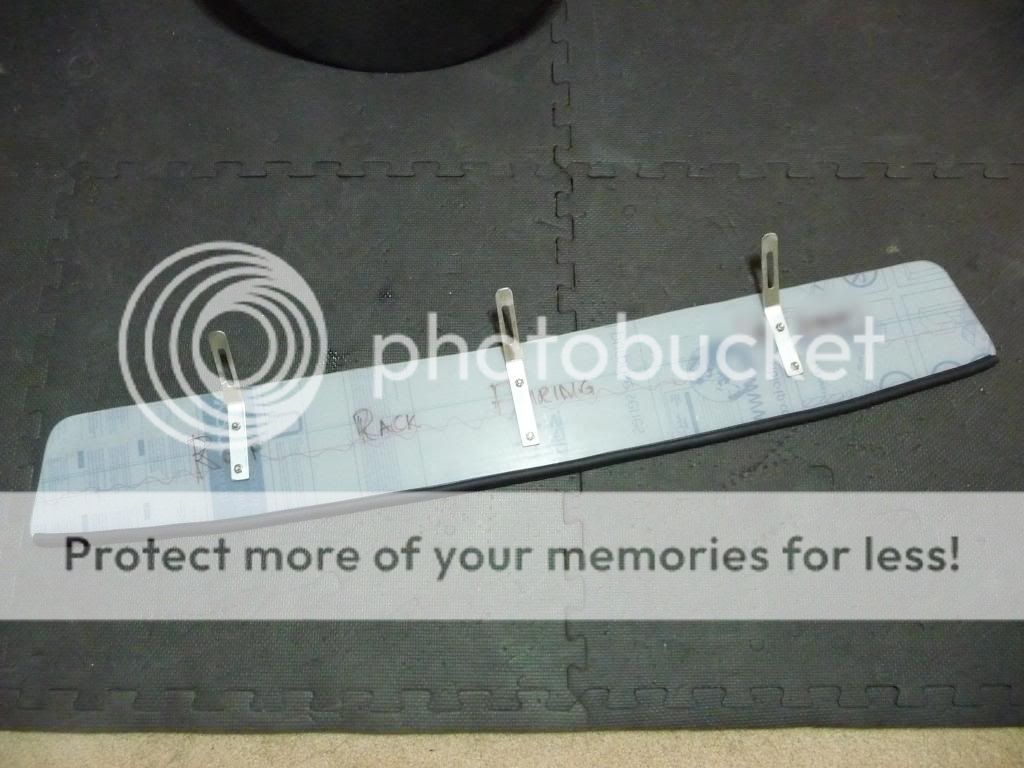

Then tear it all down for the final time and paint/vinyl wrap it. Pop on the edge grip weatherstripping.


Install and say goodbye to windnoise!


Last edited:
Register to hide this ad
Super helpful info! Thanks very much for taking your time to do a write-up. Curious what methods you used to cut the slots in the brackets? Slots like that fight me any time i need one to the point i don't even try anymore lol.
 
Super helpful info! Thanks very much for taking your time to do a write-up. Curious what methods you used to cut the slots in the brackets? Slots like that fight me any time i need one to the point i don't even try anymore lol.

The slots turned out easier than I thought. I drilled the proper sized hole at either end and then using a dremel and cutoff wheel, free handed the distance in between. Part of the reason I chose aluminum for the brackets was the softer metal.
 
They are almost identical to the old fairing brackets i had in my storage closet. I was playing around with the brackets from my current Yakima fairing. Not sure how they will work, but just wanted to see what i could do with'em.
 
Great write up! Thanks for the info... any reduction in wind noise or noticable drag? I always feel like my light bar is getting most of the wind.

I will definitely try it out soon.

Thanks
 
Great write up! Thanks for the info... any reduction in wind noise or noticable drag? I always feel like my light bar is getting most of the wind.

I will definitely try it out soon.

Thanks

Wind noise is 99% gone. I haven't noticed any added drag, either. Pre-fairing I would get a vibrating noise from 25-30 mph and starting at 55mph and up the noise was pretty much unbearable (this was with a sound deadened and insulated roof as well). The fairing returned everything to normal.
 
I saw you ended up using socket head screws on the top but can't tell what you used on the fairing.
 
I saw you ended up using socket head screws on the top but can't tell what you used on the fairing.

I used machine style screws for the fairing with nylon lock nuts on the back. They're hex key drive as well. I still need to post up the template so I'll throw up pics of all the hardware when I do.
 
I used machine style screws for the fairing with nylon lock nuts on the back. They're hex key drive as well. I still need to post up the template so I'll throw up pics of all the hardware when I do.

Cool. I think i could make the plastic fairing brackets work, but it is a lot more fitting and grinding than i feel like doing. I think the yakima fairing i have will work pretty good after i fix the brackets. I have three of the aluminum Yakima brackets from my old fairing, but since there is a support welded in the middle i am going to make a fourth bracket. It will be the same as yours, only 4 brackets instead. My current fairing had four brackets going across, so i think it will work good for keeping a curve in the fairing. I will post some pics when i am done. Thanks again for the help.
 
Rebumping this, definitely gotta make one of these for myself.

I'm trying to figure out where you got the aluminum stock. You said you drilled the slots yourself and applied the bend... so that makes it sound like they were just plain, flat plates. Did you find those at a hardware store? I'm having trouble finding just the right size.
 
Home depot has everything you need. In the first post write down the thickness of the plexiglass and dimensions. Aluminum stock you can find in the hardware isle. It's just a 3ft piece of flat aluminum. About 1/2" wide. Cut it down into strips about 6" long and bend to your needs. Use a piece is cardboard to make a template of your fairing. Then use that to trace it on your plexiglass. Theoretically you can make 3 fairings out of it. Realistically, I made one and a whole Lotta mess and breakage
 
Rebumping this, definitely gotta make one of these for myself.

I'm trying to figure out where you got the aluminum stock. You said you drilled the slots yourself and applied the bend... so that makes it sound like they were just plain, flat plates. Did you find those at a hardware store? I'm having trouble finding just the right size.

I started with flat stock and made the bends in a bench vise. Used a drill, dremel and grinder for rounding the edges and cutting the adjustment slots.

As [MENTION=93434]gshadow325[/MENTION] mentioned, Home Depot, Lowe's - any sort of decent hardware store should have the aluminum stock.

I would recommend Lexan over plexiglass, though. Plexiglass isn't as impact resistant and tends to fracture easily. Lexan isn't as cheap though and stores like Home Depot and Lowes only sell it in square sheets (at least when I was looking). You can source it on ebay pretty cheap as they sell Lexan scrap in various dimensions for way cheaper than you'd get it at a hardware store.
 
Last edited:
One more question for you: It looks like you ended up with a bit of a gap or the sides between the bottom of the faring and the body. Was that intentional, has it caused any whistling, and would you do it differently if you had a chance?
 
Grahhhh! I'm staring at a wall of bolt hell.

I found the strip, and I guessed that you used a 3/16 bit to drill those slots... but now I'm having trouble figuring out what size bolt will fit in those. It looks like a 5 mm bolt will be too big, but the 4 mm seems really tiny.

Ideas?
 
Grahhhh! I'm staring at a wall of bolt hell.

I found the strip, and I guessed that you used a 3/16 bit to drill those slots... but now I'm having trouble figuring out what size bolt will fit in those. It looks like a 5 mm bolt will be too big, but the 4 mm seems really tiny.

Ideas?

You thinking too hard. You don't need the slot in the aluminum stock. You do need to make the fairing first. What I did was make the fairing rest on the rubber for the windshield. Cut the aluminum down to 6" strips. Attach them to the fairing. Then mock it up. Make a bend in the aluminum stock to meet the rack. Use some self tapping screw's and make your holes and it's done. Don't over think it.
 
Yeah... over thinking is kinda my thing. :p I like the adjustability hokkies approach offers. I think I found the solution though. I just needed a 13/64 bit. The rest is falling into place now.
 

Members online

Forum statistics

Threads
278,316
Messages
3,554,121
Members
248,016
Latest member
Advally Service

Trending content

Back
Top