DIY Roof Rack Fairing - Whitson Metalworks

Grahhhh! I'm staring at a wall of bolt hell.

I found the strip, and I guessed that you used a 3/16 bit to drill those slots... but now I'm having trouble figuring out what size bolt will fit in those. It looks like a 5 mm bolt will be too big, but the 4 mm seems really tiny.

Ideas?

I can't remember the bolt sizes I used but I did use washers as well to provide a solid mating surface. As long as the bolts fit the slots you'll be ok.


As for the slight gap under the fairing sides, they actually flex and lay flat against the roof under speed. Wasn't designed for that but it worked out.


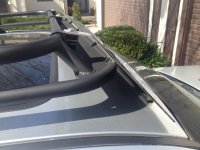
You thinking too hard. You don't need the slot in the aluminum stock. You do need to make the fairing first. What I did was make the fairing rest on the rubber for the windshield. Cut the aluminum down to 6" strips. Attach them to the fairing. Then mock it up. Make a bend in the aluminum stock to meet the rack. Use some self tapping screw's and make your holes and it's done. Don't over think it.

You don't need the slots but I designed mine that way because I'm looking for form and function. The slots allow adjustability to get a snug fit to the roofline with the weatherstripping AND add a slight bow to the front for aesthetics.

An unanticipated benefit to the slots is you can loosen the nuts a turn and slide the fairing out for easy roof cleaning after trips.
 
I have the slots in mine as well and have been able to adjust the fairing as i have been doing a little trimming to it. I have it just right now.
 
Post up your fairing pics!

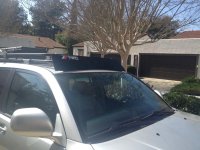
Got to thinking it would be nice to see the different fairing designs folks came up with. So if you've built one - post up a pic to give other folks some ideas.
 
Here's mine. I used some clamps from a Yakima Load Warrior and made the brackets out of Home Depot aluminum.
 

Attachments

  • rack 1.jpg
    rack 1.jpg
    130.5 KB · Views: 5,494
  • rack 2.jpg
    rack 2.jpg
    136.1 KB · Views: 3,624
I made mine out of plexi and zip ties. been rockin strong for about a year now and have less than $20 in it.
thepmfg-albums-project+2004+sr5+trail+rig...-picture25039-image.jpg

thepmfg-albums-project+2004+sr5+trail+rig...-picture23849-spent-week-between-christmas-new-years-eve-vail-co-one-taken-beaver-creek.jpg
 
So I made mine from 1/8" thick black abs material and mounted it as close to the body as possible. I used three homemade mounting brackets from aluminum. Number 8 half inch long stainless bolts and nylock nuts. I am getting a pretty bad vibration from the fairing at speed. Mine is resting on the body in the center with a slight gap around the outside. I did use body/door trim around the bottom. It is a hard plastic. Maybe that is the issue and I should order the McMaster Carr stripping? Is anyone else's vibrating and is the fairing bottom resting/touching the body?

Edit: just ordered the McMaster Carr edging. Hopefully that will solve the issue. I will report back and get some pictures as well


Bobby
 
Last edited:
So I made mine from 1/8" thick black abs material and mounted it as close to the body as possible. I used three homemade mounting brackets from aluminum. Number 8 half inch long stainless bolts and nylock nuts. I am getting a pretty bad vibration from the fairing at speed. Mine is resting on the body in the center with a slight gap around the outside. I did use body/door trim around the bottom. It is a hard plastic. Maybe that is the issue and I should order the McMaster Carr stripping? Is anyone else's vibrating and is the fairing bottom resting/touching the body?

Edit: just ordered the McMaster Carr edging. Hopefully that will solve the issue. I will report back and get some pictures as well


Bobby

Hi Bobby - can you tell if it's the fairing vibrating against the roof or if it's just the fairing itself?

I bent the brackets a little more than needed so they put pressure on the McMaster edging and hold it with a bit of force against the roof, maybe that will help? Hopefully the new edging solves the issue.
 
Matt, it is definitely the fairing vibrating and hitting the roof. I have it up against/resting on the body in the center but the sides are not touching the body. I think I need to bend the brackets a tad more to where it is resting on the sides as well. I will try that once I get the new edging.

Thanks for the response and the info on this. I looked around on the web to see what I could come up with. I did not find much aside from Yakima fairings that have been altered. I did find Gobi's instructions for installing thier fairing. It stated to have the faring mounted on the center bracket about 2" away from the rack bars, have the sides of the fairing touching the rack bars, and have the entire bottom of the fairing resting on the body of the vehicle. I have mine set up just like that but do not have the sides resting on the body. I think that will be the trick in combo of having an edging that is more absorbing like the McMaster Carr one.


:hatsoff:


Bobby
 
Hi Guys,

I originally did [MENTION=46025]HokieRunner[/MENTION] fairing mod. then i did some measurements and ordered a Yakima 44" fairing part number 8007048
44" Fairing for Yakima Roof Rack Crossbars Yakima Accessories and Parts Y07048
<a href="https://www.flickr.com/photos/129154214@N04/15717305331" title="20141105_144750 by gshadow3225 .., on Flickr"><img src="https://farm4.staticflickr.com/3952/15717305331_2175035b97_c.jpg" width="800" height="600" alt="20141105_144750"></a>

$85, more expensive than me making one from home depot BUT it took me 3 tries to make my old fairing and cost me about $45 in parts

I just put mine on today and it came out much nicer and easier than my first version i made.

So with this fairing, i used a file to deburr the edges first
<a href="https://www.flickr.com/photos/129154214@N04/15098579834" title="20141105_130048 by gshadow3225 .., on Flickr"><img src="https://farm8.staticflickr.com/7514/15098579834_d656751de8_c.jpg" width="600" height="800" alt="20141105_130048"></a>

This fairing is meant to go around the yakima round tubes on their rack.
<a href="https://www.flickr.com/photos/129154214@N04/15718479645" title="20141105_125358 by gshadow3225 .., on Flickr"><img src="https://farm4.staticflickr.com/3946/15718479645_10b9c04c3c_c.jpg" width="600" height="800" alt="20141105_125358"></a>

i took the hoops from the top picture and snipped them down to this. you will see why in later pictures
<a href="https://www.flickr.com/photos/129154214@N04/15694856026" title="20141105_130658 by gshadow3225 .., on Flickr"><img src="https://farm6.staticflickr.com/5607/15694856026_b6fbdfbfff_c.jpg" width="800" height="600" alt="20141105_130658"></a>

i used a heat gun to bend and mold the old hooks to my "new mounting tabs"
<a href="https://www.flickr.com/photos/129154214@N04/15716679921" title="20141105_131208 by gshadow3225 .., on Flickr"><img src="https://farm4.staticflickr.com/3941/15716679921_e0810b9652_c.jpg" width="800" height="600" alt="20141105_131208"></a>

as you can see in this next picture i trimmed the old hooks to become my mounting tabs. i drilled a small hole into the rack and put a pan head screw into it
<a href="https://www.flickr.com/photos/129154214@N04/15532951919" title="20141105_134846 by gshadow3225 .., on Flickr"><img src="https://farm6.staticflickr.com/5614/15532951919_e2d6a2c89e_c.jpg" width="600" height="800" alt="20141105_134846"></a>

this is what the fairing looks like behind it. it has little curved feet that come with foamies you can see them at the bottom of the fairing legs
<a href="https://www.flickr.com/photos/129154214@N04/15533987410" title="20141105_134854 by gshadow3225 .., on Flickr"><img src="https://farm8.staticflickr.com/7531/15533987410_113c831819_c.jpg" width="600" height="800" alt="20141105_134854"></a>

another shot of these foamie foot thingies. why are they important to me? keeps crap from getting clogged up behind the darn fairing. leaves branches and such. plus keesp the fairing from making a scratch into the paint
<a href="https://www.flickr.com/photos/129154214@N04/15099451193" title="20141105_134910 by gshadow3225 .., on Flickr"><img src="https://farm4.staticflickr.com/3937/15099451193_68f98b426a_c.jpg" width="800" height="600" alt="20141105_134910"></a>

finished product. took about 20 minutes of modifing and trimming. next one i do it will take 10 minutes :)
<a href="https://www.flickr.com/photos/129154214@N04/15718832595" title="20141105_134926 by gshadow3225 .., on Flickr"><img src="https://farm8.staticflickr.com/7582/15718832595_7ed0d0b197_c.jpg" width="800" height="600" alt="20141105_134926"></a>

i feel its a much quicker cleaner look. my old home depot fairing broke in 3 places only after 5 months of being on the truck. my old yakima fairing was on my old truck, and transferred from my old wagon and is still on the truck after i sold it 3 years ago, so it lasted over 8 years and not a scratch or crack on it.

 
Hi Guys,

I originally did [MENTION=46025]HokieRunner[/MENTION] fairing mod. then i did some measurements and ordered a Yakima 44" fairing part number 8007048
44" Fairing for Yakima Roof Rack Crossbars Yakima Accessories and Parts Y07048


$85, more expensive than me making one from home depot BUT it took me 3 tries to make my old fairing and cost me about $45 in parts

I just put mine on today and it came out much nicer and easier than my first version i made.

So with this fairing, i used a file to deburr the edges first


This fairing is meant to go around the yakima round tubes on their rack.


i took the hoops from the top picture and snipped them down to this. you will see why in later pictures


i used a heat gun to bend and mold the old hooks to my "new mounting tabs"


as you can see in this next picture i trimmed the old hooks to become my mounting tabs. i drilled a small hole into the rack and put a pan head screw into it


this is what the fairing looks like behind it. it has little curved feet that come with foamies you can see them at the bottom of the fairing legs


another shot of these foamie foot thingies. why are they important to me? keeps crap from getting clogged up behind the darn fairing. leaves branches and such. plus keesp the fairing from making a scratch into the paint


finished product. took about 20 minutes of modifing and trimming. next one i do it will take 10 minutes :)


i feel its a much quicker cleaner look. my old home depot fairing broke in 3 places only after 5 months of being on the truck. my old yakima fairing was on my old truck, and transferred from my old wagon and is still on the truck after i sold it 3 years ago, so it lasted over 8 years and not a scratch or crack on it.

I appreciate you posting up an alternative to my diy. Looks like it came out nice. But if we're being honest, you didn't follow my diy directions and materials as you substituted plexiglass for lexan, etc. So I feel it necessary to clarify that since you didn't really do my diy. Would just hate for other folks to be turned off of the custom fairing due to your misstatement.

To that end I'm glad you're happy with your new fairing! My fairing has been smashed against branches, rocks and more and still looks like new. That's the difference between lexan and plexiglass.

Again, I'm glad you posted up an alternative for folks but had to clarify.
 
I appreciate you posting up an alternative to my diy. Looks like it came out nice. But if we're being honest, you didn't follow my diy directions and materials as you substituted plexiglass for lexan, etc. So I feel it necessary to clarify that since you didn't really do my diy. Would just hate for other folks to be turned off of the custom fairing due to your misstatement.

To that end I'm glad you're happy with your new fairing! My fairing has been smashed against branches, rocks and more and still looks like new. That's the difference between lexan and plexiglass.

Again, I'm glad you posted up an alternative for folks but had to clarify.


very true, lexan is better than plexi! plexi is easier to get since it at home depot.

like you said, its a alternative to yours with parts that are more readily available and requires little fabrication. Your idea did make me think of doing this! So you do deserve credit for the inspiration! :)
 
I installed the McMaster Carr edging and that is what made the difference on mine. No more vibrations. I did try to get the fairing as close to the body as possible. I still have a tiny gap on the bottom in between the center bracket and the two side brackets. I followed the write up but did not make a slot in the top brackets. That may be why I can not get it to lay completely flat across the entire bottom.

Looking at it again today. It seems I might have tightened the abs material down to tight on the brackets causing it to slightly bow in between the brackets. I am going to see if slightly backing them off will help it relax.

Thanks for the info and write up HokieRunner. :drum:


Bobby
 
Last edited:
I installed the McMaster Carr edging and that is what made the difference on mine. No more vibrations. I did try to get the fairing as close to the body as possible. I still have a tiny gap on the bottom in between the center bracket and the two side brackets. I followed the write up but did not make a slot in the top brackets. That may be why I can not get it to lay completely flat across the entire bottom.

Thanks for the info and write up HokieRunner. :drum:


Bobby

Awesome! Glad it worked out -post up a pic when you get a chance! I love that folks are doing their own versions and it should give folks a lot of options when they go to solve the turbulence caused by the roof rack. There's not much info on the interwebs for diy fairings...can easily see why yakima and thule have the huge market shares.

The slots in the brackets do allow for a bit more adjustability to get the fairing perfectly flush, but it's not a necessity. I just found my original template during my move so I need to see if I can scan it for anyone interested. Or at least post up a scaled version.
 
Where did you get the side lights?

What mounts are you using on those side lights?

They're BlitzPro 6 led lights, they put off pretty good light to be so small. I ordered them directly from BlitzPro but ToyTec sells them as well. I used 3/4" long Stainless Steel #8 hardware and drilled in to the mounts Josh added to my rack when he built mine :fro:, These would easily fit in between the bars though if you could figure out a way to mount them directly.

Some pic's from my build of the light output:


Picture of the mount:


Bobby
 
Last edited:
They're BlitzPro 6 led lights, they put off pretty good light to be so small. I ordered them directly from BlitzPro but ToyTec sells them as well. I used 3/4" long Stainless Steel #8 hardware and drilled in to the mounts Josh added to my rack when he built mine :fro:, These would easily fit in between the bars though if you could figure out a way to mount them directly.

Some pic's from my build of the light output:


Picture of the mount:


Bobby
Looking good Bobby! That's Def the way to go for the fairing if you aren't running the light bar.
 
Dang those lights are bright! I might just have to get me some of those. For anyone wanting to mount them directly, or between the rails, a fender washer above and below the flooring mesh would be rock solid.
 

Members online

Forum statistics

Threads
278,317
Messages
3,554,129
Members
248,016
Latest member
Advally Service

Trending content

Back
Top