Doc's Build

Forgot to say that I picked the 4Runner up. Was going to take some pictures but having some issus with the dealer messing up the pant and wpider webbing it. I am getting the paint restored tommorrow since the dealer wants to play hard ball. Take lots of pictures bill there ass since the want to get SET involved when all it was was there guys washing it with a dirty rag stupidity. Now an extra $300 out of my pocket to get it right since I now dont trust them. And time here is very short. I will als Opti-Coat the vehicle when it comes back from the detailers. So I should have no further issues. I have done many other little things the past few days but will space out the posts a little bit.. Enjoy!
 
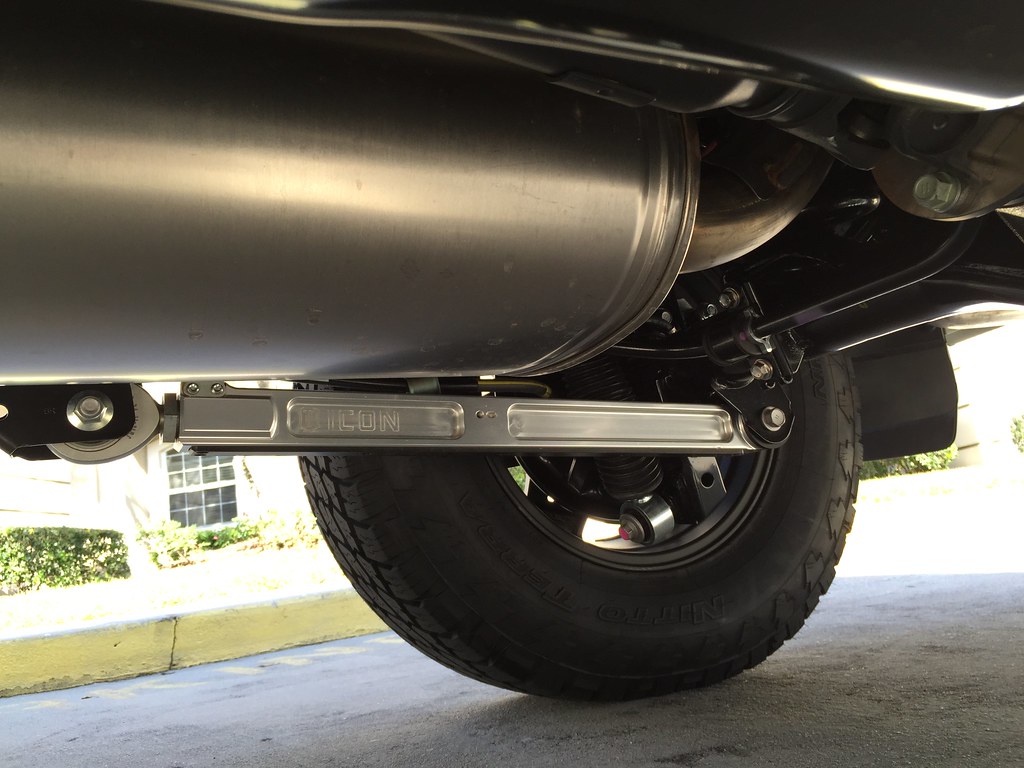
Icon Lower Links

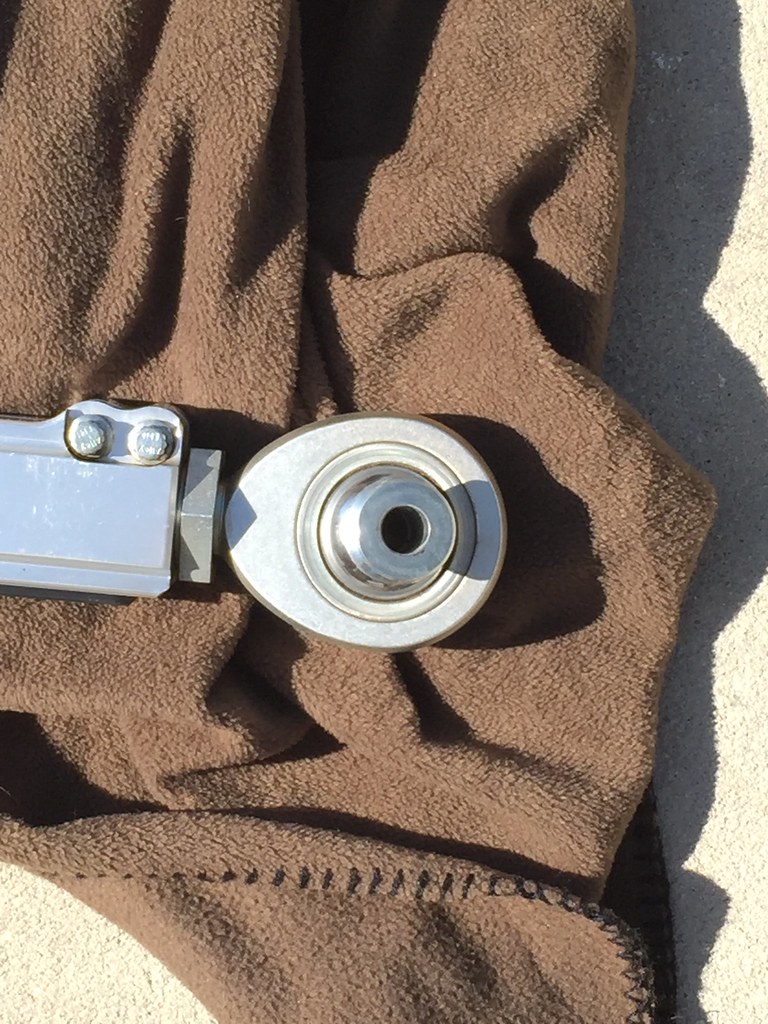
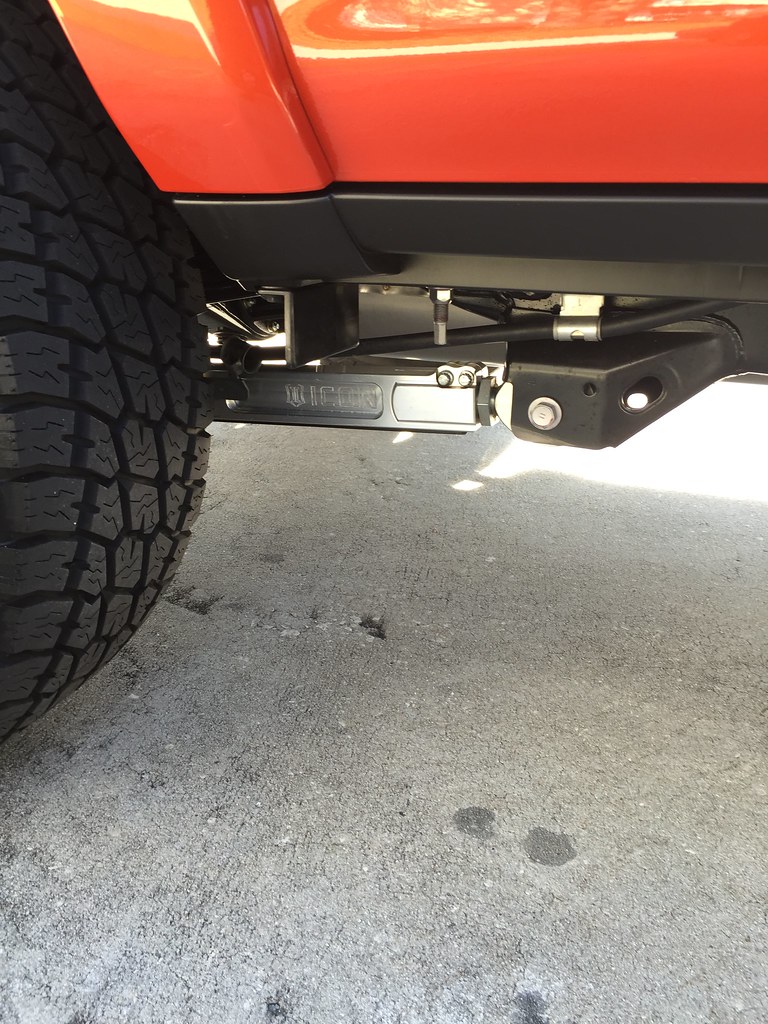
I purchashed these gently used off of the fj forum. I ended up replacing both bushings and teflon skid.

Install time about an hour
Difficulty if you can turn a wrench you can do this
Tools: Good set of Metric sockets and Wrench, Wrenches. Breaker Bar. Pliers
Optional: Torque Wrench

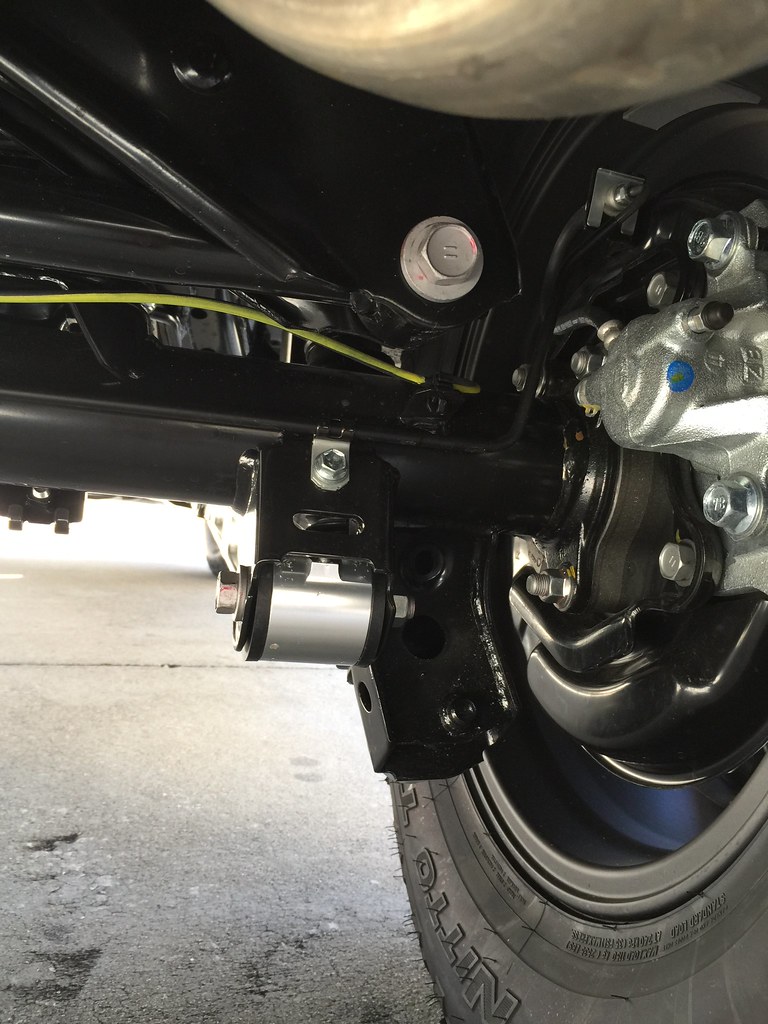
First you want to clean them up make sure they are serviceable. I found it easier to be on an even concreted surfice. First locate you Lower link attach to each sizde is a 10mm bolt holding various braking components. I next removed the bolt on the passenger side. Notice orentation of the bolt. You will need a breaker bar to remove an a 19mm Socket. At this time just remove the nut. We are going to do one side at a time. Now we need to go to the rear following the same directions. Yet, we can remove the bolt when finished. Note: Hold on to the link when removing the bolt and gently lower to the ground. Do the same for the front bolt. We will now install the Icons.

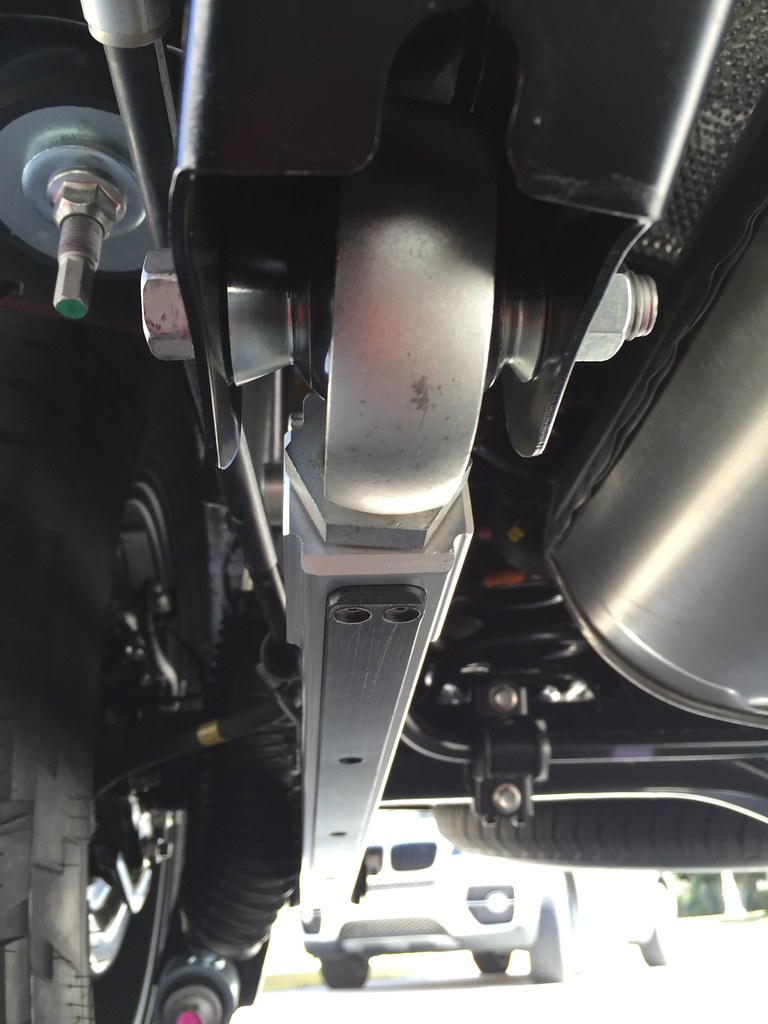
Before i mentioned something about bolt orientation, if you forgot take a look at the other side! Take the icon and set down the bushing end towards the axel the joint towards the frame.

This is the Joint end just in case there was any confusion
16406898588_e51e848eeb_b.jpg


Now go ahead and put the bolt through. The orientaion is with the teflon skid on the bottom. Place the nut on and hand tighten.

Now go to the rear using the other side for reference and do the same. Making sure you have a nut on there. You can tighten this one down with the wrench, just dont torque it down yet. We will now need the plier to bend the tab on the bracket to properly fit the alignment hole on the lower link. Once this is done and the holes line up use the factory hardware to reinstall with the 10mm. Tighten down with the wrench.

Now we will go back to the front and tighten down with the wrench. Inspect then torque down all items. Toyota recommends 40flbs on the lower link bolts. Rinse and repeat for the other side enjoy.

If you need to adjuct the lower link refer to Icon directions it is pretty self explanitory as is this installation. You are just centering the axel.

15971949364_44a7254d29_b.jpg


16408267949_4a3c81f5e2_b.jpg


16408269229_4eca77802a_b.jpg


16594119005_72e0d33d20_b.jpg
 
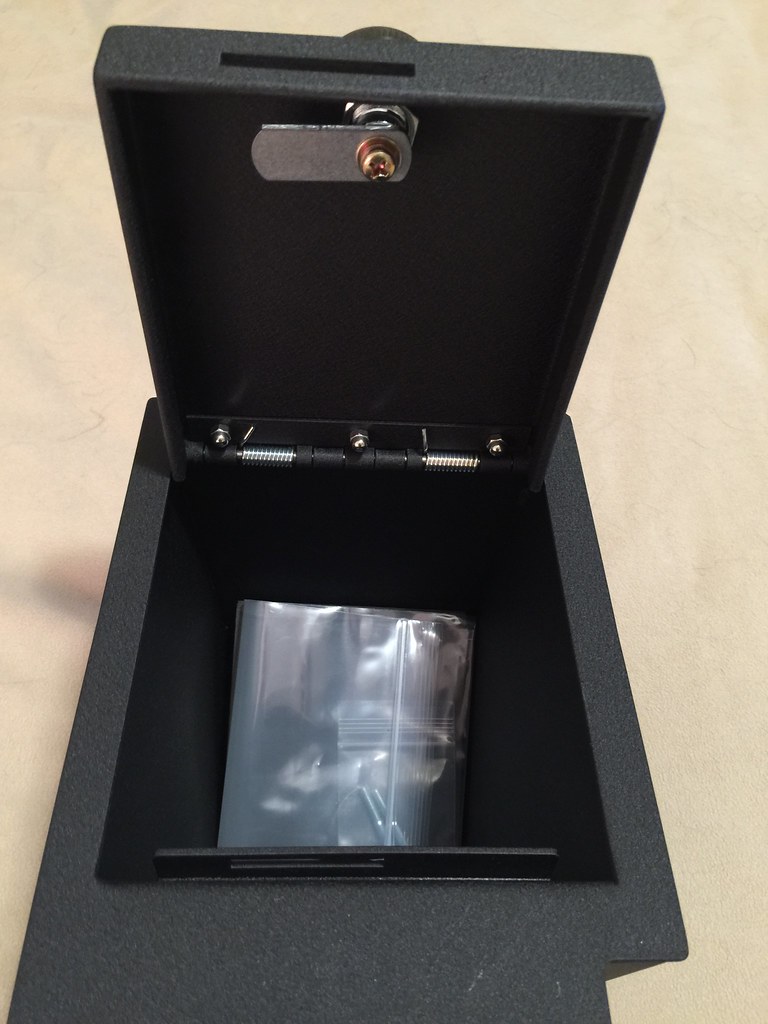
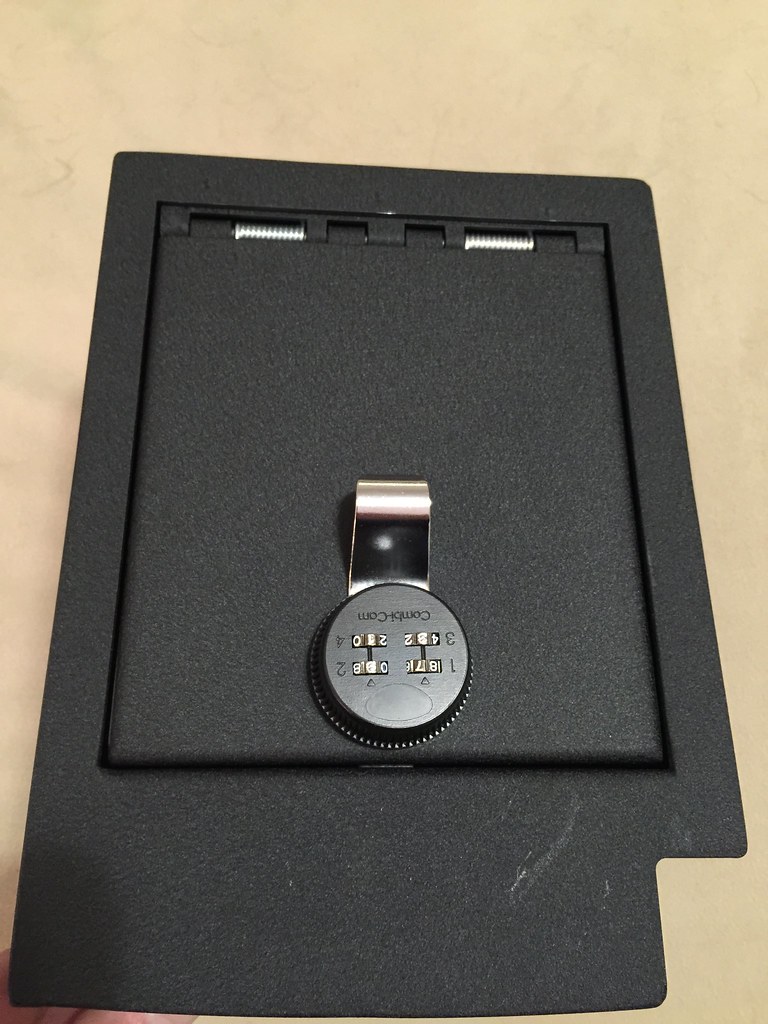
All but weary I ordered the console vault based off of the reviews of others. I had to call to order and everything went smoothly and was advised they offered .mil pricing I jumped on console vault with the rotary lock.

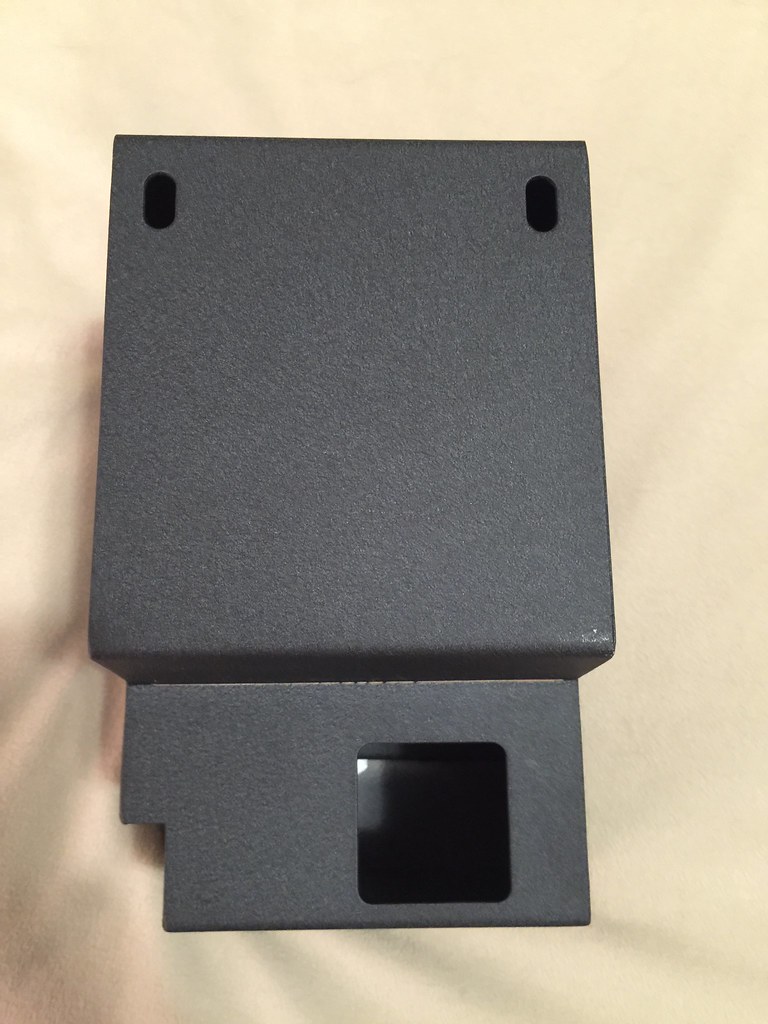
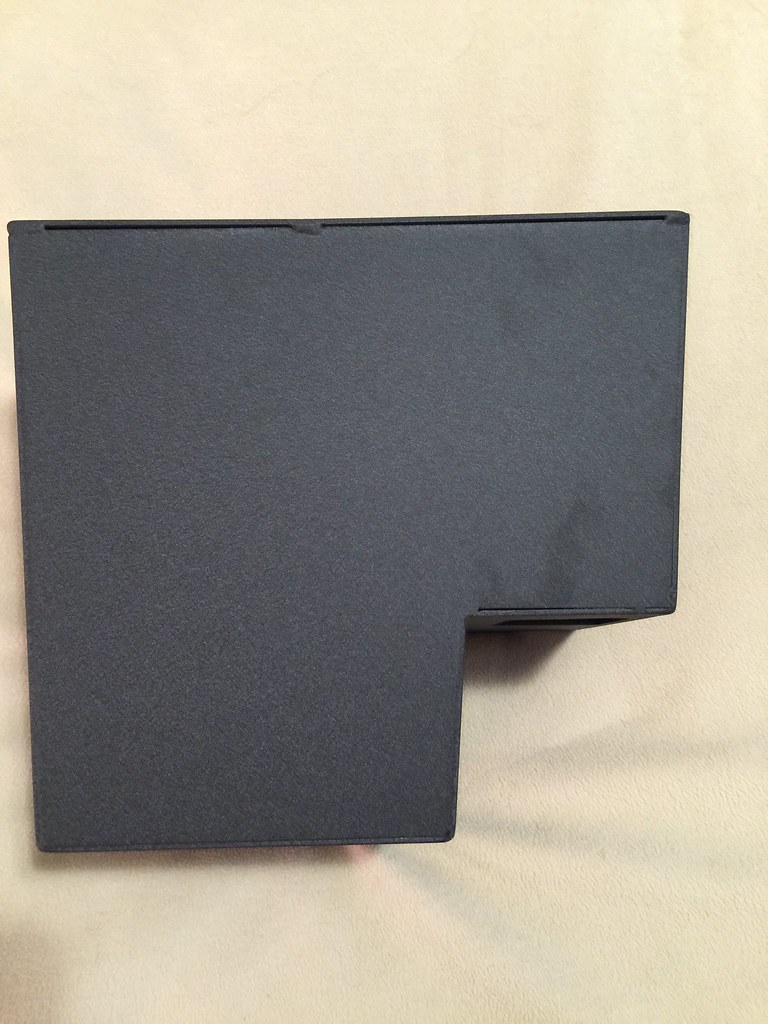
I received the vault it was well packaged. Very sturdy even though this was a concern before I ordered it, not many picture or reviews really explained how the box was made and the real quality. I would compare it to a beside safe a far a steel and strength the type that you find in Gander Mountain and the such.. The construction was well thought out no rough edges, the welds are well done. They did upgrade me at no cost to the 4 digit combo lock. A great surprise.


15971371653_d9a78271b5_b.jpg


a>


15971376363_759dcd6b4b_b.jpg


15968985624_92b63f2b0a_b.jpg


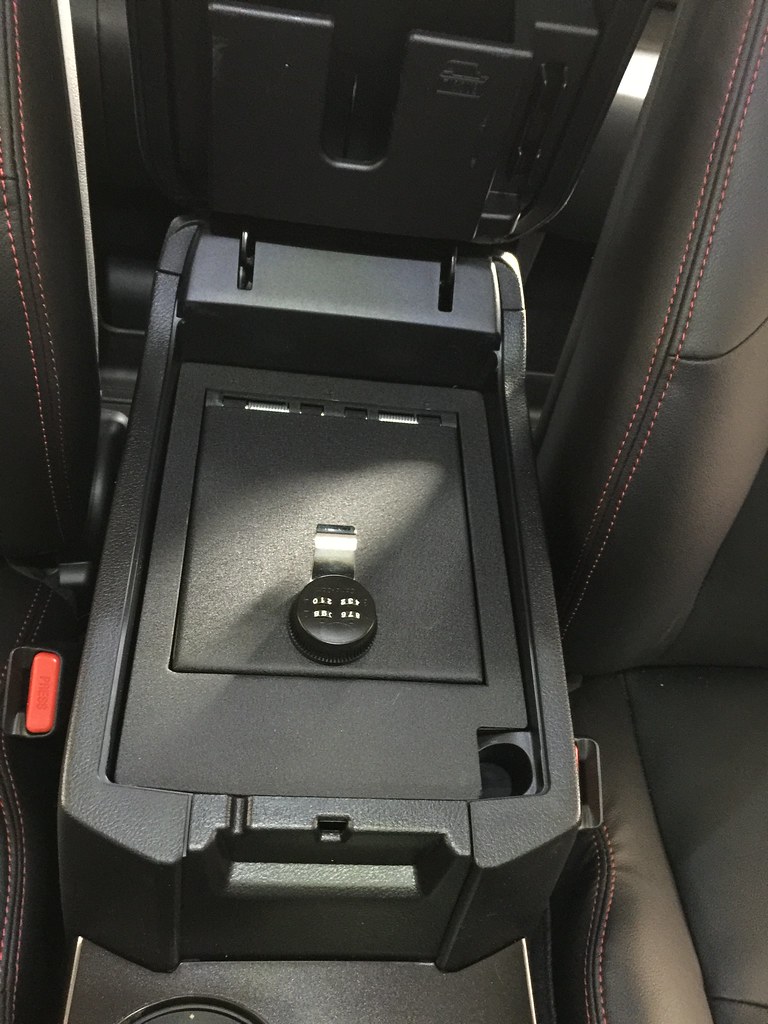
I installed the console using the supplied bolts. I had no difficulty with the length of the bolts but would recommend getting two washers, one for each bolt. They are not supplied with the kit. You will need a 10mm socket with a long extension to effectively remove and install the bolts. You will first remove the piece of carpet at the bottom of the console. The proceed to remove the divider in the console as well. Make sure that all items are removed from the console.

15971374813_26440280f5_b.jpg


Now would be the time to set the combination on the lock. Refer to the manual for how to proceed with this as it will change depending on your lock type. After you complete this remove all supplied items from the console and fit into the factory space. It should fit snugly but without difficulty. If there is a problem here stop and make sure nothing interferes. Apply the washers to the bolt and proceed to insert the bolts and hand tightens them. A tip here, you can lift on the factory console to help line up the bolt holes. After you get both holes hand tightened proceed to tighten them down with a wrench then you can torque them to the factory specs if you wish. Which I do not have. You can put in the rubber liner provided. I also reused the factory carpet as well. Bag and label your factory bolts and divider if you ever need them later and store. Test the function of the unit and enjoy.

Installed:

16605828442_762c6fa48d_b.jpg


I plan on installing velcro on the sides to mount a holster for my G19 as well as the velcro type admin organizers for a few mags, a multi tool. I also plan on adding a Fenix rechargable light in there using the power source to charge it as well as a blow out mdical kit. On the other side will be a holster for my wifes G42 as well as a mag for when traveling or going into certain buildings.
U mind posting a pic of how it looks inside after the vault was installed
 
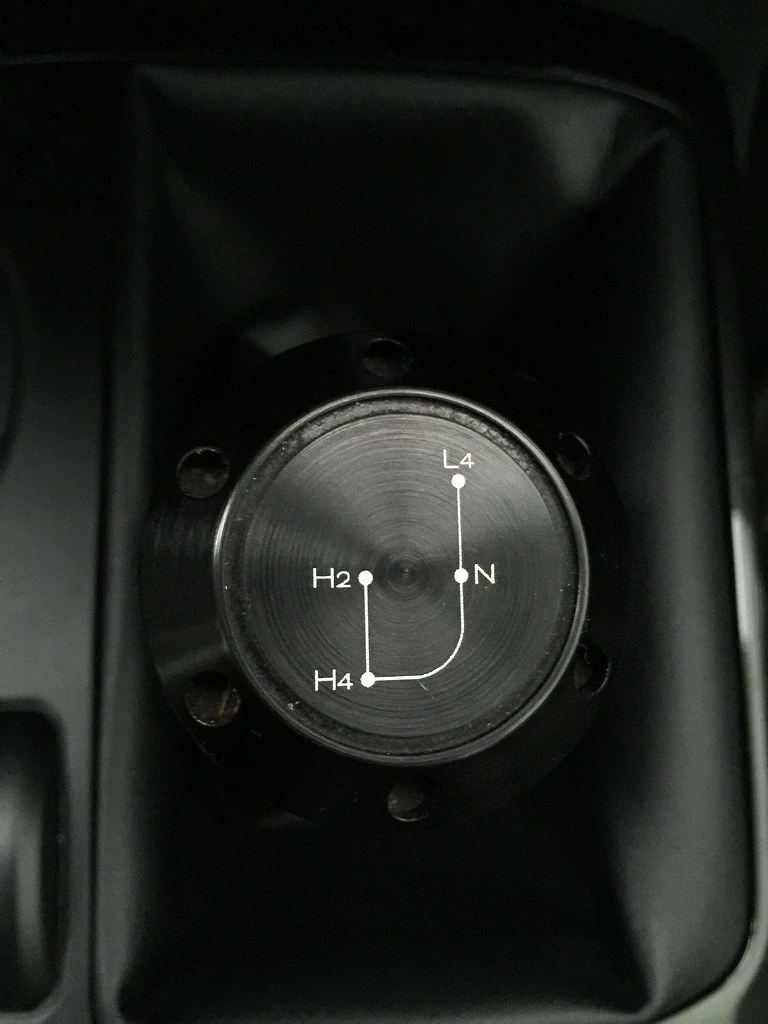
FJ Joel 4x4 Shifter

I had this part from my FJ and decided to put it on the 4Runner it is billet aluminum. Unfortunately he is no longer making them but he passed on his designs to someone else who will in the future. You will need to look around for more info.

16593478132_7a0698247c_b.jpg


I need to clean it up now I see!
 
Dealer Induced Swirl Marks

A little update. As you can see from the pictures above I have know the status of the vehicle through every major step of the process. It left the port in tip top shape as my pictures show and brother inspected it before qc. So no issues. Anyways somewhere after that at the dealer someone screwed up pretty big and scratched up my paint pretty good. The dealer only offered to wax it and not correct the paint. I as for a Rep.

Over the weekend as I was frustrated with the dealer I ended up finding someone who could move appointments around and do it for me the next am. I had him correct the paint and it turned out great. The swirl marks in the Inferno paint are difficult to see unless in direct noon sunlight. At a bill to the tune of $300 I was happy with the result. But the dealer well you know you screwed up here bud reimburse me. More of a principle thing now.

After this I did Opti-Coat the Paint and will do a write up soon. So far great easy stuff to work with if the prep work is done correctly.

Anyway met with the rep talking to him and he looks at the paint and says man I dont see a thing. Well I hand him the receipt and some photos. He smiles and asks if I am happy with how everything looks, a yes and he says shoot an email with invoice here and I will get you reimbursed and will deal with the dealer.

Not a normal outcome so quickly. i would just let you know one avenue you can take if you properly document your issues and are tired of the dealer or are tome constraints as me and it lowers stress levels for sure to not deal with 50 people. That there are other ways of handling things. And whenever you pick up a new car make sure after you are handed the keys before you sign your final paperwork walkthrough and have them document everything as well as you. Remember it is a new car, no sense in getting a new car with year old looking paint or settling for wax that will wear off. Doesnt matter if the vehicle is dark or light it is not supposed to be that way! good luck and carry on!
 
Thanks!

A quick update. Finally got in items to fully clean the ruck and protect it as I like with a spray type wax. Made it super easy to clean. Used a pressure washer, the plug in kind, to spray it off then the optimum car wash to was it with a microfiber wash mitt rag thingy with a bucket that I put in a screen on the bottom as to not pickup dirt. Afterwards I wiped the truck down with a microfiber rag, then I sprayed on the Optimum spray wax, tip do one area at a time, then wiped it down leaving it clean and super slick. I then cleaned off the windows with Invisible Glass. Afterwords i used a 3m tire dressing which is water based and a matte finish. Made the tires look new. I am super pleased so far with the system and how well the Opticoat has made clean up much easier to keep it looking pristine. I am not a professional by far but have had many years cleaning and maintaining vehicles and this by far is the most complete easiest system that I have used. If my broken ass can do the whole truck in two hours most should be able to do in about an hour or hour and a half. Not half bad for using about abuckets worth of water and the time that I did it one. And to reinterate i live down a forest road and had all kinds of dirt, mud, amd debrie on the vehicle. I plan on doinf the was part two to three times a year.

On another note I called Gobi today to check the status of my rack since I am at the 8 week mark. I was told that they where packaging it up and would have it shipped to me this week. I already ordered a 40" curved Led Light Bar that Gobi customized the rack for from Desert Runner. I also ordered a 32" light bar this week for behind the grill. After I cleaned the vehicle yesterday I applied clear bra behind the door handles. Came out very good. Still need to hit it with a heat gun to get out the bubbles, I plan on doing the door edges also as well as under the rack fairing. I ordered a light kit for under the hood as well. I already have on hand ready to install Icon billet UCAs and Toytec Baja spacers that compress the spring to help ofset weight added later on wi the winch that I still need to order. I did get in switches from otrattw and oba also. It will be quite an extensive install electrically that is being held up to make a electrical switching box with ten or so separate circuits and relays.

Sliders are ordered from Schroxworks, my wife liked the ones with the step the best. The finalists where from Bud Built, Shroxworks, and Metal Tech. The step won out.

I did get in my refurbished and updated Valentine One as well and will install when the circuit is complete. I will continue to take photos and install posts when I am able to get to them. For now I hope this wets many appetites.

I am working tomorrow on the FJ and may begin to remove the second battery for i stall on the FJ depending on how I feel. Look,for updates too in the near future on communication systems as I come down to a decision on a disaster/off road type setup on the cheap.
 

Attachments

  • 1C27A7C0-8D13-4F78-AB7B-8261AFC63BB3.jpg
    1C27A7C0-8D13-4F78-AB7B-8261AFC63BB3.jpg
    140.4 KB · Views: 1,815
Switch Install Lighting

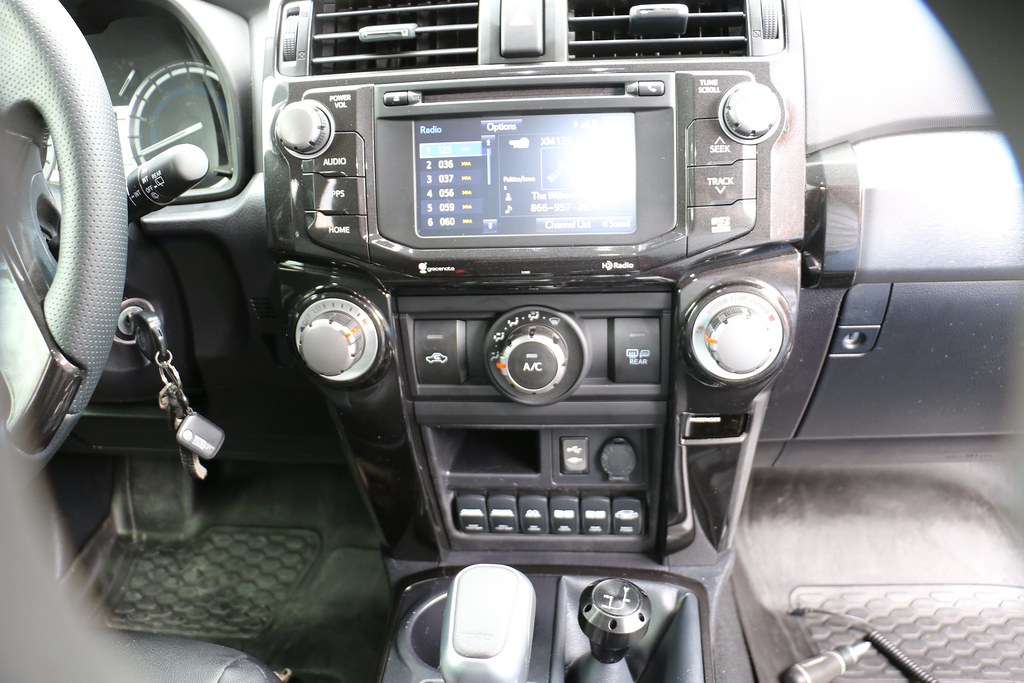
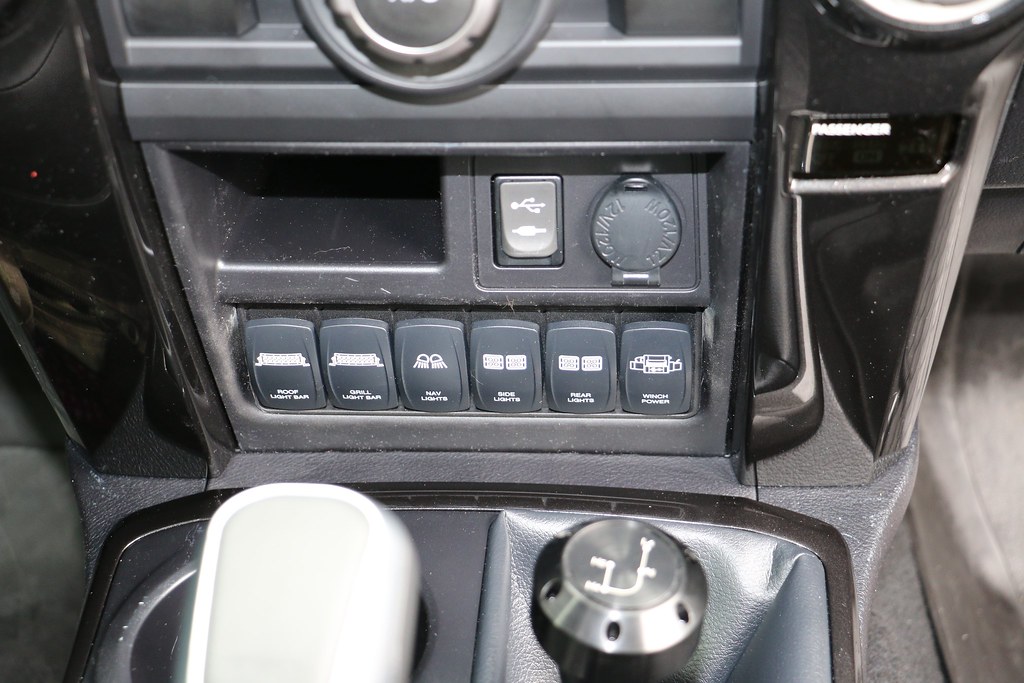
Today I installed the switches to power my lights that I have planned to install.

Parts:

Six Position Switch Holder V-Series Switches Link

Switches Six of them. Link

Project Difficulty:
Medium

Tools Needed:
Panel Pry Bar
Phillips Screw Driver
Dremel with cutting blade (or other cutting instrument)
Sand Paper Fine Grit
File
Exacto Knife

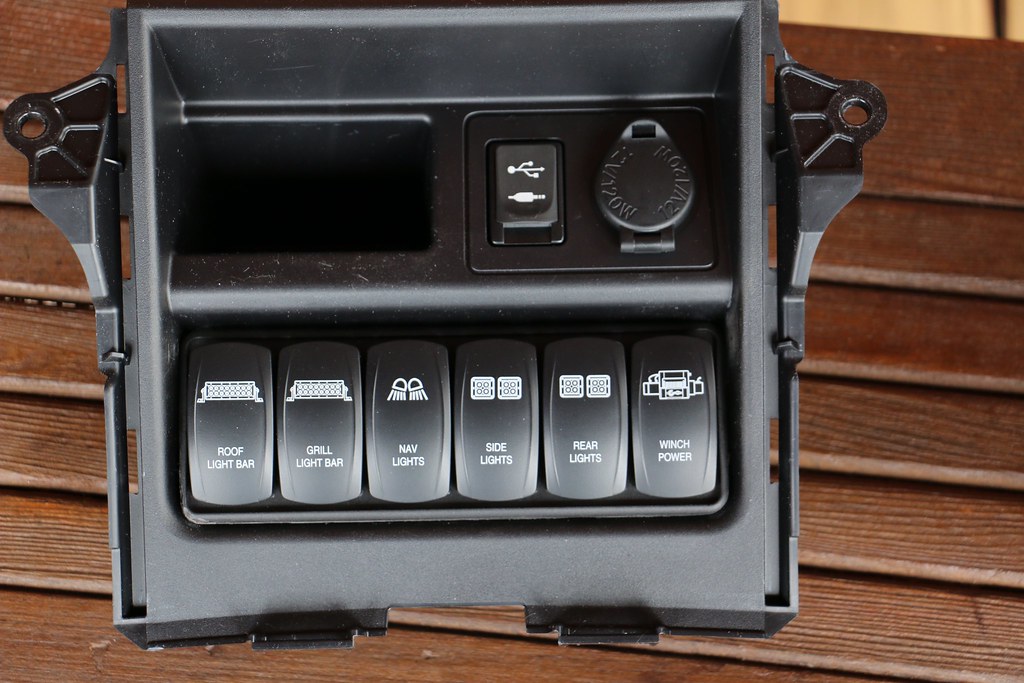
Here is the finished product:

16670342519_79bfb824d7_b.jpg


Installation:

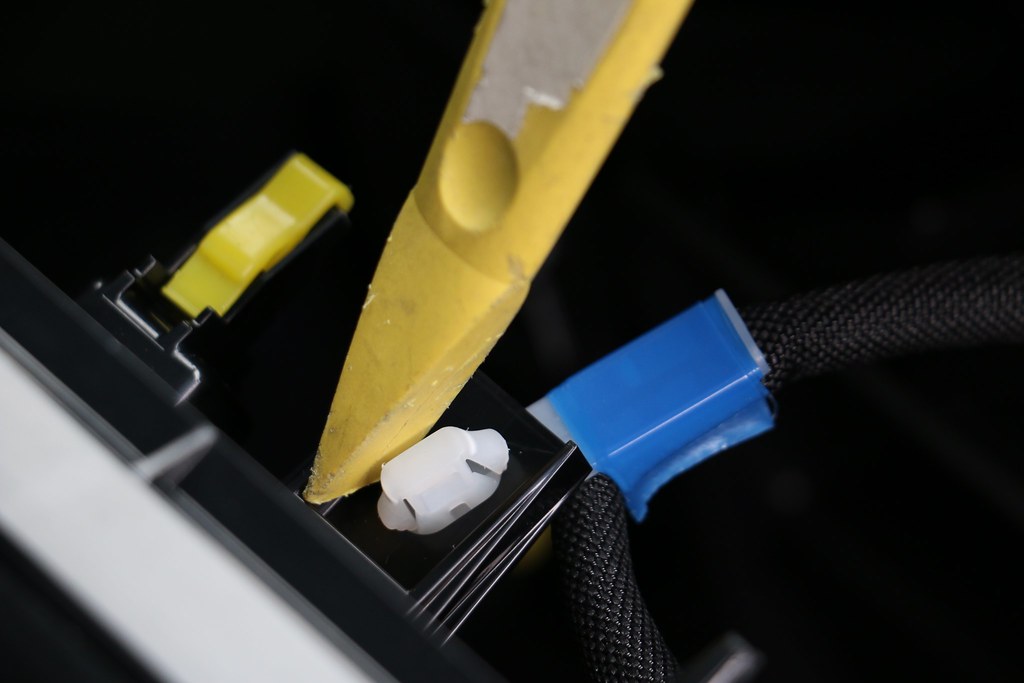
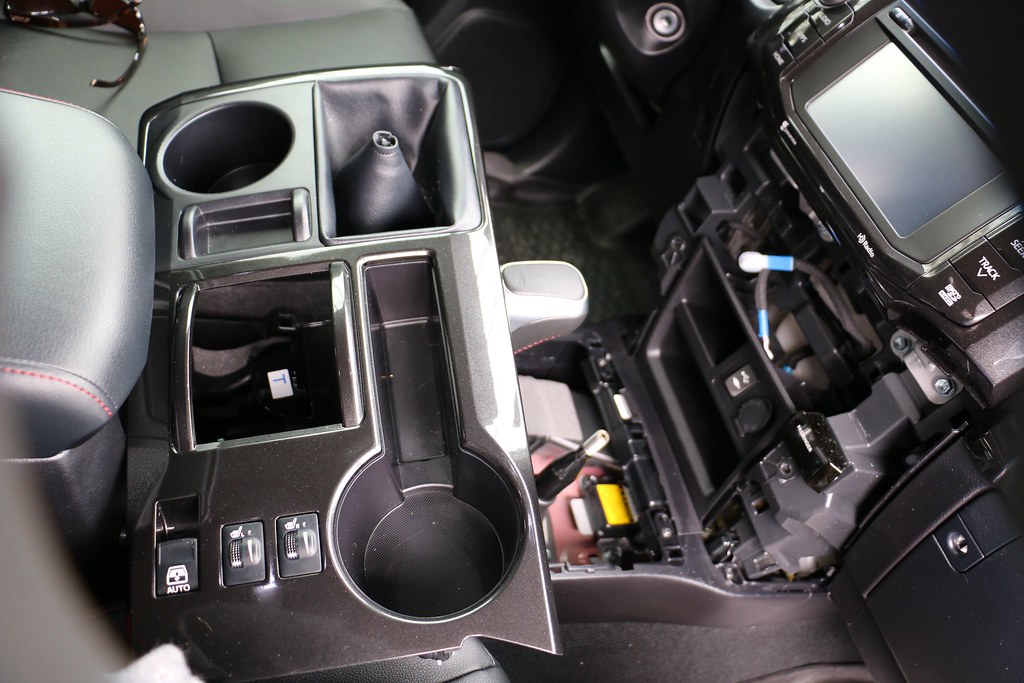
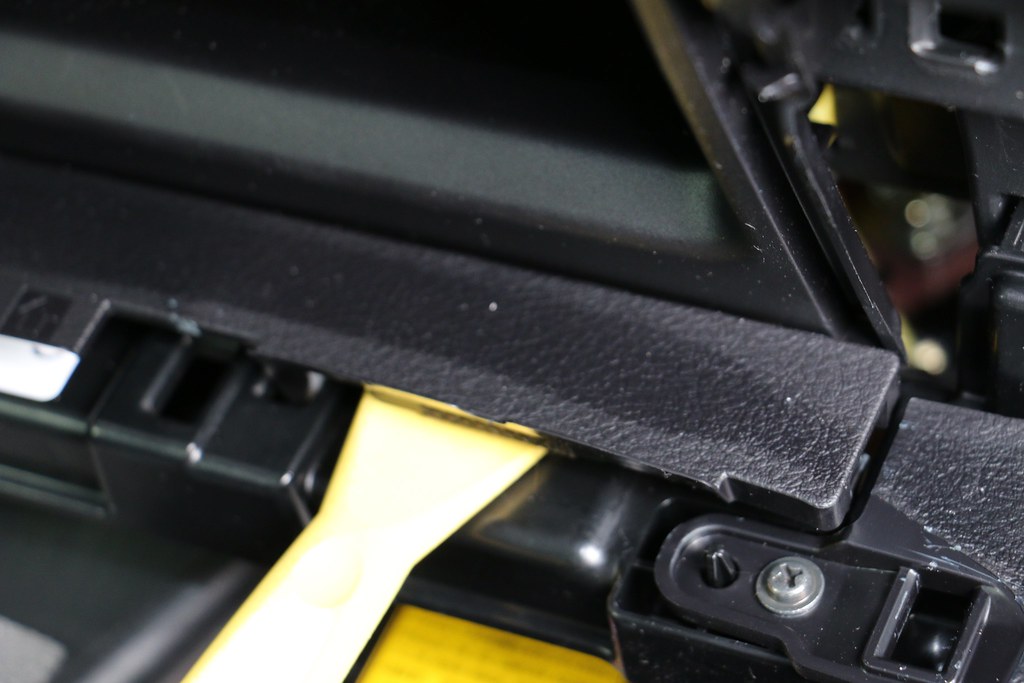
First we must remove all of the trim work to get to the part that we need to modify to fit the switches. Using a panel pry bar (can get at Harbor Freight or make your own) pry here to remove the lower panel:

16830583966_bbba1b5ed5_b.jpg


The panel can now be removed by hand.

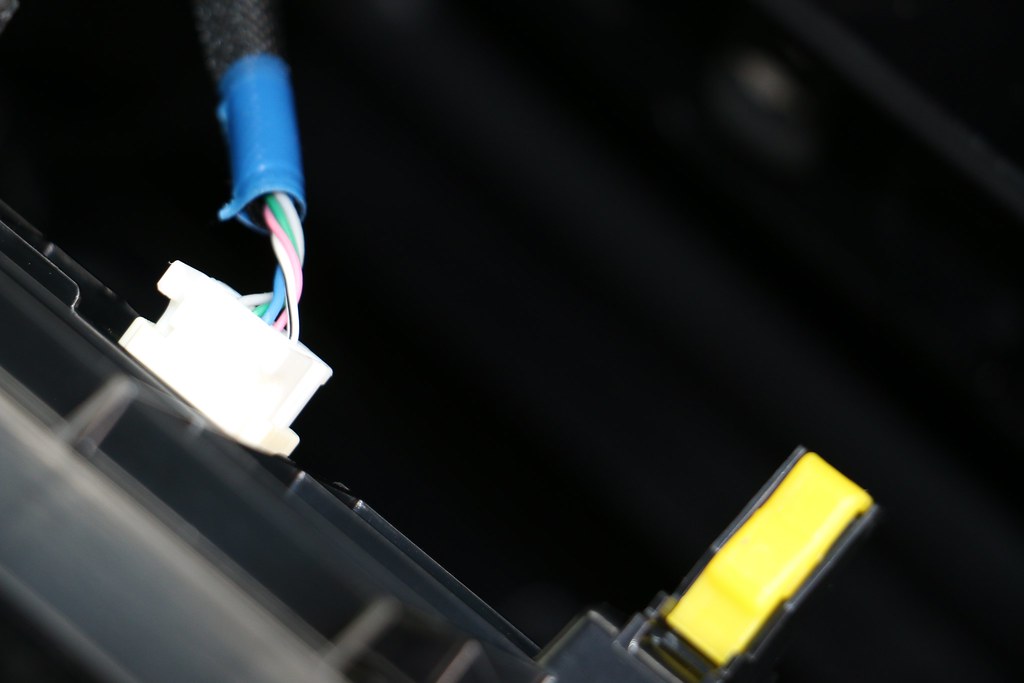
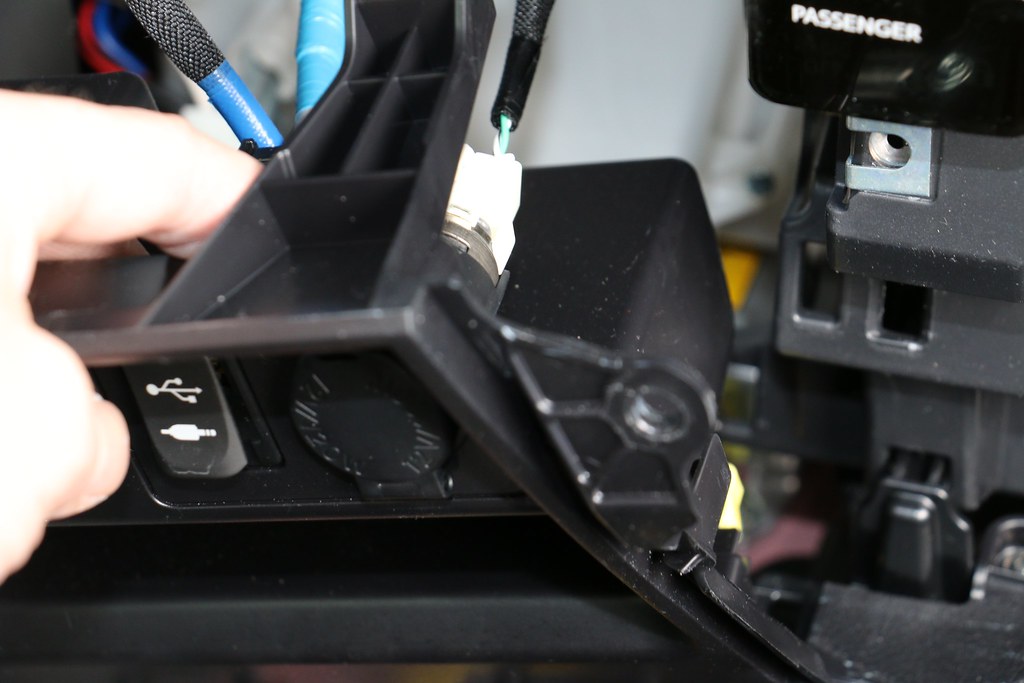
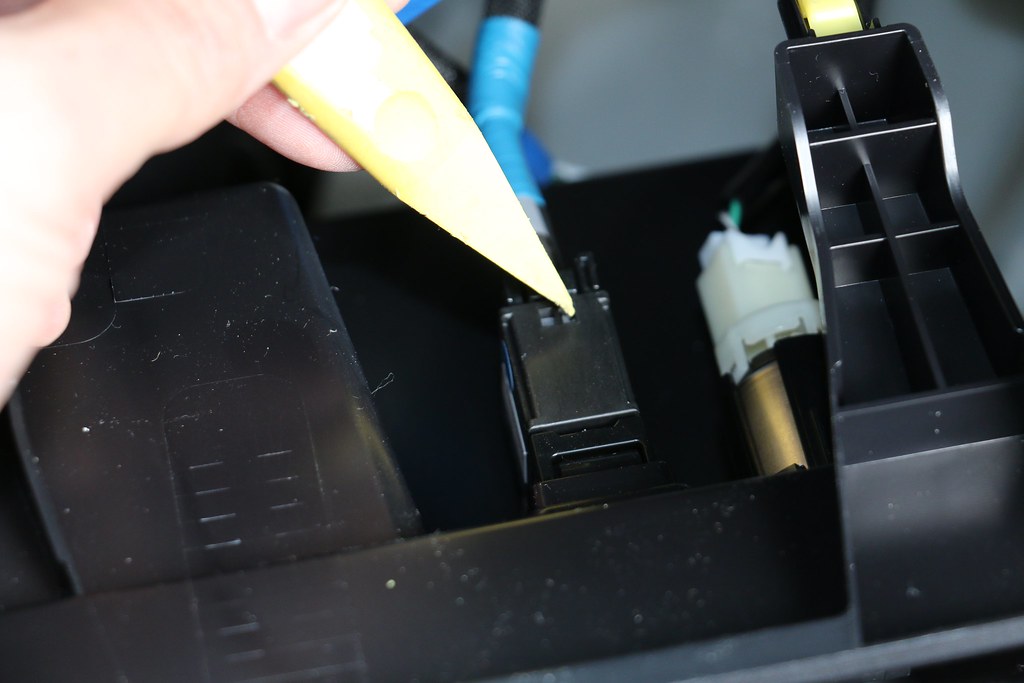
After you remove the panel use your tool to pry off the panel. You must remove the electrical connection to the panel. see the pictures below for what you need to remove. It does help using your tool to remove them.

16668859378_ff7954e06a_b.jpg


16855298852_c1ccb38f41_b.jpg


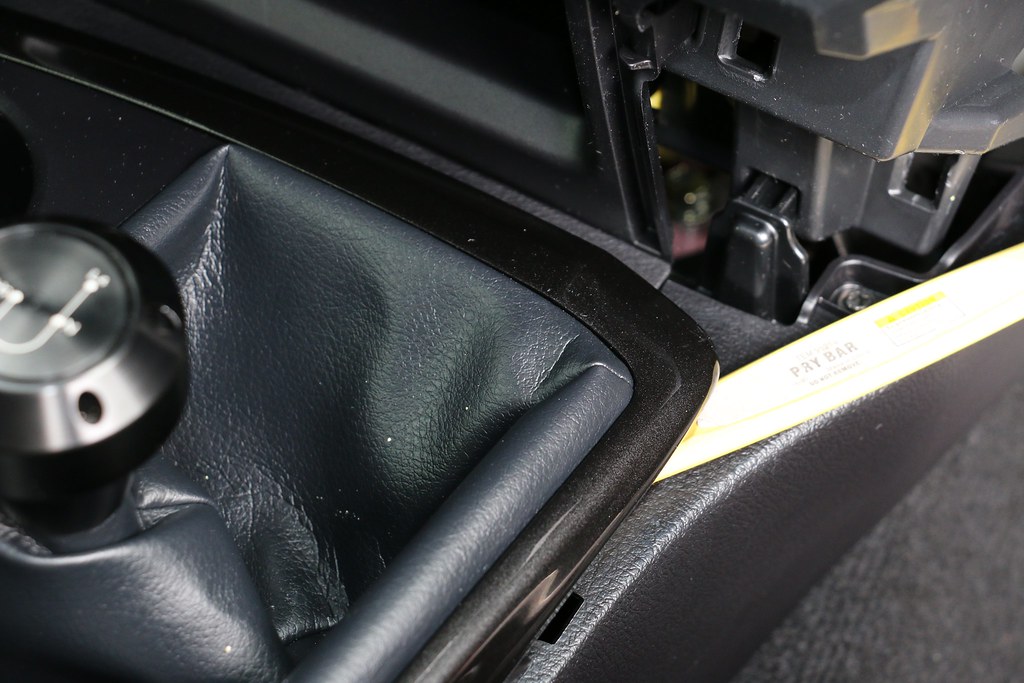
Now the panel can be set safely aside. Now we must remove the trim work around the shifter to be able to remove the panel we need. Using a pry tool lift here to begin to remove the panel at the front clip.

16669069610_587f935af3_b.jpg


After you pull up you can turn the panel aside. You may need to shift the vehicle out of park to do so.

16855418351_a1b8fca459_b.jpg


You can now remove the small trim panel shown.

16855421811_79c8dd4d56_b.jpg


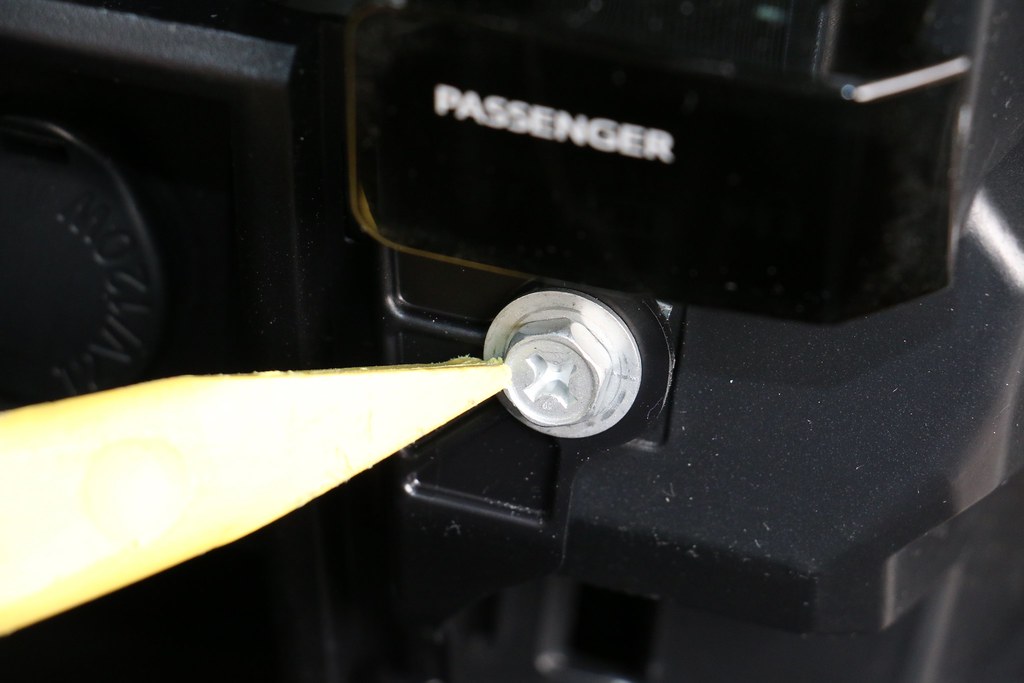
After this is remove you must remove the two screws that hold on the panel. Using a phillips screw driver to do so.

16670320759_c9203ec9ff_b.jpg


You can now use your hand to pull the panel out.

16668872298_9b9b651df9_b.jpg


You must remove the electrical connections to the panel.

16236501943_277e3892c9_b.jpg


[IMGhttps://farm8.staticflickr.com/7625/16855427051_7d99561548_b.jpg/IMG]

After this is done pat yourself on the back you have done well without hurting your vehicle and can now take off the panels without causing any further damaging while doing mods in the future.

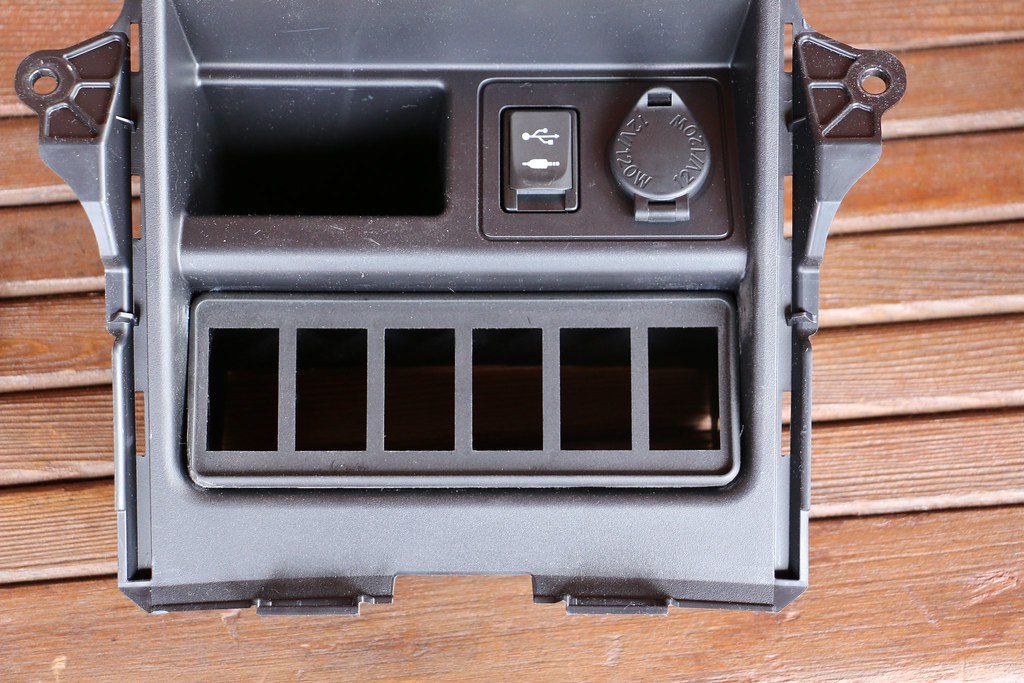
You must now trim the switch blank. I used sand paper to do so slowly. Using a dremel will melt the edges ad you will need a new piece. you could also file the edges if you would like. I would not recommend trimming with the switches in place.

16670334689_0839c5ee9f_b.jpg


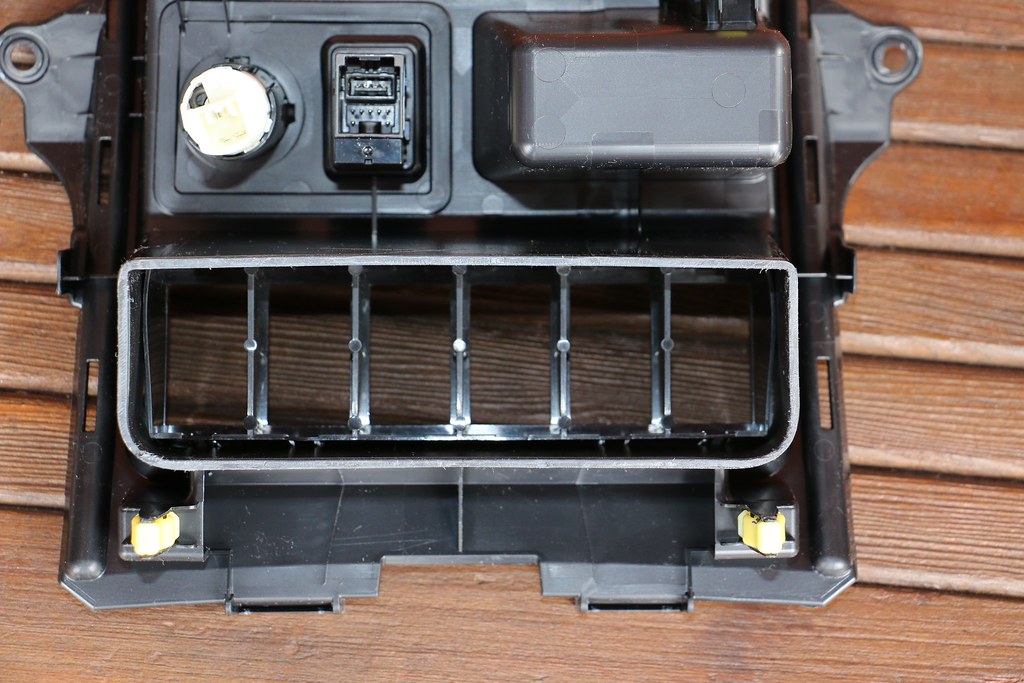
After you have tried it and test fitted it you will need to cut out the cubby for access to the switch wiring. I used a dermal cutting wheel to accomplish. Then I used a exacto knife and sandpaper to clean up the edges. Tape you cubby hole to prevent scratches. I did scotch mine and need to fix it.

16856465555_903b304a1f_b.jpg


Insert your switches to the blank. and fit into the panel. I have not wired them up at this time I will do so in a later post. You can do so if you would like. You can secure the switch panel with hot glue. I recommend getting High temperature black glue to secure the panel.

16670340289_a01dc8abe4_b.jpg


Installation of the panels are the reverse of removing them. In the end it should look something like this. I need to clean up the trim piece still when I finish wiring the switches and glue the panel in place.

16855324152_e891b96a2b_b.jpg
 
Last edited:
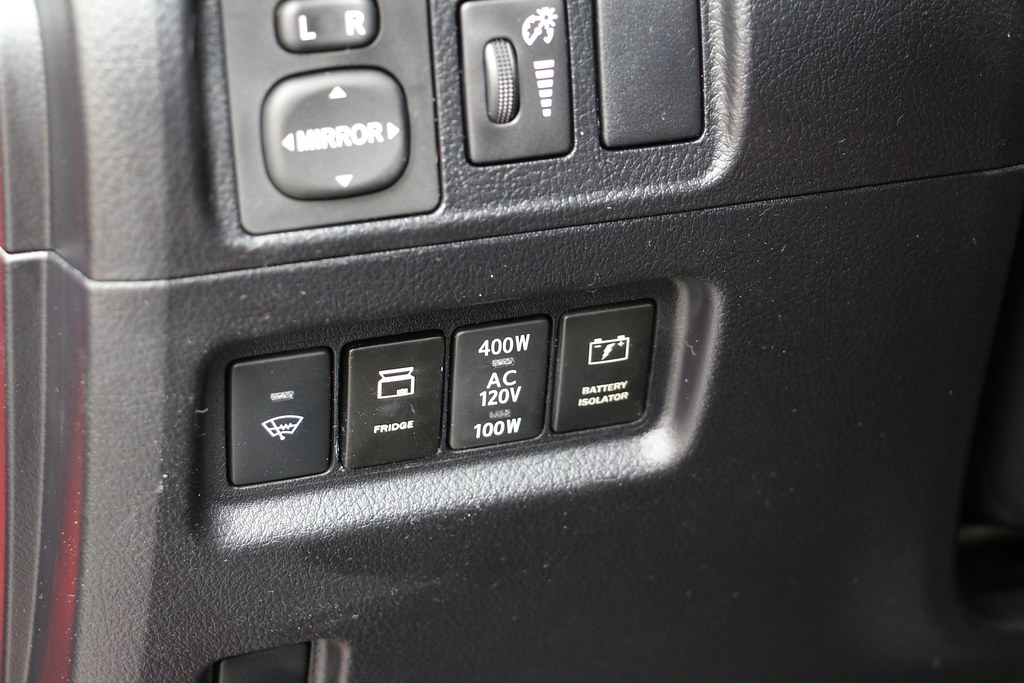
Switch Install Part 2

Parts Needed:
Switches Link
Must have an open spot to put a switch.

Difficulty:
Easy

Tools:
None

Here is the finished Product:

16669095480_7ecf708e97_b.jpg


Installation:

Using your hand reach up behind the panel and push out the blanks. Note you cannot move the switches to another location that are factory as they have cutouts for where they are positioned.

Replace the blank with the supplied switch from above. Wiring will be explained in a later article.
Finished Product:

16669095480_7ecf708e97_b.jpg
 
Last edited:
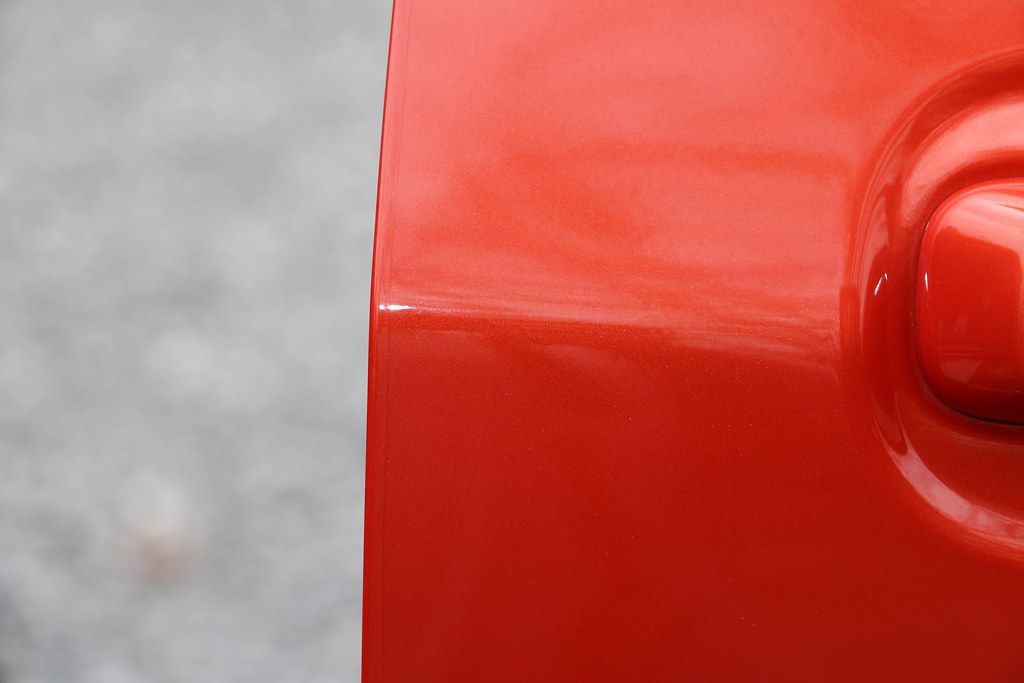
Door Edge Protection Film

Every vehicle that I have owned at one time or another has had the door hit another car by my fault or a passenger. This product will help prevent the chipping of paint on the door edge.

Difficulty:
Easy

Parts:
Expel Door Edge Guard Link

Tools:
Window Cleaner
Scissors
Microfiber Towell
Finished Product:


16669960980_eab2954ea4_b.jpg


16234992724_97f6c01822_b.jpg


Installation:

Installation begins with a clean vehicle. I would recommend doing this after you wax the truck or apply any paint protection. Don't worry if you mess up as you can always take it off. I was surprised by how easy this was and how good it does look.

Begin by measuring how long of a strip you need of the door edge. I always make it a bit longer.

16669767008_d6d8ef8462_b.jpg


Beginning with the rear passenger door while open notice on the inside edge that there is a welded seam. We will use this as our guide to install the product. Spray down the inside and outside of the door edge with Window Cleaner.

16237398933_592f3b8bdf_b.jpg


Remove part of the protective film from its backing. Starting from the top of the door begin applying the film on the inside of the door edge. Using you fingers to push out the window cleaner. There should be no bubbles while working your way down the door edge. When you reach the bottom of the seam you will need to trim the door edging to exact length.

16237400163_d026f7f41e_b.jpg


Now that we got the back of the door finished we will spray the front of the door edge and product again with window cleaner.

16856337111_fc42cfb000_b.jpg


Beginning at the top we will fold the edge of the product over using pressure pushing outwards towards the outside of the door. Making sure we have no bubbles while we work our way down.

16856342561_afcb80a85d_b.jpg


When Finished you need to wipe of the excess window cleaner off of the door. Allow the door edge to remain in the sun for a few days so the adhesive can cure. You may return to the edging to remove any excess bubbles the next day. Rinse and repeat for every other door.
 
Last edited:
Some test fitting for an upcoming installation. Kennel may change to a ruff kennel. Fridge is a engel mt45.
 

Attachments

  • image.jpg
    image.jpg
    132.5 KB · Views: 1,883
Last edited:
thank you for your service, after a season of waterfowl hunting with a childhood friend and old football teammate who is disabled from combat, i have a renewed appreciation and bolstered respect for you who do what you do

glad you have a good vehicle to enable you to participate in the things that make you happy, i know that the memories made in ours have already made it worth the price


Year: 2015
Model: 4Runner
Trim: TRD PRO
Color: Inferno
Port Accessories: Sliding Tray
Aftermarket See Below

Well it looks like my truck came in to the port 12Feb15 and made its way into the Tire/Suspension shop at the port 13Feb15. Also, had the suspension done and the wheels and tires installed. Was told still needs an alignment, skid plate and Pre-Delivery Service done before it is on its way to the dealer. We are going to head down to Florida to pick it up on Monday hopefully missing all the snow and crap weather that is hitting the Blue Ridge Mountains. I'll start to do lots of little mods while I am down there. I will take lots of photos and notes.

Here is a picture of the 4Runner right off of the Ship into the Tire/Suspension Shop for the Port Accessories.

16521887525_c187fdf8c2_b.jpg


16334168298_abcdc67223_b.jpg


Here are some pictures after the Suspension is installed. As well as the tires and rims. Note the orange colored Scion to the side, just for those who always wonder how the color Orange compares to Inferno.

16521892435_38d18af13b_b.jpg


16495864266_3c2f309f3c_b.jpg


We are heading down on 16FEB15 to Florida to pick up the vehicle.

A little about me. After being seriously into wheeling, I unfortunately was injured in combat and unable to seriously wheel anymore. I was medically retired from the Army on OCT 2013 with 90% disability. Currently, working on a 100% disability hoping to achieve this goal in the near future but, only time will tell. I ended up buying a Silverado to make it easier for me to get around as driving a Totally pimped out FJ was difficult for me now. Especially, with a service dog. My wife and I ended up selling our home in Colorado to move back east to be closer to our support center, Family. Where we have bought a cabin in the far NW of the Georgia Mountains. Due to the cost of the Ad Valorem tax to register our 2 year old truck we decided to sell the Silverado and buy new. With my Brother in Law working at the Toyota Southeast port for 23 years it was the perfect time and opportunity to pick up another Toyota. Going with the Pro tickled our fancy and with the monthly costs meeting our current payments fitting our budget we had a winner. I started to take off all the mods off of my Toyota FJ from the Long Travel Suspension to the ARB Bumper and beyond. Thus allowing me to get some mods on the new truck and return the FJ back to stock condition in order to sell it, since it is payed off. We are hoping to use the vehicle now for some exploring, camping, hunting (I hunt ) and to do lots of fly fishing as a form of therapy. We drive almost daily Forest Roads and dirt type roads daily. The mods will reflect this type of driving and surrounding mountain roads. Stay tuned as everything will be thought out and well done. I will not being doing any major wheeling anymore but it does not mean that the vehicle will not be very reliable #1 or very capable.
 
Nice write up on the console switches. Looks very clean, and looks like they changed that section a little from the 2010-2012 models.

What is the battery isolation going to be used for? (I have a cole hersee and looking to wire a button but its a momentary button thats needed) And are you running a relay for the fridge to power it when its in or permanently keeping the fridge in your car.
 
Nice write up on the console switches. Looks very clean, and looks like they changed that section a little from the 2010-2012 models.

What is the battery isolation going to be used for? (I have a cole hersee and looking to wire a button but its a momentary button thats needed) And are you running a relay for the fridge to power it when its in or permanently keeping the fridge in your car.

I am. Using the battery isolation for a dual battery setup. For the fridge, I wanted complete control of powering the fridge. It will be on a 12v circuit that is seperate from the factory system, I will document the instal when I am able to get all the parts needed for the install.
 
Engel MT-45 Install and Kennel Install

Tools:
Electric Drill

Parts:
Engel Slide Lock
Engel MT-45

Difficulty:
Easy

Installation:
My 4-Runner has a Pull Out Tray.

Take the slide lock and position it on the pull out tray. I positioned it on the left and the rear edge of the tray. Note: you will need larger screws than supplied as the trays core is foam to allow it to hold, also make sure that the slide lock tray is positioned with the release on the front left. With the slide lock snapped together Screw in the 4 corners. I also screwed in the two middle screws.

16875576481_1b36cf1ae6_b.jpg


Clean up any mess before installing the fridge. The fridge slides in to the slide lock. Pull up lightly on the front and the rear of the fridge to make sure it is secure. I ran the power cord to the factory plug for now. I plan on running my own dedicated plug in the future.

16256604183_512f306baf_b.jpg


Kennel Install:
I also installed the kennel while I was at it. I am not sure if I will replace this kennel with a rough Kennel. I am using a XL Kennel. I installed the kennel so it can be removed easily and with a small modification.

Parts:
Paracord
Cutter
Lighter
Kennel
Drill
5/32 Bit

Difficulty:
Easy

Position the kennel on the tray with the tray pushed all the way to towards the front of the vehicle. Drill one hole in the right corner. Take a long piece of paracord with the end burned with the lighter. Tie a large knot or monkey fist after running the cord through the hole under the tray. Note: There will be quite a mess of foam from the tray you will need to vacuum up the mess. Tie the cord to the tie down point on the kennel. Cut the end of the cord and burn the edge. Continue to do so for all the other corners. When finished I would pull out the tray to verify that you are not caught up anywhere.

My Helper

16875414272_338a7c499f_b.jpg


16256612293_1c5b9ebbf0_b.jpg


16875588961_968184eca5_b.jpg

16876599735_59087772fa_b.jpg
 
Updates

Today I had a Gobi rack come in, I started the install. Ran into a small issue with one of the plates fitting correctly, spacing mm off. I will call Gobi to correct. Very happy with the quality of the rack. I do think that there instal, instructions are severly lacking. Pictures of steps would be much easier breaking it down even further than they did in there instructions. I ended up figuring it out as the instructions where difficult to see what parts where being used especially in the bracket area for the tuck. I will post some more pictures when I get everything finished With my better camera.

I also received my new skid plates from RCI metalworks. I really think they and the rack where two of the best packed items I have ever received. I have the trasfer case and trany skid plate. I am waiting on the fuel tank plate. I will post up more on these at a later date. I decided to try another option here besides the budbuilts, That I recently sold from my FJ. Yes, I could have used them but new truck mostly new parts. I will update.

See next post for some cell phone pictures from today.
 
Thanks CSix I am trying to do this build a little different using what I can from previous builds and parts that make sense and of high quality. Not to worry though I still have loads of tricks up my sleeve. A few big ones then will be lots of little things.

17083666631_c11ce51cd0_b.jpg


17082894582_1deffeb31a_b.jpg


16461941464_d3cf15a082_b.jpg
 
Last edited:

Members online

Forum statistics

Threads
278,306
Messages
3,554,045
Members
248,016
Latest member
Advally Service

Trending content

Back
Top