Bala de Plata
New member
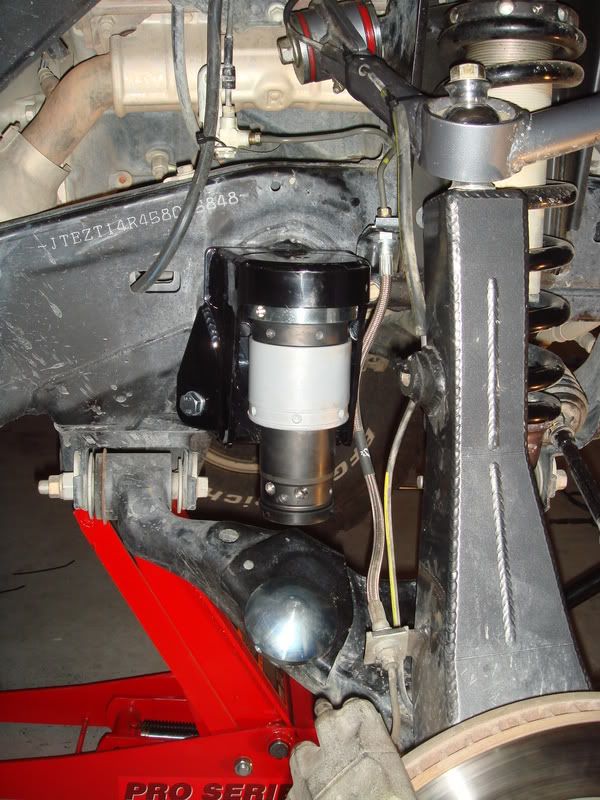
I recently purchased some of these "chubby's" as DR affectionate calls them. I was only able to get the fronts for now as they are in a transition right now. DR will no longer market there own labelled Jounces but rather just market the Specialty/Light Racing ones directly. But they have made a maybe last order for me so that they are matching. This is at least according to recent conversation with them when I was at their shop.
Here is the description for front install only, I will do a rear build when I recieve and install.
First off, with what seems to be the rule of modding, I was missing some parts, spacers that we're supposed to come with the kit for use on 4r/FJ as opposed to the tacoma. There is a side bolt that is gapped away from the stock bump stop was necessary. Now, Im not sure of this as I havent talked to DR, but I found that I had to modify these spacers to fit. I used my grinding wheel to remove about an 1/8" from the spacer and slightly beveled them on one side to fit better. So maybe I didnt get the exact spacers that were required. But this was definitely a challenging install for bolt on application. You definitely need to have a comfort level for cutting on your truck and a steady hand at that. This involves marking along a template to cut off part of the stock bump stop, and then using two existing holes to mount the first bolts and then drilling the remaing to holes. There are 5 mounting holes, but on 4r and FJ only four are used as there are differences between the ours and the tacomas bump stop geometry. Also the directions have some assembly for the top cup mounting to the bracket that attaches to the frame which is called the 15 deg flex plate. This was pre installed by donahoe and gave me a bit of confusion at first but no problems. Just wanted to be sure I wasnt missing more parts.
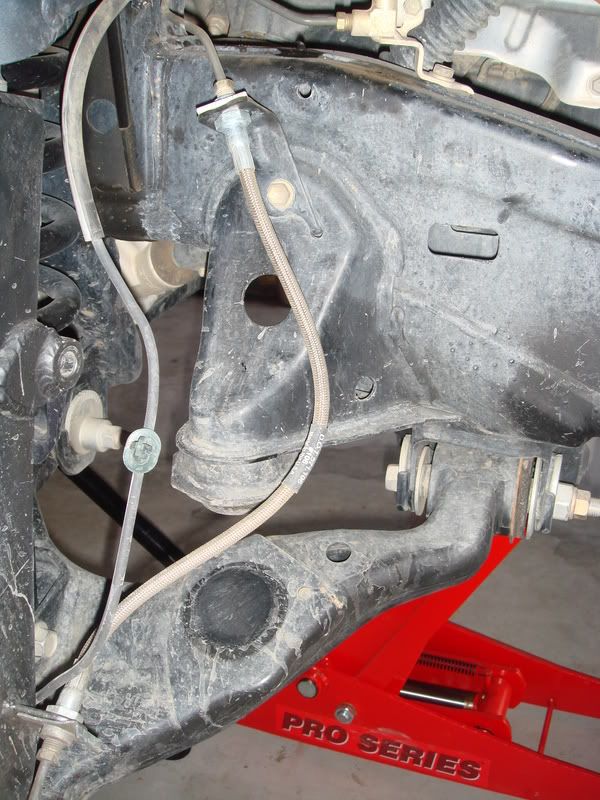
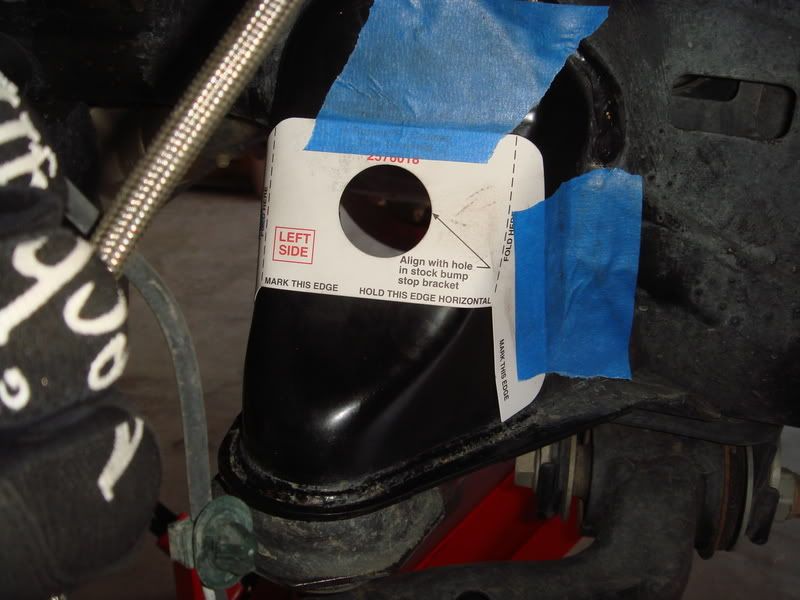
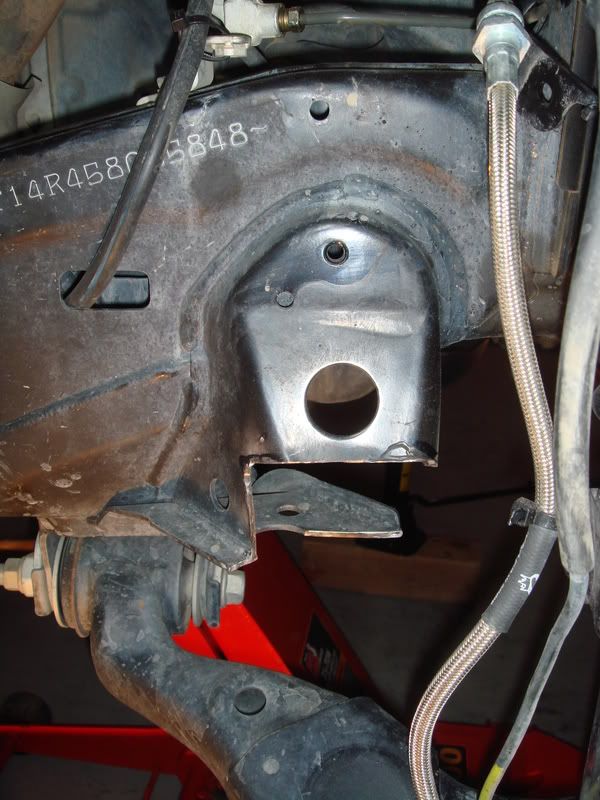
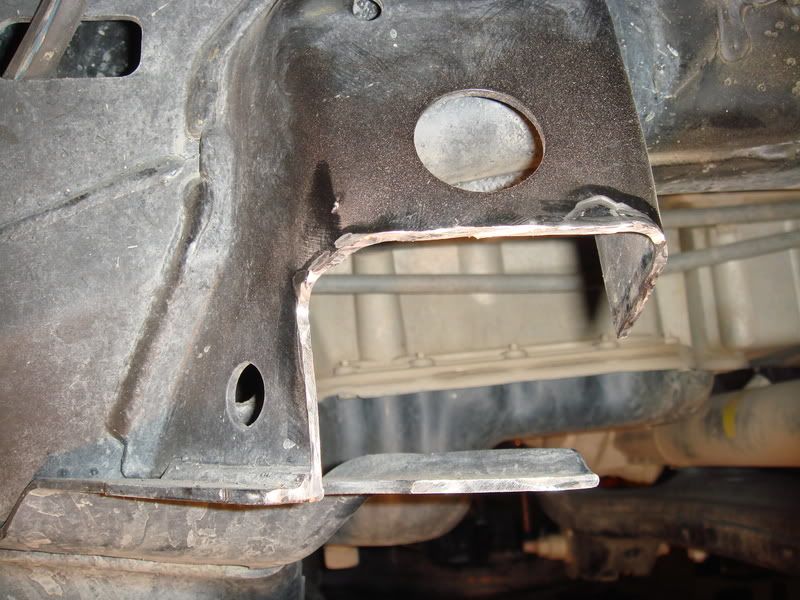
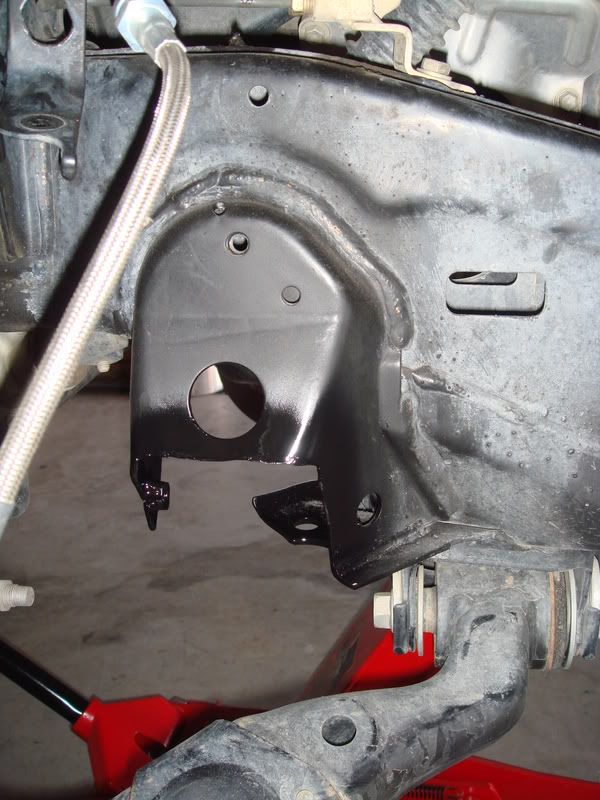
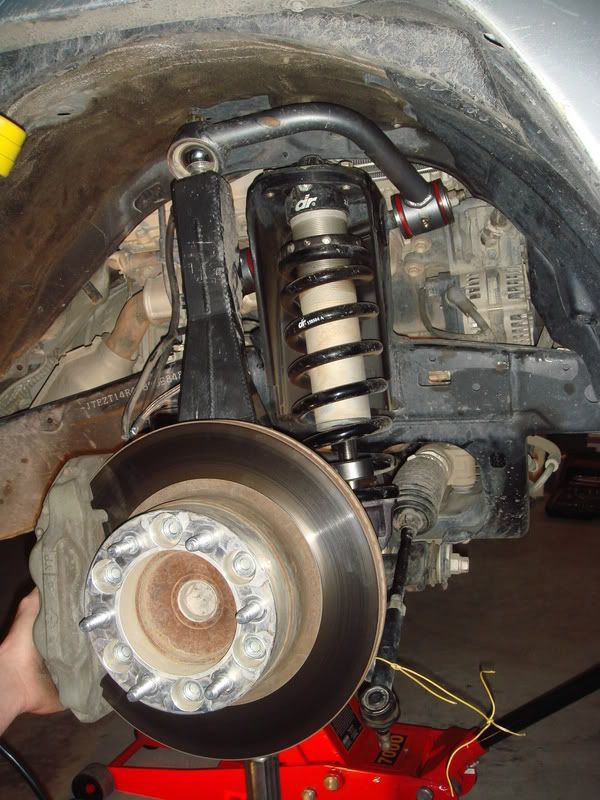
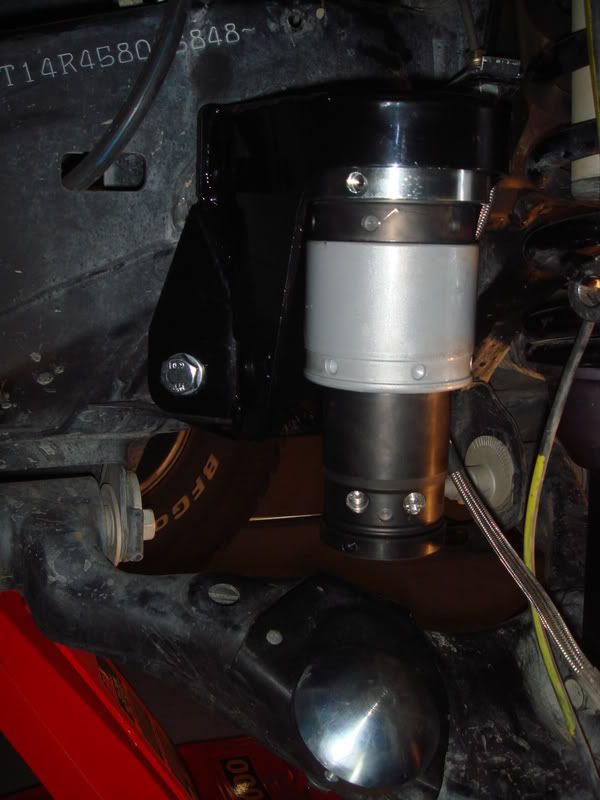
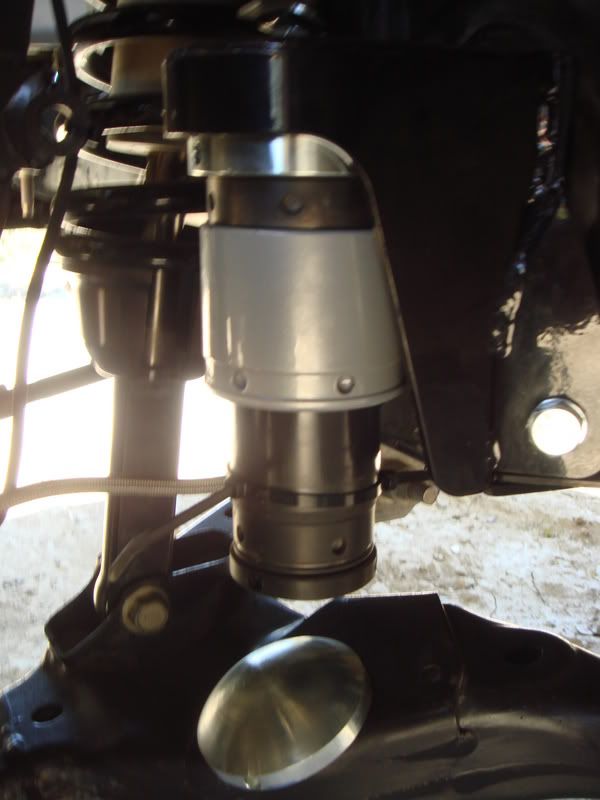
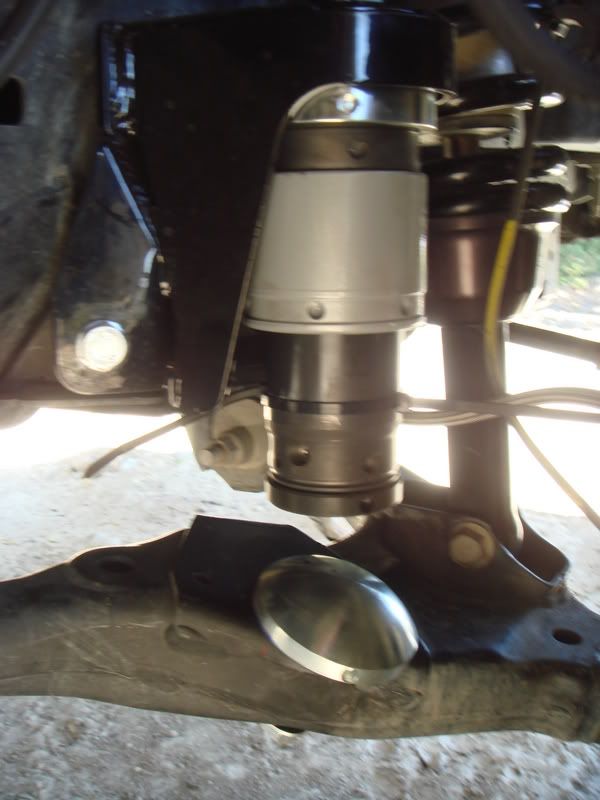
Ok, first doing the usual jack and removal of tires. I started on the driver side first as the directions recommend. I unbolted the brake line clip near the frame and slightly bent out of the way. Also unbolted the tie rod and lower shock mount so that I may move this out of the way. Others may want to completely remove the coilover for more room. But I felt it was adequate with just removing the bolt to the lower arm and swinging out of the way. Then I marked the area of the stock bump stop to be cut. I used some tape to attach the template and used a sharpie and a scoring tool to mark these lines. I preferred to use a angle grinder with a cut off wheel for these cuts. I thought this to be a better way of getting straight lines. I used my dremel for the tight spots in connecting the horizontal and vertical cuts and also cleaning up the edges as best I could. Once removed, I painted the bare edges and let those dry for a bit. Then I tested fitment, this was tricky. Holding it in place trying to get it just right and this thing is heavy. The directions said to bolt the bottom bolt first, but I found this to be problematic. If you install the bottom bolt first and tighten, the bolt itself is then in the way of getting to the side bolt that utilizes the spacer that I customized a bit. What I found to work best was just barely thread the lower bolt and then put in the side bolt and tighten the side bolt first. So, following that order, once you have those on and play around with them so they line up fairly well and the bracket sits against the frame nicely, I tightened them up and then drilled the hole behind where the jounce shock will sit. I found this to be the best order as the other bolt needed to be drilled and mounted towards the front would also be slightly in the way of the other bolt. Drilling was not to difficult as a I bought a few new bits as I new I would use them up rather quickly. I highly suggest doing the same, breaks and dulling happen fast. And its really frustrating using dull bits.
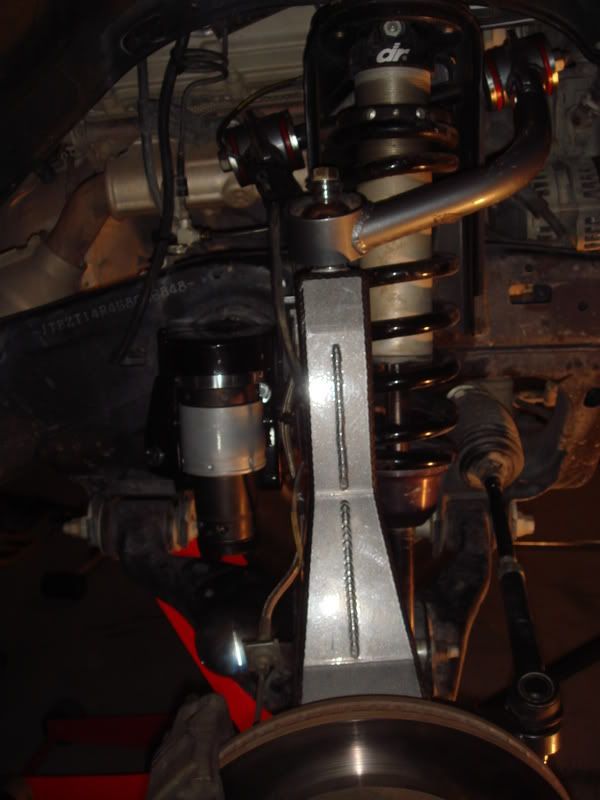
Ok, so at this point I had the mount completely on and fully tight. Then I screwed in the jounce and cycled the suspension to see were the strike pad should sit. This was a bit concerning as mounting the strike pad requires drilling a 1/2" hole through your lower arm. And not only that, the hole needs to be right on the edge of the arm. This was proved to be tricky. As you cycle it, the jounces wants to pust the strike pad away and if you drilled it where it completely sits, you are on the edge of your lower arm. You want it to be drilled where the first initial contact is and not where it wants to slide. I sat and thought on this one before I drilled for quite awhile just thinking everything through and going through pictures I had seen of other installed jounce shocks on Light Racing's website and determined that this was the right spot.
And at the perfect moment, my buddy Fabien (Happy) showed up and we both went through it in our heads to make sure we agreed. Once we battled over 1/16'ths of an inch in different directions it was time. And it took quite awhle to get through the arms. Used a center punch to mark the holes and then drilled a 1/4" hole as a pilot before going to the full 1/2" And it worked perfectly!!
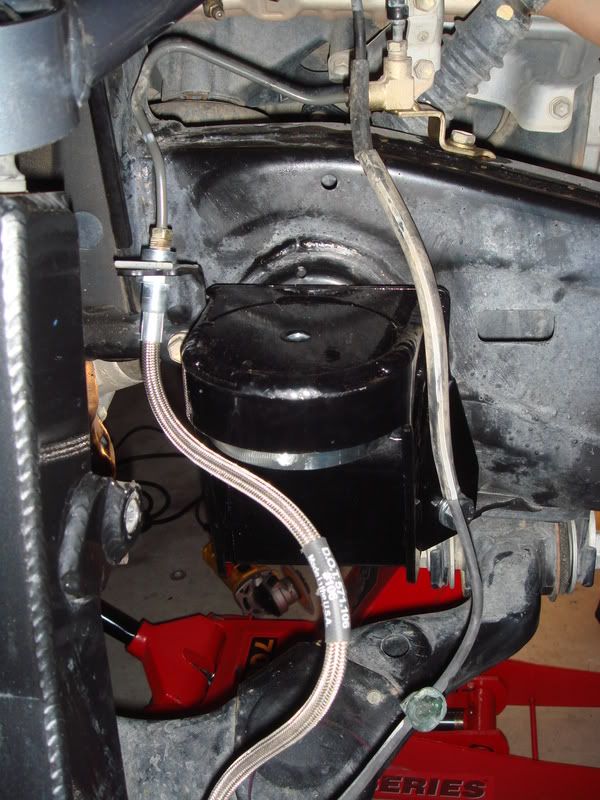
Bolted up the bottom strike pad with some blue thread lock and put everything back together. They povide a nut and washer to use the stock brake line clip to a tab on the donahoe bracket. You need to loosen the nut on the brake line at the tee to turn the hard line and slightly bend it to fit in the relocated tab. Also, I found that the hole in the tab was slightly to small for the 8mm bolt. So I drilled this out just a bit to fit. And thats pretty much it I think. I will edit if I remember something else.
This morning we took it for a little test drive. Did a 2.5 hour drive up a local mountain called Saddleback and these things where great!! I certainly agree with all the good word about improved dampening and what these allow you to romp over and through. I used some zip ties to show me how much bump travel I was getting out of them which was about 1 and a 1/4".
Cant wait to get the backs on!!
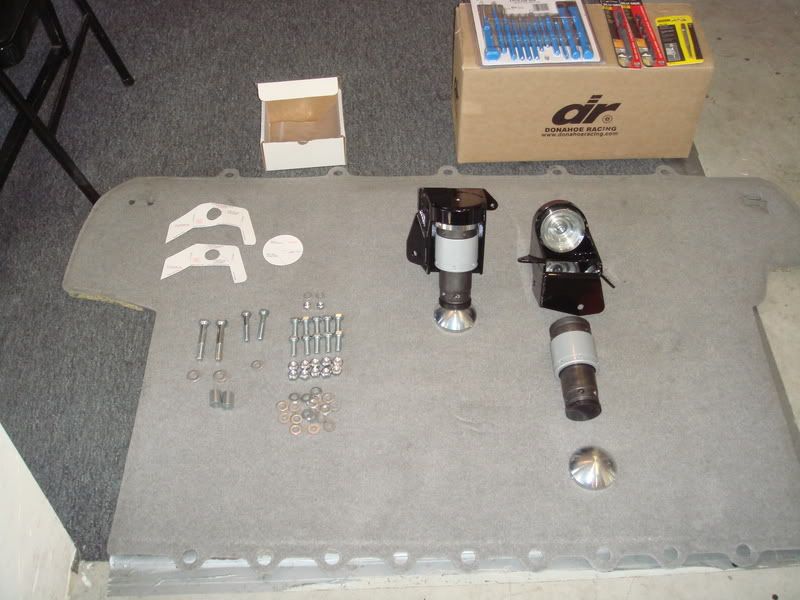
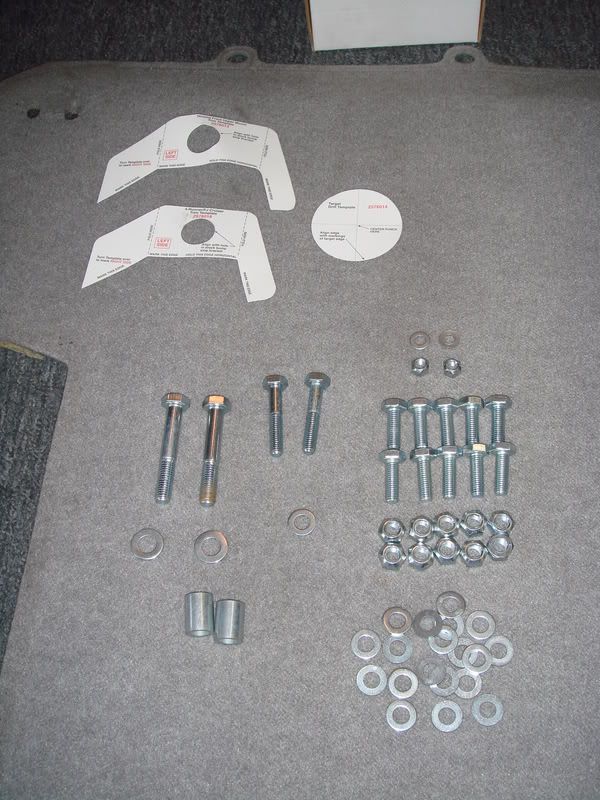
Pic of the kit laid out
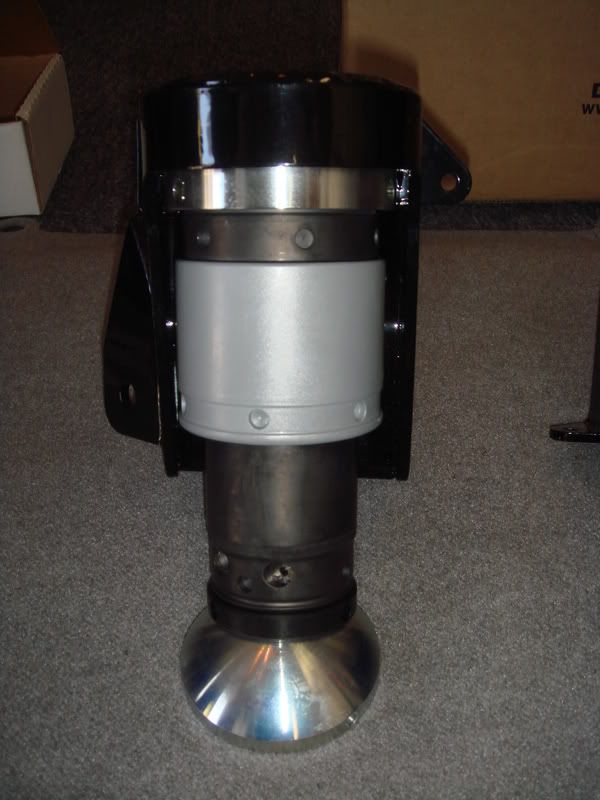
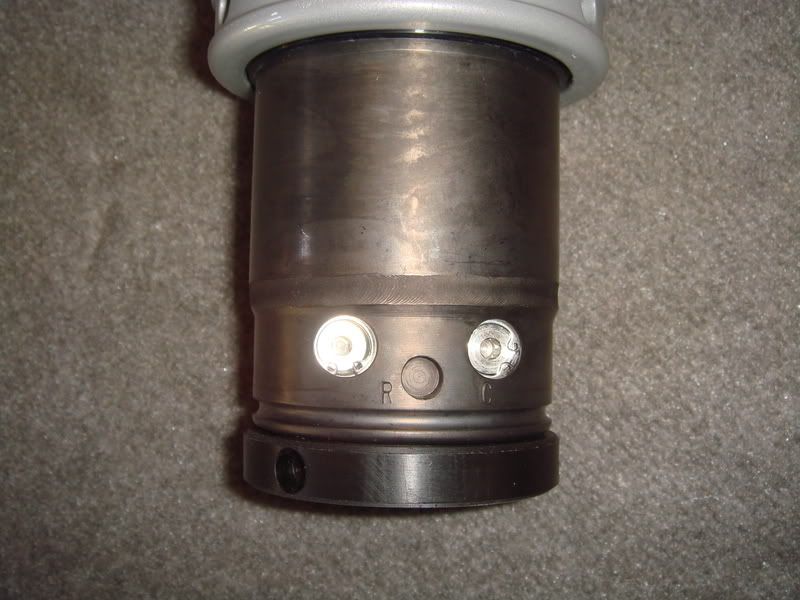
Rebound and Compression adjustment
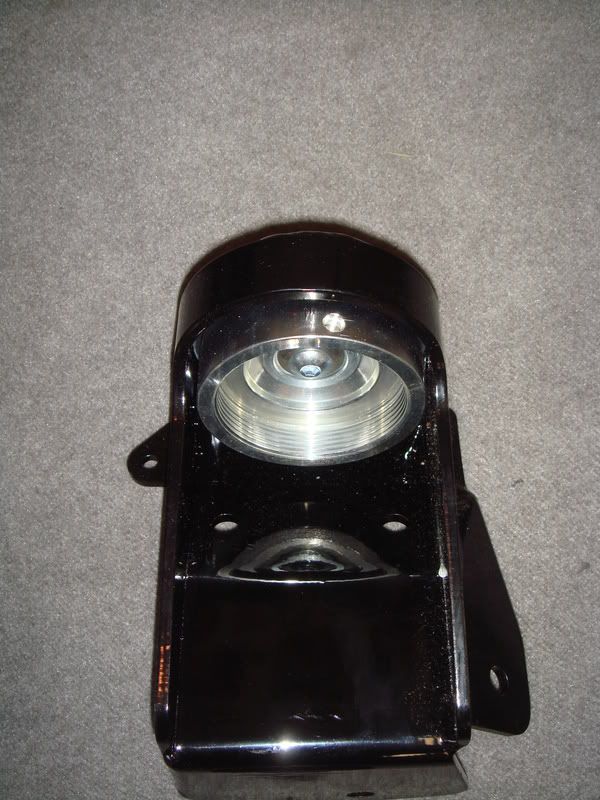
Bracket
Hardware
Here is the description for front install only, I will do a rear build when I recieve and install.
First off, with what seems to be the rule of modding, I was missing some parts, spacers that we're supposed to come with the kit for use on 4r/FJ as opposed to the tacoma. There is a side bolt that is gapped away from the stock bump stop was necessary. Now, Im not sure of this as I havent talked to DR, but I found that I had to modify these spacers to fit. I used my grinding wheel to remove about an 1/8" from the spacer and slightly beveled them on one side to fit better. So maybe I didnt get the exact spacers that were required. But this was definitely a challenging install for bolt on application. You definitely need to have a comfort level for cutting on your truck and a steady hand at that. This involves marking along a template to cut off part of the stock bump stop, and then using two existing holes to mount the first bolts and then drilling the remaing to holes. There are 5 mounting holes, but on 4r and FJ only four are used as there are differences between the ours and the tacomas bump stop geometry. Also the directions have some assembly for the top cup mounting to the bracket that attaches to the frame which is called the 15 deg flex plate. This was pre installed by donahoe and gave me a bit of confusion at first but no problems. Just wanted to be sure I wasnt missing more parts.
Ok, first doing the usual jack and removal of tires. I started on the driver side first as the directions recommend. I unbolted the brake line clip near the frame and slightly bent out of the way. Also unbolted the tie rod and lower shock mount so that I may move this out of the way. Others may want to completely remove the coilover for more room. But I felt it was adequate with just removing the bolt to the lower arm and swinging out of the way. Then I marked the area of the stock bump stop to be cut. I used some tape to attach the template and used a sharpie and a scoring tool to mark these lines. I preferred to use a angle grinder with a cut off wheel for these cuts. I thought this to be a better way of getting straight lines. I used my dremel for the tight spots in connecting the horizontal and vertical cuts and also cleaning up the edges as best I could. Once removed, I painted the bare edges and let those dry for a bit. Then I tested fitment, this was tricky. Holding it in place trying to get it just right and this thing is heavy. The directions said to bolt the bottom bolt first, but I found this to be problematic. If you install the bottom bolt first and tighten, the bolt itself is then in the way of getting to the side bolt that utilizes the spacer that I customized a bit. What I found to work best was just barely thread the lower bolt and then put in the side bolt and tighten the side bolt first. So, following that order, once you have those on and play around with them so they line up fairly well and the bracket sits against the frame nicely, I tightened them up and then drilled the hole behind where the jounce shock will sit. I found this to be the best order as the other bolt needed to be drilled and mounted towards the front would also be slightly in the way of the other bolt. Drilling was not to difficult as a I bought a few new bits as I new I would use them up rather quickly. I highly suggest doing the same, breaks and dulling happen fast. And its really frustrating using dull bits.
Ok, so at this point I had the mount completely on and fully tight. Then I screwed in the jounce and cycled the suspension to see were the strike pad should sit. This was a bit concerning as mounting the strike pad requires drilling a 1/2" hole through your lower arm. And not only that, the hole needs to be right on the edge of the arm. This was proved to be tricky. As you cycle it, the jounces wants to pust the strike pad away and if you drilled it where it completely sits, you are on the edge of your lower arm. You want it to be drilled where the first initial contact is and not where it wants to slide. I sat and thought on this one before I drilled for quite awhile just thinking everything through and going through pictures I had seen of other installed jounce shocks on Light Racing's website and determined that this was the right spot.
And at the perfect moment, my buddy Fabien (Happy) showed up and we both went through it in our heads to make sure we agreed. Once we battled over 1/16'ths of an inch in different directions it was time. And it took quite awhle to get through the arms. Used a center punch to mark the holes and then drilled a 1/4" hole as a pilot before going to the full 1/2" And it worked perfectly!!
Bolted up the bottom strike pad with some blue thread lock and put everything back together. They povide a nut and washer to use the stock brake line clip to a tab on the donahoe bracket. You need to loosen the nut on the brake line at the tee to turn the hard line and slightly bend it to fit in the relocated tab. Also, I found that the hole in the tab was slightly to small for the 8mm bolt. So I drilled this out just a bit to fit. And thats pretty much it I think. I will edit if I remember something else.
This morning we took it for a little test drive. Did a 2.5 hour drive up a local mountain called Saddleback and these things where great!! I certainly agree with all the good word about improved dampening and what these allow you to romp over and through. I used some zip ties to show me how much bump travel I was getting out of them which was about 1 and a 1/4".
Cant wait to get the backs on!!
Pic of the kit laid out
Rebound and Compression adjustment
Bracket
Hardware