Don't look, KidV--Chevy 350 installation notes

BucknutBob

New member
I've had a few people request a write-up/build thread for putting a V8 in my 2nd Gen, so with my profound apologies to those that may get a rash from this subject, here is my lame attempt at reliving the headaches and triumphs.

First off, I did a LOT of research, seeing what all may be involved--in hindsight, it wasn't nearly enough (LOL)! The guys who sell the adapters and such leave out a great many details, things you'll only figure out after you're committed (or need to be committed). I hadn't planned on doing this at this time (this past winter), but when my 3.0 took a dump (what else--head gasket), I decided it was time to get a little closer to my dream truck, and avoid putting another dime into a 3.slow. So, I started ordering parts...expensive parts (ouch).

Used 350 from Got Engines.com= $1500
Clutch kit from Northwest Offroad (clutch, press. plate, custom bellhousing, larger slave cylinder, bearings and bolts, etc.)= $1400
Engine mgmt system from Howell Engine Development (full harness with GM connectors, computer with custom PROM, sensors incl. heated O2 for headers, in-line fuel pump)= $900
Motor mounts from Northwest Offroad= $I forget offhand (oops)
Headers from Northwest Offroad= $I think 800 (stock 350 manifolds won't work--they go straight to the frame)
3" body lift from 4Crawler (incl. new urethane body mounts, oversized lift blocks (wider), heavy-duty hardware, steering shaft extension, front bumper lift brackets)= $350

First disaster, before I even began--bad choice on Got Engines--got stiffed, as they failed to mention they were in the process of going under, all the while telling me over the phone that "the engine's on its way"...until I called and got a recording that they were no longer in business! Thankfully, my bank got the money back, and I hear Got Engines is back, too--"run away, run away!". I then got a fully rebuilt 350 from a reputable local shop, bored .030, for $1700.

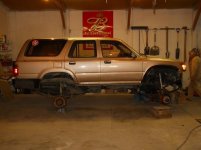
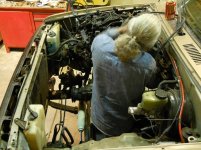
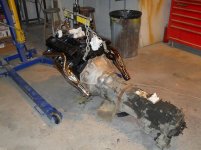
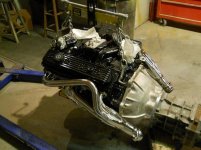
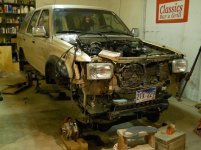
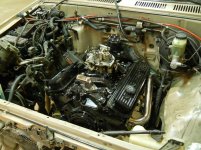
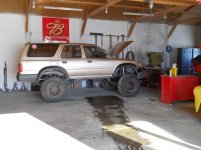
In these first pics, you'll see the gutted truck (with my brother helping out)--even sitting on blocks on the floor, the darn thing is too tall! The engine mated to the Yota tranny and T-case--my research showed this is a reliable combination, with the Yota parts more than capable of handling a stock 350. More to come.
 

Attachments
  • Tall One downsized 4.jpg
    Tall One downsized 4.jpg
    67.1 KB · Views: 15,659
  • Tall one 1.jpg
    Tall one 1.jpg
    40.4 KB · Views: 13,093
  • Tall one 2.jpg
    Tall one 2.jpg
    76.9 KB · Views: 13,085
  • Tall One downsized 5.jpg
    Tall One downsized 5.jpg
    74.5 KB · Views: 13,216
  • Tall one 7.jpg
    Tall one 7.jpg
    58.3 KB · Views: 25,270
  • Tall one 8.jpg
    Tall one 8.jpg
    63 KB · Views: 12,978
Last edited:
Register to hide this ad
Fitting the hard parts

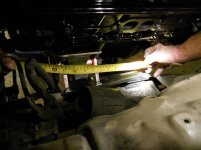
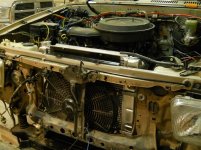
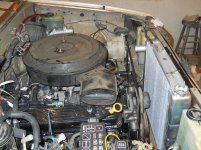
After hooking up the Centerforce clutch, components, and Advance Adapters bellhousing (that's what NWOR sells), we did the first fitting in the truck--and found it wasn't going to work as built. The engine was so far forward, it practically hit the A/C condensor (let alone the radiator, had it been in). As you can see in the pics, there was a ton of space behind the engine, and none in front. To make matters worse, NWOR's engine mounts were backwards--in the info, they say to have the engine mount to the REAR of the Yota frame mounts--as you can see from how far the engine mounts are in FRONT of the frame mounts, there wasn't a chance in you-know-where of that happening. Also, NWOR's mount bolts and nuts DIDN'T MATCH--one piece was fine thread, the other coarse! We put together our own sets.

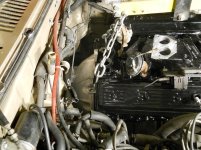
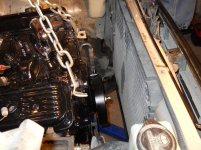
We moved the whole drivetrain backward about 4", necessitating fabricating a T-case mount, and changing the lengths of the driveshafts. With the engine mounts turned backwards, we were able to get both frame holes to line up. This gave about 1.5" behind the distributor, and with the radiator installed, about 1.5" from water pump pulley to radiator--good enough. Even with the move rearward, there was still no room for a cooling fan, so I had to get a pusher electric fan to go with my new all-aluminum radiator (made specifically for performance V8's). Not only was the Yota radiator insufficient, the hoses are completely opposite of the 350's. Without changing the whole front grill area, there was no room for the Yota's A/C components with the electric fan, so sadly that went bye-bye. I kept the parts, just in case I can re-install them later (I REALLY want my A/C back!). Now that the basic layout was set, it was time to concentrate on all the little things--more to come.
 

Attachments

  • Tall one 3.jpg
    Tall one 3.jpg
    45.8 KB · Views: 12,901
  • Tall one 4.jpg
    Tall one 4.jpg
    78.5 KB · Views: 14,319
  • Tall one 5.jpg
    Tall one 5.jpg
    78.7 KB · Views: 14,564
  • Tall one 9.jpg
    Tall one 9.jpg
    84.1 KB · Views: 16,071
  • Tall one 11.jpg
    Tall one 11.jpg
    73.2 KB · Views: 15,186
  • Tall one 12.jpg
    Tall one 12.jpg
    82.4 KB · Views: 13,930
  • Tall One downsized 7.jpg
    Tall One downsized 7.jpg
    93.1 KB · Views: 14,047
Gah, my eyes!

I kid, I kid. One question though, if you had to do it again, would you? That's a lot of cash and a lot of work, for that much flow you could have paid a shop to do a 3.4 swap.
 
I can't wait to see the finished project.

I had (and wish I still had) a 1989 Blazer Silverado 4x4 w/350CID. With over 200K on the engine I still got better gas mileage, and way more power than my 93 4Runner V6 has. I'll always have a soft spot for a small block 350.

Keep us posted!

:party:
 
awesome knowledge about the mounts, etc... now ill make some instead. howd you make yours & what vehicles dshaft did you use?
 
Kid, I probably would not have done it AT THIS TIME, but I definitely still would have done it within a couple years or so. I could've had the 3.0 fixed and then concentrated on the rest of the drivetrain and other goodies for now, and still had plenty in the bank. BUT, I don't regret having done it--I love the way it feels, the easy power on the trail and highways. I'm a V8 torque lover, plain and simple.
Priest, I just took my shafts to a local shop and had them redo them. Just don't ask what I paid (major ouch!). I guess they had to do a lot of lathe work on them because of the tapered design--at least that was the line they gave me. It's a reputable shop, but I paid about double what I intended. Live and learn. On the mounts, I would still recommend the NWOR set, because they ARE extremely well-built, and the wide offset from the frame mounts requires a beefy design--I'm just disappointed in the details that occurred.
 
Last edited:
this swap sounds and looks like a pain in the a** to me, I give you major kudos for doing it and actually finishing it. In the end im sure its worth it. IMO you have one of the nicer 2nd gens around.
 
this swap sounds and looks like a pain in the a** to me, I give you major kudos for doing it and actually finishing it. In the end im sure its worth it. IMO you have one of the nicer 2nd gens around.

Thanks for the compliments, Reed! I won't lie--it WAS a pain at many times in the process, but yes, it was worth it, too. It's just one part of what I've always had in mind for my ultimate backcountry exploring/wheeling rig, and now I'm closer than ever.
 
The HP you have now is def worth it! When my 3.0 goes out, I will be swapping some more muscle in mine. Nice work:hatsoff:
 
well done bob
and KID if he didn't do the bell housing conversion and just did a straight chevy drivetrain it would be about a 1,000 less.
 
So the big parts fit, now comes the "interesting" part...

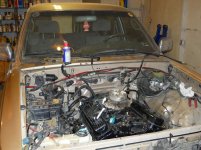
So now that the engine fits the compartment, it's time to make it live, which means lots of problem-solving and fabrication. The wiring harness and computer are basically plug-n-play, but far from that for the many other small systems that need worked out.

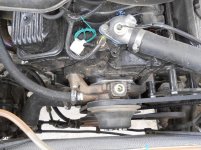
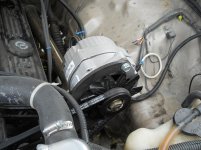
A short neck water pump is necessary for the spacing, and the rest of the brackets and pulleys must match to run the belts. These are mostly older vehicles that ran this, so time to dig through the junkyards. After much searching, I only came up with matching pump and crank pulleys. I came up with a separate GM power steering pump, pulley, and bracket assembly which mated up. Then I ordered an Alan Grove alternator bracket, a specialty aftermarket set-up with a simple, ingenious design that's been used on many show and kit-type cars. To this I added a one-wire alternator, after trying to figure out how to mate the Yota wiring to a standard alternator (and not doing so well--LOL). Lazy, but effective!

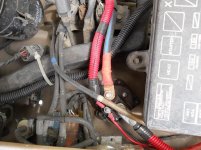
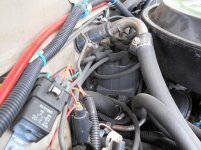
For starting, the Yota doesn't produce enough juice to crank over the monster GM starter, so I had to make a separate system that I'd read about. Using a Ford starter solenoid as a relay, I used the truck's ignition wire to merely close the circuit (instead of turn the starter), which sends the full battery wallop to the starter, and voila! Cranks every time. See pic.

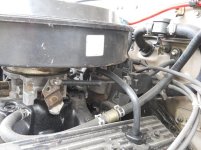
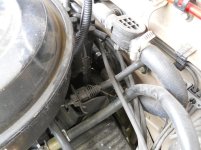
For the throttle, I used parts of the Chevy cable and bracket, some of the Yota's fittings, and some spare tubing. The Toy has that big looping route, but the Chevy was almost direct, so with a slight S-curve of tubing for a guide, the ridiculously short cable runs through the Yota firewall fitting, into the Chevy bracket, and attachs with the factory Chevy end to the TBI. See pic.

To make the heater work, I needed some tight curves in the inlet hose, which meant pre-bent--of course, none fit. I went to the store (Sturdevant's, my right-hand retailer on this swap) and they let me dig through the bins of hoses. I managed to find two with a couple of the right curves, and with some from the original Toyota hose, pieced together a nice one that curves down at the firewall, back and around the distributor, and then does a tight angular bend to enter the intake opening at the back.

To get the proper fuel pressure (the Toyota's MPI uses far too high pressure for a TBI), it was suggested that I use an in-line pressure regulator and drop it to around 30, which the TBI would then drop to 12-15. My friends and I weren't thrilled with this idea--it sounded like a band-aid fix that would eventually backfire on me. Instead, I got a Chevy in-tank fuel pump for a TBI truck--it is close in size to the Yota's pump--and adapted it to the Toy's bracket. String a power wire from the Howell harness to the pump's hot lead outside the tank, and now I've got the proper 15 psi all the way.

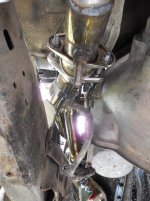
The Howell wiring harness runs through the firewall in the passenger footwell, with the computer, the diagnostic port (OBD I), a "check engine" light, and fuse block inside, and the slick prerouted harness on the other. The plugs fall right where the sensors go (for the most part--it's a little tight near the back of the engine), with GM weatherproof connectors. The fuel pump relay and a couple power leads attach to the firewall. The O2 wire needed extended, but I believe that was the only one (they don't know how far away it may be mounted, so this was expected). The O2 sensor is pre-heated, because headers stay cooler than manifolds, and the computer won't get the right readings without it. You can see where it mounts in the collector. The factory O2's get snipped.

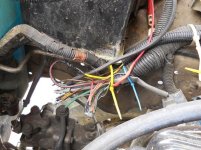
Part of the fun (and frustration) is tossing much of the original harness and those infernal vacuum hoses. I was really nervous at first, having not done this swap before, and not finding one single article or tech that offered advice, but then logic took over--if it went to the 3.0, it was now irrelevant, and wasn't sending any signal to anything, so "snip!". I went from this massive harness hanging over the front of the truck, to the little stub you see in the pic. And the vacuum lines--bye, bye! The Chevy uses about 5 hoses total--love the simplicity. I ended up using three wires from the harness--a keyed ignition lead, a constant power lead, and the tach lead.
 

Attachments

  • Tall one 14.jpg
    Tall one 14.jpg
    82 KB · Views: 12,672
  • Tall one 15.jpg
    Tall one 15.jpg
    59.4 KB · Views: 12,526
  • Tall one 16.jpg
    Tall one 16.jpg
    64.3 KB · Views: 12,552
  • Tall one 20.jpg
    Tall one 20.jpg
    69.5 KB · Views: 12,601
  • Tall one 17.jpg
    Tall one 17.jpg
    79.2 KB · Views: 12,580
  • Tall one 19.jpg
    Tall one 19.jpg
    60.3 KB · Views: 12,413
  • Tall one 21.jpg
    Tall one 21.jpg
    64.1 KB · Views: 15,523
  • Tall one 25.jpg
    Tall one 25.jpg
    65.2 KB · Views: 12,577
Last edited:
I want to laugh at your 2bbl TBI, but then i want to laugh and kick myself for having a holley 850 double pumper. It goes like a raped ape on flat ground, as soon as i hit a decent incline im done for.
 
OOHH be careful of that throttle cable. I did the same thing on my last one i built. I lost the rubber on my pass. side motor mount and it pinned the throttle wide open. I almost didnt get it stopped before i went airborne off a razorback dune.
 
OOHH be careful of that throttle cable. I did the same thing on my last one i built. I lost the rubber on my pass. side motor mount and it pinned the throttle wide open. I almost didnt get it stopped before i went airborne off a razorback dune.

What would you suggest for a solution? Not sure what needs changed, but I'm definitely open to the voice of experience, Nate.
 
This is what I did. That was no matter what the engine does it wont pull the throttle cable open. I even spaced the gas pedal up from the floor a little to make sure i had WOT.

c3127a88.jpg~original

e321b3bf.jpg~original


This is my old one
480735_32_full.jpg~original


I have pictures of the aftermath too but cant find them right now. To put it simple. 2 broken shock towers, a cracked transmission pan (ha i guess transmissions have always been a problem of mine), a bent front axle housing and almost a front flip to my death because of one bad motor mount. Needless to say I learned my lesson. Now learn from mine and fix it!
 
i used a cable from a V6 and wrapped from the front. the v6 cable was a perfect fit for a wrap around and it bolted right in with just some 1.5 long bolts instead of the .5 they use stock.
 
I stopped by the shop where my 4Runner is getting some work done, and chatted with my mechanic friend there. I mentioned the 350 swap that was done to a 4Runner here, and he pointed to his soon to be engine swap.

It is a rebuilt (by my mechanic) LS1 with some extra mods. Man that engine would look good sitting under the hood of my 4Runner!

:cheers:
 

Members online

Forum statistics

Threads
278,310
Messages
3,554,079
Members
248,016
Latest member
Advally Service

Trending content

Back
Top