
Drivers side CV Axle Problem

johnnotestine

New member
I am having serious problems getting my driver side CV axle re-installed in my 2016 TEP (it was removed to fix a boot I tore while installing my lift kit).

I have read all the threads about getting it past the pin. I even invented a tool similar to the one in the other thread using all-thread rod and nuts. I have smacked it repeatedly as hard as possible. I have inspected the inside and made sure nothing is holding me back. I actually removed the end pin and tried - it still wouldn't go in all the way.

Here is how close it is:
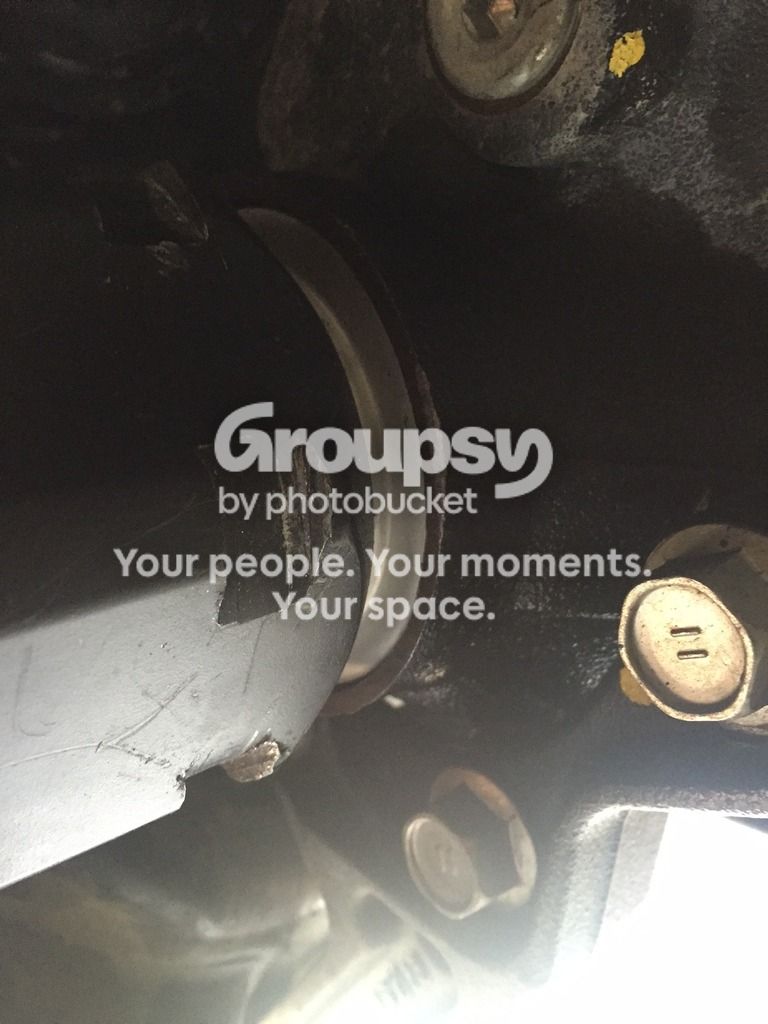
image1-2_zpsnhcozqcd.jpg~original

You can see that it has about a 1/2" to go.
I even clipped the outside boot clamp and removed the inner pieces to smack the outer easier - still no luck:
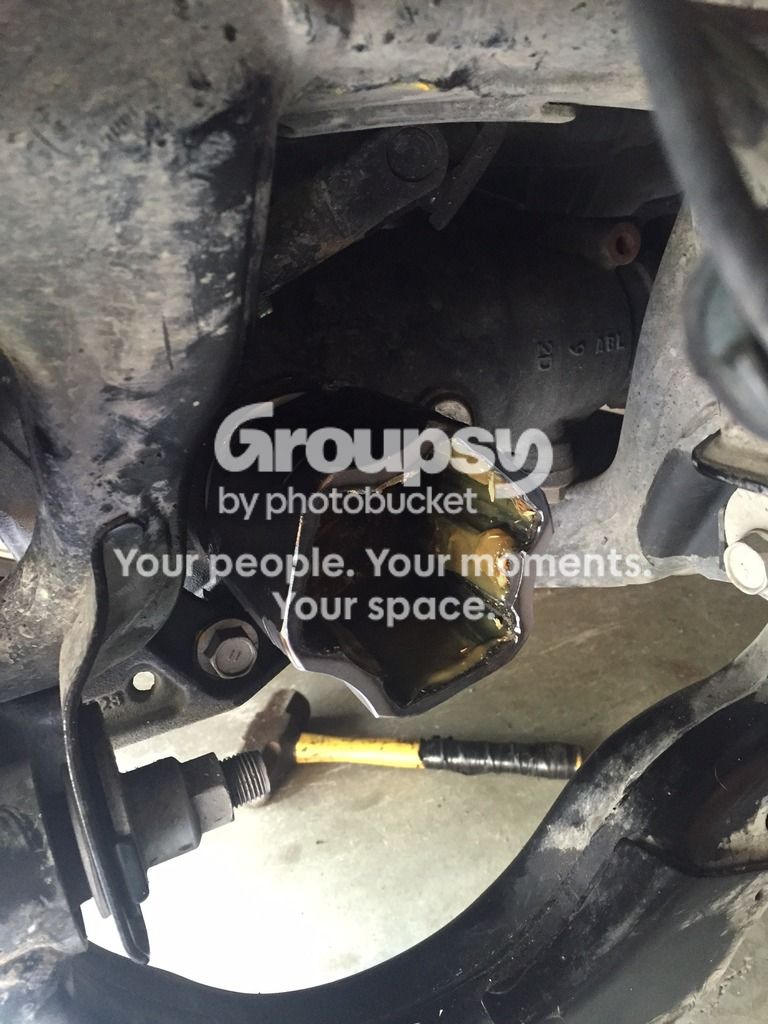
image2-2_zps54m7bhkk.jpg~original

I have hit it so hard that I have started damaging the notches on the outer axle piece as you can see in this picture:

image1-3_zpsspul7wsn.jpg~original


Anyone have any ideas? I'm open to any suggestions!
 
Register to hide this ad
How do you tear a CV boot installing a lift? What the hell "pin" are you talking about? I have removed/re-installed my CVs many times from the center diff and all it takes is a few taps from a large flat blade screw driver and mallet. I mean a crappy plastic mallet with sand in it that couldn't dent a rotten tomato. If you are shearing off parts you are doing it wrong.
 
How do you tear a CV boot installing a lift? What the hell "pin" are you talking about? I have removed/re-installed my CVs many times from the center diff and all it takes is a few taps from a large flat blade screw driver and mallet. I mean a crappy plastic mallet with sand in it that couldn't dent a rotten tomato. If you are shearing off parts you are doing it wrong.
Good questions. To damage the boot you have to be a complete idiot when you disconnect the sway bars and accidentally catch one side on the CV boot. Not one of my brighter moments.

The "pin" I am talking about is the C-clip pin on the end of the axle shaft.

I'm guessing now that this stupid thing is actually back in, but it seems like I have a wider gap then when I removed it.
 
Something is definitely not lined up correctly, my replacement only took a couple taps from hammer just as [MENTION=78273]Jeremy556[/MENTION] said. Pull it out and make sure there are not any damage to the inner gears.
 
I haven't done this...yet, but I think I read that you have to pay attention to the depth you install the new seal as you can push it in too far.

Maybe that's why it appears to be 1/2" out. I can't tell from the pics.

Good luck, please post your resolution!
 
Not sure from the photo but here's a possibility: It looks like the seal may be installed backwards, turn it around 180 degrees, the narrow section should be towards the inside.

And...never beat something that is not supposed to be beaten. Why would you think that smacking it that hard would solve any problem?
 
Not sure from the photo but here's a possibility: It looks like the seal may be installed backwards, turn it around 180 degrees, the narrow section should be towards the inside.

And...never beat something that is not supposed to be beaten. Why would you think that smacking it that hard would solve any problem?

Because I did what everyone suggests and read the other threads on replacement. Several talk about how hard it is to get back in. One thread even has a special tool that was welded because it was so difficult.
 
Because I did what everyone suggests and read the other threads on replacement. Several talk about how hard it is to get back in. One thread even has a special tool that was welded because it was so difficult.

They were just kidding.

Now get out there and turn that seal around!

:biggrin1:
 
That tool he made was actually to remove the axle, not install it.

I think he used it for both:

"Quote:
Originally Posted by lovemybadkitty View Post
Thanks for the reply! I got the axles out with your recommended tools but I just can't seem to get the darn things in? I tried the clip up and then down and still fighting with getting it to work...

Are you able to get them started? I had to hammer mine pretty hard to get it all the way seated. I used a 1/2" steel rod with a small plate welded to the end and used a large band clamp to hold it in place while I whacked the end with a 5 lb. hammer. FWIW I installed mine with the clip opening facing down."
 
That can't be the problem. I never took the seal out.

OK, thanks for that update. Not sure from the photo.

If that is the metal flange piece that is right after the tulip, and that piece is recessed within the opening of the casing, then you are done. Stop pounding on it and relax. It appears that it may be in far enough. It does not need to be far in, it can vary from 1/16" to 1/4". It is more of a dirt shield than part of the seal. If it is not within the opening, then yank it and try again. I opt for the clip opening down. Take another photo for us to check. Also, you probably should have replaced the seal while you were at it.
 
It hard to tell by the picture how for the axle is in. To me it all most looks in. The best way to reinstall the axle is to pack the area around the c-clip with grease (wheel bearing grease) it dissent require much. Once you have some grease in there you need to move the clip so the open end is at the bottom. Center the clip on the axle using the grease to help it stay in place. If you've done this the axle will go in with almost no effort. If not get a new clip. Stop forcing.

Sent from my VS985 4G using Tapatalk
 
It hard to tell by the picture how for the axle is in. To me it all most looks in. The best way to reinstall the axle is to pack the area around the c-clip with grease (wheel bearing grease) it dissent require much. Once you have some grease in there you need to move the clip so the open end is at the bottom. Center the clip on the axle using the grease to help it stay in place. If you've done this the axle will go in with almost no effort. If not get a new clip. Stop forcing.

Sent from my VS985 4G using Tapatalk
^^^ this

It should go in with light taps. It's nice to have two people. One to line it up and keep the open end at the bottom... and the other to tap the end with a soft blow or rubber mallet. It is a finesse job (not force...)
 
Well...I think I finally got it. I had it in far enough, but the seal was pushed in on the bottom. It made it look like it wasn't in far enough.

I ended up getting a new National seal and replacing it. Everything seems to be OK now.

Thanks for the help. I got a lot of snarky replies, but several of you had some helpful tips.
 

Members online

Forum statistics

Threads
278,309
Messages
3,554,066
Members
248,016
Latest member
Advally Service

Trending content

Back
Top