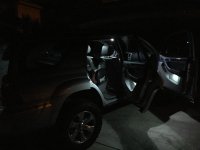
Sleeper
Not sure if this qualifies as "easy" but I did it in a day, including the trip to lowes for all the supplies. Here's my best attempt to remember everything. I built this a few weeks ago. It is a sleeper/ storage setup. Eventually I will finish building the A/C (cooler, ice, fish tank pump, PC fans, dryer duct...) but I didn't have time for that on this weekend.
The seats will need to be like this for the complete setup and during construction.

I cut a piece to fit the bottom, you should be able to read the dimensions from the photo, I have them written on the plywood. ATM I don't remember what the thickness was, but I'll update when I get that info. I think it was half inch.

Then, I cut the joists from 2x10 boards. In this picture, they are just sitting there. I actually cut all the pieces then assembled it all using mostly wood screws, with an occasional nail to hold something in place while screwing elsewhere. Disregard the small 2x10 in the back.

Then, a 47x36.5" plywood square for the top. Go ahead and cut another piece the exact same size, you'll need it later.

Then I added supports in the back out of some spare lumber I had laying around because I didn't think that part through. It is important that the top support is 2" thick as it will need to be a lip support for the part that goes over the seats. The driver side has the bottom open in the back intentionally so that the ducts for the A/C will fit.

Here is a better view of the lip I was talking about. The plywood does overlap the 2x4 intentionally. The next picture shows how much room I left between the seats and the joists for the future duct work.


^That is square... I promise

Fasten the plywood and cross supports, including the 2x4 lip support, and then lay the second 47x36.6" plywood piece over the seats so it is resting on the lip and seats. Looks like this:

There will be a hinged compartment on the driver side, and a drawer on the passenger side. So now I cut the plywood and hinged it and removed the screws so it could open.


Then I built the drawer and put an end on the other side. It was raining at this point so I just finished building and took pictures of the finished (for now) project. In this picture you can see that the second piece can sit on top to allow the second row seats to sit upright in a comfortable position.


Position of seats. They can move one click further back if you push it.

It'll be more clear about the A/C part once I get that build finished and posted. Then I'll carpet the whole thing with all weather carpet.
The platform perfectly fits
this double sleeping pad.