• If you plan to post to Classified forums, you must follow these rules, or your post will be deleted.

    1. Thread title must include at a minimum: FS or FT, Item(1st, 2nd, 3rd, 4th or 5th gen), Price and Location. For Example: FS: 4th GEN Carpet Floor Mats - Tan, $50 Denver, CO.
    2. All Threads must contain the following information
      • What is for sale/trade (model, specs, etc.)
      • Condition
      • Price/What you want to trade for
      • Location of item
      • At least one picture of the item for sale or for trade
    3. No "Feeler" Threads - Its either for sale or it isn't.
    4. Moderators lock Classified Threads that have not had any activity in 90 days or when the part is announced SOLD.
    5. Threads not complying with the rules will be deleted without notice.

Ecotechne roof rack GROUP BUY!!!

Status
Not open for further replies.
I think I'm one of the few people here that put the bars on top of the roof rack and not bottom. I also had to put a light bar cover on mine because of NJ laws.. pfft.


17634814_10154949913766609_5863809999775170769_n.jpg
 
I think I'm one of the few people here that put the bars on top of the roof rack and not bottom. I also had to put a light bar cover on mine because of NJ laws.. pfft

I had mine on top for about a week. Flipped them back to 'normal' this weekend and cut down on some wind noise. Or it could have just been the 50mph winds in Oklahoma the last few days!

IMG_20170402_180836664_HDR_zpsy3fjwbng.jpg~original
 
I grabbed some from the hardware store, I believe it was 3/4" wide by 1/8" thick.

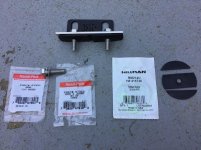
Confirmed that I used the same dimension flat bar as well. Attaching a pic of the other parts I used for mounting the bracket.
 

Attachments

  • rack bracket parts.jpg
    rack bracket parts.jpg
    82.8 KB · Views: 620
I ordered black oxide fasteners from mcmaster.com, which seemed cheaper. I think 1" long would have worked as well, especially if you tighten everything down at once. Part numbers I used:

97763A363 18-8 Stainless Steel Hex Drive Rounded Head Screws Black-Oxide, 3/8"-16 Thread Size, 1-1/4" Long, Packs of 5

96765A150 Black-Oxide 18-8 Stainless Steel Washer for 3/8" Screw Size, 0.406" ID, 0.875" OD, Packs of 100

98514A041 18-8 Stainless Steel Thin Hex Nut Black-Oxide, 3/8"-16 Thread Size, Packs of 25 (maybe thicker ones would be stronger here)

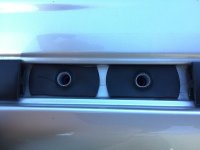
Pic of the rubber washers installed around plastic sleeves attached. I added silicone sealant at every interface as well.
 
wish i would of jus done that. hopefully the dent shop can get them all out


I'm not able to see your pics but if they are like the ones I friggin put in mine, then you should be good-to-go after several hundred bucks at the paintless dent repair shop. I was using screwdrivers and pry bars to adjust the height of the rack and used the drip rail as my fulcrum. I felt worse than a jack wagon [MENTION=140851]Vinsil[/MENTION]
 
My comment above was aimed at the top (visible) bolts on the mounting bracket. If you are talking about the bolts that fasten the mounting bracket to the roof of your vehicle I can tell you that the 2" Bolts from my OEM rack were too long. NOTE that my 2016 TE OEM rack bolts are M8 x 1.25 bolts. Make sure you check your bolt packs for 8 smaller dia bolts as mine did not have any. [MENTION=109477]Rorck[/MENTION] said his bolt pack had some different bolts that worked well so he did not have to use the OEM roof rack bolts like I'm having to.

Here's what I had to do to get the OEM roof rack bolts (or any bolts) to work with the rear mounting brackets:

Looks like they cut all the holes in the brackets first then bend them and that made a problem with mine. There's no meat for a bolt head or washer to grab on the backside:
d7f7e2f283e012dcfd1057235ca67089.jpg


I made a top piece out of aluminum from lowes and this worked well. Cut it a little longer than the bracket so that it bridges the gap between the two roof weather stripping:
69f7d9a6ead2a8848f2597f87df732f1.jpg

Post #193 shows how you can spread the load of the bolt on the mounting bracket, if you felt like it needed better contact.
 
Post #193 shows how you can spread the load of the bolt on the mounting bracket, if you felt like it needed better contact.

My brackets were similar to the ones pictured above, the holes were close to the bend and there wasn't much metal for the bolts to grab onto when tightening the brackets down. The aluminum bar provided the contact area needed for the bolts to hold everything securely.
 
Thanks for that write up. Very good points made as well.

I am curious what the marine silicone was for. Do you mind explaining?

Post #629
http://www.toyota-4runner.org/group-buys/231393-ecotechne-roof-rack-group-buy-42.html#post2668010

If you look at post #629 by [MENTION=152421]4Radski[/MENTION] he shows the area where other members have put silicone. When you take off the OEM rack, there are four attachment points with these two holes... the 'L shape' brackets will bolt into these holes. With the roof rack's design, these holes could technically still be exposed to water when it is raining so it is just an extra precaution to prevent water from getting inside the car and onto the headliner.
 
On the list for the 6th batch! #Paid

Can't wait to get it in, and installed. Hopefully, before I depart to Zion at the end of May.
 
Last edited:
Status
Not open for further replies.

Members online

No members online now.

Forum statistics

Threads
278,316
Messages
3,554,120
Members
248,016
Latest member
Advally Service

Trending content

Back
Top