SamNavy
New member
Trying to do a full system on a budget. I've got a Scion T1809 HU that I'm waiting on RCA cables to install. Yesterday I got my speaker adapters so I decided to install those.
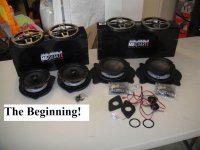
MBQuart FSA216 components & FKA116 coaxials. Both are 6.5" and MB's budget line. I paid $105 shipped from Amazon for both.
The adapters were from Car-Speaker-Adapters.com through eBay for $60. I had a few minor easily fixed issues with the adapters. Overall they're a good product. The company however is for shit. I left 3 emails, 3 phone messages, contacted them through eBay and through website feedback with no response... tried for over a week. Finally I just ordered and hoped for the best. They showed up a few days later on time, but to me no communication means negative feedback.
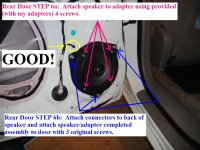
REAR DOORS: Piece of cake.
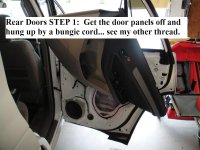
1. Pull off door panel (see my step-by-step other thread on this). http://www.toyota-4runner.org/audio-electronics/67142-idiots-guide-door-panel-removal-4th-gen.html
1. Pull off door panel (see my step-by-step other thread on this). http://www.toyota-4runner.org/audio-electronics/67142-idiots-guide-door-panel-removal-4th-gen.html
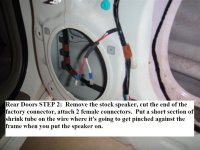
2. Disconnect wire and unbolt stock speaker
3. Cut wire, install connectors onto wire.
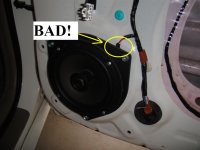
**I knew I would never reinstall the factor speakers, so I cut right at the connector to give me as much wire as possible. If you cut the wire a few inches up to that there's
enough room to splice the factory connector back on, be sure you don't cut so far that it won't reach the back of the speaker... Or you could just buy the eBay connector harness extenders.**
**I knew I would never reinstall the factor speakers, so I cut right at the connector to give me as much wire as possible. If you cut the wire a few inches up to that there's
enough room to splice the factory connector back on, be sure you don't cut so far that it won't reach the back of the speaker... Or you could just buy the eBay connector harness extenders.**
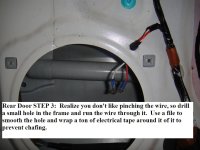
4. OPTIONAL: Drill hole in door to pass wire through... means about 1" less run of wire needed. Be sure to file smooth the hole and insulate the wire with shrink wrap or electrical tape. Now the adapter will fit flush with the door.
5. Install speaker into new adapter using screws supplied with the adapters.
6. Plug wires onto speaker terminals.
7. Install assembled/connected speaker & adapter into door using original 3 bolts from OEM speaker.
8. Turn on radio and use fade/balance to isolate that speaker and listen… crank up the bass and listen for a minute for rattles and integrity.
9. If all is good… THEN reinstall door panel.
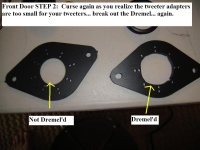
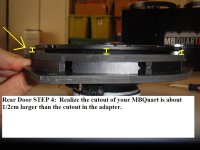
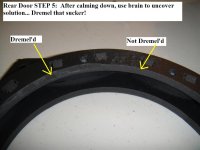
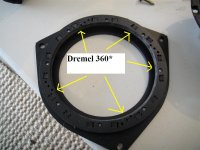
Of course, there were a few issues. The adapters were just a pinch too narrow in diameter for the speaker to fit flush. Good thing a Dremel sanding drum goes through PVC like buttah. Route a few mm's on either side and good to go. The front adapters were the same situation… had to Dremel a little off. Tweeter adapters same way, see pics.
FRONT DOORS: Piece of cake’ish.
1. Pull off door panel.
1. Pull off door panel.
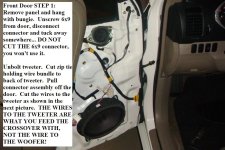
2. Unclip woofer, tuck connector back into door somewhere.
3. Unbolt tweeter… and cut the single red/black wires soldered to the tweeter as close to the tweeter as you can.
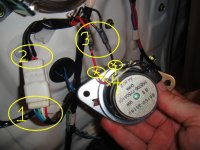
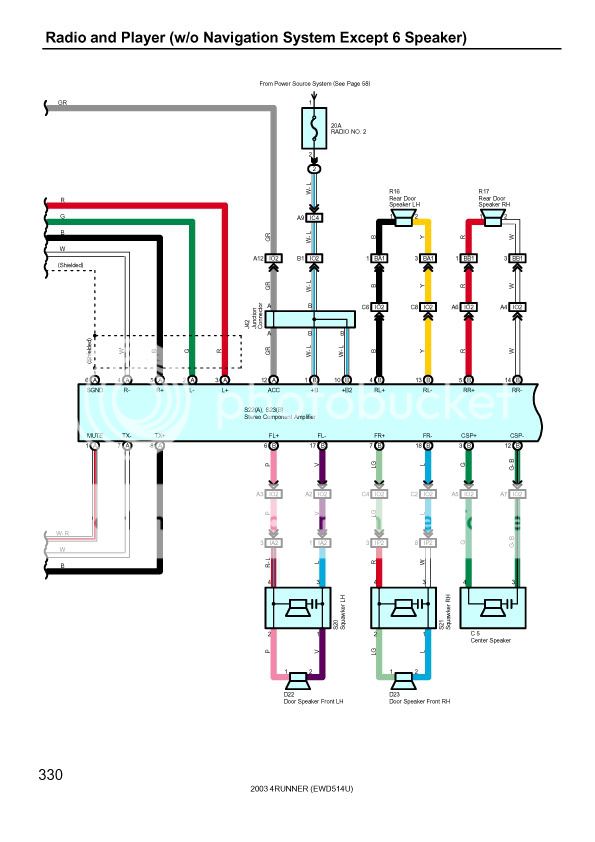
** LOOK AT THE THIRD PICTURE IN THE 2ND POST OF THIS THREAD. Coming out of the door, there are 4 colored wires going to the tweeter. At the point where the 4 colored wires (pink/purple/etc…) plug into a white connector, coming out the other side are 2 red and 2 black wires. Those wires are fused together to become 1 red and 1 black… which plug into the tweeter. If that white connector is not connected, the 2 wires that plug into the woofer have no signal. So unless you want to do some re-wiring of the wiring harness, just use the single red/black for the tweeter as the input for your crossover. If you cut those wires right at the tweeter, there shold be enough slack to reach wherever you end up mounting the x-over without adding in a splice.**
** LOOK AT THE THIRD PICTURE IN THE 2ND POST OF THIS THREAD. Coming out of the door, there are 4 colored wires going to the tweeter. At the point where the 4 colored wires (pink/purple/etc…) plug into a white connector, coming out the other side are 2 red and 2 black wires. Those wires are fused together to become 1 red and 1 black… which plug into the tweeter. If that white connector is not connected, the 2 wires that plug into the woofer have no signal. So unless you want to do some re-wiring of the wiring harness, just use the single red/black for the tweeter as the input for your crossover. If you cut those wires right at the tweeter, there shold be enough slack to reach wherever you end up mounting the x-over without adding in a splice.**
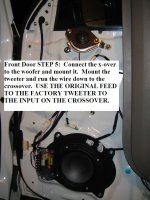
4. Install new tweeter onto tweeter adapter. Again, I needed the Dremel… no big deal.
5. Install assembled tweeter/adapter into door and let wire hang down.
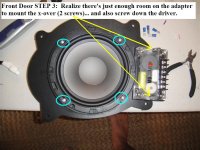
6. Decide where you’re going to mount your x-over. I had just enough room on my adapter to mount it there making this step easy. There’s plenty of room inside the door where the window sits to mount just about any sized x-over and not interfere with the window… just make sure none of yoru wires are slack and can interfere with window operation… then mount the crossover.
7. Mount the woofer onto the adapter.
8. STEPS IN ORDER? Now you need to install the wires onto the crossover and mount the woofer in it’s hole. How you do that depends on where you’re mounting the x-over. You just don’t want to install the woofer and then realize you need to get back there for some wiring… so plan it out.
9. Turn on radio, crank bass, listen for rattles… once satisfied, reinstall door panel.
Attachments
Last edited: