
You are using an out of date browser. It may not display this or other websites correctly.
You should upgrade or use an alternative browser.
You should upgrade or use an alternative browser.
HULK Build Thread
- Thread starter ameining
- Start date


00_4runner
New member
Sick ride man. If you dont mind saying how much was that bumper? After seeing it on your ride I want one! Haha

ameining
New member
Sick ride man. If you dont mind saying how much was that bumper? After seeing it on your ride I want one! Haha
Shrockworks, right around $1200...yeah not cheap
Great product, dont regret a penny
Shrockworks Bumper
00_4runner
New member
Shrockworks, right around $1200...yeah not cheap
Great product, dont regret a penny
Shrockworks Bumper
Oh my... Im ready to shell out some money for a bumper but WOW haha

driffter33
New member
Nice Build man!!!
ameining
New member
Wheels First
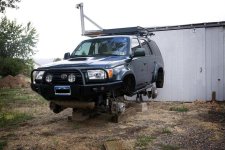
So I have hired the help of a good friend to get my wheels PC'd while I am in CA working. He did all the leg work, while I did all the paying!!
This is the current status of the Hulk...looks rough with no legs!
Rest of the projects are still a go for my days off...also going to install some of the Energy Suspension poly steering bushings to help with vibrations...
So I have hired the help of a good friend to get my wheels PC'd while I am in CA working. He did all the leg work, while I did all the paying!!
This is the current status of the Hulk...looks rough with no legs!
Rest of the projects are still a go for my days off...also going to install some of the Energy Suspension poly steering bushings to help with vibrations...
Attachments
Last edited:
ameining
New member
Days Off Work Begins
Small things only for today, there was a major rain storm and I cannot fit in the garage anymore. So the work for the day was minimal. I have a couple photos of the wheels, will have some better before and after shots in a little while to see how the powder coating worked out. I really like the look. I went to ebay for a TRD shift knob to go with the seat covers, which are next.
Before with the stock shifter and my Hulk custom knob:

Comparison of the two knobs side to side, as you can see the TRD knob is larger but is not inconvenience and I like the leather feel of it.

And the knob installed:


Small things only for today, there was a major rain storm and I cannot fit in the garage anymore. So the work for the day was minimal. I have a couple photos of the wheels, will have some better before and after shots in a little while to see how the powder coating worked out. I really like the look. I went to ebay for a TRD shift knob to go with the seat covers, which are next.
Before with the stock shifter and my Hulk custom knob:
Comparison of the two knobs side to side, as you can see the TRD knob is larger but is not inconvenience and I like the leather feel of it.
And the knob installed:
Last edited:
ameining
New member
Wet Okole Installed
So after the long 4 week delivery, and then a two week delay because of that 4 letter word 'wor*' I finally had time to get the seat covers on.
Installation is relatively self explanatory, but I would recommend getting a buddy to help (as you will see my Mom aided since she loves interior decorating!).
Packaging is very professional from Wet Okole however the delivery is quite lengthy...


Interior Before in the Front:

Interior Before in the Rear:

I google image searched TRD to find the emblem I wanted, I was debating between a red TRD Off Road or a mountain scene...and ended up with the best of both worlds.
The emblem replaces the standard Wet Okole emblem that is placed on only the driver and passenger front seats. They have a variety of options available to customize this emblem....

Front Installation
1.) Slip over for the upright portion of the seat, and then a velcro seal along the bottom of the seat. This is pretty simple
2.) The bottom section of the seat cover has nylon straps that span the bottom of the chair to hold it in place. ALSO, the recliner pull lever and the lumbar supprt wheel need to be removed so that the seat cover can go behind. The wheel requires a snap ring to be removed (not photographed), and the lever requires only a couple philips head screws.
Here is the final product for the front:


Rear Installation
1.) The upright portion requires the removal of the backing carpet with a series of 6 (I believe) plastic snaps. Then it is a slip over with a velcro fastener along the bottom side to secure in place
2.) The lower portion is identical to the front seats, in that there are nylon straps that hold it in place. The seats fit tighter together, so lowering of the seats is a little more challenging...but is still completely functional

3.) The rear carpet is then placed back in the original position through a series of holes provided originally on the seat cover
Here is the final product in the back


With the carpet re-installed

After thinking about these for about a year, and three sessions of color swatches I went with full piping and the dark brown to match the dash (color matches very well, if photos do not do it justice). Also, the carpeting for the back comes off the seat for the install and then goes back in place, so it is fully functional for a bed as we all likely do.
Let me know your thoughts.
So after the long 4 week delivery, and then a two week delay because of that 4 letter word 'wor*' I finally had time to get the seat covers on.
Installation is relatively self explanatory, but I would recommend getting a buddy to help (as you will see my Mom aided since she loves interior decorating!).
Packaging is very professional from Wet Okole however the delivery is quite lengthy...
Interior Before in the Front:
Interior Before in the Rear:
I google image searched TRD to find the emblem I wanted, I was debating between a red TRD Off Road or a mountain scene...and ended up with the best of both worlds.
The emblem replaces the standard Wet Okole emblem that is placed on only the driver and passenger front seats. They have a variety of options available to customize this emblem....
Front Installation
1.) Slip over for the upright portion of the seat, and then a velcro seal along the bottom of the seat. This is pretty simple
2.) The bottom section of the seat cover has nylon straps that span the bottom of the chair to hold it in place. ALSO, the recliner pull lever and the lumbar supprt wheel need to be removed so that the seat cover can go behind. The wheel requires a snap ring to be removed (not photographed), and the lever requires only a couple philips head screws.
Here is the final product for the front:
Rear Installation
1.) The upright portion requires the removal of the backing carpet with a series of 6 (I believe) plastic snaps. Then it is a slip over with a velcro fastener along the bottom side to secure in place
2.) The lower portion is identical to the front seats, in that there are nylon straps that hold it in place. The seats fit tighter together, so lowering of the seats is a little more challenging...but is still completely functional
3.) The rear carpet is then placed back in the original position through a series of holes provided originally on the seat cover
Here is the final product in the back
With the carpet re-installed
After thinking about these for about a year, and three sessions of color swatches I went with full piping and the dark brown to match the dash (color matches very well, if photos do not do it justice). Also, the carpeting for the back comes off the seat for the install and then goes back in place, so it is fully functional for a bed as we all likely do.
Let me know your thoughts.
Last edited:
ameining
New member
Energy Suspension Steering Rack Bushings
Much to my dismay, this is the one project I did not do myself on the Hulk...The reason is that there was a relatively major shake happening and I wanted them to look at all the equipment while it was torn apart. Results were that the steering racks are slightly loose (like every single 3rd gen I have seen) but not leaking and the rest looked good.
So I personally stood by the hand who balanced the tires on the wheels and I can attest to the fact that he did all he could and they are simply out of round....dam* 33's are just too much rubber. I can live with the shake at 65 mph as long as I know what is causing it.
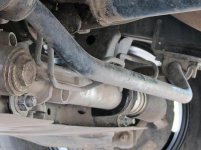
Here is a shot of the bushing in the center. Steering is much more steady now, and the old rubber bushings were shot. I would highly recommend this upgrade to poly bushings if you have increased your tire size. It is cheap, and if you DIY then it will be less than $30 and about 2 hours (that is my estimate)
Much to my dismay, this is the one project I did not do myself on the Hulk...The reason is that there was a relatively major shake happening and I wanted them to look at all the equipment while it was torn apart. Results were that the steering racks are slightly loose (like every single 3rd gen I have seen) but not leaking and the rest looked good.
So I personally stood by the hand who balanced the tires on the wheels and I can attest to the fact that he did all he could and they are simply out of round....dam* 33's are just too much rubber. I can live with the shake at 65 mph as long as I know what is causing it.
Here is a shot of the bushing in the center. Steering is much more steady now, and the old rubber bushings were shot. I would highly recommend this upgrade to poly bushings if you have increased your tire size. It is cheap, and if you DIY then it will be less than $30 and about 2 hours (that is my estimate)
Attachments
Last edited:
ameining
New member
Days off To Do List
So this hitch on the rig, I was able to spend some time on here and online to get some parts that I have been wanting. It was like Christmas all over again for me when I got home!
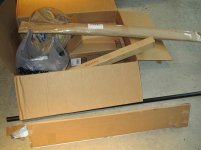
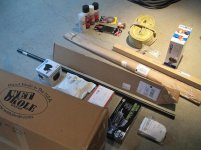
As mentioned earlier, I have a few things going on: LJ's LED interior light kit arrived and that is to be installed. I need to modify the roof rack front bar length so that my mountain bike will fit next to the Loadmaster. New end caps for the factory tracks since I literally busted every single one installing roof rack. Toyota Parts Cheap also had the Tacoma whip antenna parts, and so I got those with an additional black whip antenna, so that needs to be installed. I also got all the necessary parts to install a Uniden PRO 520XL and PA speaker with the Firestick Firely 4' antenna, I am only waiting for Drifters bad ass antenna mount for the rear of the vehicle. Thanks LJ and Drifter for feeding my habit!
Here are a couple shots of the 'stuff' to be done in the next few days. Had to get a blow dryer at Walgreens to remove the emblems so I can pain them. I got the Rustoleum primer, flat black and clear coat for those. Also going back to black (truck liner rattle can paint) for the factory skid plates. i primed them last year, and I think it will look better having it black since everything else on the bottom half is black now
So this hitch on the rig, I was able to spend some time on here and online to get some parts that I have been wanting. It was like Christmas all over again for me when I got home!
As mentioned earlier, I have a few things going on: LJ's LED interior light kit arrived and that is to be installed. I need to modify the roof rack front bar length so that my mountain bike will fit next to the Loadmaster. New end caps for the factory tracks since I literally busted every single one installing roof rack. Toyota Parts Cheap also had the Tacoma whip antenna parts, and so I got those with an additional black whip antenna, so that needs to be installed. I also got all the necessary parts to install a Uniden PRO 520XL and PA speaker with the Firestick Firely 4' antenna, I am only waiting for Drifters bad ass antenna mount for the rear of the vehicle. Thanks LJ and Drifter for feeding my habit!
Here are a couple shots of the 'stuff' to be done in the next few days. Had to get a blow dryer at Walgreens to remove the emblems so I can pain them. I got the Rustoleum primer, flat black and clear coat for those. Also going back to black (truck liner rattle can paint) for the factory skid plates. i primed them last year, and I think it will look better having it black since everything else on the bottom half is black now
Attachments
Last edited:
ameining
New member
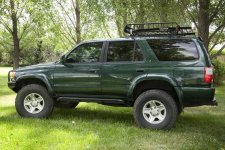
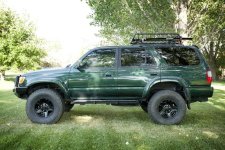
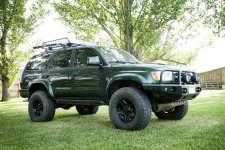
A few glamour shots
Since I am going to be delayed at least a day or two due to weather, I grabbed some pictures on the way to mountains to show the current setup.
I also got the front windows tinted to match to rears (right around 20%) and I think it makes a much cleaner look
Let me know if any of you guys have any suggestions.


Since I am going to be delayed at least a day or two due to weather, I grabbed some pictures on the way to mountains to show the current setup.
I also got the front windows tinted to match to rears (right around 20%) and I think it makes a much cleaner look
Let me know if any of you guys have any suggestions.
Last edited:
ameining
New member
Those are some slick-looking seat covers! Where'd you get them done?
Geo,
I went to Wet Okole online, and after quite a few phone conversations, email trails and color swatches I finally decided on the ones you see....like I said, VERY pricey but I think well worth it. They look like new upholstery instead of Wal Mart covers.

ameining
New member
great looking runner. Are those wet okole seat covers? How did you get that emblem on there?
What emblem? The one on the covers, side of vehicle or shift knob? Covers was a challenge but Wet Okole worked with me and we got it taken care of. The others were simply ebay.....

Geolander
New member
Geo,
They look like new upholstery instead of Wal Mart covers.
That there is worth the price imo. They look fantastic. I like the logo choice too - nice twist on the classic TRD emblem.
ameining
New member
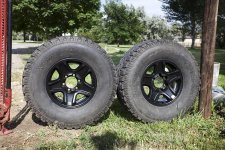
Good shot of the PC'd wheels
$55 a wheel and $5 to do center caps. Decent deal, even though a set of steel wheels can be close to that much I like the 5 stars and I really like how it turned out.
$55 a wheel and $5 to do center caps. Decent deal, even though a set of steel wheels can be close to that much I like the 5 stars and I really like how it turned out.
Attachments
Last edited:

ryankmasuda
New member
I see that you are a fly fisherman, Good Choice! Nice rig by the way
ameining
New member
Tacoma whip antenna
I finally did the whip antenna.
Tools needed:
1.) Socket set, I believe mostly 12 and 14 mm
2.) Philips screwdriver
3.) Wire cutter
4.) Electrical Tape
5.) Tacoma whip antenna parts as listed below
-8630035090 Antenna assy - Manual 1996 - 2002 1 $44.70
-86309AA042 Antenna mast, tacoma, manual 1998 - 2004 $27.94
Only thing I did different from the t4r GREAT write up on this project was that I taped the new antenna wire to the old one and traced it back through that way. It allowed for a very easy installation on the factory wire clips (which makes me happy) and also kept me from trying to find where in the he## the wire comes through the wheel well back to the dash!
Here is a shot of what I was dealing with prior to the whip, this was the third Autozone cheap antenna that I tried...and of course that stupid motor was still functioning each time I turned the ignition key!!

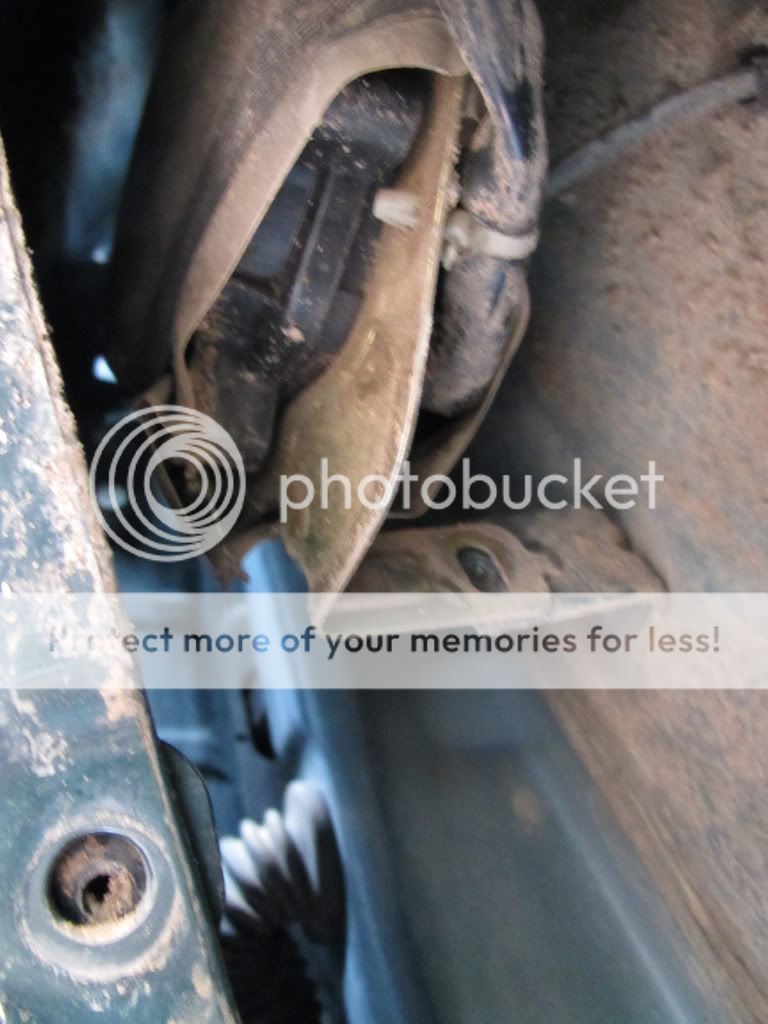
Step 1.) Pull back the splash guard in the wheel well so you can get at the old mast. There are a series of 4 pins to remove the entire thing, I simply pulled the two in the back and bent the plastic back over the tire:


Step 2.) Remove the glove box with two philips screws on the bottom and it pulls right out. Remove and set aside


Step 3.) I also pulled out the part attached to the AC duct right behind the glove box, which I believe was a couple bolts. This allows to easier access to the wire clips for antenna wire. There are 4 wire clips (running from left hand side of the glove compartment all the way across) for the antenna wire, the wire needs to be removed from all 4 of these clips so it can be fully removed:

Step 4.) Pull off the dash with the snaps around the outside, a total of 6 (start from the bottom and pull up and outward....CAREFUL not to bust any of the fittings). The unscrew the radio so it can be removed, and take out the factory antenna cable jack:


Step 5.) Remove the old antenna and mast. Do this by unscrewing the single bolt on the bottom of the mast. Then get the screw on the top side of the antenna assembly loose with a dime or a flathead screwdriver (careful not to slip and scratch the paint!). Then pull motor system loose and let hang from antenna wire.
Step 6.) THIS IS DIFFERENT THAN SOME MAY CHOOSE TO DO IT: I cut the factory antenna wire off to use as a wire snake. I used a good amount of electrical tape to fasten the new antenna wire (shown on the bottom with the insulation on it) to the old antenna wire:

Step 7.) Pull the taped wire back through the rubber gromet and then through the entire dash using some care to not tear anything loose. Do this from the inside of the vehicle using the old antenna wire. Start on wheelwell side, and track it all the way to the back of the radio. The tape took a bit of a beating getting through the very beginning, but from there it was an easy operation:


Step 8.) Not photographed Re-attach the new antenna wire to the factory wire clips (all 4 of them), and remove the electrical tape so the old wire can be fully removed and set aside. Pull as much slack out of the wire, leaving just enough to attach new mast on the outside. There is a little bit of extra wire, I just zip tied it down on the inside so it did not work its way out.
Step 9.) Attach new antenna mast to the factory mounting position. My guess is the Tacoma mount does not have the exact dimensions (likely slightly shorter), and so the antenna mast is bent ever so slightly as can be seen here:

Step 10.) Re-attach the locking nut and plastic protector on the top side of the hood to secure and protect the new antenna:

And one of the final product:

I am very pleased with the outcome, and the reception is WORLDS better.
I finally did the whip antenna.
Tools needed:
1.) Socket set, I believe mostly 12 and 14 mm
2.) Philips screwdriver
3.) Wire cutter
4.) Electrical Tape
5.) Tacoma whip antenna parts as listed below
-8630035090 Antenna assy - Manual 1996 - 2002 1 $44.70
-86309AA042 Antenna mast, tacoma, manual 1998 - 2004 $27.94
Only thing I did different from the t4r GREAT write up on this project was that I taped the new antenna wire to the old one and traced it back through that way. It allowed for a very easy installation on the factory wire clips (which makes me happy) and also kept me from trying to find where in the he## the wire comes through the wheel well back to the dash!
Here is a shot of what I was dealing with prior to the whip, this was the third Autozone cheap antenna that I tried...and of course that stupid motor was still functioning each time I turned the ignition key!!
Step 1.) Pull back the splash guard in the wheel well so you can get at the old mast. There are a series of 4 pins to remove the entire thing, I simply pulled the two in the back and bent the plastic back over the tire:
Step 2.) Remove the glove box with two philips screws on the bottom and it pulls right out. Remove and set aside
Step 3.) I also pulled out the part attached to the AC duct right behind the glove box, which I believe was a couple bolts. This allows to easier access to the wire clips for antenna wire. There are 4 wire clips (running from left hand side of the glove compartment all the way across) for the antenna wire, the wire needs to be removed from all 4 of these clips so it can be fully removed:
Step 4.) Pull off the dash with the snaps around the outside, a total of 6 (start from the bottom and pull up and outward....CAREFUL not to bust any of the fittings). The unscrew the radio so it can be removed, and take out the factory antenna cable jack:
Step 5.) Remove the old antenna and mast. Do this by unscrewing the single bolt on the bottom of the mast. Then get the screw on the top side of the antenna assembly loose with a dime or a flathead screwdriver (careful not to slip and scratch the paint!). Then pull motor system loose and let hang from antenna wire.
Step 6.) THIS IS DIFFERENT THAN SOME MAY CHOOSE TO DO IT: I cut the factory antenna wire off to use as a wire snake. I used a good amount of electrical tape to fasten the new antenna wire (shown on the bottom with the insulation on it) to the old antenna wire:
Step 7.) Pull the taped wire back through the rubber gromet and then through the entire dash using some care to not tear anything loose. Do this from the inside of the vehicle using the old antenna wire. Start on wheelwell side, and track it all the way to the back of the radio. The tape took a bit of a beating getting through the very beginning, but from there it was an easy operation:
Step 8.) Not photographed
Re-attach the new antenna wire to the factory wire clips (all 4 of them), and remove the electrical tape so the old wire can be fully removed and set aside. Pull as much slack out of the wire, leaving just enough to attach new mast on the outside. There is a little bit of extra wire, I just zip tied it down on the inside so it did not work its way out.Step 9.) Attach new antenna mast to the factory mounting position. My guess is the Tacoma mount does not have the exact dimensions (likely slightly shorter), and so the antenna mast is bent ever so slightly as can be seen here:
Step 10.) Re-attach the locking nut and plastic protector on the top side of the hood to secure and protect the new antenna:
And one of the final product:
I am very pleased with the outcome, and the reception is WORLDS better.
Last edited:
ameining
New member
LJ's LED kit
So, in my OCD nature and complete ignorance to simplicity it took me more than a day to get this project complete. After realizing the kit comes with the most simple adapters, it was about a 15 minute project!
Parts needed:
1.) Light kit
All that needs to be done is remove the factory bulbs, and then install the appropriate adapter for each light housing. Then use molding tape to fix the LED lights in the desired location.
Just photos of the final install, I am VERY happy with the amount of light provided.
Front Map lights:


Overhead Light:


Cargo Light:


License Plate Light:

GREAT PRODUCT LJ! And the price is great, thanks for the help!!!
So, in my OCD nature and complete ignorance to simplicity it took me more than a day to get this project complete. After realizing the kit comes with the most simple adapters, it was about a 15 minute project!
Parts needed:
1.) Light kit
All that needs to be done is remove the factory bulbs, and then install the appropriate adapter for each light housing. Then use molding tape to fix the LED lights in the desired location.
Just photos of the final install, I am VERY happy with the amount of light provided.
Front Map lights:
Overhead Light:
Cargo Light:
License Plate Light:
GREAT PRODUCT LJ! And the price is great, thanks for the help!!!
Last edited:
Similar threads

- Replies
- 0
- Views
- 2K
- Replies
- 0
- Views
- 83

- Replies
- 2
- Views
- 3K

- Replies
- 2
- Views
- 6K


