HULK Build Thread

It was time for a CB, and of course the PA speaker

TIME FOR SOME FUN with the PA, and CB system!!

Parts:
1.) Uniden PRO520 XL
2.) 4' Firestik Firefly
3.) 18' Coax wire from Firestik
3.) Soldering Gun
4.) Screwdriver
5.) Drill
6.) Hardware
7.) Conduit
8.) Zip Ties
10.) PA Speaker
11.) Electrical Tape
12.) Hack Saw
13.) File


The process is relatively involved if you are doing the PA and the antenna all at the same time. This involves more wiring than I love, but the rest of the project is relatively simple.

Step 1.) Remove Dash. I did this in conjunction with the Whip Antenna, so I had the dash apart already...

***If questions, see previous post on dash removal***

Step 2.) Pull dash out, and remove the ash tray. This involves the removal of two philips screws. Then a cut needs to be made in the housing for the ash tray so the extra length of the CB will fit in the slot:

NOTE: The 'wings' need to remain on the upper portion, so that the CB can mount to them:
CBandPASystem1.jpg~original


Step 3.) Insert the CB in the newly made slot, and fasten. I used zip ties to the CB mounting bracket (small black ones seen. And then a larger one (yellow) to hold the whole unit more stable):

CBandPASystem2.jpg~original


CBandPASystem5.jpg~original


Once I got the unit sitting where I wanted, I decided to do all of my wiring (PA and antenna) before finalizing the dash mount.

Step 4.) Mount PA speaker. The speaker I had came with 10' of wire, so I had enough room to mount on passenger side front wheelwell and then run wire across engine compartment through the firewall on drivers side.
CBandPASystem6.jpg~original


CBandPASystem7.jpg~original


CBandPASystem8.jpg~original


Here is a photo of the wiring I ran. I added conduit to the outside for additional protection.

CBandPASystem10.jpg~original


CBandPASystem11.jpg~original


CBandPASystem12.jpg~original


Lastly, just run the wire to the back of the CB unit and tie down where is necessary to contain the extra wire slack.

Step 5.) Prepare and run the antenna wire.

NOTE: The firestik 18' coax wire requires some soldering. This is not a challenging task, as long as you have a solder. I did not, so I had to purchase one. It is recommended to NOT do the soldering until after the wire is run, this makes the end you are fishing through your vehicle much smaller and easier to work with.

I chose to go through the driver side vent and then through the entire side of the vehicle, also ending up in the drivers side kick panel (similar location to the PA wire).


CBandPASystem19.jpg~original


CBandPASystem21.jpg~original


Wire snake helped in a couple of the locations to get the wire through to reduce the additional parts to be removed:

CBandPASystem23.jpg~original


CBandPASystem24.jpg~original


CBandPASystem25.jpg~original


CBandPASystem26.jpg~original


It is noted that any additional slack would be good to pull through. Leave yourself enough wire in the back of the vehicle to accomodate any mount you have for your antenna, and then maybe a couple inches of slack...but not a huge amount.

Step 5a.) Now it is time to solder the end on the wire now that it is routed so it is ready to be plugged in:

The end parts need to be assembled as shown:

CBandPASystem28.jpg~original


Then solder the gap, and cut off additional wire sticking out of connector:

CBandPASystem29.jpg~original


CBandPASystem30.jpg~original


Step 6.) Complete the running of the antenna wire, with a 90 COAX piece to allow for a deeper fit in the dash. Then mount the dash back in place

CBandPASystem31.jpg~original


***Yes it is mounted offset, I changed this...which is posted on the build***

CBandPASystem33.jpg~original
 
Last edited:
Incredible build up so far, one of my favs, I look forward to more mods. Where did you get all the parts for the Taco Whip mod?? Did you find it off a tacoma or order it?
 
Incredible build up so far, one of my favs, I look forward to more mods. Where did you get all the parts for the Taco Whip mod?? Did you find it off a tacoma or order it?

JLR
I went to toyotapartscheap.com for all of the parts. I can provide part numbers if you would like. The change is well worth the money, and it will match the black CB antenna if I can ever get that installed!!
 
Those seat coves are sweet! how much are they? how much for the TRD logo?

They charged me I think an additional 15 for the extra colors. If you go to their website, they offer quite a few options that will cost no additional I just wanted the mountains....so I had to pay!
 
Yeah that would be great if you could post up the part #s, thanks!


Part Numer: 8630035090
Desription: Antenna assy - Manual 1996 - 2002
Price: $44.70

Part Number: 86309AA042
Description: BLACK Antenna mast, tacoma, manual 1998 - 2004
Price: $27.94

You do not need to get the extra black mast, I just wanted the black once since the rest of the effects are black on my vehicle. The normal color is silver, but I now have a back up option if this one breaks!!

Total for the order was less than $80. Installation time was about an hour since I did it where the new antenna wire went the exact same path as the old one. Also of note is that I cut the wire for the motor, so if I ever want to run it again (which I can NEVER see happening), I will have to do a wire repair. There are guys on here that did it without cutting the wire, but it was beyond me to figure out where the wire went through the wheel well to the passenger dash. The install is clean, and no more motor!!
 
Okay great thanks for the part #'s and install info! Im ready to get rid of this sketch antenna I have.
 
Bed lined factory skid plates

Black out the bottom

When I first started this project I thought I would stick with silver rims and so I threw a couple coats of primer on the skid plates to give it a small silver 'accent'. Since I have gone primarily with black effects on the lower half, I decided to pull them and get them black. I went with Rustoleum Bed Liner.


I am happy with how they turned out, but what should be noted with any of these rattle can paints with the texture is how they have the tendency to drip while spraying. Maybe it is just my poor technique. Since they are on the bottom of the vehicle it is not noticeable.


Some before photos:

TacomaWhipAntenna32.jpg~original


TacomaWhipAntenna33.jpg~original


TacomaWhipAntenna34.jpg~original


A shot of the paint I used, and I threw about 2-3 coats on...then waited 48 hours for everything to dry...sorry my after pictures went MIA so there is not a great before/after comparison...apologies!

Bed20Liner20Skid20Plates204.jpg~original


Bed20Liner20Skid20Plates201.jpg~original


Bed20Liner20Skid20Plates203.jpg~original


Bed20Liner20Skid20Plates209.jpg~original
 
Last edited:
Time for some wheeling

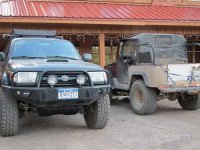
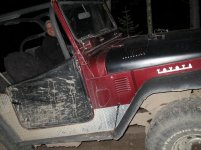
So one of my good friends around where I live has a bad A** FJ40. He has done a huge amount of work to it, and his 350 certainly puts my 3.4L to shame. Either way, he proposed a midnight cruise last night to test out our rigs. The 4Runner did not have any issue keeping up, it was a great little cruise we took.

Yes, my fog lights need some alignment. That has been an ongoing issue with the PIAA's but all the rest of the lights are aligned and work great!
 

Attachments

  • July%20Days%20Off%20(6).jpg
    July%20Days%20Off%20(6).jpg
    107.3 KB · Views: 1,380
  • July%20Days%20Off%20(7).jpg
    July%20Days%20Off%20(7).jpg
    108.3 KB · Views: 1,438
  • July%20Days%20Off%20(8).jpg
    July%20Days%20Off%20(8).jpg
    81.6 KB · Views: 1,371
Last edited:
Great build! Quality parts throughout. I was lovin' the picture of the hot blond helping you out w/wrenching, and the fish sticker on the back window...:thumb3:

This thing is coming along very nicely! Good work sir.
 
Great build! Quality parts throughout. I was lovin' the picture of the hot blond helping you out w/wrenching, and the fish sticker on the back window...:thumb3:

This thing is coming along very nicely! Good work sir.

Thanks for the props BigFish!! I am indeed a fly fisherman, and try to get on the lakes/rivers around my house as much as I can...of course pending I do not have a huge 'to-do' list on the vehicle!
 
Ideas!!

So, since I sold my other car I have been very busy on this build. I work 14 days on/14 days off. So, needless to say, while I am at work I research and then when I am on days off I am busy in the shop.

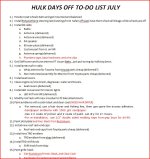
Attached is an example of the 'to-do' lists I like to assemble, however this hitch of work I am looking for ideas!

Right now, in the queue is the 231 Tundra brake upgrade...I would really like to have the red calipers that would be a minor accent, but have yet to see any actual part numbers for this project.

Also, a rear bumper is a must. I would very much like for Shrockworks to make one, and I think I am going to post a new thread to get some ideas that would match my front. But any ideas here would be great!

Any other ideas for my rig??
 

Attachments

  • Example.JPG
    Example.JPG
    125 KB · Views: 1,502
So, since I sold my other car I have been very busy on this build. I work 14 days on/14 days off. So, needless to say, while I am at work I research and then when I am on days off I am busy in the shop.

Attached is an example of the 'to-do' lists I like to assemble, however this hitch of work I am looking for ideas!

Right now, in the queue is the 231 Tundra brake upgrade...I would really like to have the red calipers that would be a minor accent, but have yet to see any actual part numbers for this project.

Also, a rear bumper is a must. I would very much like for Shrockworks to make one, and I think I am going to post a new thread to get some ideas that would match my front. But any ideas here would be great!

Any other ideas for my rig??

First off, very nice build! I really need to do that Tacoma whip mod. For red calipers, Advance Auto has a caliper paint kit that works quite well. I used it a couple months ago when I tore my whole front end apart to do a bunch of maintenance. I believe it was around $20 or so. I like it and gives a subtle accent. I have also been debating whether to powder coat my 5 stars as well, and figured my red calipers would look even better behind the black. As for other ideas, have you thought about doing an external transmission cooler to prevent the dreaded pink milk shake?
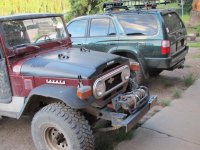
Question: since the powder coating, where did they put the wheel weights when balancing? My 33's take quite a few weights and I don't particularly want them on the outside of the wheel if I decide to go black w/ my wheels. I asked about them using the stick on ones, but he basically told me it take a whole lot of them to balance it right and wasn't willing to try (may be finding a new tire guy anyways lol).
Again, nice rig!
 
First off, very nice build! I really need to do that Tacoma whip mod. For red calipers, Advance Auto has a caliper paint kit that works quite well. I used it a couple months ago when I tore my whole front end apart to do a bunch of maintenance. I believe it was around $20 or so. I like it and gives a subtle accent. I have also been debating whether to powder coat my 5 stars as well, and figured my red calipers would look even better behind the black. As for other ideas, have you thought about doing an external transmission cooler to prevent the dreaded pink milk shake?

Question: since the powder coating, where did they put the wheel weights when balancing? My 33's take quite a few weights and I don't particularly want them on the outside of the wheel if I decide to go black w/ my wheels. I asked about them using the stick on ones, but he basically told me it take a whole lot of them to balance it right and wasn't willing to try (may be finding a new tire guy anyways lol).
Again, nice rig!

UARandy,
Thanks for the compliment! I hightly recommend the Taco Whip antenna, it has increased my reception greatly and I no longer suffer from a broken mast and stupid motorized system.

As far as wheel balancing, I was on the same page with NOT wanting the weights mounted on the back side. The 33" tires take a huge amount of weights, and I called around tire shops to price shop and just talked to their managers about letting me observe the balancing. I also had them CONFIRM that they can use the weights on the inside of the wheels. They are 1/4 oz sticky weights, and you are right with that much rubber there is a S*** ton of them. Either way, they balanced as well as they can and the counterweights are only visible if you get up close to the wheel. So, like you said, just call around and you will find a shop who is willing to help you. With my OCD, I have always liked shops who let me stand over them while they balance to ensure they do the best job possible.
 
Last edited:

Members online

No members online now.

Forum statistics

Threads
278,306
Messages
3,554,045
Members
248,016
Latest member
Advally Service

Trending content

Back
Top