Huskey's Build

love those taillights. what kind are they? runner looks sweet too

Bermuda Black LED Tail Light

Edit: They weren't a "perfict fit" as they had a slight amount of side to side movement, pivoting off the two holding studs. Easy fix was to cram a bunch of the packing foam that they came with between the light and the body just to make it a little more snug towards the outer edges of the lights.
 
Last edited:
On a scale of 1-10 how hard/time consuming was the locker install?

Im planning on doing front and rear mabye this year.

BTW Sick Truck and Cool dog!!
 
On a scale of 1-10 how hard/time consuming was the locker install?

Im planning on doing front and rear mabye this year.

BTW Sick Truck and Cool dog!!

The dificulty of it all is relative to the persons experience doing it, I've never opened up a rear axle before so for me alone, I would have not done it, also because I have no shop. However my cousin is a heavy duty mechanic and has helped me out with most of the "larger" mods I've done to the truck, and has everything needed to do anything in his shop. For him it was an easy job as it wasn't some silly big dump truck axle we were opening up.

As for the time taken, If you order everything, then you could push hard and have it done in a day or enjoy spending a weekend on it. It took us extra long because when we saw the sloppyness in the bearings, we decided to order new bearings and had to wait. This gave alot of time to work with, and ended up drinking more beer then doing any work in any given day.

I recommend doing the bearings, the condition of them wasn't so bad but they were a little loose, also do all the shaft seals, that was something we had planned for (my back right side was previously leaking)

Unfortunatly I have no pics of the installation, usually to busy and always to dirty to think about pictures.
 
After a funtastic day exploring new terrain I thought I should post a few pics. Unfortunatly where the damage occured, there was no camera out to take the pics. Actually the camera didn't come out very much at all today, but here's what we have...

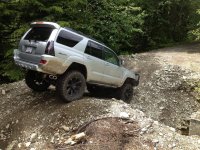
The damage occured on our way into the watershed. We didn't know it was a restricted area until we found a way out. There was no gate goin in beacause of the landslide and tree leaning up hill where entrance looked too challenging for most.

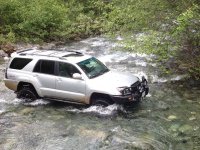
Here we are crossing the creek just above the dam

creek.jpg

And here is a crossditch blocking the exit, just after this was the gate, which was suprisingly simple to get around compared to the rest of the day.

aproach.jpg

exit.jpg

Here's the damage from the tree that I slipped into while on a funny angle trying to get up and around it. Its the first actual dent I put into the runner and I don't feel too bad about it (no paint damage). As for the plastic that was ripped off, its just an excuse to get the Perkins rack I like so much.

dent.jpg

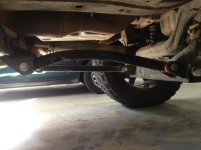
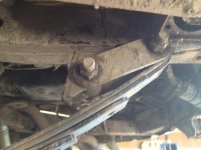
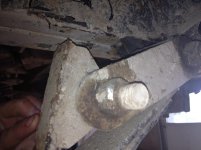
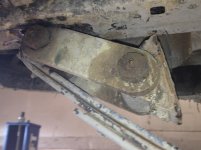
When I slipped over into the tree, a large rock/boulder was kicked out from the tire and hit my suspension support bending it up. After this it still drove well, looks like the crossmember and bracket are still straight and its only the bushings that are pulled out of place. Plan is to order a new support and bushings and do an alignment check once I get it installed.

oops.jpg

It was a great day regardless of the damage done :D
 

Attachments

  • creek.jpg
    creek.jpg
    140.5 KB · Views: 1,527
  • aproach.jpg
    aproach.jpg
    137.5 KB · Views: 1,523
  • exit.jpg
    exit.jpg
    136.1 KB · Views: 1,546
  • dent.jpg
    dent.jpg
    52.5 KB · Views: 1,528
  • oops.jpg
    oops.jpg
    75.5 KB · Views: 1,905
So I broke it again this week, about 700 Km's away from home. Only 20 Km's (offroad and not so casual) away from a welder but he was unavailable for 4 days :)

Anyhow, got it patched up for now but needs some better fabricating to strengthen the frame.

Here's what broke, actually it took the chunk of frame it was welded to clean off.

IMG_0513.jpg

Here is a better view of the hole left behind...


IMG_0514.jpg

And here you can see the "lower" side of the shackle up in the hole.
No damage to shackle, leaf or bushing :cheers:

IMG_0516.jpg

The other side was cracked all around the weld but didn't break - if it had it would have messed up the exhaust. The welder charged me 45 minutes of welding to fix it all up.

Lesson learnt: 4th gen frames are THIN. I never had a chance to measure it but no more then 3 mm, 2.5 at best. The seam split as well. It wont be offroad until it is properly reinforced above both front and rear shackles.
 

Attachments

  • IMG_0513.jpg
    IMG_0513.jpg
    108.8 KB · Views: 1,556
  • IMG_0514.jpg
    IMG_0514.jpg
    103.5 KB · Views: 1,624
  • IMG_0516.jpg
    IMG_0516.jpg
    98.2 KB · Views: 1,554
Nice rig.

Truck looks like you get an idea, figure it out, and do it. Good deal. Someday I'll have the place and resources to leaf the rear and 3 link the front. Until then ill follow your build thread. That sucks lots of plating to do.

We had a border collie/husky for a while. She ate my headliner out of my quad cab Dakota after being in my truck overnight and a black bear came in at the Vineyard. LOL I also liked the husky video on youtube.
 
So I finally got around to taking a few pictures of what's been done to her.

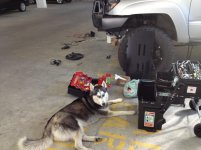
Here's my personal assistant...

IMG_0803.jpg

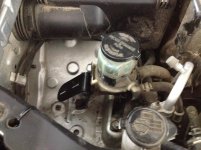
I removed the mount for the power steering fluid tanks and put the mount there:

IMG_0807.jpg

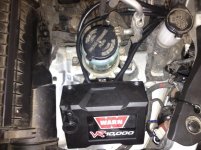
As the stock Warn cables were all now too short I had to replace all of them, and even purchased a 30$ crimping tool for the 1 through 4 guage wire.

IMG_0828.jpg

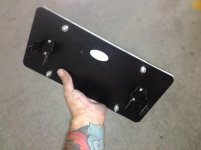
And I finally purchased my plate mount for the fairlead

IMG_0832.jpg

End result is a much cleaner looking front end :cheers:
 

Attachments

  • IMG_0803.jpg
    IMG_0803.jpg
    82.3 KB · Views: 1,444
  • IMG_0807.jpg
    IMG_0807.jpg
    109.6 KB · Views: 1,446
  • IMG_0828.jpg
    IMG_0828.jpg
    112.2 KB · Views: 1,431
  • IMG_0832.jpg
    IMG_0832.jpg
    53.6 KB · Views: 1,521
Here's a few more pics, mainly the radio install with a few other pics of whatever I thought worthy of this thread:


Here's the two holes I made throught the fire wall for all my wires. The unused hole on the right was done as it was an easier angle to get the drill at it however there is a steel plate behind it (unseen from inside the cabin) for part of the parking brake support. Anyhow, the hole I used was made with many small holes, pliers and a file - its not pretty but it works.
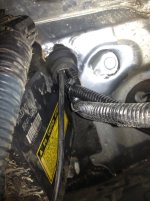
IMG_0826.jpg

This was basically the only place left to install the speaker for talking to the dog.
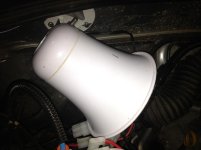
IMG_0824.jpg

Below the speaker is where the compressor sits for the rear diff locker
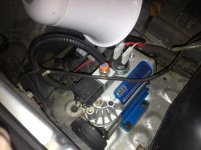
IMG_0825.jpg

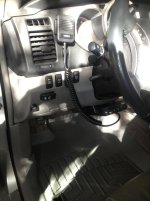
Here's where the radio sits, had no choice as the antenna cable just barely made it to here. The switch to the left of the fuse box opening is for the KC, the switch hidden behind the Uniden cable is for the compressor and the the horisontal switch is for the rear locker.

Almost forgot, got me some beauty floor liners!
IMG_0830.jpg

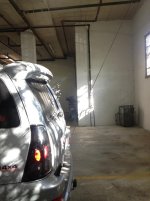
Here's the antenna mount, cable goes down the frame, and up through my uber messy firewall hole!
IMG_0834.jpg

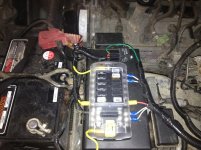
Here's my attemp to tidy up the wireing under the hood, actually it made a huge difference to install a secondary fuse box - and yes, i left enough space to get into the existing fuse box!
IMG_0827.jpg

Here's my temp hilift mount!

IMG_0835.jpg

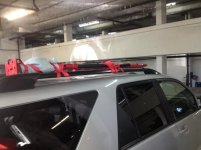
Things to come are my rear CBI bumper, and SW roofrack - who knows when!

 

Attachments

  • IMG_0826.jpg
    IMG_0826.jpg
    95.4 KB · Views: 1,484
  • IMG_0824.jpg
    IMG_0824.jpg
    55.4 KB · Views: 1,559
  • IMG_0825.jpg
    IMG_0825.jpg
    81.9 KB · Views: 1,471
  • IMG_0830.jpg
    IMG_0830.jpg
    78.1 KB · Views: 1,463
  • IMG_0834.jpg
    IMG_0834.jpg
    83.3 KB · Views: 1,483
  • IMG_0827.jpg
    IMG_0827.jpg
    120 KB · Views: 1,482
  • IMG_0835.jpg
    IMG_0835.jpg
    71.4 KB · Views: 1,495
Love the weird angle CB antenna. Actually makes me chuckle a bit. But, dude that's awesome wish I had a rear locker though...
 
Bad news

So ICBC (insurance) didn't want to touch the truck due to the water/electrical damage which is abundant, they called it a total loss. Some luck - I purchased a vehicle replacement plan and will get my full initial purchase value back in cash. So I lose the 4runner, but have already put a down payment on a 2012 pickup. Not a toyota because of the deal I got on it and I didnt like the new Tundra when I test drove it.

I managed to salvage some parts before it goes to the crusher this week. Parts I'm still willing to sell include the rims and tires, the front bumper and the weathertech liners. All the rest is being kept or already sold. Unfortunatly I am not allowed to take off the suspension and sell it or the aftermarket lights. I had to fight to keep my bumper. I am keeping my KC lights though.

Anyhow, thanks for the help on here with everything, some prety solid people out there in 4 runners.
 
NOOO!!! Dang it man, that's the saddest news I've gotten in a while. I loved that truck. I was gonna nominate you for T4ROTM next 4th gen go around since I didn't get a chance to this past time.

I'd take those tires off of you in a heartbeat if you weren't so damn far away.

Anyway, I wish you the best with your future rig Huskey!
 

Members online

Forum statistics

Threads
278,307
Messages
3,554,049
Members
248,016
Latest member
Advally Service

Trending content

Back
Top