Installing TRD Pro bumper trim pieces on SR5

to quote TheG00ds from earlier in this thread:

"Step 3: Use dremel to create slots. There are 13 indication marks on the bumper."


That's the whole reason I reordered it. Hardest part should be removing the bumper, but I'm about to be home for two weeks once our baby girl is born so I'm ready!!

AWESOME!!!!!!!!!!! I just wanted to reconfirm, I have dropped the bumper before it's actually not bad at all. Thanks for finding the sites with the good prices to BTW I appreciate it.
 
AWESOME!!!!!!!!!!! I just wanted to reconfirm, I have dropped the bumper before it's actually not bad at all. Thanks for finding the sites with the good prices to BTW I appreciate it.

No worries man, just glad I still had all the skus handy.

As for front bumper removal, do you know of any write ups on here for reference?
 
No worries man, just glad I still had all the skus handy.

As for front bumper removal, do you know of any write ups on here for reference?

Its been awhile since I have last done it, but I believe you pop the hood remove the radiator cover then there are bolts in there you remove them, I believe I also unbolted the bumper from the splash guards and that was it. all your really removing is just the bumper skin so it should be pretty straight forward. I'm sure someone on here has a wrietup, if not hit up Demello I'm sure they know how it comes off.
 
Big thanks to Hook Em' Horns and [MENTION=121887]TheG00ds[/MENTION]

Went ahead and pulled the trigger on the TRD pro front bumper valence and clips. Also ordered the blackout emblem kit that Hook Em' Horns posted up. No more plastidip for this guy

Word to folks who have thought about the vinyl wrap option. I had the vinyl wrap and I guess the installers didn't do a great job because at the very bottom of the center section of the front bumper where it meets my RCI filler plate the wrap started to peel up and look like shit, so if your getting the wrap done make sure they do a good job of wrapping where the bottom of the bumper ends.
 
Last edited:
Big thanks to Hook Em' Horns and [MENTION=121887]TheG00ds[/MENTION]

Went ahead and pulled the trigger on the TRD pro front bumper valence and clips. Also ordered the blackout emblem kit that Hook Em' Horns posted up. No more plastidip for this guy

Word to folks who have thought about the vinyl wrap option. I had the vinyl wrap and I guess the installers didn't do a great job because at the very bottom of the center section of the front bumper where it meets my RCI filler plate the wrap started to peel up and look like shit, so if your getting the wrap done make sure they do a good job of wrapping where the bottom of the bumper ends.

You got it, bud! For those wondering, here is the link for the blackout kit:

https://nox-lux.com/product/2014-2015-4-runner-black-out-kit/

\m/
 
Last edited:
Can't stop, won't stop.

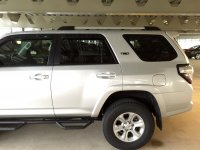
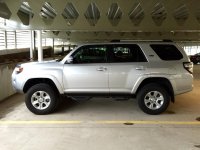
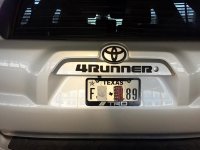
So yeah...Even though I ordered the roof rack end caps and badge/emblem black out kit, I just couldn't help myself and dipped them last night. I fig this will hold me over until I receive the new items and to be honest, I just had to see how clean its gonna look. Oh, and threw on the new color-coordinated TRD license plate frame too!

Baby girl is due Sunday, so this gave me something to pass a few more hours as we anxiously wait for her arrival :)
 

Attachments

  • Dipped Roof Rail End Caps.jpg
    Dipped Roof Rail End Caps.jpg
    127.9 KB · Views: 13,690
  • Dipped Roof Rail End Caps - Side.jpg
    Dipped Roof Rail End Caps - Side.jpg
    129.9 KB · Views: 10,400
  • Dipped Rear Nameplate & Emblem.jpg
    Dipped Rear Nameplate & Emblem.jpg
    133.3 KB · Views: 11,185
So yeah...Even though I ordered the roof rack end caps and badge/emblem black out kit, I just couldn't help myself and dipped them last night. I fig this will hold me over until I receive the new items and to be honest, I just had to see how clean its gonna look. Oh, and threw on the new color-coordinated TRD license plate frame too!


Baby girl is due Sunday, so this gave me something to pass a few more hours as we anxiously wait for her arrival :)


Hey is there a post or thread you can point me to on how to get the roof rack end caps off? Or where to order them in black? I really like how that looks.
 
Hey is there a post or thread you can point me to on how to get the roof rack end caps off? Or where to order them in black? I really like how that looks.

For part numbers and merchant sites, look on the previous page in this thread, post#38.
As for removal, I followed the YouTube video 4RunnerPro mentioned. It's easy as 1-2-3 ��
 
Last edited:
53901-35250 Front TRDP bumper valance - $159.26
7539235220 Bumper valance clips (13@$1.34) - $17.42
63491-35030 + 63492-35030 TRDP roof rack Front end caps (black) - $38.55 per
63493-35030 + 63494-35030 TRDP roof rack Rear end caps (black) - $39.86 per
7681135220 TRDP rear lift gate handle panel (black) - $115.16
7543135050 New rear nameplate (4RUNNER) - $43.75
7543206030 New rear Toyota emblem - $12.14

You can find great pricing at the sites below:

Toyota Online Parts | toyotaonlineparts.com

AutoNation Toyota Gulf Freeway Parts - Genuine OEM Toyota Scion Auto Parts and Accessories - Houston, TX

Find Toyota Parts at Discount Toyota Parts - AutoNation Toyota South Austin


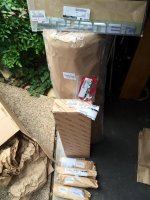
Missed the FedEx guy yesterday, so you best believe I was outside waiting for him today!!
Now I get to learn how to remove front bumper..lol
 

Attachments

  • image.jpg
    image.jpg
    134.8 KB · Views: 8,759
Awesome Man!!!! Please Post Pics Of All the Goods Unwrapped & Play By Play - I just found out I have Sunday & Monday Off so I will be installing my front and rear valances I hope.
 
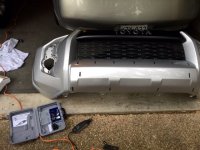
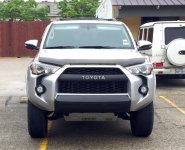
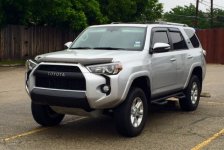
TRD Pro front bumper valance panel & roof rack end caps

Wooooooooooo!! (Ric Flair shouting)

I have to say I’m feeling damn good about completing this mod. I was able to get the front bumper off much easier than expected. If you've already done the TRDP grille then it won't be hard, as the bumper pops/snaps right off just like the upper grille section. If you don't already own one, add $50 to this mod's cost for a Dremel. I got mine for $50 at HD and it came with a pack of bits, which included the one I needed.
The biggest tip I can give you is about the three screws in the fender/wheel well area. After you remove all screws and before pulling bumper away, make sure you go back and pull bottom two holes slowly away from the clamps. For the top screw, you will notice that area has a nipple that fits into the hole--You will need to slowly pry the nipple out (unlike the others that just snap away).

Once you have removed all screw and separated all clamps, pull bumper up and away. You will be scared its gonna break right before it starts snapping away, trust me. Let's just call it a leap of faith lol

I also took off my dipped roof frack end caps and replaced with the TRDP ones.

I love the way all this black contrasting with our classic silver!!

Next up: Rear gate handle panel and emblem/letters. I have no clue how to go about this one, but assume it will start with removing the inside hatch door panel..

Cheers!!
 

Attachments

  • TRD Pro front bumper valance panel.jpg
    TRD Pro front bumper valance panel.jpg
    80.6 KB · Views: 11,938
  • TRD Pro front bumper valance panel-front.jpg
    TRD Pro front bumper valance panel-front.jpg
    91.2 KB · Views: 19,413
  • TRD Pro front bumper valance panel-2.jpg
    TRD Pro front bumper valance panel-2.jpg
    77.3 KB · Views: 13,626
So yeah...Even though I ordered the roof rack end caps and badge/emblem black out kit, I just couldn't help myself and dipped them last night. I fig this will hold me over until I receive the new items and to be honest, I just had to see how clean its gonna look. Oh, and threw on the new color-coordinated TRD license plate frame too!


Baby girl is due Sunday, so this gave me something to pass a few more hours as we anxiously wait for her arrival :)


I think I've seen you driving near southwest parkway. Bout a month ago right when I got my trail. Possible?
 
Clips do NOT come with the bumper valances... You need to order 13 for the front and 14 for the rear valance if you bought that one also.

I have yet to find time to install mine but I picked up the clips at a local dealership.

TheG00ds used Toyota Part Number: 75392-0R010 $1.35 each which are blue

The Toyota dealership said the clips for the TRD PRO Valance are: 75392-35220 $1.78 each which are white.

They visually look like the same clips just more money and a different color...


Hey bud--Do you or anyone else know if the same clips are used for the back bumper cover?
 
I found out I need a couple parts in order for me to complete the rear hatch handle panel, so today I plan to just take off my front skid, tape the TRD and then dip it like My14runner did. We shall see how it turns out.

This should hold me over until the needed seal comes in for the rear handle panel portion of the project..
 
Hey Dave (my14runner) -Any pointers you can share in regards to dipping the front skid?

I see the main bolts and what looks to be some I will have to hit with an Allen wrench..?

How many cans will project require?

Did you just tape up the lettering and then apply 4-6 coats?

Did you then just cut the overspray that got on taped lettering with a box cutter?

Thanks in advance for any insight you provide!!
 
Hey bud--Do you or anyone else know if the same clips are used for the back bumper cover?

Sorry for the delay, I had a interwebz free weekend.

Based on talking to the local Toyota Parts Dealership they are the same part # for the rear clips as the front. You need 13 for the front and 14 for the rear.

I still have yet to do mine, work and prego wife have taken most of my time lately.

Let me know how it goes.
 
Hey Dave (my14runner) -Any pointers you can share in regards to dipping the front skid?

I see the main bolts and what looks to be some I will have to hit with an Allen wrench..?

How many cans will project require?

Did you just tape up the lettering and then apply 4-6 coats?

Did you then just cut the overspray that got on taped lettering with a box cutter?

Thanks in advance for any insight you provide!!


I will try to help you out, but I have never dipped my skid plate "I have an RCI front Skid", but don't see it being to overly difficult. I'd say since the skid plate is a high traffic area you'd want to hit with at least 8 coats, I'd tape up the lettering and try to get the lettering taped off the best you can, I have yet to get a perfect line with plastidip but have came close. I'd say get four maybe five cans of plastidip to be safe "I like to have too much of a product then too little". Once your done with your last coat, give it about 20 mins and while the dip is still tacky use a box cutter, a tooth pic or whatever to peel the tape off of the letters. Then I'd let it dry for 8-12 hours then put it back on the runner take pics and post them on here.
 
Last edited:

Members online

Forum statistics

Threads
278,315
Messages
3,554,104
Members
248,016
Latest member
Advally Service

Trending content

Back
Top