Inv4drZm's Build Thread

Lol, gotta get it done so you can get to work and make that money for more parts!

The cycle continues.

How much of a pain is it?


Sent from my iPhone using Tapatalk

The front shoe springs werent that bad, the bent rear pins took the longest. I stretched the rear pin enough to rub the back of the hub and 'unlocked' the front pin when I removed the rotor. I tried using the parts kit from Autozone but I couldnt get the spring compressed enough to lock in the rear pin so I reused the original pin I stretched and bent it back a little.

Most use a string or needlenose pliers to compress the spring but I only had 2 tiny screwdrivers. I don't think it was too bad considering everyone seems to absolutely hate it.
 
The cycle continues.


The front shoe springs werent that bad, the bent rear pins took the longest. I stretched the rear pin enough to rub the back of the hub and 'unlocked' the front pin when I removed the rotor. I tried using the parts kit from Autozone but I couldnt get the spring compressed enough to lock in the rear pin so I reused the original pin I stretched and bent it back a little.


Most use a string or needlenose pliers to compress the spring but I only had 2 tiny screwdrivers. I don't think it was too bad considering everyone seems to absolutely hate it.


Everyone makes it out to be worse than doing the headers/manifolds so I’ve been putting it off lol. Also super jealous of your rig by the way, nice build.


Sent from my iPhone using Tapatalk
 
I wonder what I'll be doing this weekend...
Expensive carwash repair.
New aluminum mount plate and cover. I'll probably make a fiberglass or carbon fiber cover using the aluminum one as a mold eventually.


Old one:

 
Last edited:
More progress. I think I'll hold the cover down with something similar to a battery tie-down/strap.

Plugged it all in and it works. The newer switchpro is a little nicer than my old one, RGB button panel, some more higher amperage outputs, separate connectors for the button panel and outputs, and a proper cord for the button panel instead of loomed wires. Some other stuff I'm probably missing.

Tomorrow I'll work on wiring my compressor, its all bolted in already.

Oh yeah, set my dial calipers on my tire and drove off, good thing they weren't Mitutoyo's. Used to use them all the time at my old job. RIP.


Success today boys and girls.

I cut an access panel in my cargo drawer system to make the connections/ check on things.


Routed all the cables through the cable tray along the doors. Connectors and air locker connections stowed under my seat.


One of the jobs I hated to do most was push wires through the firewall grommet. I figured out a good way to do it easily, poke a small rod through the engine side being careful not to poke the factory harness just on the inside (a small bend helps), tape the wire you want to pull through with a couple dozen wraps, and slowly pull.


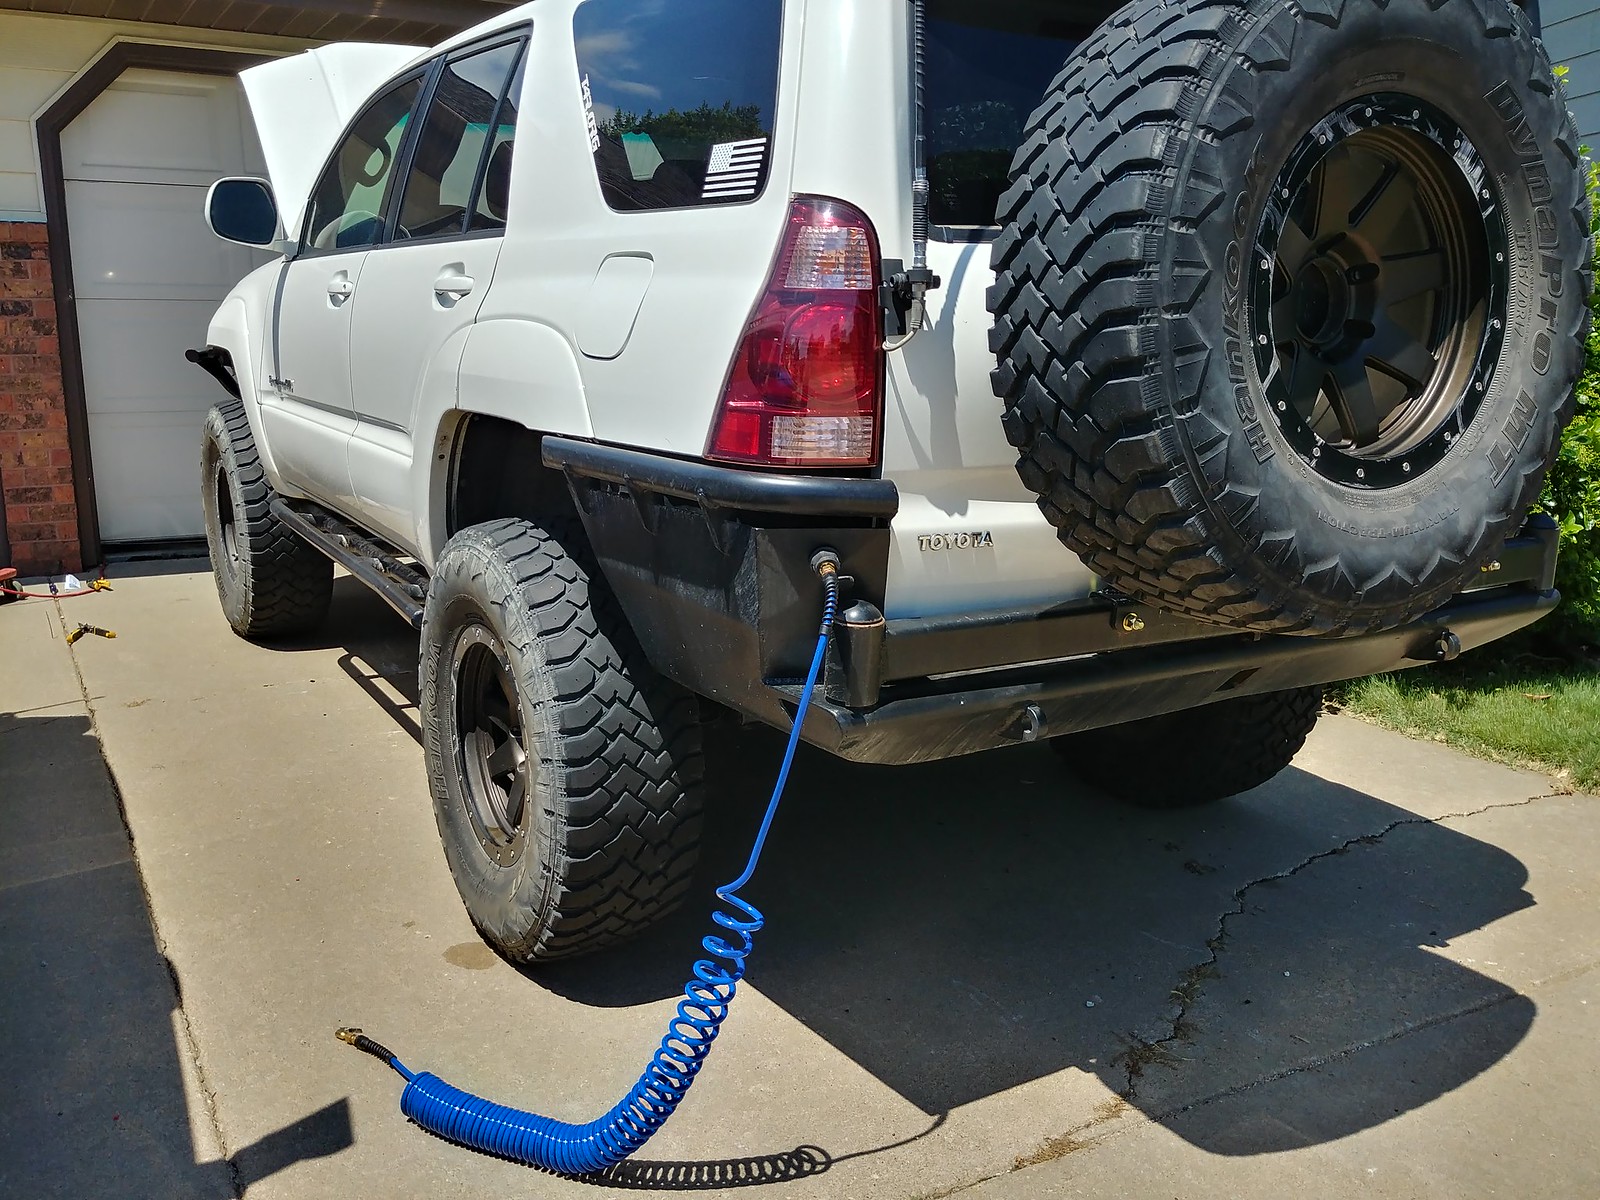
50psi regulator for locker manifold, full gallon tank at 150psi for tires/tools. Screws used as temporary manifold mounting. LOL.


Airing up tires is as easy as plugging in the hose. Nothing beats the sound of the twin ARB's firing up. Now ECGS ship my differentials, I'm ready.

 
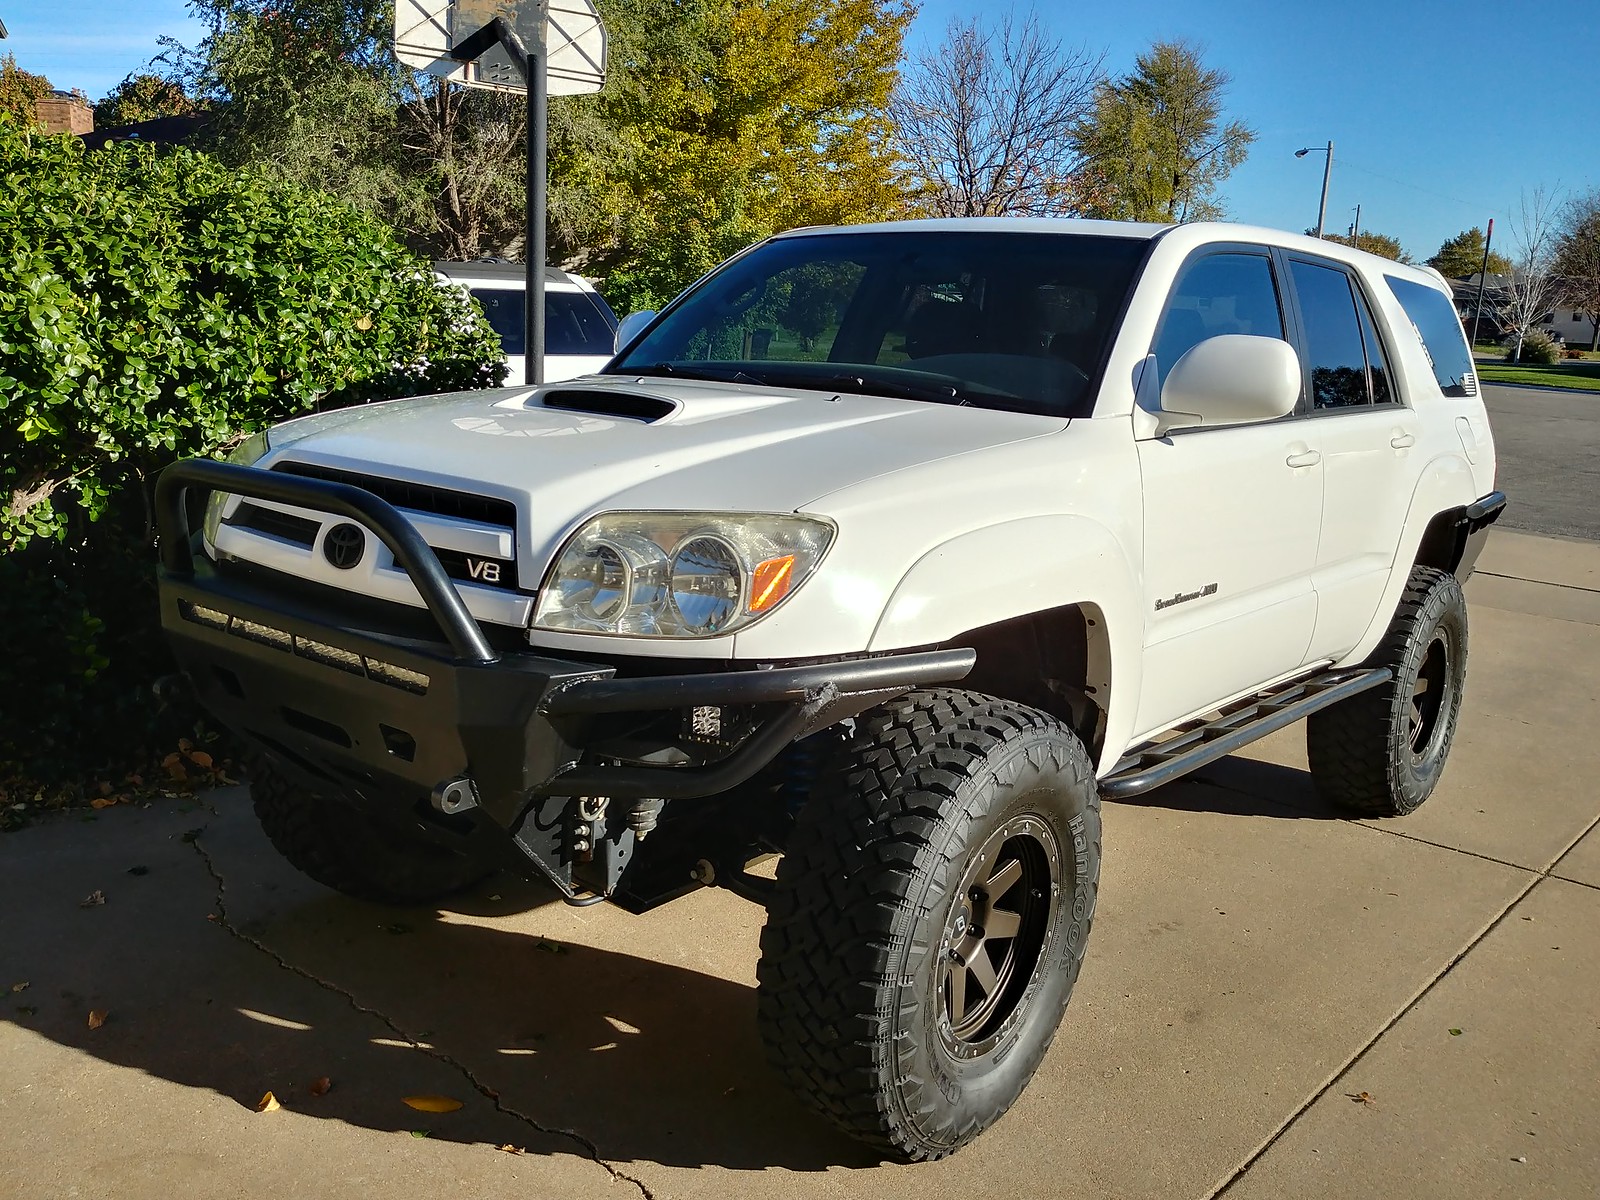
I want that bumper!
is there a company offering a front bumper like this? I haven't found any, I don't understand how you can build this badass bumper but companies who's business it is to make bumpers hasn't made one like this for the 4th gens.

I'm not sure why all 4th gen 4Runner bumpers practically look the same.

If a shop wants to differentiate itself from the competition a tube bumper would be the ticket. You and I would bet plenty of other guys would be interested.
 
Looks like I'm getting a new driveshaft made, the shop I took it to (Inland Truck Parts) seems to think it can't be cut/shortened due to its design. They said they could make one but ordering one from their supplier I guess is cheaper/easier so that's what we're doing.

$550, wish me luck.
 
Got the driveshaft in today. Looks like 1310 spicer joints but they measure a hair larger than the OEM joints so I guess the OEM isn't 1330 like I thought.

The guy said they couldn't cut and shorten the one I brought in because the tube necks down right before the weld on the yoke (1st pic) and it is an oddball tube size so they couldn't just retube it. (You can't cut in the middle either).

$50 in tax made the total over $600 unfortunately.

ECGS said to shorten the driveshaft 'rule of thumb 1 inch' but I guess they haven't tried to shorten one themselves. Price of being the guinea pig.


Got further on the 'splashproof' cover for my Switchpros this friday evening

Like I said I might eventually make a carbon fiber version so I didn't finish the rough spots too much yet.


Installed a used set of 06' style OEM headlights w/ Auxbeam LED's. Waiting on the H11 adapters to come in to try the low beams.


It seems like every 4th of July I'm welding on something. Front bumper, rear bumper, now this crossmember.


First, capped the tire carrier tube that was leaking water and dirt onto my hatch.


The crossmember:
Maybe it'll stop the bumper/body rub?


howd it go replacing the headlights?


i have had brand new in box as pretty much my only overhanging project for awhile. i have TYC projector replacements. i know about the pesky behind fender bolt for the process (some dont bother replacing this one always even though i might be able to get it), but is it a pain to disconnect all the wires? i dont love electric (ironic because i have been 5 years inside sales/finance for a honeywell commercial fire alarm business) and the mess of wiring is what keeps me procrastinating this project.

kickass rig by the way - miss you and your bro's wheeling shots
 
howd it go replacing the headlights?


i have had brand new in box as pretty much my only overhanging project for awhile. i have TYC projector replacements. i know about the pesky behind fender bolt for the process (some dont bother replacing this one always even though i might be able to get it), but is it a pain to disconnect all the wires? i dont love electric (ironic because i have been 5 years inside sales/finance for a honeywell commercial fire alarm business) and the mess of wiring is what keeps me procrastinating this project.

kickass rig by the way - miss you and your bro's wheeling shots


I just finished a retrofit using some parts from tyc and some oem parts
With the tyc I would definitely recommend finding a way to seal the lens better or I can almost guarantee that they will fog up on you
Your options would be to open them up and replace the glue with a better quality glue or the easier but less guaranteed way would be to just silicone around the entire housing
As for the pesky bolt you will be cursing up a storm taking it out and you’ll want to get it back in so the light is more stable and you can aim the light correctly. I found out the easiest way to do this is take the extra 30 minutes and pull off the front bumper fascia to get to that 4th bolt
 
I just finished a retrofit using some parts from tyc and some oem parts
With the tyc I would definitely recommend finding a way to seal the lens better or I can almost guarantee that they will fog up on you
Your options would be to open them up and replace the glue with a better quality glue or the easier but less guaranteed way would be to just silicone around the entire housing
As for the pesky bolt you will be cursing up a storm taking it out and you’ll want to get it back in so the light is more stable and you can aim the light correctly. I found out the easiest way to do this is take the extra 30 minutes and pull off the front bumper fascia to get to that 4th bolt

thanks for info - i dont want to clutter this guys thread too much. i might clear silicone the outside but at the time i did plenty of research to conclude the TYC are prob the best oem-replacement, with lots of strong reviews/non leakers compared to the others i researched; still might silicone and ill have my stockers if i run into anything like that. thanks for info on that bolt. im more concerned if its a pia to disconnect all the wiring harnesses from the old lights (sounds like the bolt will be bigger issue) to the new ones.
 
howd it go replacing the headlights?


i have had brand new in box as pretty much my only overhanging project for awhile. i have TYC projector replacements. i know about the pesky behind fender bolt for the process (some dont bother replacing this one always even though i might be able to get it), but is it a pain to disconnect all the wires? i dont love electric (ironic because i have been 5 years inside sales/finance for a honeywell commercial fire alarm business) and the mess of wiring is what keeps me procrastinating this project.

kickass rig by the way - miss you and your bro's wheeling shots

Easiest mod so far, like 10min each side. But my tube bumper made it real easy to access the bottom bolts. Depress the tabs on the connectors with a screwdriver and they'll sort of pop open by themselves. That, or remove the headlight first and access the wires after pulling it out a couple inches but again, that might have worked due to my bumper design.

Also, I haven't messed with incorporating the turn signals into the housings. I still have my LED strip zip-tied to my LED pods which are still working surprisingly well as turn signals.

We leave for Moab on the 12th so stay tuned for pics. :photo:
 
Another FJ in our driveway, silver w/ red accents from Vermont making her way to Moab. That time of year again already? I noticed her fender liner air intake might make a perfect addition to the 4Runner. The part is only $21 on ebay... it should fit and help cover splashes.


How the 4runner's liner looks once you trim:


Another difference I noticed with the FJ, the power steering lines on both sides of the frame rails/bumper are tucked in. Might be another worthwhile mod to route mine out of harm's way.

The 4runner's:


A grinder and paint make me the welder I ain't.


Buffed and clear-coated my headlights, and buffed my brother's. Will be aiming my new headlights tonight and trying them out.


 
Do you have a link to the fender liner? Thank you!


Another FJ in our driveway, silver w/ red accents from Vermont making her way to Moab. That time of year again already? I noticed her fender liner air intake might make a perfect addition to the 4Runner. The part is only $21 on ebay... it should fit and help cover splashes.


How the 4runner's liner looks once you trim:


Another difference I noticed with the FJ, the power steering lines on both sides of the frame rails/bumper are tucked in. Might be another worthwhile mod to route mine out of harm's way.

The 4runner's:


A grinder and paint make me the welder I ain't.


Buffed and clear-coated my headlights, and buffed my brother's. Will be aiming my new headlights tonight and trying them out.


Members online

Forum statistics

Threads
278,309
Messages
3,554,066
Members
248,016
Latest member
Advally Service

Trending content

Back
Top