Inv4drZm's Build Thread

Just be careful. Don't mount to both body and frame unless you add a joint to account for flex.

It looks cool, but might make later work a pain (Checking UCA torque, greasing UCA, o2 sensors etc) Just soemthing to think about

It probably won't be much worse than the factory rubber liners. Maybe even easier not having to deal with those clips. Just a couple bolts is all.

Yeah it seems all the jeep ones only mount to the body.
 
It probably won't be much worse than the factory rubber liners. Maybe even easier not having to deal with those clips. Just a couple bolts is all.

Yeah it seems all the jeep ones only mount to the body.

Fair enough lol. I switched to the Ford style tree clips, progressively bigger from the tip, just jam in until they grab
 
My man! Super sweet build. Where did you get that rear tire carrier, I don't see it listed on your build.

I built it myself. Most of it is on page 7 but it is scattered throughout the thread.

For the last year or so I've had a 4X4Labs rear bumper instead of just my tire carrier though.
 
I'm trying to source 2 axle backing plates so ECGS can build my D60 without me having to tear apart my axle and ship them mine. They are having trouble sourcing them.

They are around $225 each on ebay, you have to buy the axle shaft/bearing assembly with it.

Passenger Rear Axle Shaft 42311-60240 Fits 03 04 05 06 07 08 09 Lexus GX470 OEM | eBay

I thought my brother said they were around $250-300 each new from Toyota but I can't find the part #'s.

EDIT: found the part #s

46503-60131 RH
46504-60091 LH

Cheapest new is $454 from Partsouq
 
Last edited:
Noticed a CV boot clamp came loose :( Had it fixed 20 minutes later.


I have about 1.5"-1.75" of room to compress my current driveshaft, but a guy on the FJ forums said his ended up being 43.25" long w/ the D60 and mine currently is 46" long which is 2.75" of difference so I might be cutting closer to 2" off.


Compressed all the way:

 
Last edited:
Restored the rear bumper to her former glory. Finally welded the rear spindles properly after the weld failure in Moab last year, and mounted the spare back on, its been riding in my hatch for almost a year.

Oh yeah, got the ECGS D60 'on order' should receive it in little over 1 month... Was going to go 4.56 with 37's/potential supercharger, but decided 4.88s would be best with some of these new IFS components coming out that can handle 40s. In case a 25% increase in crawl ratio isn't enough, front and rear ARBs of course.

Other specs: +6" track width and 35 spline chromoly shafts.


Engine hoist worked better than the pallet jack. This sucker is heavy and awkward but I managed it by myself.


Freshened it up with a new coat of paint while I had it off:


Engine oil change, had 10,500 miles on it... Still using Mobil 1 Synthetic.

Washed my AEM air filter too. Part of me wants to go back to a stock paper filter for quick changes and better filtering but paper is useless if it gets wet.

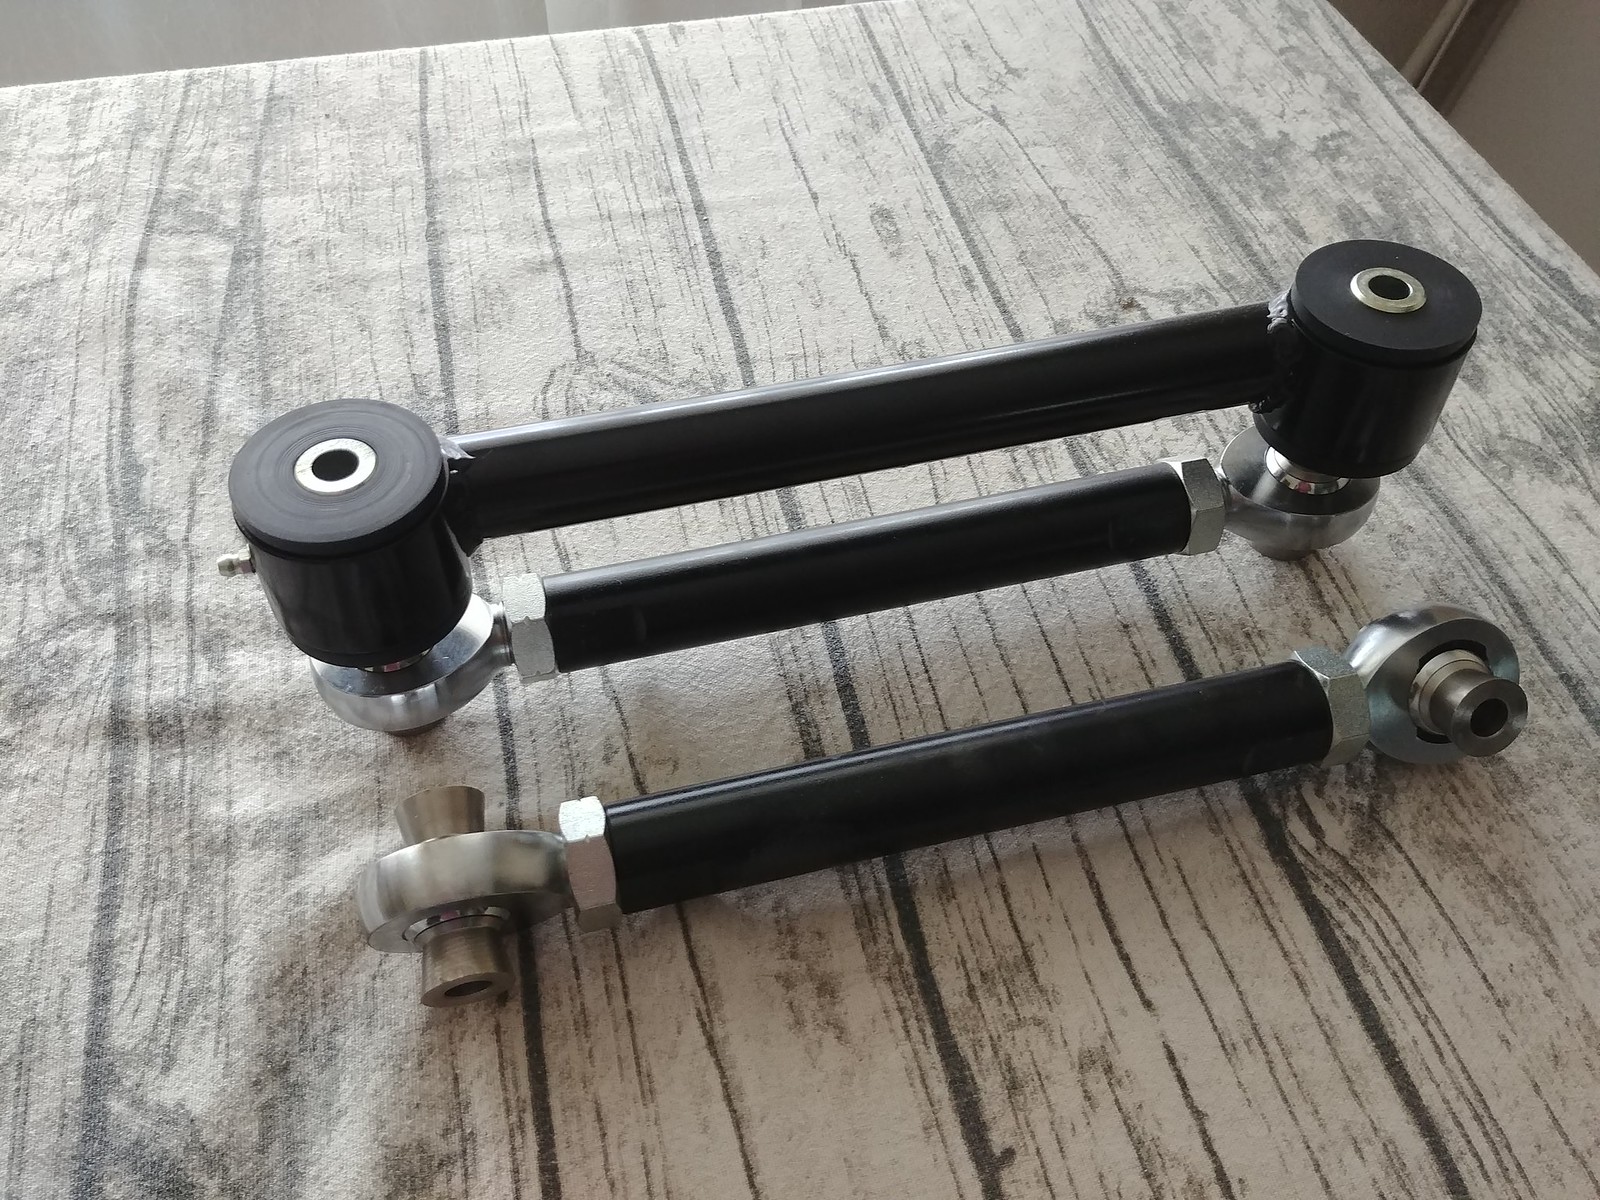
Also installed the upper links today, I already installed the lowers last weekend. I lengthened the lowers by 1/4" and the uppers by 3/8". Both sides are heims so I was expecting some added vibrations, but yeah, it's about as bad as I expected. That's just the lowers installed; I'll do some driving with the uppers and see how much worse it gets.

Not ideal but they were cheap and it'll be strong enough for my D60. They'll hold me over until I properly link the rear end.


Front Range Offroad links vs my brother's RESZ Fab offset links.


I just zipped-tied the ebrake cable mount out of the way, no provisions to mount them on these lower links.

 
Nice build!! I'm gonna need around 10k for all the goodies I want to add to my 4runner lol

That's about what I have into it at this point. And I haven't fell in the rabbit hole quite yet.


Started running the air lines for my compressor. ARB quick disconnect point in the bumper shell. Cable gland fitting to seal it off. There is an ARB dust cover I will be using as well for the QD. I installed all of this without removing my rear bumper which I thought was an impressive feat.


Used a step drill to make an access hole. Took 30 min to thread that nut onto the backside of the cable gland without dropping it into the channel and loosing it forever. A plastic snap in cap from McMaster-Carr should plug the hole.


Capped:


Now with dust cap installed:

 
Last edited:
I have about 1.5"-1.75" of room to compress my current driveshaft, but a guy on the FJ forums said his ended up being 43.25" long w/ the D60 and mine currently is 46" long which is 2.75" of difference so I might be cutting closer to 2" off.


Compressed all the way:


Did some more measuring for the driveshaft cut. Mainly talking out loud here but some might like the pictures. Looks to be 3.5" of travel before the female end pulls out of the sleeve part. I guess that would be the safe travel amount?

If I have 1.75" to compress it from ride height then that means it has 1.75" of extension left; perfectly centered now. This doesn't really mean anything unless I measure with the suspension compressed and extended to get a ballpark of its current range but I don't think it compresses more than .5" and extends more than 1".

So cutting 1.75" might be good? If the new diff is 3" larger I'll still have .5" of compression room and if it is only 1" larger I'll have 1" of extension room + a couple more inches of splines.


EDIT:

So it extends from 1.75" of room at ride height to 2.25" of compression room when I jack up the bumper to get both rear shocks extended. So my estimate of 1" extension is wrong, its only .5".

It's probably only .5" either way from ride height.

Cutting 2"; if the new diff is 3" larger I'll still have .75" of compression room and if it is only 1" larger I'll have .75" of extension room + a couple more inches of splines.


Last edited:
Drove to the old flex spot after work and tested her out.


Sitting on the newly-installed Wheeler's superbump.


Without the superbump I could tuck the tire well up into the fender. Now it's just below level so it should work well with my new axle being 3" wider each side.


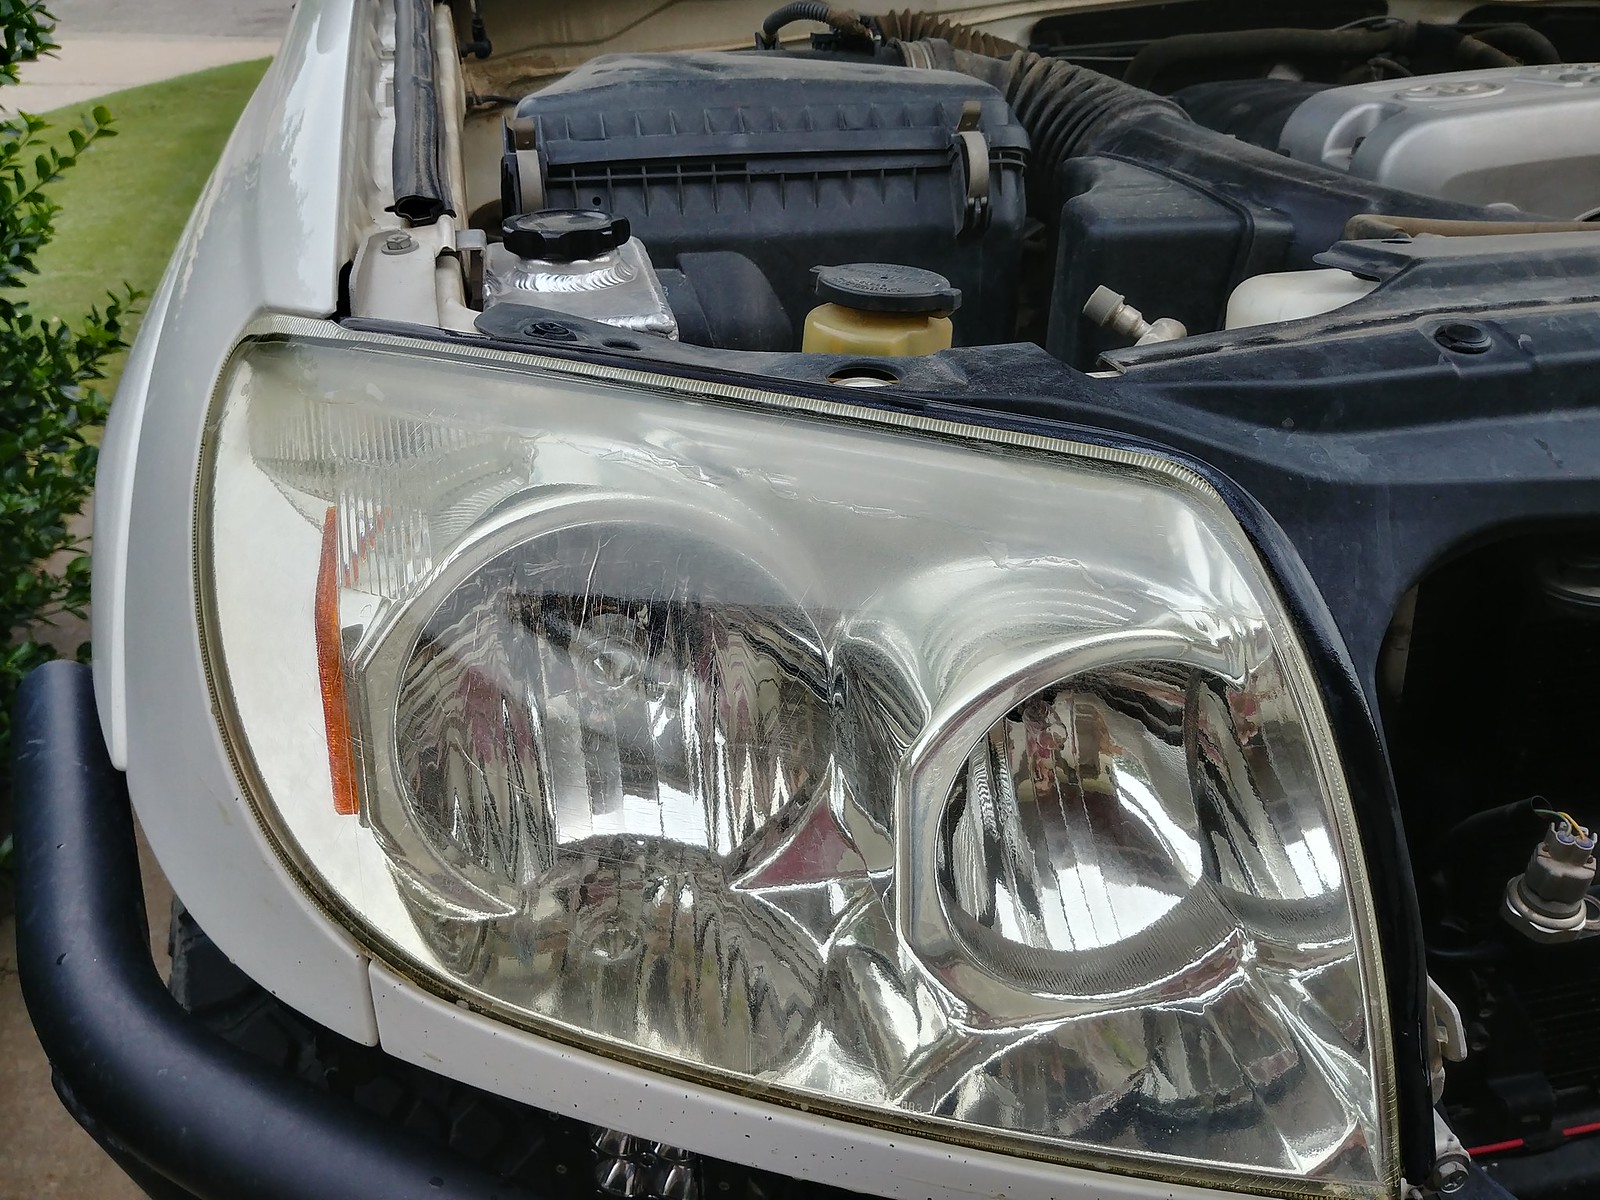
Also polished my headlights for the 3rd time. The spray-on clear coat started peeling off the top of the headlight. Wet sanded it with 400,1000,2000 grit then will polish it with my DA machine and clear coat them this time with the Sylvania kit that has worked well on my mom's Sequoia.

Also also washed out my radiator while I had the hose out, I'm sure my engine will thank me.

Before:


After (will still need to polish though the Sylvania clear coat would work fine at this stage):
 
I probably cooked my switchpros by washing my engine bay today. I noticed my led lights turned themselves on tonight in the driveway and the control panel didn't light up with my key in the ignition.

2yr warranty and I bought them new in box from a member on here 2 yrs 1 mth ago.
And I had them mounted horizontally against their recommendation of vertically.
Ouch.
:redbrick:
 
Last edited:
Achievement unlocked, Level 75 Toyota Technician.

Worked until 10:30 at night in the driveway reassembling my parking brake so I can drive to work the next morning.
 

Members online

Forum statistics

Threads
278,308
Messages
3,554,057
Members
248,016
Latest member
Advally Service

Trending content

Back
Top