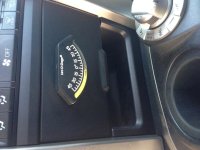
Next up was the Spod, I SUCK at electrical, and once I got the rear bumper I knew putting new back up lights in it was going to start a squirrels next if I kept going straight off the battery. So since I didn't want to blow anything up, I threw a little money at the problem. Yes there are cheaper ways to do this, but I don't have the time, patience, or skill to do it. So thank you Spod!!!
Mounting it under the hood, easy as it looks, two bolts, used one existing hole and a punch and the supplied self tapping screw for the other side.
<a data-flickr-embed="true" href="https://www.flickr.com/photos/140489411@N02/26604328205/in/dateposted-public/" title="P4021004"><img src="https://c6.staticflickr.com/2/1469/26604328205_b501f6c638_z.jpg" width="640" height="480" alt="P4021004"></a><script async src="//embedr.flickr.com/assets/client-code.js" charset="utf-8"></script>
In, essentially I go the Tacoma unit, I also followed their instructions for running it through the firewall and it was tight but got the wire plug through.
<a data-flickr-embed="true" href="https://www.flickr.com/photos/140489411@N02/26604326175/in/dateposted-public/" title="P4021006"><img src="https://c8.staticflickr.com/2/1661/26604326175_1f6235a80a_z.jpg" width="640" height="480" alt="P4021006"></a><script async src="//embedr.flickr.com/assets/client-code.js" charset="utf-8"></script>
Front rigid lights hooked up since they were already in place
<a data-flickr-embed="true" href="https://www.flickr.com/photos/140489411@N02/26604317755/in/dateposted-public/" title="P4051023"><img src="https://c4.staticflickr.com/2/1648/26604317755_6ba132df01_z.jpg" width="640" height="480" alt="P4051023"></a><script async src="//embedr.flickr.com/assets/client-code.js" charset="utf-8"></script>
Next up switches! The AOB are not great quality, I like the Contura, installing the 3 switch plate was easy, with my dremel!
<a data-flickr-embed="true" href="https://www.flickr.com/photos/140489411@N02/27376210991/in/dateposted-public/" title="IMG_4917"><img src="https://c8.staticflickr.com/8/7338/27376210991_8ba931a986_z.jpg" width="480" height="640" alt="IMG_4917"></a><script async src="//embedr.flickr.com/assets/client-code.js" charset="utf-8"></script>
Upon hooking up and trying to turn on, no juice, this was beyond frustrating but even after troubleshooting with a couple members it didn't work. I called Spod, after some phone tag I spoke with the man himself, John the Spod guy! He walked me through item by item to check only to realize my harness had been assembled backwards, I am NOT an electrical idiot! (well I am but THIS time it wasn't me)
<a data-flickr-embed="true" href="https://www.flickr.com/photos/140489411@N02/26331079180/in/dateposted-public/" title="P4231027"><img src="https://c5.staticflickr.com/2/1467/26331079180_8c0910e1ec_z.jpg" width="640" height="480" alt="P4231027"></a><script async src="//embedr.flickr.com/assets/client-code.js" charset="utf-8"></script>
Picture of AOB switch wired in for testing, note RED does NOT go to RED even though it looks like it in pic, green is ground on the Spod harness.
<a data-flickr-embed="true" href="https://www.flickr.com/photos/140489411@N02/26604313345/in/dateposted-public/" title="P4231032"><img src="https://c2.staticflickr.com/2/1533/26604313345_b0faf01c26_z.jpg" width="640" height="480" alt="P4231032"></a><script async src="//embedr.flickr.com/assets/client-code.js" charset="utf-8"></script>
NOTE: I have zero connections of my added accessories to the factory wiring, the only link is the battery and that's how I like it. Maybe I have nightmares of all the electrical gremlins for my previous trucks but this works for me and other than cutting holes in the dash and such it's all easily reversible. Plus if there is a problem it's easier to isolate, I think, haha.