June 2010 T4ROTM - harper7

congrats harper! well deserved and glad you're the first to represent the 5th gens! numerous mods already completed with two new projects in the next few weeks....you've got some deep pockets!
 
HEEEYY...look who made the bigtime!! (and so deservingly):thumb3:

Congratz and thanks for all that you bring to the Forum:thanks:

Pat
 
HI Harper7,

I've just gotten my Shrockworks rails as well and now need to switch out the rocker panels on my Limited (Shrockworks should post that on their site so you can make sure you have all the parts when you get your rails! :( ) ... Can you please post the parts number for the Trail Edition rocker panels that you ordered?

I'm not looking to change out the fender flares (if I don't have to) but I'm having a hard time finding the parts online based on just the name alone.

Thanks!
Okki
(2010 Limited: Black w/ tan interior)
 
Last edited:
Harper7, awesome truck! My wife saw your pictures and asked me why mine didn't look like yours!! HA! I tried to find a silver one, but settled on black because I would have been car-less for a month. Anyways, I am attempting to put the 275 BFGs on my LTD once I find some SR5 wheels to swap out, and the front spacers that you got. Not planning on lifting any more than that. Got a quote today to install the spacers for $450. I thought that was high...how many hours of labor should that take? They said four hours. Does this seem like a lot? I am not a mechanic! Look forward to seeing your next move. Apologies if this was already answered. Thanks.
 
harper, I don't think you ever responded to the request for part numbers for the TE pieces.

I've been scouring the web too and cannot find what I need.

I have a TE and I need to replace the front left upper fender flare (the black outer piece).

Any idea on the TE part numbers for these or where to find them? I want to know how much it costs to replace the one left.
 
It's been awhile since I posted on this thread.
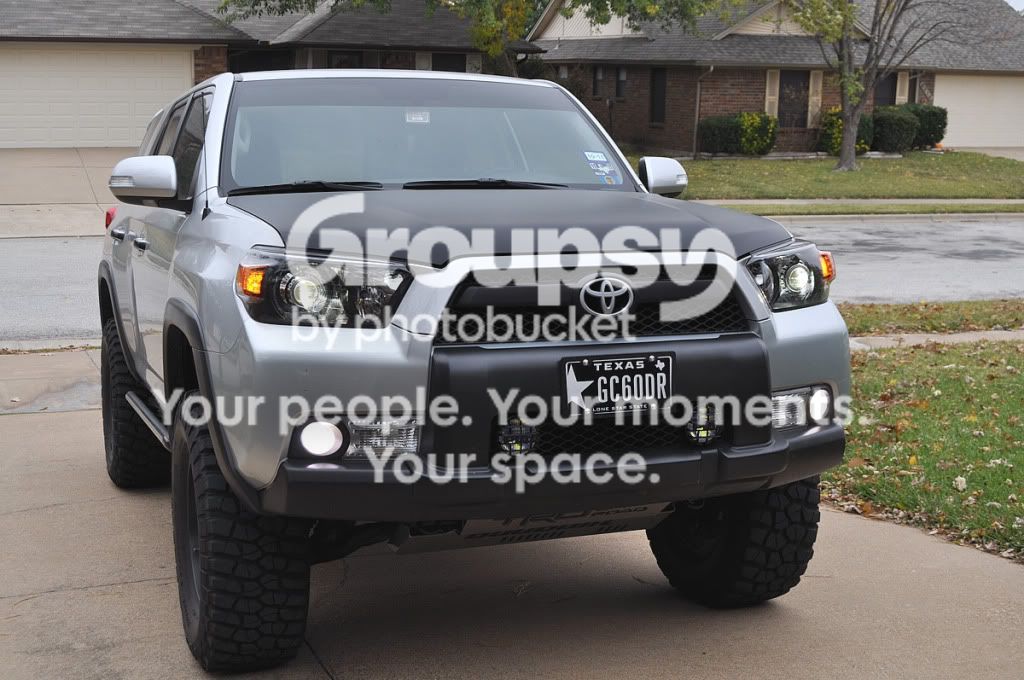
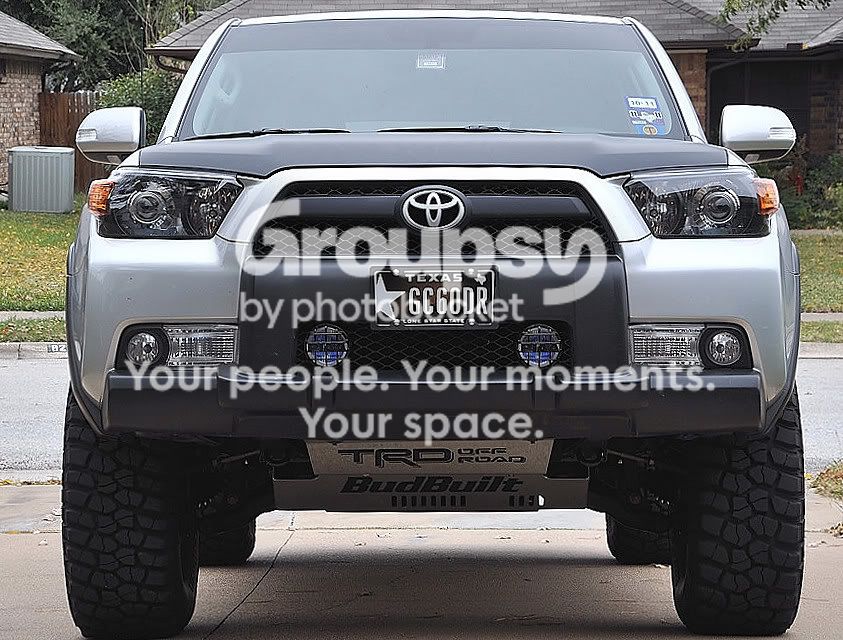
I have a bunch of mods I've done lately . Here's the latest and I'll post more later.
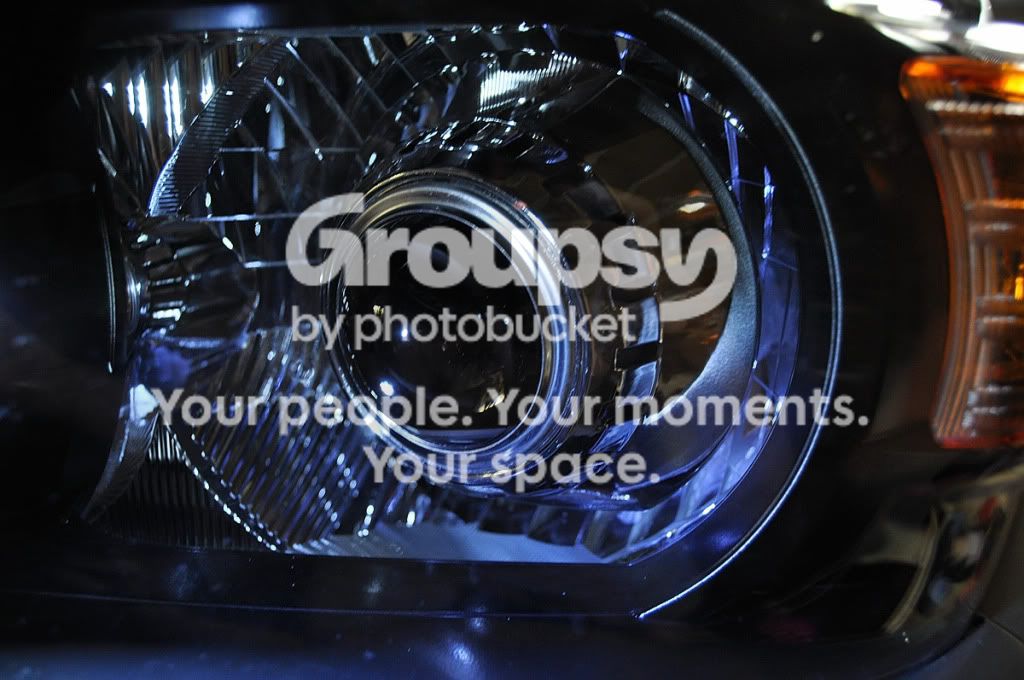
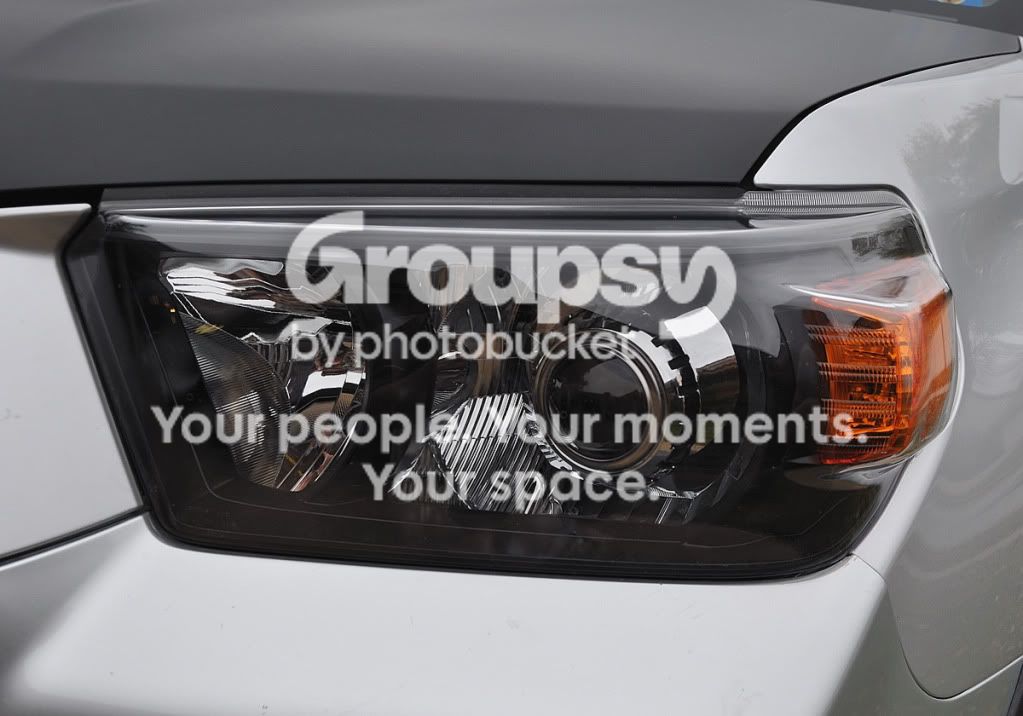
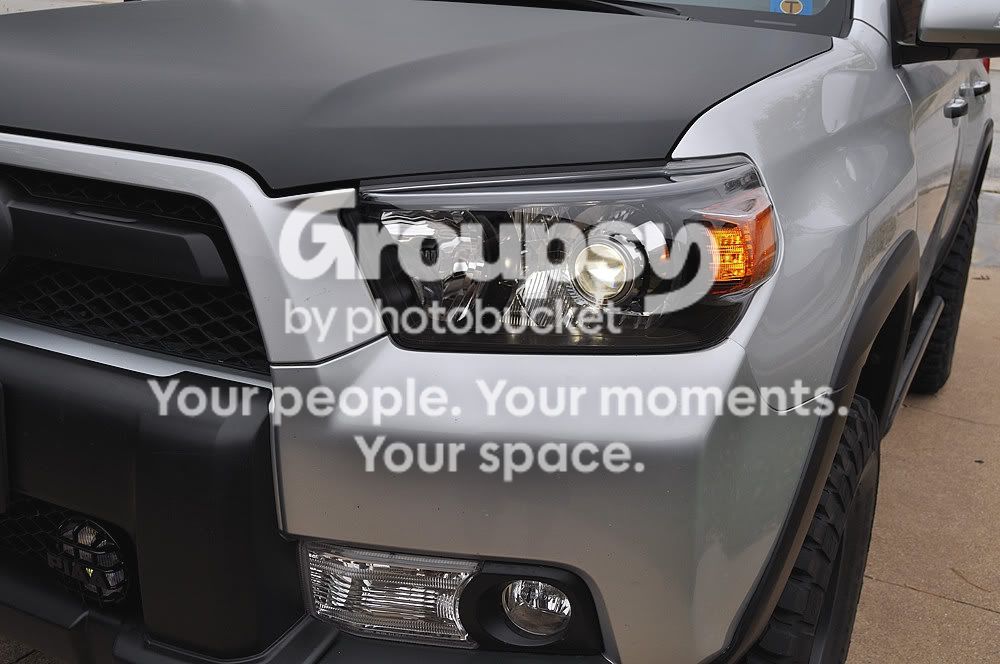
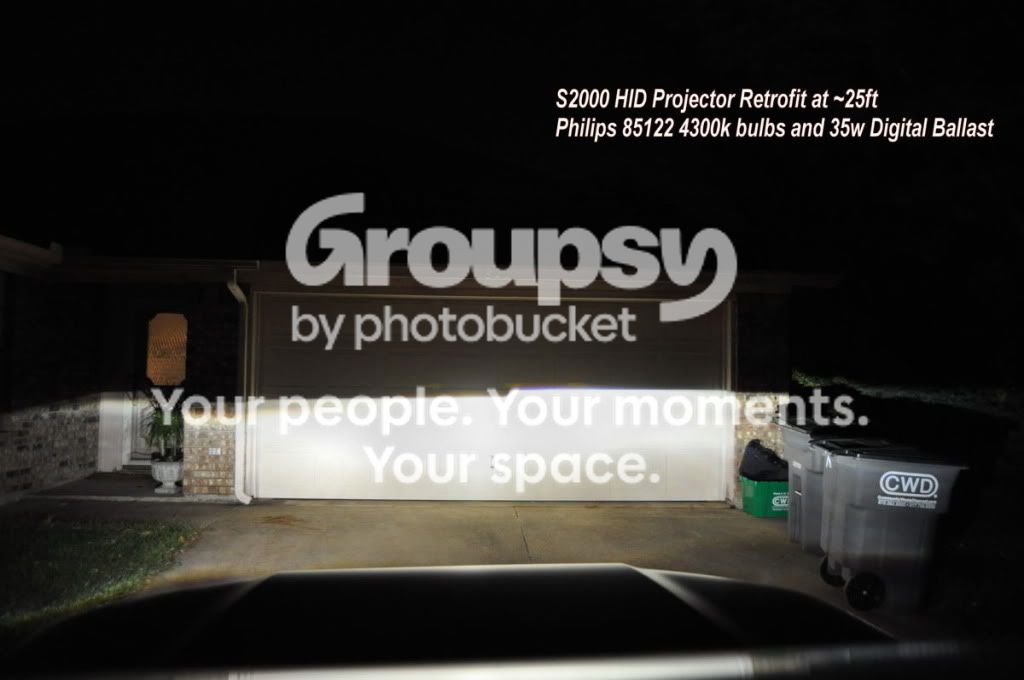
I did a HID retrofit with S2000 HID projectors . They have Philips 85122 D2S bulbs and 35w Digital ballast.
Here are some pics.
Thanks to Phil for the inspiration!

Picture047.jpg~original


Picture052.jpg~original


Picture051.jpg~original


Picture048.jpg~original


Picture059-3.jpg~original


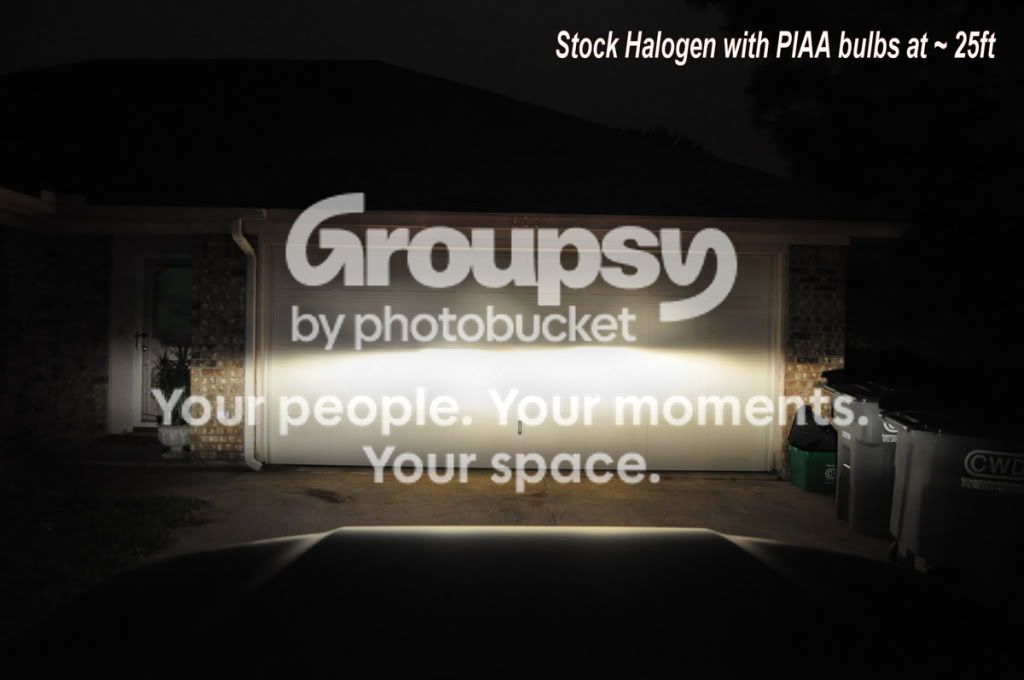
Stock Halogen with PIAA X-treme White bulbs
Picture053.jpg~original


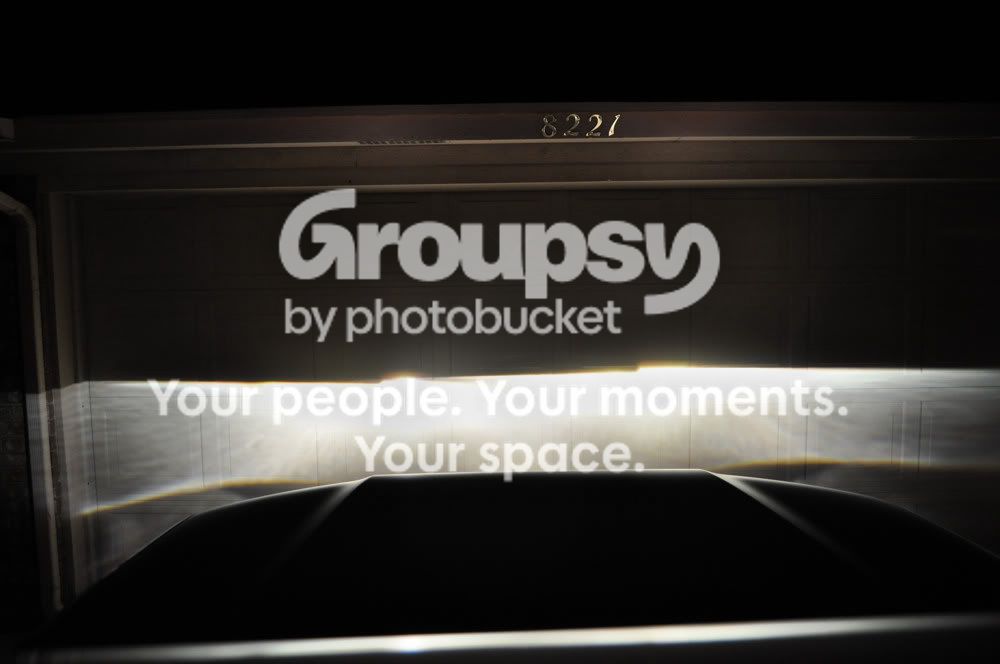
S2K HID's with Philips 85122 4300k bulbs-taken while aiming ....Notice yellow tape on garage door that I marked from the stock light cutoffs
Picture076.jpg~original


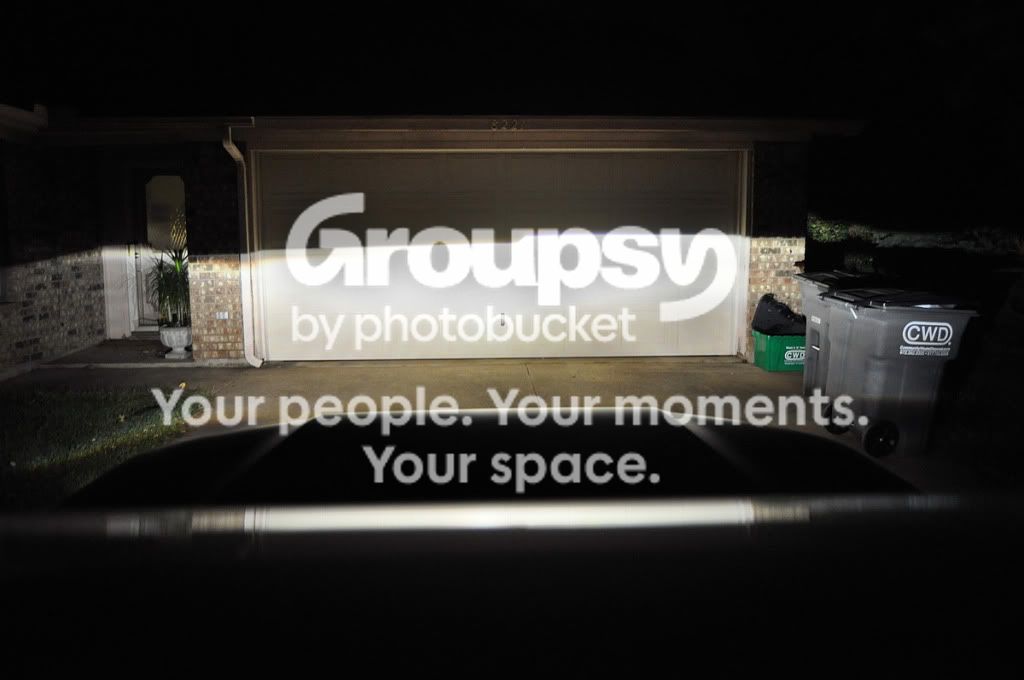
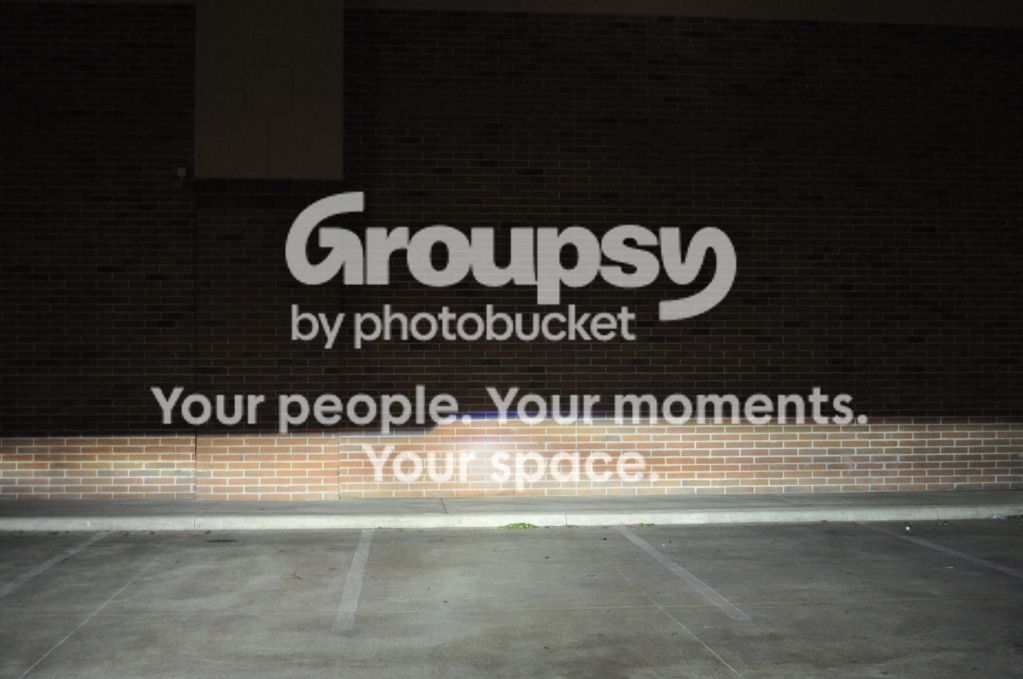
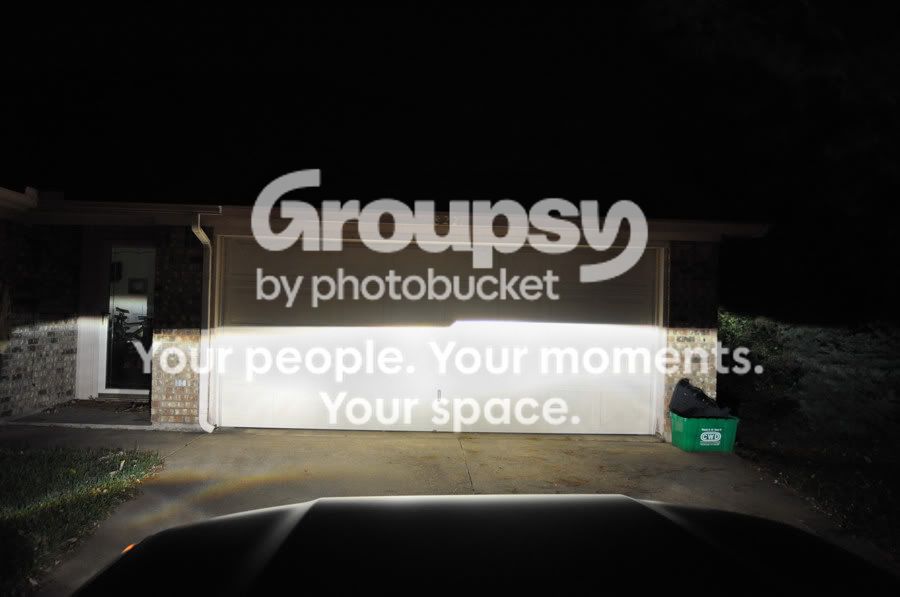
Finished S2K HID Projector output.It looks high in my driveway because I'm on the sidwalk hump at 25ft. On the road the cutoff is at ~33 inches high.
Picture039-2.jpg~original


Picture025-4.jpg~original

Picture023-5.jpg~original
 
Last edited:
As always the truck looks great!

Does the black hood mean you are doing roof lights soon or is it for looks?
 
As always the truck looks great!

Does the black hood mean you are doing roof lights soon or is it for looks?
Thanks Blair!
For looks and it's functional as it nullifies glare and my hood was getting nicked up anyways.So easy on the eyes at night with no glare.Love it!
Also,working with Sergio at Bajarack to custom build me me a full flat utility rack for a LED light bar up top and mesh to stand on behind the moonroof. Like this on the FJ Introducing 2 new racks for the FJ - Toyota FJ Cruiser Forum They are coming out with it for the 5th Gens. too.
Maybe 4 HID's but I have to see what will still fit up there and still fit in my garage.

If Bajarack doesn't hurry up the Gobi Stealth is starting to look good at $1199 shipped!
 
Last edited:
Harper the retro fit looks sweet! Do you have any pics off the backside of the unit? I really want to do this mod but dont know how the mouting of the projector to the unit will be. Did you have to fab up some brackets? Also which shrouds did you use? Those look like the e46 nonextended/extended. Thanks!
 
Harper the retro fit looks sweet! Do you have any pics off the backside of the unit? I really want to do this mod but dont know how the mouting of the projector to the unit will be. Did you have to fab up some brackets? Also which shrouds did you use? Those look like the e46 nonextended/extended. Thanks!

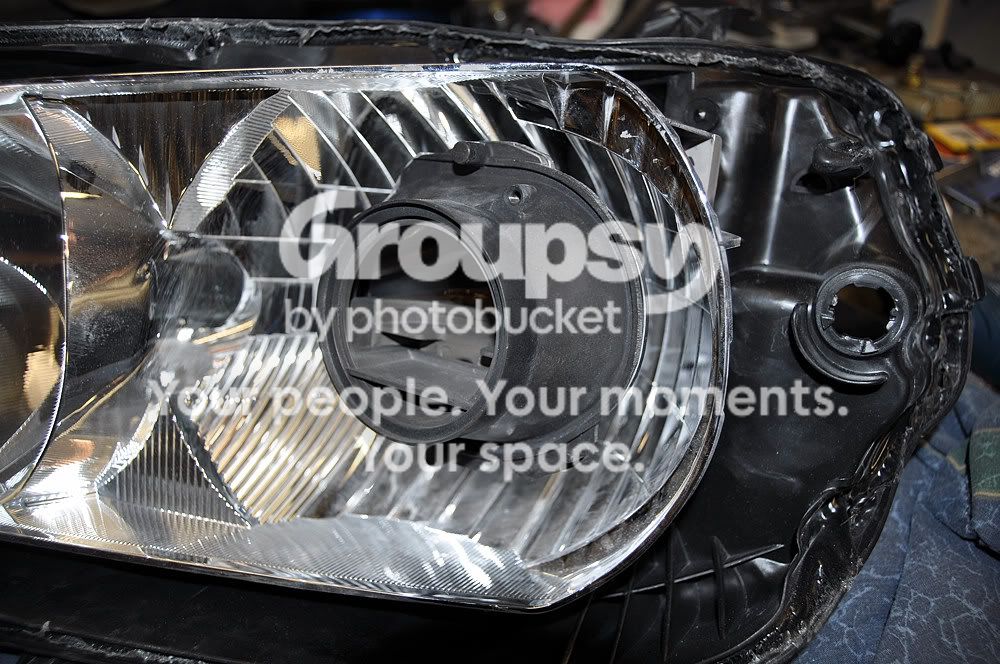
Here are a few pics and a mini DIY of fitting the S2K projector for ya. Other projectors might be different.I of course trimmed the access Honda factory bracket off,took the lens and the spring off first so they wouldn't get scratched/damaged before fitting.

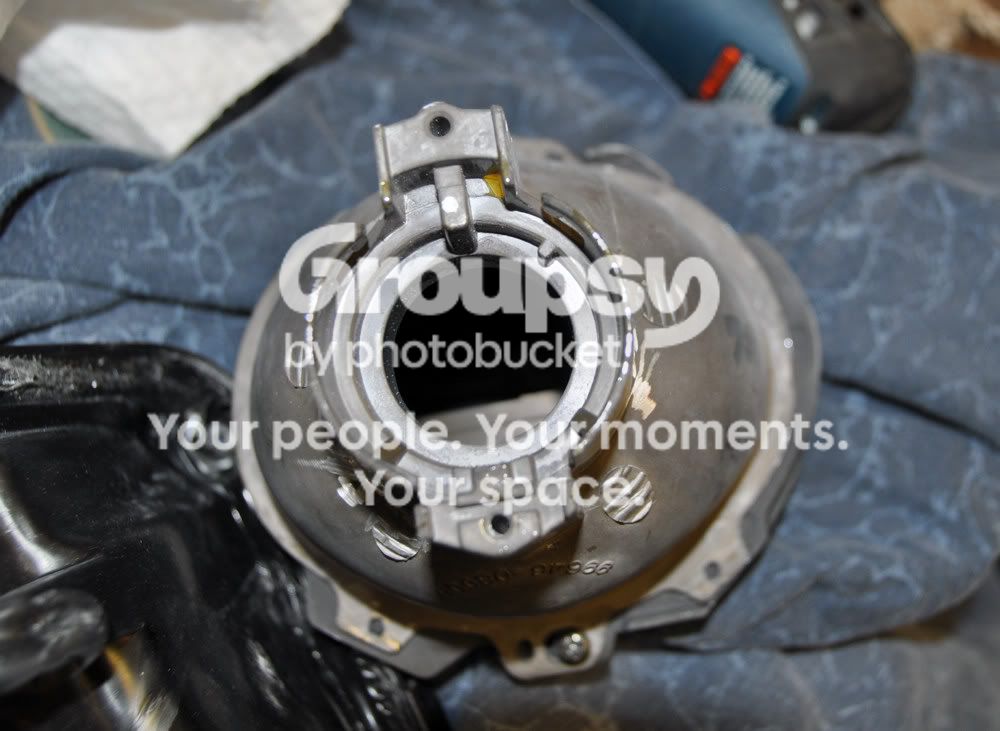
Backside view of the S2K projector after trimming the access bracket off.
Picture023-2.jpg~original


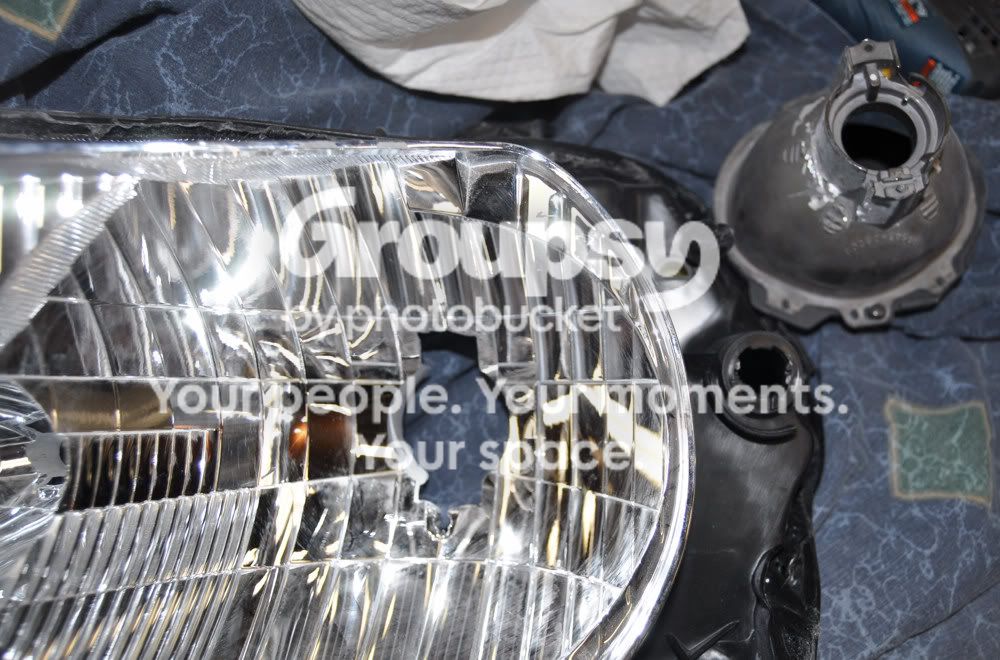
You have to dremel/file the reflector hole out to the shape of the projector rear. The reflectors are made of fiberglass so they are pretty easy to work,but be careful as it can splinter or crack. I made a template out of cardboard the shape of the projector to make it easier to make my holes.
Picture022-3.jpg~original


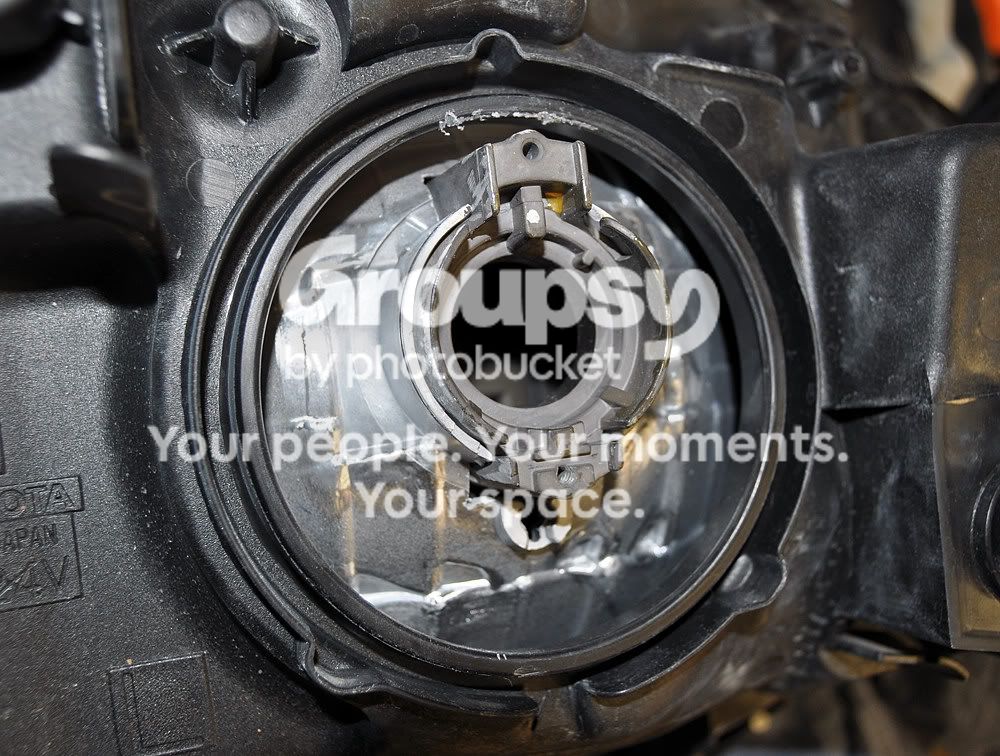
Pic of the backside after I fit the projector in. It's a pretty tight fit but still leave a little play to get the final aim.You can see the round hole that the oem halogen bulb sat down in. That gives you a pretty good starting point for the aim being same as stock
Picture026-2.jpg~original


Pic of the front side after it was fitted in.
Picture028-2.jpg~original


Now for the time consuming part.
Next I put the S2K lens,springs,bulb,ballast ect.(without the front oem lens) to test in the truck against the garage door in the dark after both are done. My drivers side was a little crooked so I had to file the hole a little. Checked it again then shimmed it with a little sliver of wood tacked in place with epoxy and let it set up.

Then I took both headlights back off,cleaned with alcohol in behind the projector and used Dow Corning RTV 100% silicone sealant/adhesive to seal/retain the projectors to the reflector . Then put the headlights back in the truck with the RTV still soft and made sure the aim was perfectly level.You can still shim it with toothpics or slivers of wood still at this point if it's not perfect at this point.

Let the RTV cure/setup overnight(or at least 4-6 hrs) in the truck. A heat gun can speed it up a little,just be careful. Next day I added more RTV under the bowl of the projector about an inch thick to really seal/adhere them in place. Tip... I got a little RTV sealant on the reflector where I didn't want it and it's hard to get off when dry, so next time I will mask off the reflector everywhere except under the bowl of the projector where it's sealed to the reflector.

Fit the E46 extended shrouds as the hole was a little small and RTV in place ,then put the outer lens and everything back together and seal the rubber cover on the back. All this took me about 10 hours work (5hrs each night)as you need it to be dark to get the aim down. I researched on HID Planet forum and youtube first and improvised where needed of course. Not really hard just tedious and time consuming.

You can see Lightwerkz really earns their money as they have probably have to use a mock up of some sort to match the horizontal/rotational aim of the oem halogen as they don't have the vehicle. Vertical aim can still be easily adjusted as the oem adjustment still works but there is no horizontal/rotational once it's sealed in place.

Some make metal brackets rather then RTV to hold them in place. We use this RTV 100% silicone to hold rubber seals in place inside jet engines on airplanes and is really good stuff . The key to getting a good seal is both surfaces MUST be surgically clean. It won't stick to oils and even your fingers give off oil.....I wear nitril rubber gloves. The bad part of RTV is once it's cured,it's a mother to get off stuff.The cleaners at work have to use a special stripper to get it off and by scraping by hand.

 
Is only one light on in those pics? I only see one step :confused:
The step from the pass side light is blended in to the pattern of the drivers side with the top of the pattern being level with the drivers side.That super wide and sharp cutoff is what made the S2K's so desireable.Ideally most people only want one step as it's easier on the eyes when driving.
You can learn alot in this forum,you just have read ALOT.... The HIDPlanet University

That one step when your driving should be right on the center stripe when your on a 2 lane road. That's the purpose of the step so it shines farther down the road in your lane and dips down in the oncoming lane to not blind them. There's no reason for a step in the middle of your lane.You can have 2 steps if you want by adjusting the pass side up but that bothers me and most people,especially when the steps/cutoffs are this sharp. It makes it so easy to drive when you can just look ahead and keep your one step on the center line or lines on the road on your left.

You can see both steps when they shine on something less then 25 ft where they were set up for. I kind of have an advantage of driving and envying my brother-in laws 04 Honda S2000 HID's for years,so I know how they are supposed to look . I had a M3 and I ribbed him about his HID's,compared to my BMW Bi-Xenon HID's being the only thing better for years.BMW projector cutoffs and step is not nearly as sharp and wide.


You can see the steps as I get closer to the door.
~5ft from door
Picture061-1.jpg~original


Around 15 ft

Picture062.jpg~original


And at ~25ft where they should be aimed using the drivers side as the step point.
Picture064.jpg~original
 
Last edited:

Members online

Forum statistics

Threads
278,314
Messages
3,554,093
Members
248,016
Latest member
Advally Service

Trending content

Back
Top