June 2010 T4ROTM - harper7

Not only is this the coolest 5th gen ever, it's like the coolest "new" vehicle in America! I seriously would take a 5th gen 4runner setup exactly like this over anything else money could buy. It's perfect. :trophy:
 
Gary

You going to go vinyl on the roof as well? It would look badass, not that your rig doesn't already. I am thinking of doing my roof when I get my new rack.

God I love the projectors too.

If I only had more $$$$
 
Not only is this the coolest 5th gen ever, it's like the coolest "new" vehicle in America! I seriously would take a 5th gen 4runner setup exactly like this over anything else money could buy. It's perfect. :trophy:
Thanks! I don't know if I'd go that far......it's still a work in progress!

Gary

You going to go vinyl on the roof as well? It would look badass, not that your rig doesn't already. I am thinking of doing my roof when I get my new rack.

God I love the projectors too.

If I only had more $$$$
Hey Mike.....I was going to vinyl the roof but think I'm going to wait to see how the BajaRack looks without it first. I'm just going to seal the paint on the roof first with some of that high dollar...lol ...paint sealant the dealers use. They left a full bottle in the glove box of the new Venza they gave me as a loaner before I picked up my Limited.It had a $600 charge on the window sticker for "paint sealant".

The vinyl I was going to use was the Avery A9 9 year vinyl with UV protection in Urban Camo or Digital Urban Camo and couldn't make up my mind. The urban camo had silver/gray blotches that almost matched our silver color and I was leaning towards that. This stuff is pretty easy to work with.... especially up on a semi-flat roof.It would be about $200 total in materials to do the roof yourself and would be easier to do in 2 pieces. A 4' x 7' piece would bring you just past where the moonroof ends ,starting from the back.It's easier to splice in along the side of the moonroof where it's only a couple of inches wide.. And a 4"x 3' piece in the front and most of it gets wasted on the moonroof opening.

Here's a pic of the 2 samples they sent me.Of course I was just going to put them on the roof. Maybe next year as I do think it would look great,protects and won't show dirt underneath the roof rack.

Picture004-9.jpg~original
 
Good Deal. I bet the urban camo would look killer and would be so subtle on the roof. There is a guy by me that does vinyl (did all of my chrome strips and fog bezels) and I was thinking of going with a dry carbon fiber look for the roof.
 
There is a guy by me that does vinyl (did all of my chrome strips and fog bezels) and I was thinking of going with a dry carbon fiber look for the roof.
They make this carbon fiber vinyl that is really nice.It's actually textured like real carbon fiber. It called 3M Di-Noc and it's a little more expensive then Avery A9 because it's a little thicker and easier to work with a heat gun for curved spots. Your installer guy should know about it. Comes in a bunch of different colors too. Some of these space age vinyls 3M and Avery are coming out with are unbelievable quality.Alot of guys in the sports car world are doing their roof in it or even their whole cars.

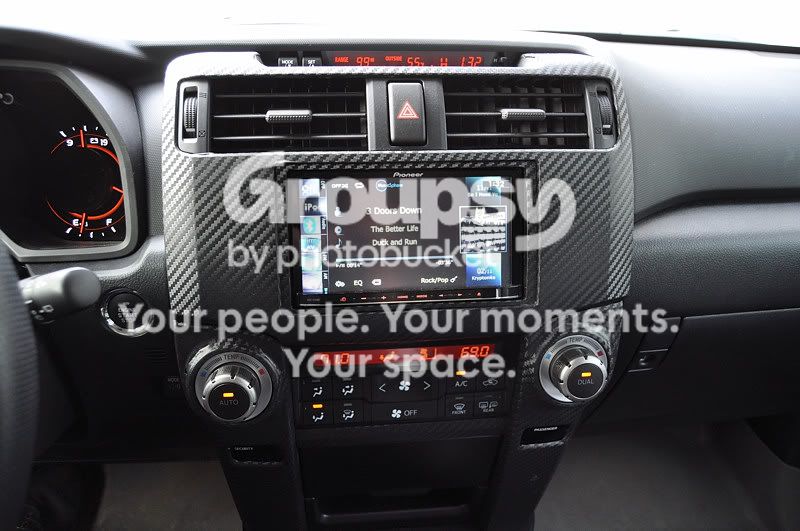
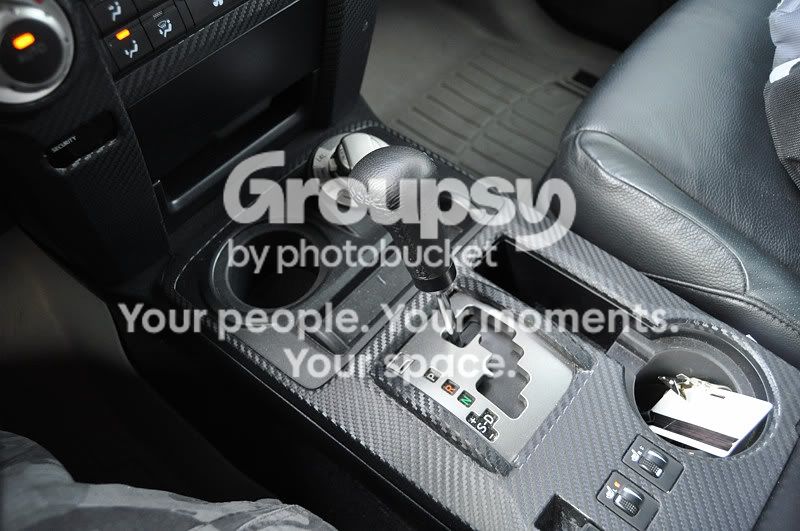
I wrapped my interior silver pieces in that black Di-Noc Carbon fiber and like it alot better then the plain silver paint. The silver made my center dash look huge after I put a new stereo in.
Here's some pics of the Di-Noc I installed.....my first time and it wasn't that hard except you have to take the parts out to do it right.
CopyofPicture015.jpg~original


CopyofPicture013.jpg~original


CopyofPicture016.jpg~original
 
Wow, that compliments the interior perfectly.

Now if u did the whole exterior in camo and stood in front of it, good chance you'd blend right in. Lol
 
good eye...lol....That's just a roller fairlead I bolted up there to check the fit and give the fab guy and idea of how I want it.It has black polyurethane rollers for synthetic rope and it's a perfect fit in the lower grill. It's going to sit back about another inch after I cut the lower grill out right there. I have a winch and a winch plate to go on the inside ,I just have to get Justin at Rocktek to fab an internal steel bumper to tie into the frame for support .

Here's a couple pics of the fairlead and how the plate attaches to it.

Hey Gary - truck looks great! Regarding the winch plate and internal steel bumper from Rocktek, will those be bolt-on? Once you get it done, would you mind sharing the details so that we can replicate what you've done? I think you're on the right track given the huge amount of space available behind the bumper cover. Looking forward to seeing the final product! Thanks.
 
harper7

thanks for the great thread, have learned a ton.

looking to upgrade stock HU on my '11 SR5 w/ either the z120 or the jvc NT3HDT.

having been all over the aftermarket thread, i still can't figure out how to take off the center console for the metra, find a wiring diagram, or in addition to the Axxess steering wheel adapter, know if i need another harness to connect stock speakers, etc to the new unit.

can you help with this?

thanks in advance
 
Hey Gary - truck looks great! Regarding the winch plate and internal steel bumper from Rocktek, will those be bolt-on? Once you get it done, would you mind sharing the details so that we can replicate what you've done? I think you're on the right track given the huge amount of space available behind the bumper cover. Looking forward to seeing the final product! Thanks.
I still can not get a hold of Justin at Rocktec Customz here locally. Anybody know what happened to him or how to get a hold of him?
harper7

thanks for the great thread, have learned a ton.

looking to upgrade stock HU on my '11 SR5 w/ either the z120 or the jvc NT3HDT.

having been all over the aftermarket thread, i still can't figure out how to take off the center console for the metra, find a wiring diagram, or in addition to the Axxess steering wheel adapter, know if i need another harness to connect stock speakers, etc to the new unit.

can you help with this?

thanks in advance
Nashman69G has the repair manual on the forum that shows stereo removal. http://www.toyota-4runner.org/5th-gen-t4rs/65237-tis-fsm-2010-4runner-here.html#post565247
That's what I used.Basically pull off those 2 silver pieces below it and the bolts for the stereo removal are behind them.

As far as part numbers/harnesses I used they are given here......Pioneer Avic Z120BT Install in place of JBL Nav

But you have a SR5 so the main harness will be different since you don't have a JBL. The people I have used for stereo questions for years is Installer.com . They know stereo installs/parts and alot of installers use them because they are good. If I got questions,I call them.

Here's a pdf of the wiring manual from Nashman69G..2010 4Runner Wiring Diagram

Hope that gets you headed in the right direction Jake! I still love my Z120BT after almost a year!

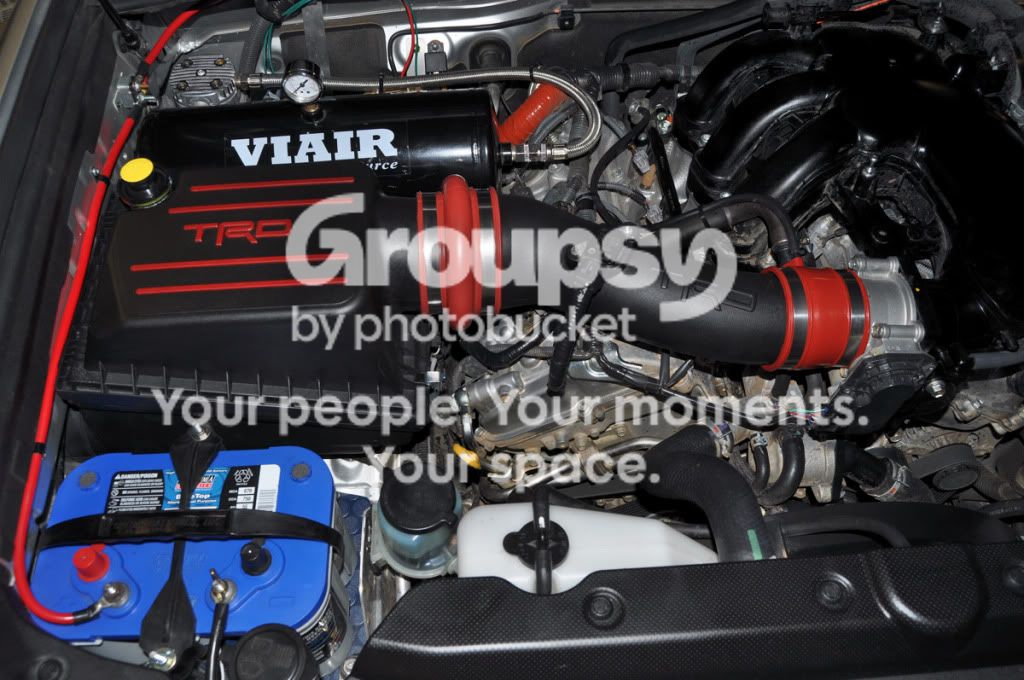
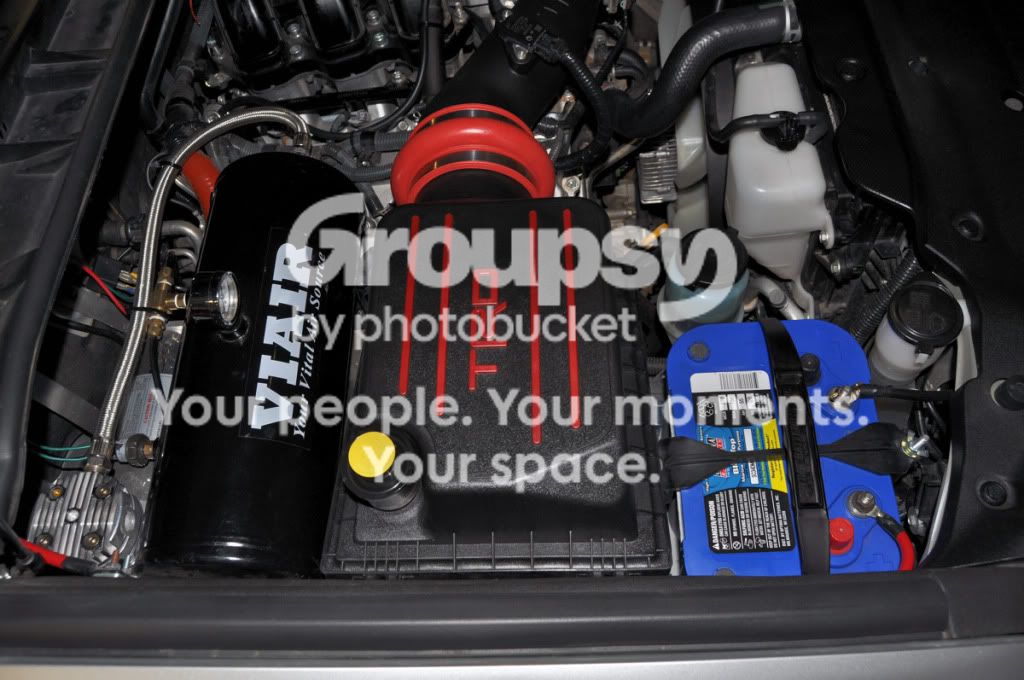
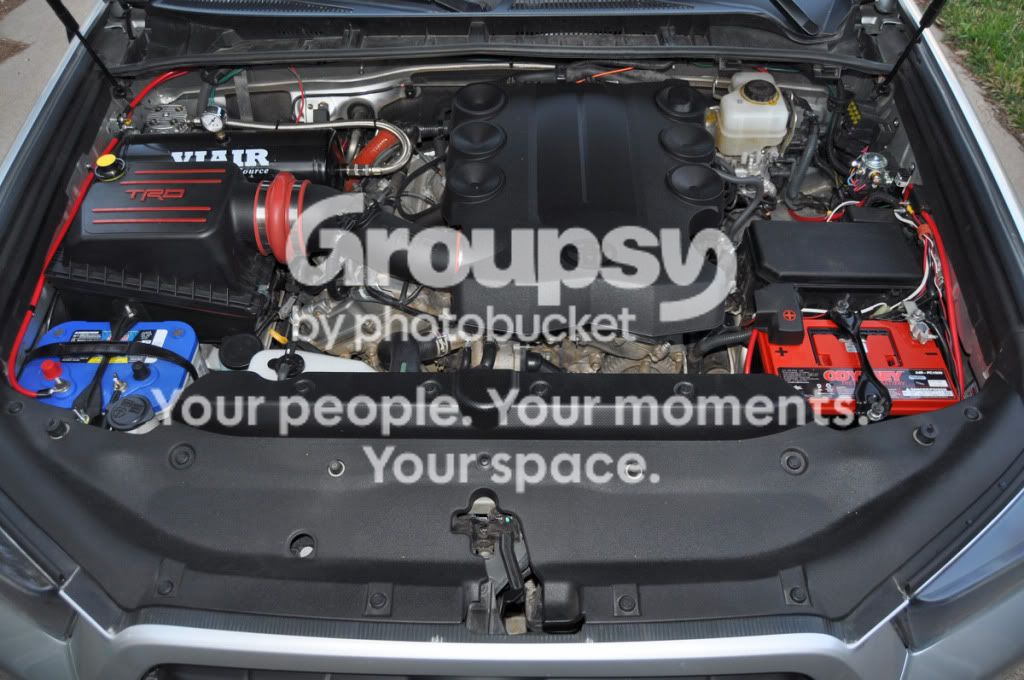
I also installed my TRD CAI and here are some pics. Fit was great and took about 2 hours.

Picture008-4.jpg~original


Picture014-3.jpg~original


Picture012-4.jpg~original


Picture016-5.jpg~original
 
Last edited:
thanks for the info. right after i posted, i got the console cover off. was just a bit nervous, didn't want to snap anything...

have decided to go w/ the JVC KW NT3HDT: the Z series is nice (as is the 920) but the integrated HD radio along w/ the Traffic Plus feature seals the deal for me (although the front only USB port is a bummer). i see the Z130 is coming out soon w/ integrated HD but $700 is more manageable than $1300

couple more questions if you don't mind:

chose the ASWC over the SWI: seems an easier install and the SWI has some bad reviews. that being said, according to the Axxess Interface .pdf, i'm supposed to ground black of ASWC then red to 12v, green/orange to pin 7 of vehicle, black/green to pin 8, then pin 6 of vehicle harness to ground (using the Metra 70 1761 in SR5 stock 8 speaker). do these connections have to be tapped, since i'm using some of those wires (red for example) in the JVC install? or am i not reading that right?

you stated that the factory camera didn't work. has this been remedied and if so, what wire did you tap? coming down from rearview or near center console?

thanks in advance.
 
amazing

harper 7, i've just spent the last hour looking at all the modifications youv'e made, and like everybody I'm amazed! Since i don't have one fiftieth of your energy i only have two items i would like to correct on my limited 2010.
number 1. when you were soundproofing your vehicle did you put any soundproofing on the firewall to keep the engine noise out. I've been disapointed that my 2005 limited had less engine noise inside than my new one. If you did hopefully you can show or tell me and hopefully you didn't go hyper on it and take the motor out to do it:)
number 2. is there any way to lift the vehicle an inch safely and still keep the swaybar disconnect feature. I't one of the reasons i bought the vehicle. lots of rocks in the wyoming mnts. Thank you for any response Harper, and for all of the in depth information you have already given us.
 
holy crap man! You did a lot of quality work here. Good work my friend. My dad lives in Carrollton, and i'm originally from Dallas. I'm living in Washington DC right now, but, i may move back to Dallas in a few years.

If i move back we better hang out!!!
 
harper 7, i've just spent the last hour looking at all the modifications youv'e made, and like everybody I'm amazed! Since i don't have one fiftieth of your energy i only have two items i would like to correct on my limited 2010.
number 1. when you were soundproofing your vehicle did you put any soundproofing on the firewall to keep the engine noise out. I've been disapointed that my 2005 limited had less engine noise inside than my new one. If you did hopefully you can show or tell me and hopefully you didn't go hyper on it and take the motor out to do it:)
number 2. is there any way to lift the vehicle an inch safely and still keep the swaybar disconnect feature. I't one of the reasons i bought the vehicle. lots of rocks in the wyoming mnts. Thank you for any response Harper, and for all of the in depth information you have already given us.

Thanks,
#1....I didn't take my front seats out yet to soundproof the front. Planning On switching seat covers to cloth real soon as the black leather was too hot here in Texas last year and I'll do it then.
#2.... To raise it only an inch you would probably just go with spacers. Won't be any problem with the swaybar as it does'nt actually disconnect anyways on TE's.

holy crap man! You did a lot of quality work here. Good work my friend. My dad lives in Carrollton, and i'm originally from Dallas. I'm living in Washington DC right now, but, i may move back to Dallas in a few years.

If i move back we better hang out!!!
Thanks, look me up when your here!

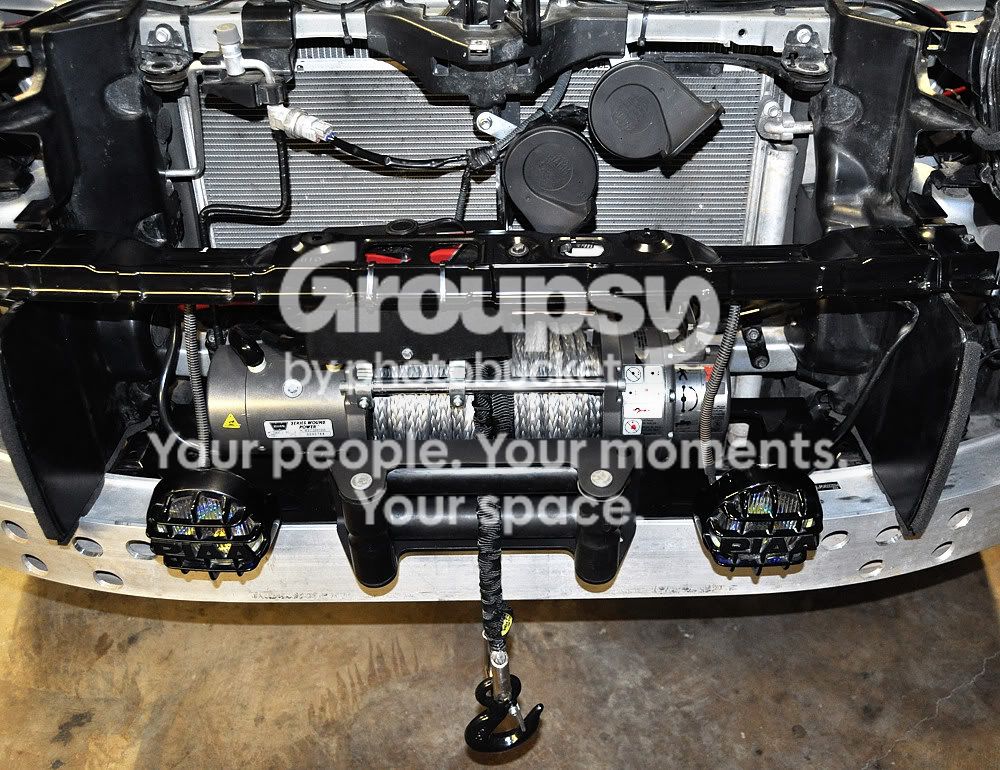
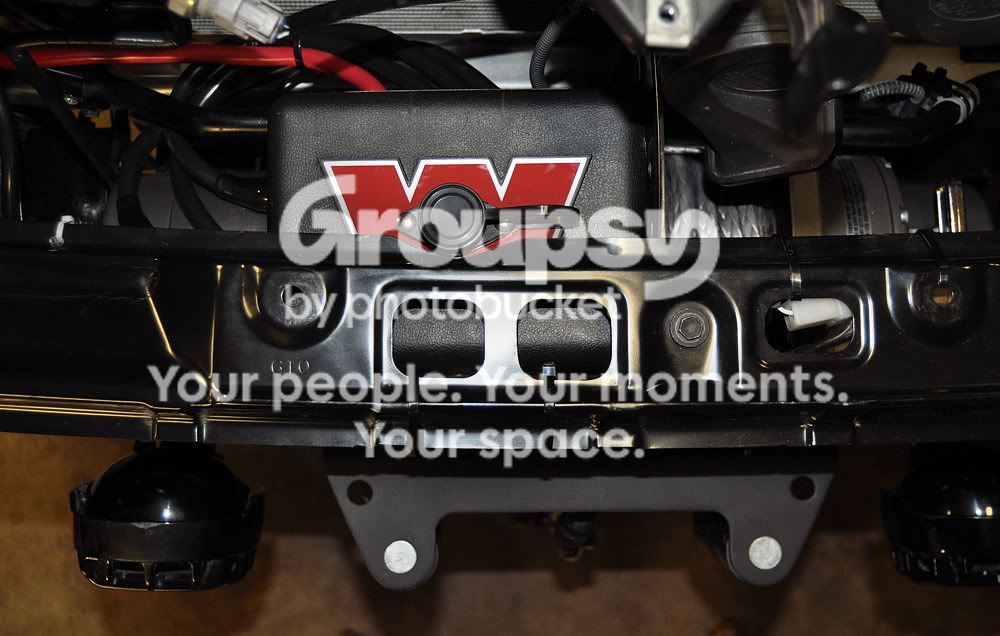
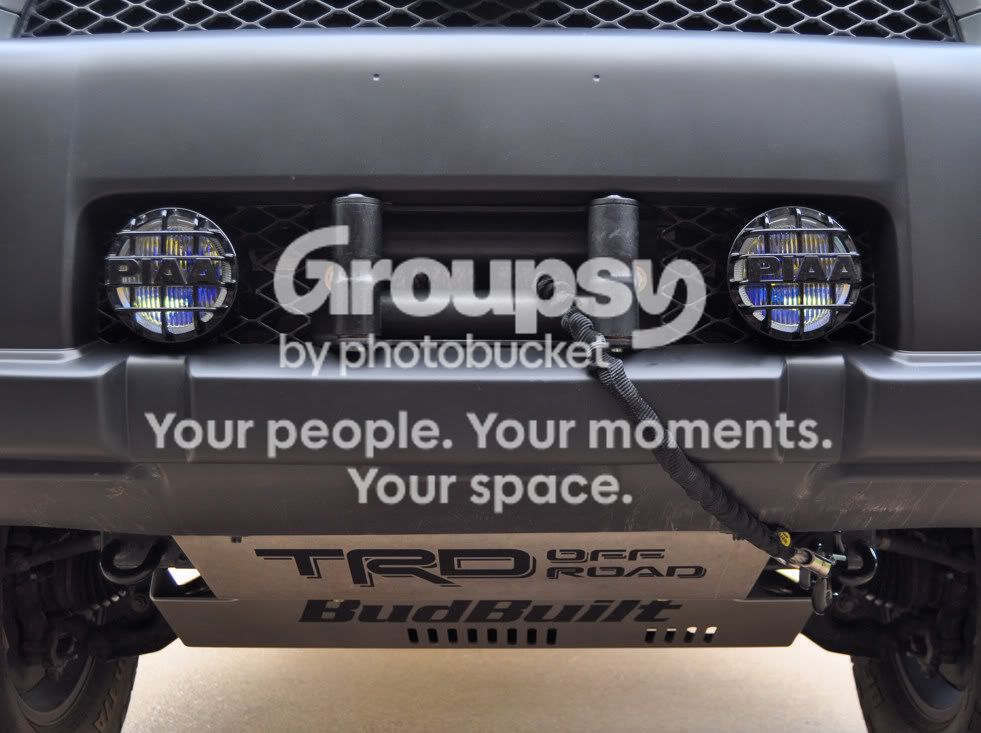
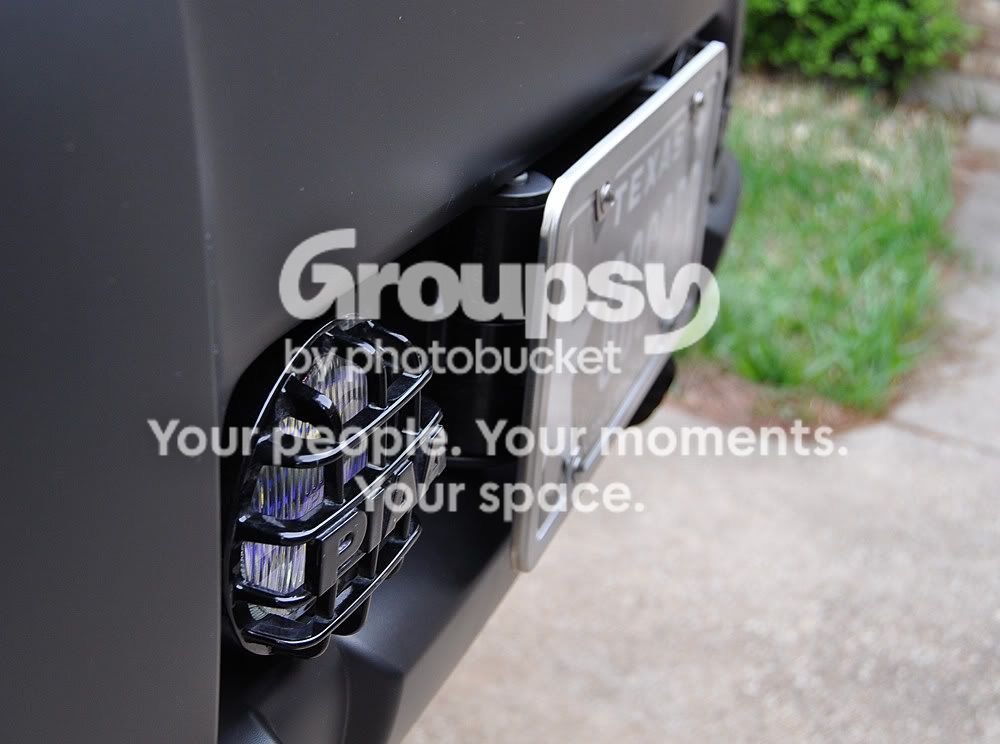
I finished up my Warn M8000 winch install with the new BudBuilt Internal winch plate for 5th Gens today for the stealth look. Kind of a tight fit for the Warn control box but I got it to work. It's a little off center and tilted as there's a center support right in the middle in the way.Might be easier to get new longer cables and mount it under the hood.I also had to redo the PIAA fog lights from the way I had them and just put some brackets off the winch plate.
Here is the link to the Thread on the Internal Winch Plate........BudBuilt Internal Winch
Here are some pics.....
Warn M8000 winch , Smittybuilt 10k synthetic rope and black Daystar polyurethane rollers.
Picture007-7.jpg~original

Looking straight down....I put the control box on top of the winch with brackets and trimmed the top brace a little for access to the plug where a wireless remote will plug in.
Picture012-5.jpg~original

A front look with out the license plate.
Picture029-2.jpg~original

With the plate installed there is about a half an inch clearance.It's straight and even as the pic just makes it look like it's not! I used a Rugged Ridge roller plate holder and a stainless frame. Rugged Ridge Plate Holder
Picture046-2.jpg~original
 
Last edited:
Thanks!

wow! Nice work!


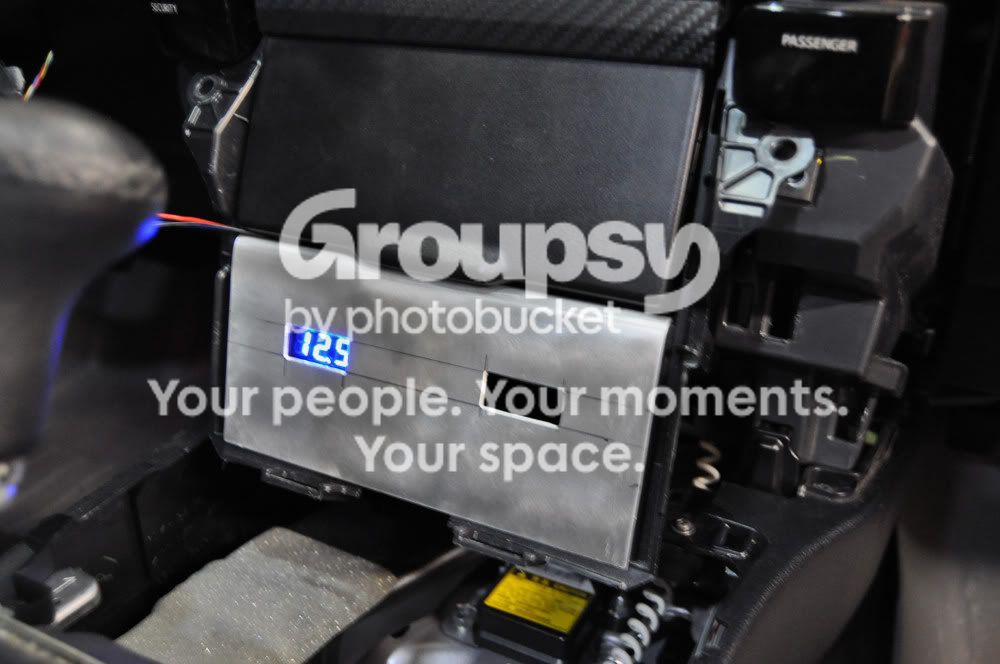
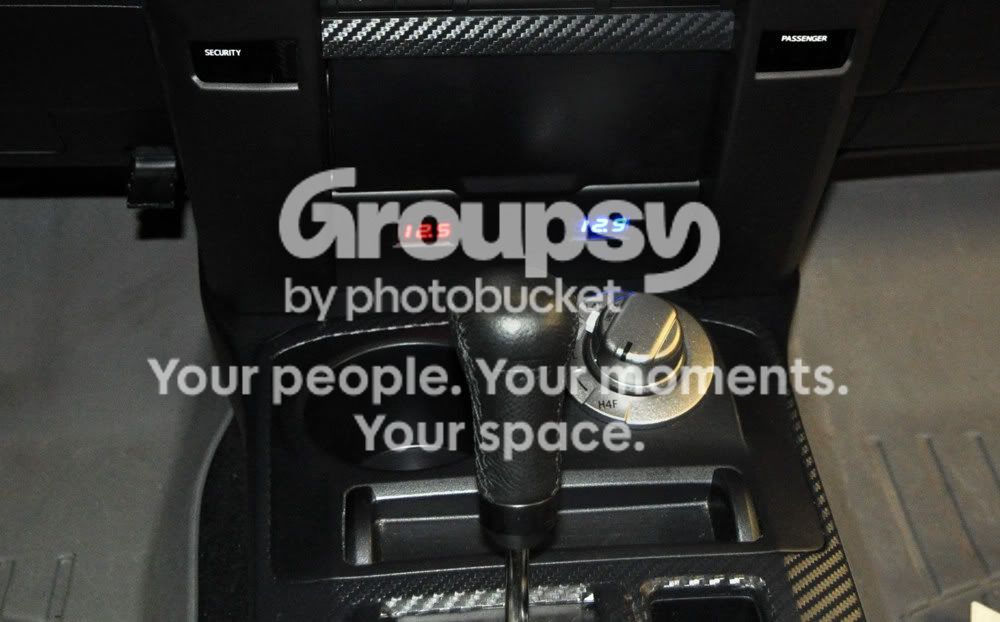
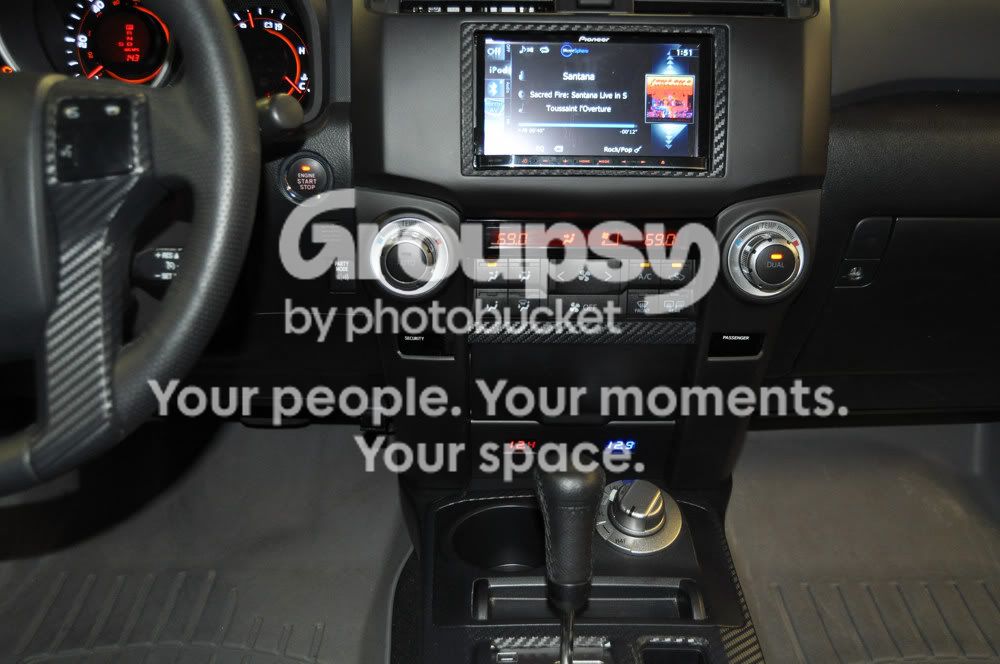
More Mods.......I had to run a bunch of wires thru to my center dash for my CB,Isolator switch and Isolator status light so I wired up a couple of Volt Gauges while I was at it. They are wired directly to each battery to better get their true readings.Used my Fluke meter to calibrate them.

I fabbed a piece out of 2024-T3 aluminum that I cut holes in for the gauges and painted it satin black to match the other interior pieces. The volt meters are made by Stinger and I bought one in red LED and one in blue since I have one red battery and one blue battery so it makes it simple.They sit in place of that bottom storage hole that I never used anyways.

Here are some pics....
Test fitting....decided to make the holes bigger as it was hard to read when at an angle.
Picture006-8.jpg~original

Holes cut..ready for paint
Picture007-8.jpg~original

Installed and Wired
Picture025-1.jpg~original

Picture016-6.jpg~original

Full Center Dash shot
Picture022-4.jpg~original


I also wired my Cobra 75 WXST CB in my center console for now.
 
Hey Harper great install!! Do these gauges say "Stinger" right above the number readout? Is there a part number you can get me? I have been looking for a solution to monitor batt voltage and I think yours is perfect.
 

Members online

No members online now.

Forum statistics

Threads
278,315
Messages
3,554,104
Members
248,016
Latest member
Advally Service

Trending content

Back
Top